SQL Server 2017 now is considered as a hybrid database enterprise solution as it expands its market and is ported to other operating system platforms. It also includes mainstream support for Linux machines. The Cloud makes the life of administrator much easier, now it’s no longer daunting task to configure the SQL Server instance. The easiest way to explore SQL Server on Linux is to provision a virtual machine through Microsoft Azure portal – portal.azure.com. The Linux azure virtual machine will come pre-configured with Linux and SQL Server 2017.
Background
Azure SQL Database is the Microsoft platform-as-a-service (PaaS) database offering. It is scalable and offers a predictable performance; each database is isolated. In addition, Azure SQL databases provide monitoring and alerting as well as failover options. With the on-premise SQL Server, the DBAs are engaged in managing all the upgrades and patching. For instance, when we start using Azure SQL databases, Microsoft manages everything for us.
In the SQL Server environment, whether the instances are virtual machines or physical servers, and whether they are located on-premise or in the cloud, DBAs have to configure high availability. However, with the platform-as-a-service SQL database offerings, a high availability is already configured and managed for you. The DBAs scope is to manage all the backups on the SQL Server instances. For Azure SQL databases, the backups are configured in-built.
In the case when DBAs require full administrative rights on the servers where the SQL Server instances are already configured, the DBAs will only have administrative rights to the database in the Azure SQL Database environment. The nice thing about moving to an Azure SQL Database is that the machine and SQL licensing costs have been completely eliminated. If we require a customized solution for the servers, the SQL Server will be your choice because the application layer is in the focus of the Azure SQL Database. Finally, the SLA only covers virtual machines, rather than the SQL Server. In Azure SQL databases, the SLA is 99.99%. When it comes to Azure, there are always different tiers and SQL databases are no exception.
Prerequisites
If you don’t have an Azure account, you can create a free 30-day trial to test things out.
Prepare Linux VM for SQL Installation
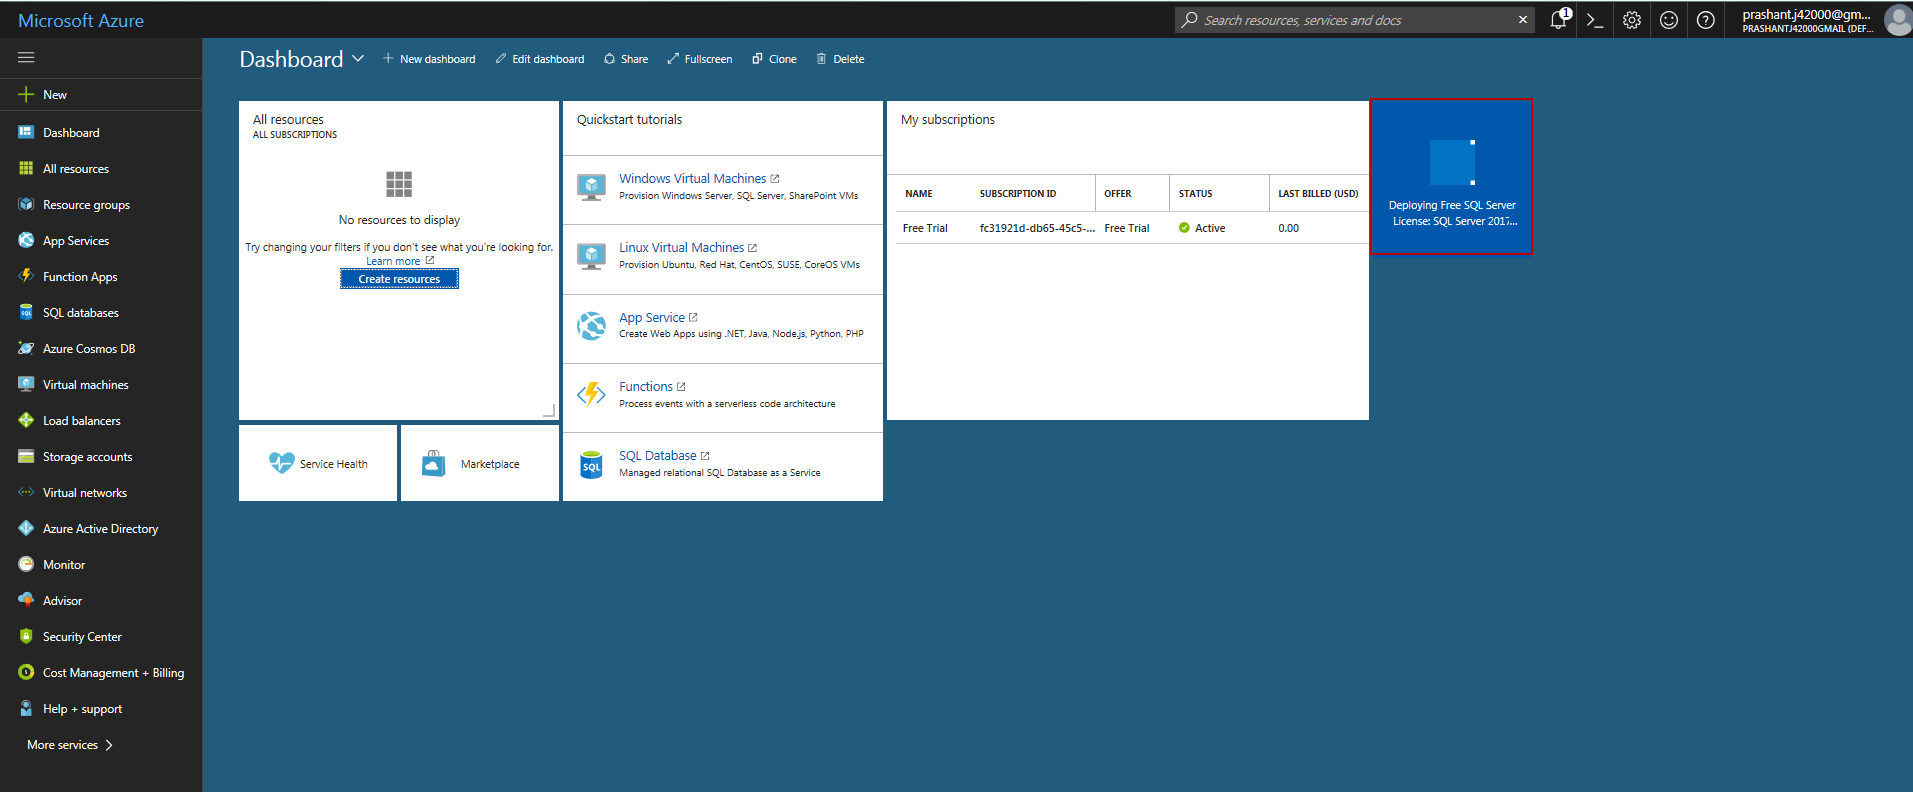
Once you sign up for a free trial version, the first screen you see is the dashboard. It summarizes the current setup with all the default values.
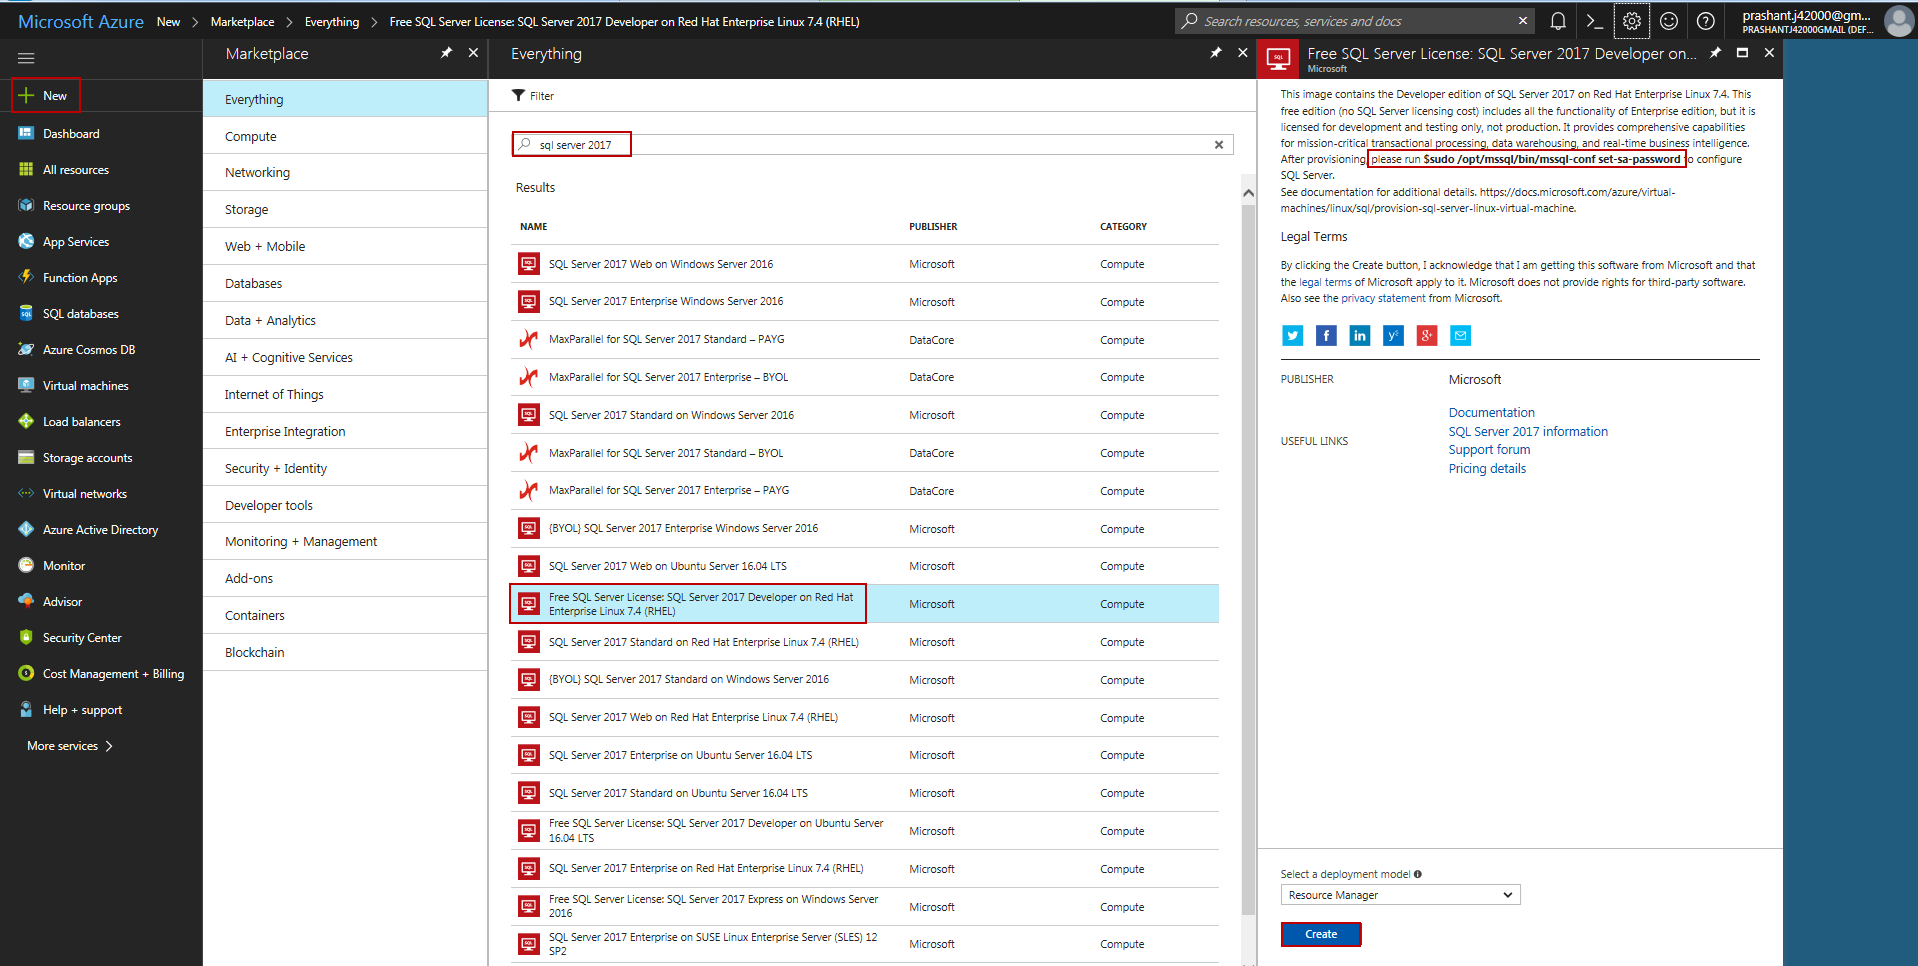
On the dashboard, follow the steps to create a VM machine:
- Click the New button to create a new resource.
- In the search box, type in SQL Server 2017 to list all the SQL Server 2017 VMs
- Select Free SQL Server License: SQL Server 2017 Developer on Red Hat Enterprise Linux 7.4
- Go through the full description. You will need to run the command to configure SQL Server. This is going to be important, so make a note of this text here.
- At the very bottom of the screen, press the Create button to start the process
To create the VMs, you need to go through these four steps:
- Basics to configure basic setting of the VM
- Size to choose the VM machine size
- Settings to configure the features. In this case, the default values are used. You just need to click the Next button to proceed further
- Purchase
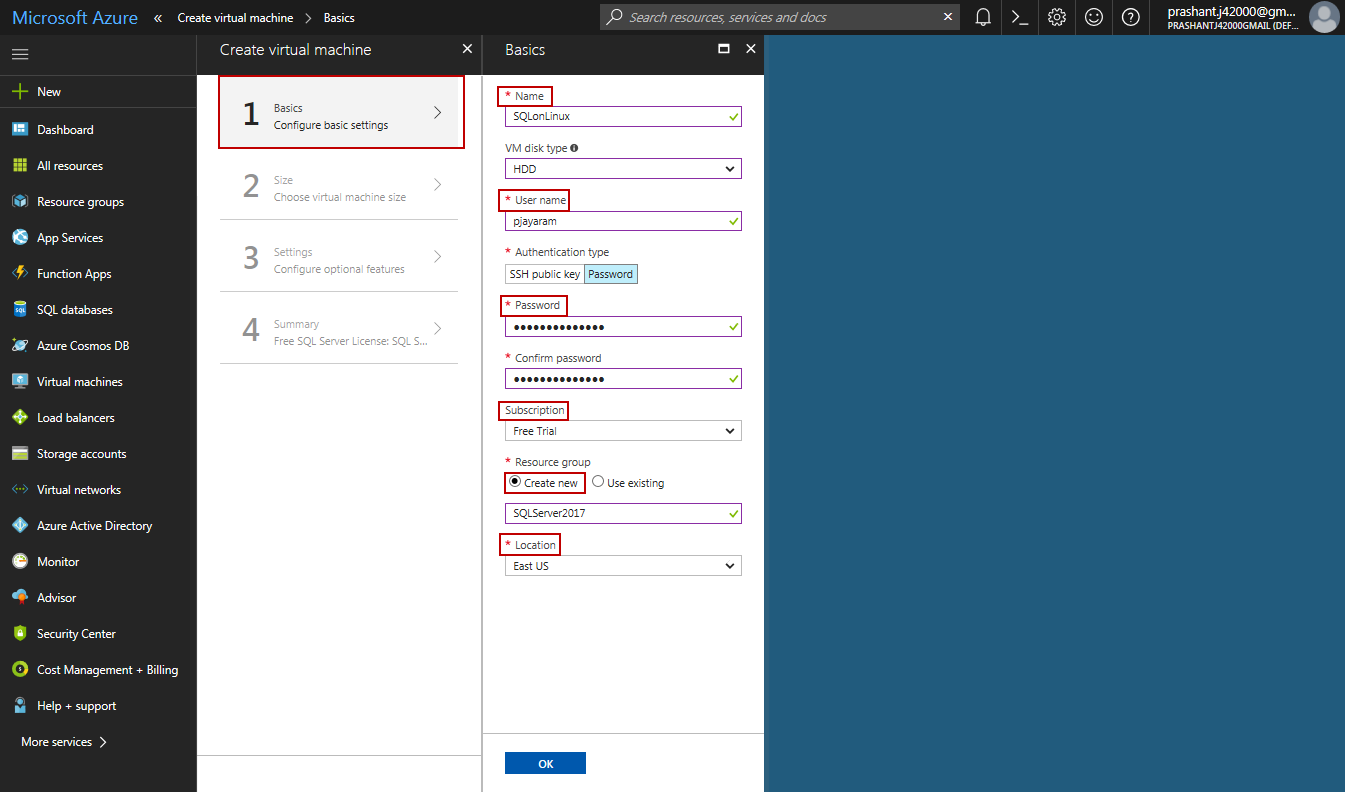
Let’s go over the basics window to add the new VM details.
- The name of the VM is SQLonLinux
- Select HDD as the disk type from SSD just to keep the pricing down
- Enter the username and password and confirm the password for the username
- Choose a subscription type. In our case, it is Free Trial
- Select Create new to create a resource group SQLServer2017 for this virtual machine
- Choose the location. For me, East US is the nearest
- Click Ok
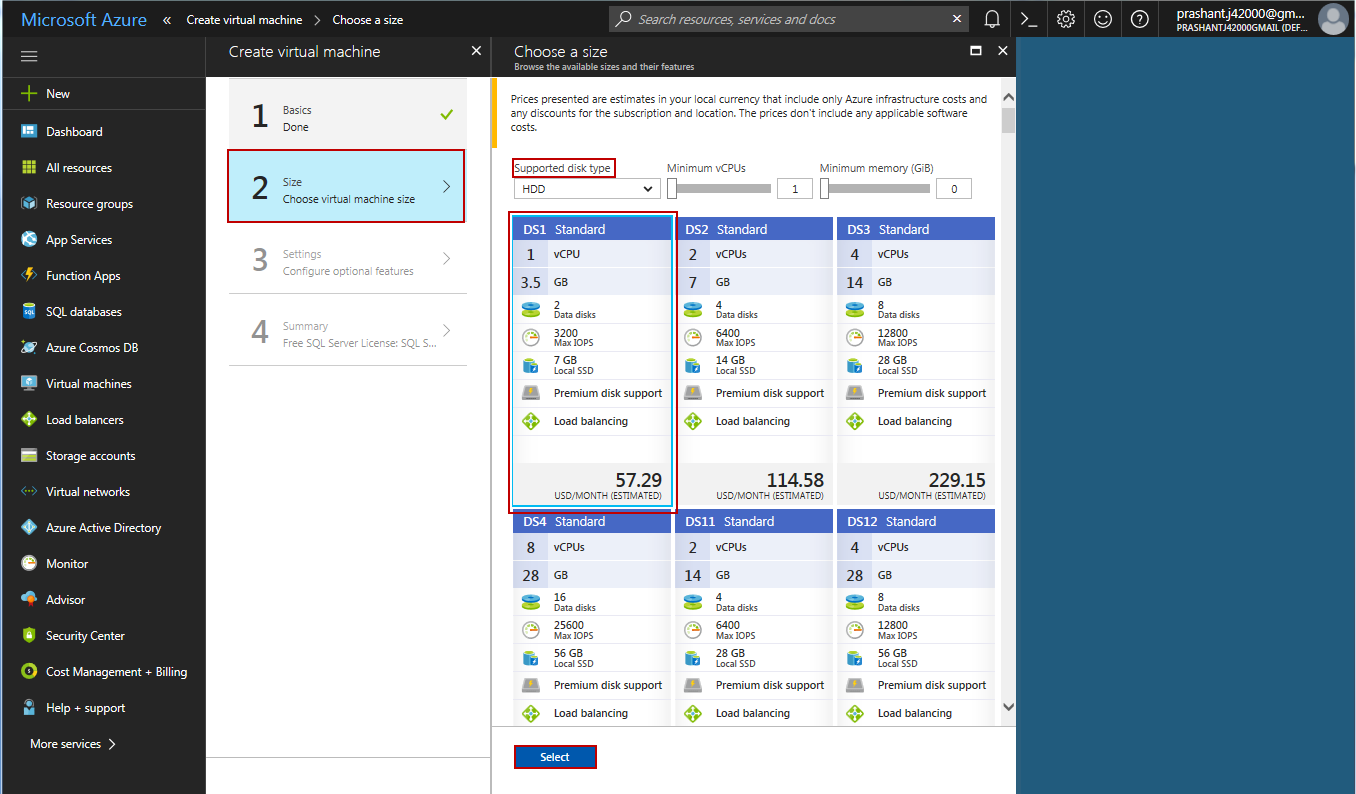
VM Sizing
Choose whichever model suits your pricing model. In this case, the DS1 standard model is selected. Let’s go ahead and just press the Select button.
Settings
All the settings should be left at the default values. Then, press the OK button to proceed to the next section.
Purchase
It’s the summary of the selections. Select the Purchase button to proceed further.
We can see that the VM deployment progress and this process will take a few moments. The bell icon at the top menu is designed for the notifications. After a few minutes, we can get a notification that the deployment is successful.
Thus, the VM is ready and the overview summarizes the configuration details of the SQLonLinux virtual machine.
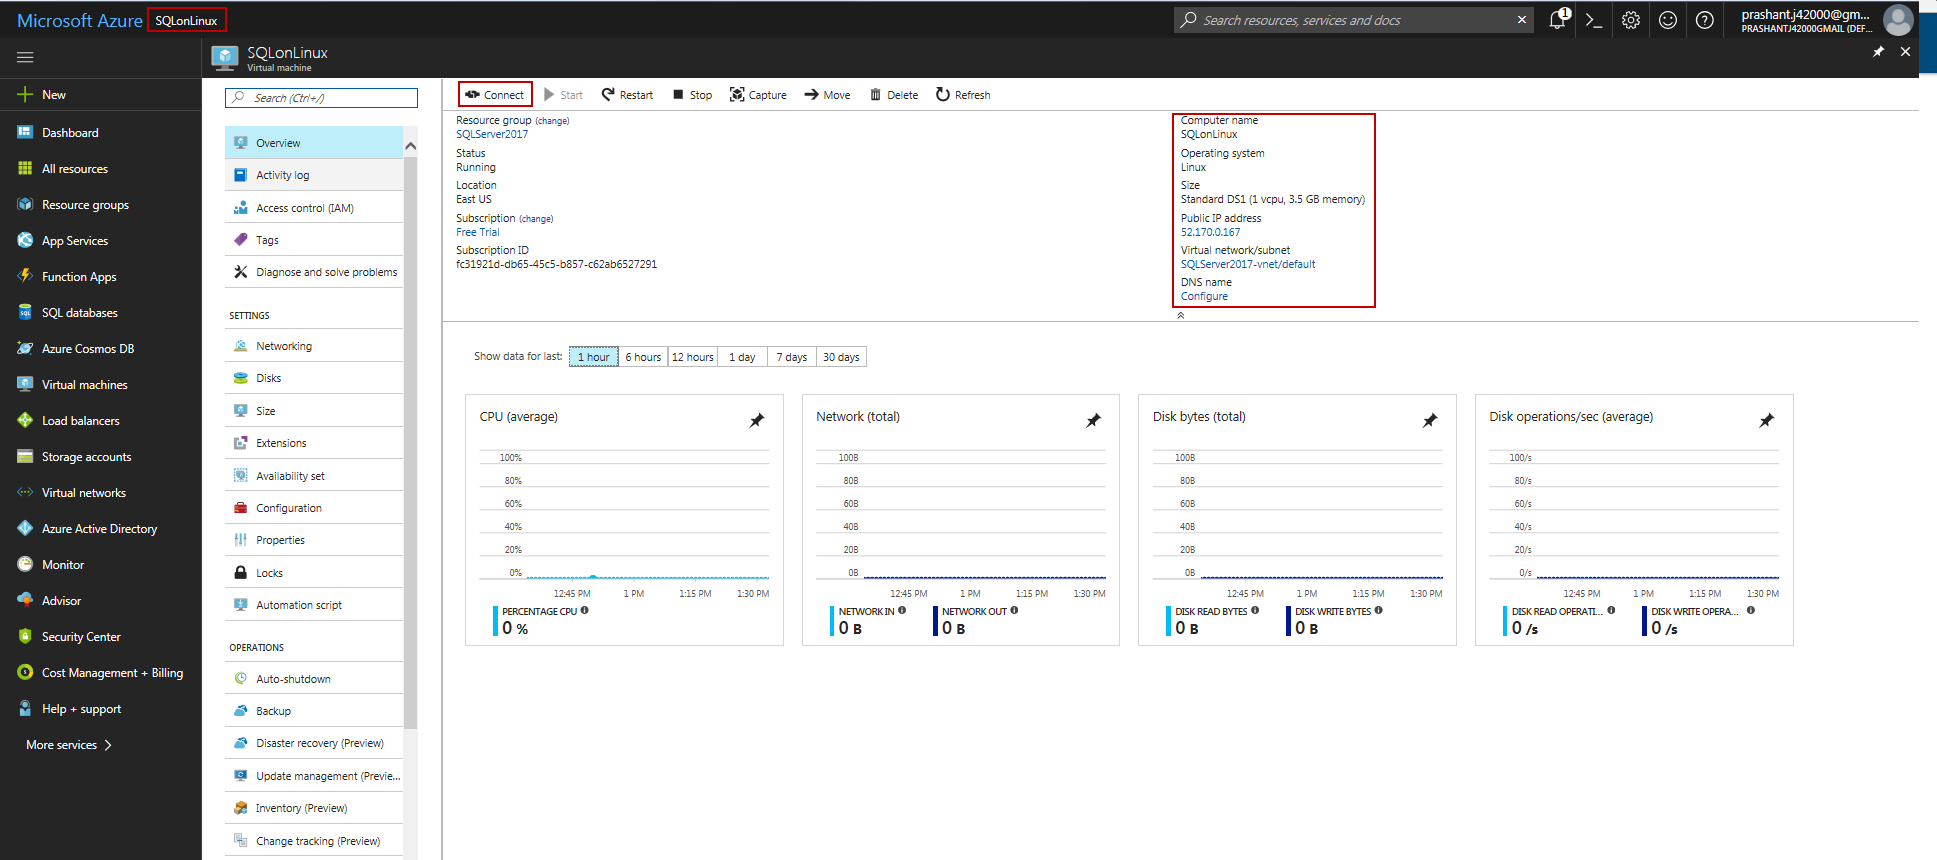
On the dashboard, select the VM and press the Connect button. This action displays a message that we need to run a secure shell, or an SSH client for the connectivity. The next step is to connect to this virtual machine.
Connecting to a VM with PuTTY
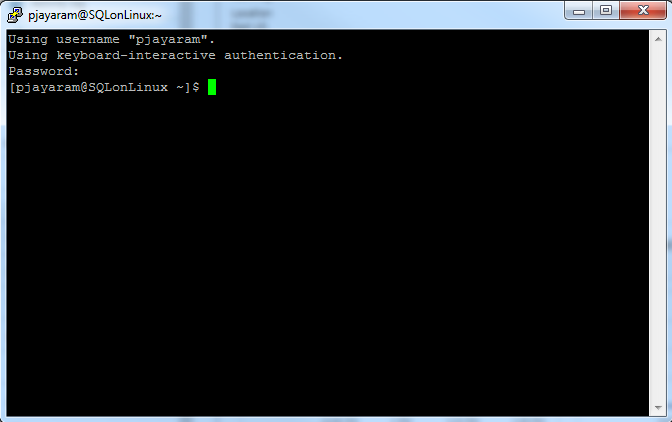
The Linux VM is provisioned; we need to connect to it using SSH client, Putty. To do this, follow these steps:
- Start the PuTTY application
- Enter the VM public IP address
- Click Open
- Enter username and password
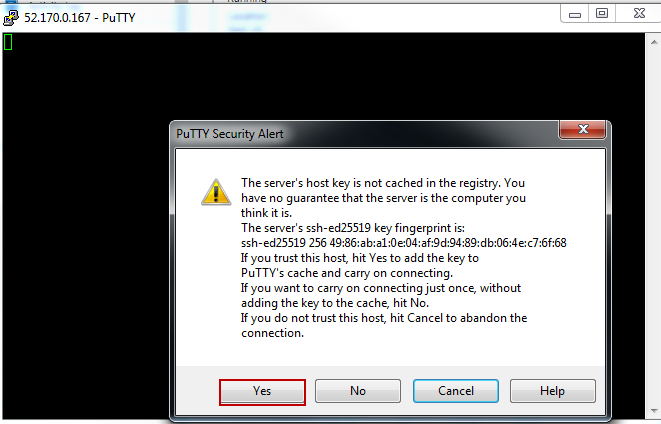
For the first time, you can see a PuTTY security alert, the message is self-explanatory. The server host key is not cached in the registry. That simply means that this is the first time we are trying to connect to the machine. Let’s go ahead and press the Yes button to add the key to our registry. Then, it will bring up a login as a prompt.
The VM is ready and we’re logged into Linux machine, and now, finish the installation of SQL Server 2017.
Let’s follow the below steps to complete the SQL installation and configuration:
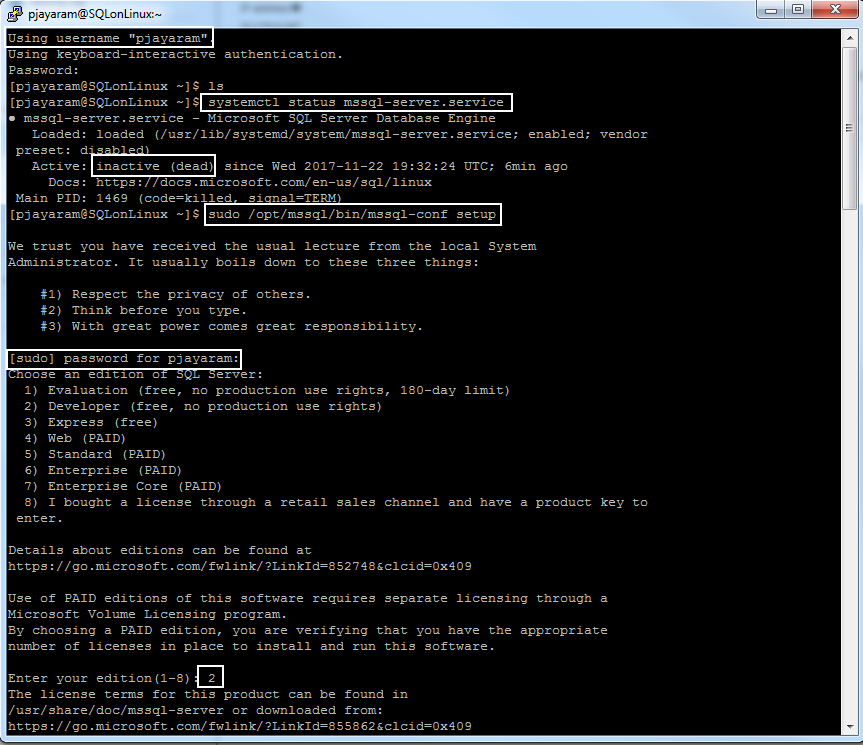
- Check the SQL Server service
- Execute the /opt/mssql/bin/mssql-conf setup command
- Accept the license term for SQL Server by typing the word Yes.
- Select the SQL Server Edition
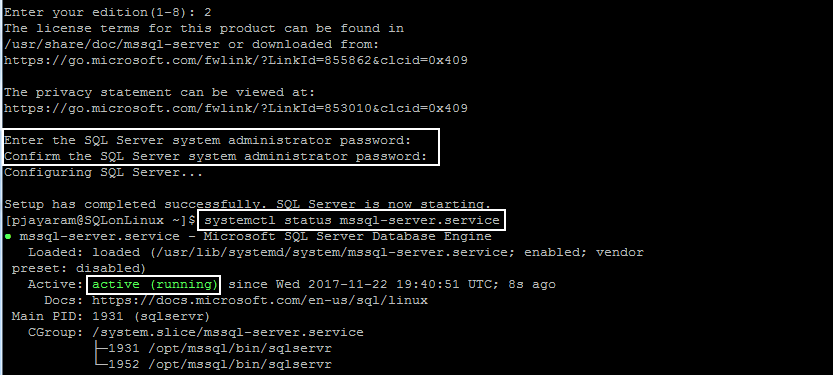
- Enter the new SQL Server system administrator password and confirm the new SQL Server system administrator
- The next step takes a moment to run
- Check the SQL Server service
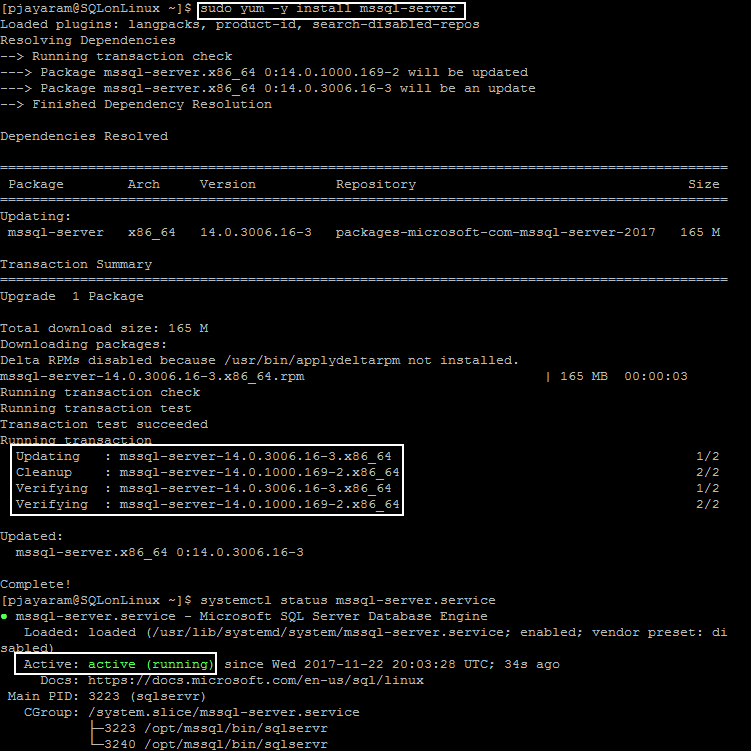
After a few moments, we get the message that the setup was completed successfully and return to the Linux command prompt. Now, we’re ready to go with SQL Server 2017 on our Red Hat Linux virtual machine.
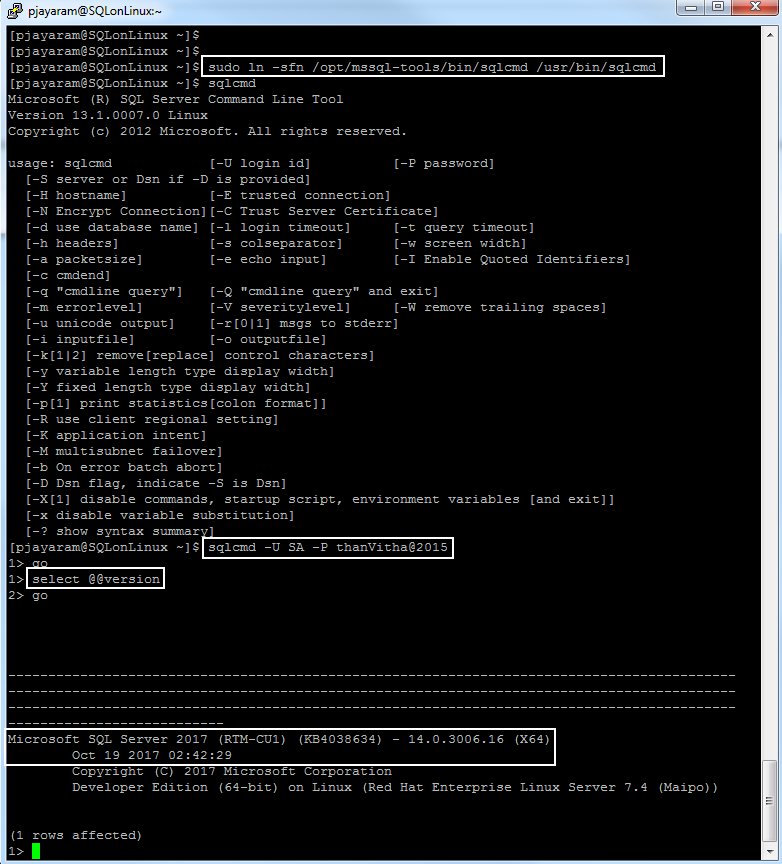
In order to interact with it, the command line tool called sqlcmd is used. We can find that by navigating to a different directory. I’ll issue the command cd, and then we’ll navigate into a directory called opt/mssql-tools/bin.
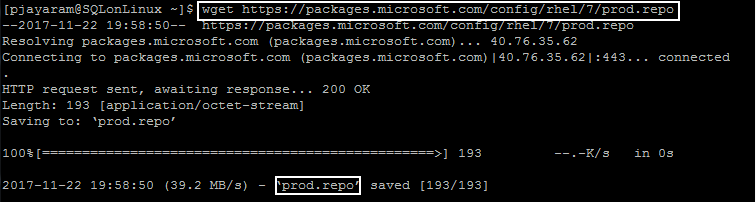
Let’s run the wget utility to download the latest available repository package of SQL Server 2017.
$wget https://packages.microsoft.com/config/rhel/7/prod.repo
Move the repository to the /etc/yum.repos.d/ directory.
$sudo mv *.repo /etc/yum.repos.d/
![]()
The libraries are downloaded and moved to the respective directories. Thus, it’s ready for the update.
$sudo yum –y install mssql-server
$sudo systemctl status mssql-server.service
Connect to the SQL Server using SQL tools.
Such SQL tools as sqlcmd and bcp can be available by using a soft link or by adding the tool path to the environment variable so that it will be automatically available to all the sessions.
That’s all…
Wrapping Up
As more enterprise computing is moving towards the cloud and the Linux is the platform for many applications, the Microsoft move from SQL Server 2017 to Linux would open up a wide market. This article highlights how you can get started using SQL Server 2017 by setting up a Red Hat Linux virtual machine with the help of Microsoft Azure cloud platform, and how to connect to Linux instance using an SSH client such as PuTTY. Every SQL Server DBA must agree that SQL Server 2017 is the major breakthrough for Microsoft.
Do you agree? Please share your comments and ideas.
References
https://docs.microsoft.com/en-us/sql/linux/sql-server-linux-overview
Tags: azure, azure sql, linux, sql server 2017 Last modified: October 07, 2022