Introduction
Azure is growing every day. Microsoft created Azure, which is a Cloud Computing service released on 2010.
According to Microsoft, 80% of the fortune 500 companies are using Azure. Also, 40% of the Azure Revenue comes from Startups and independent software vendors. 33% of the Azure Virtual Machines are using Linux. Microsoft expects to earn $20 billion in 2018.
That is why companies are migrating part of the data to Azure and sometimes all the data.
Azure Data Lake is a special storage to analyze Big Data in parallel in Azure. It is optimized for analytics. You can store Social network data, emails, documents, sensor information, geographical information and more.
If you want just to store data, the Azure Blob Storage is enough. If you want to analyze the data, Data Lake is the best option because it is designed for reports.
The Data Lake Store is usually analyzed using Cortana Analytics Suite, Power BI, SSIS is a well-known and popular tool to migrate data. In this new article, we will show how to use SSIS to migrate data to Azure. We will also show how to export data from a .txt file in Azure Data Lake Store to SQL Server on-premises.
If you do not have any experience in Azure, but you have experience with SSIS. This article is for you.
We will follow these steps to import the data in Azure Data Lake:
- Install the SSIS Feature pack for Azure
By default, you cannot connect to Azure Data Lake Store. It is necessary to install the feature pack for Azure in the SSIS projects.
- Create an Azure Data Lake Store (ADLS) in the Azure Portal
If you do not have an Azure Data Lake Store, you will need to create a new one. We will create a folder in this ADLS and we will import the data from a local folder here.
- Create an app registration
In the Azure Portal, in the Azure Active Directory (AAD) options, there is an option for app registration. We will use an app registration to access to the ADLS.
- Assign permissions to ADLS
In ADLS in the Data Explorer, you need to grant access to the App registration.
- Exporting files to ADLS with SSIS
Using the ADLS task for SSIS in the SSDT, you can export the data from a local file to SSIS. For this purpose, you need the ADLS URL, the Application ID of the App registration and the Key of the App registration.
- Verify the results
Finally, in the Azure Portal go to the ADLS, Data Explore and verify that the files were successfully copied.
Requirements
The following software is required for this article:
- SSIS Installed (included with the SQL Server installer)
- SQL Server Data Tools (SSDT) installed
- An Azure Account
- The SSIS Feature Pack for Azure
Get started
1. Install the SSIS Feature pack for Azure
There is a free Feature Pack for SSIS that includes tasks to connect to Azure. The SSIS feature pack needs to be installed. This package includes several tasks to work with Big Data in Azure (HDInsight), Azure Blob Storage, Azure Data Lake Store, Azure Data Warehouse and more:
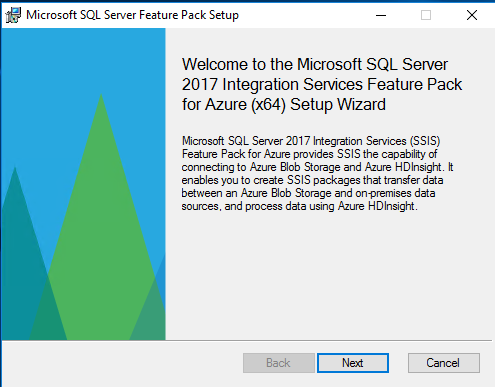
The installer is a 29 MB. There is a version for 32 and 64 bits.
2. Create an Azure Data Lake Store (ADLS) in the Azure Portal
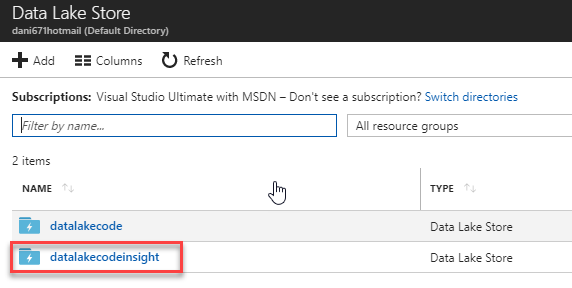
You will also need a subscription to Azure. There are trial editions for newbies who want to learn this new technology. We will create an Azure Data Lake Store. A Data Lake Store is where you store your data in Azure for analytics.Log in to the Azure Portal and go to more services (>) and in the search textbox write Data Lake Store. Select the Data Lake Store:

I am assuming that you do not have a Data Lake Store yet, so we will create a new one by pressing the +Add icon:

Specify a name for the Data Lake Store. The resource group is to handle multiple Azure resources in groups. Location is to specify the location closest to you. You can pay for consumption. The price is around 0.39 USD per GB. The more TB, the cheapest it is. There are also charges per read and write operations (10,000 write operations per $0.05 and 10,000 read operations per $0.004).

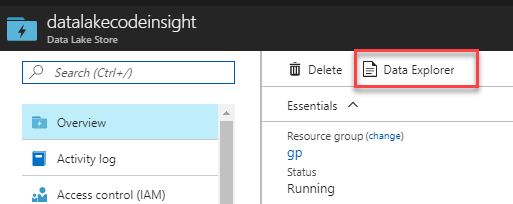
Once created, click on the Data Lake Store:
To create folders and add files, go to the Data Explorer:
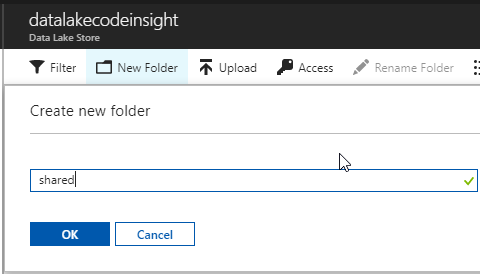
Create a New Folder. We will upload files to this folder. Assign a name and press OK:
3. Create an app registration
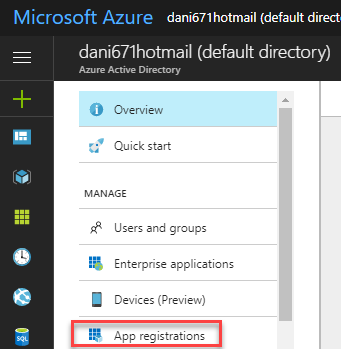
We will create an App registration to access to Data Lake. In App registration, you register your application and you are assigned an application ID and a key.To do that, we need to go to More services>Active Directory:
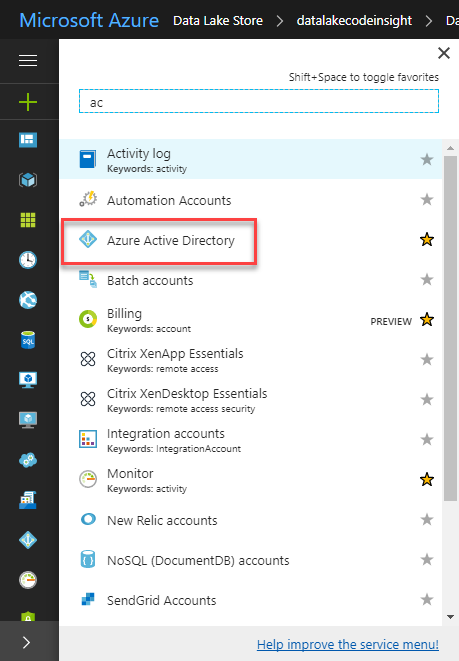
Go to App registrations:
Add a name. The application type is Web app/API (the default one). The URL can be any URL for your preference:

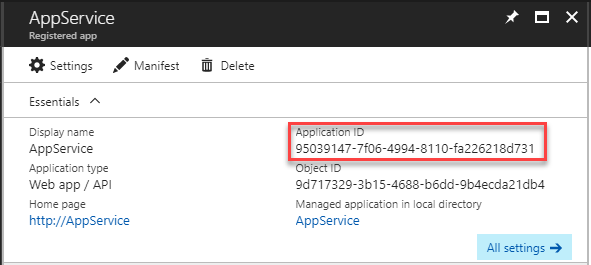
Click on the application just created:

To connect to Azure Data Lake Store, you need the Application ID:
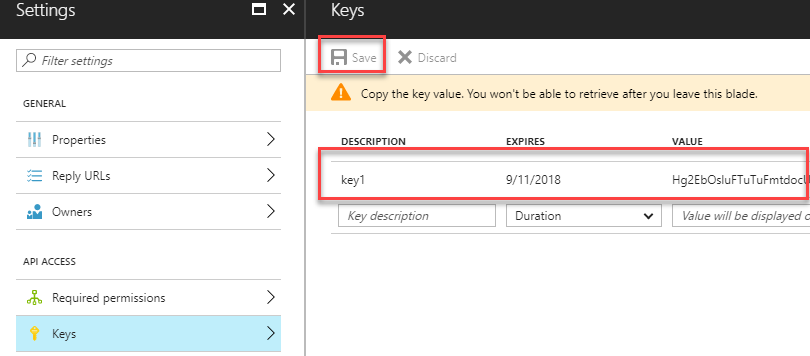
In the App registration, go to keys. Create a new key and assign an expiration duration for the key. Copy and paste the value somewhere. This value will be required to connect to the Azure Data Lake Store:
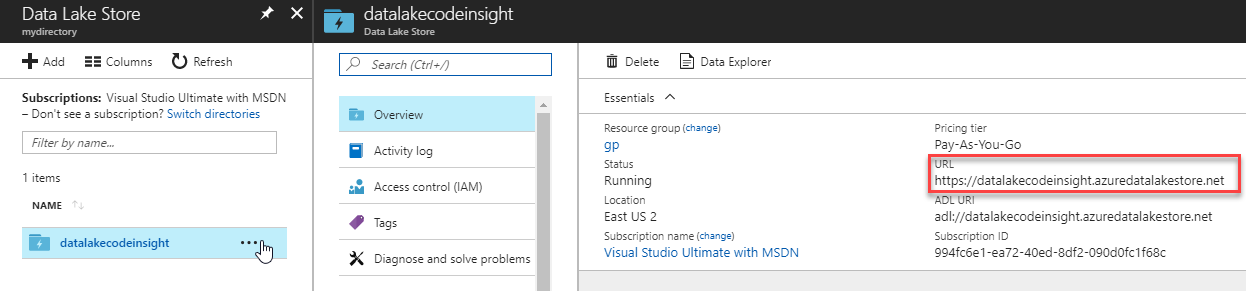
Go to the Data Lake Store and copy the URL in the Overview section. This information is also useful to connect using SSIS:
4. Assign permissions to ADLS
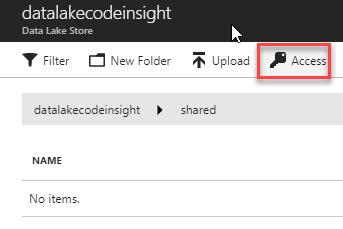
We will grant permissions to our App registrations. These permissions will allow accessing to ADLS.Go to the Data Explorer:

Press the Access option to add the App Registration:
Press the +Add option to add the App registration:

In the text box, write AppService and press the Select button:

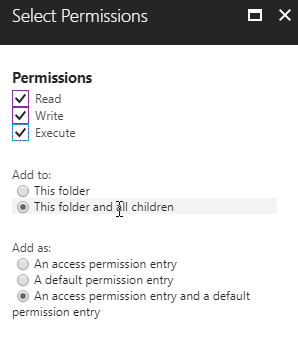
Assign read, write and execute permissions. You can add permissions to the folder and the folder and all children.
You can also assign access, default permissions and both:
5. Exporting files to ADLS with SSIS
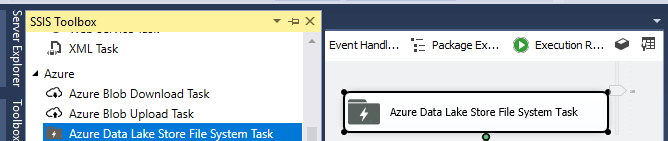
In SSDT, create a SSIS project. If you installed the feature pack for Azure, you will be able to see the Azure Data Lake Store File System Task. Drag and drop this task to the design pane:
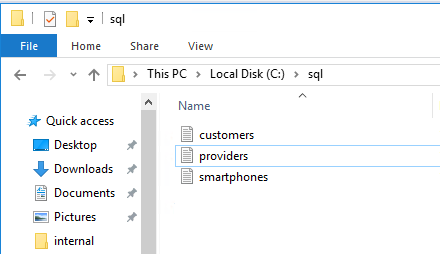
Double-click the Azure Data Lake Store File System Task. There are 2 possible operations. To copy from Azure Data Lake (ADL) or to copy to ADL. In this example, we will copy from a local file to ADL.In the source, we will use the c:\sql folder, we will have some local files to copy to ADL. In AzureDataLakeDirectory, we will use the folder shared. This folder was created in ADL Store in previous steps. The AzureDataLakeConnection will be explained later. Live the file expiry (this option is used to specify when the files expiry):
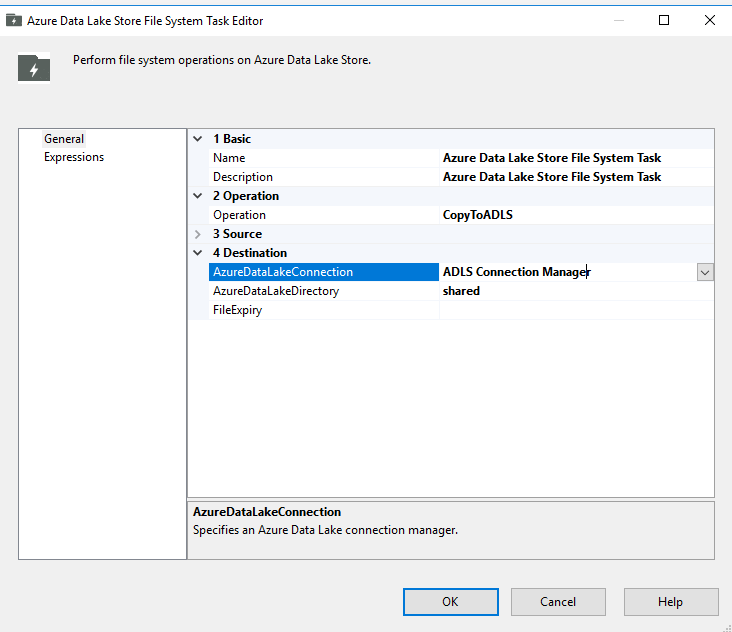
In AzureDataLakeConnection, we will select the option New Connection to create a new one:

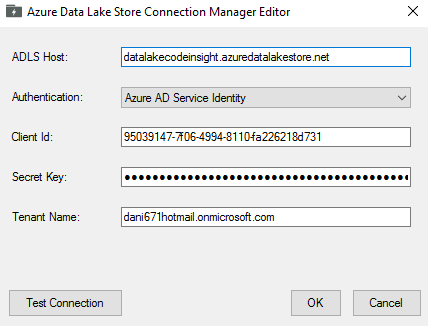
In the connection, you need the ADLS host. This is the URL when you go to the Overview section of the ADLS in the portal.In Authentication, we will use an Azure AD Service Identity. This option uses the App Registration created in Azure.
The Client ID is the Application ID of the App Registration. You can find this information in the App Registration section of the Azure AD.
The secret key can be found in the portal in App Registration in Azure AD in the key section. You can create a key and use the value in this section.
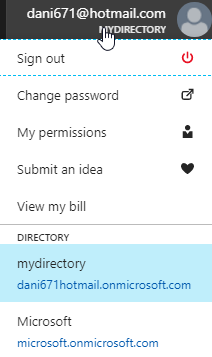
Tenant name is the name of the Azure AD domain (we will explain the Azure Domain).
Press the test connection to verify that everything is fine. Once it is fine, press OK:
If you do not know your domain (Tenant Name), you can check by clicking in the top right section of the Portal.
You can run the SSIS package to export the data to ADLS. In this example, we have 3 files in the local folder.
6. Verify the results
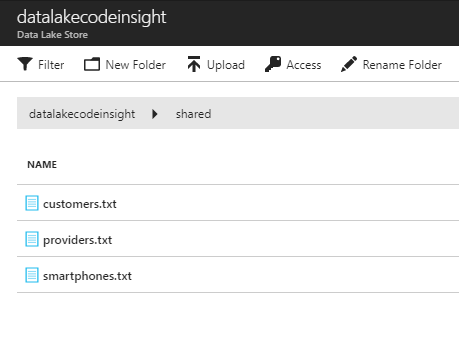
If everything is OK, in the Azure Portal, go to the ADLS and go Data Explorer. Go to the shared folder and check the files there. You will be able to see the 5 files copied.
Export data from Data Lake to SQL Server on-premises
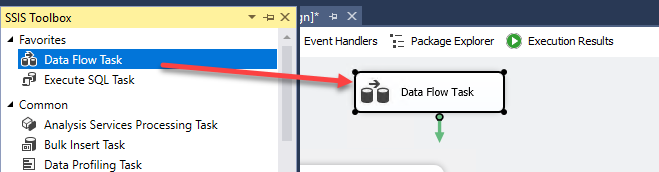
In the second part, we will export data stored in Azure Data Lake to SQL Server on-premises. Drag and drop a Data Flow task:
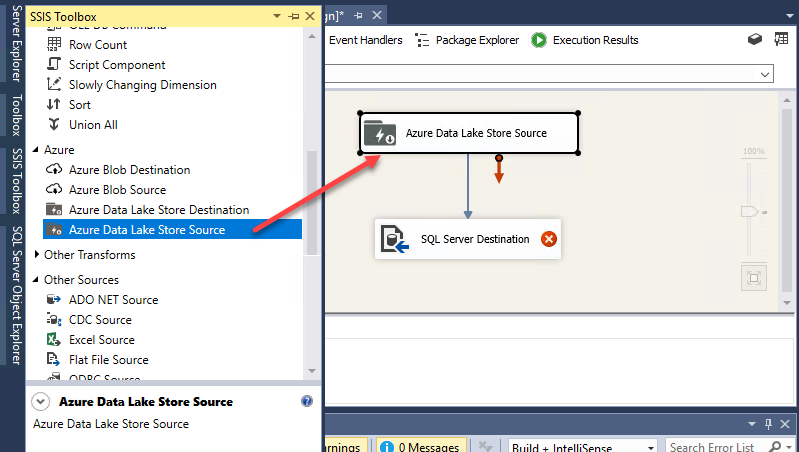
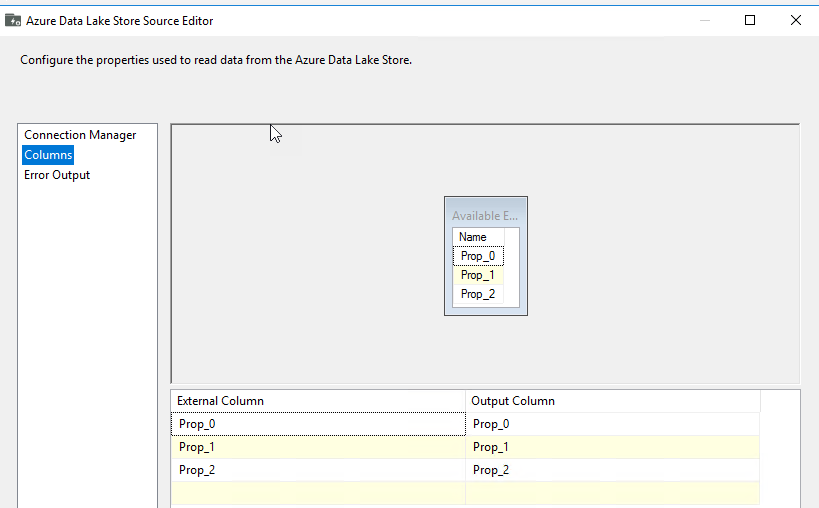
Double-click the Data Flow task and drag and drop the Azure Data Lake Store Source and the SQL Server Destination. Connect both tasks. Double click Azure Data Lake Store Source:
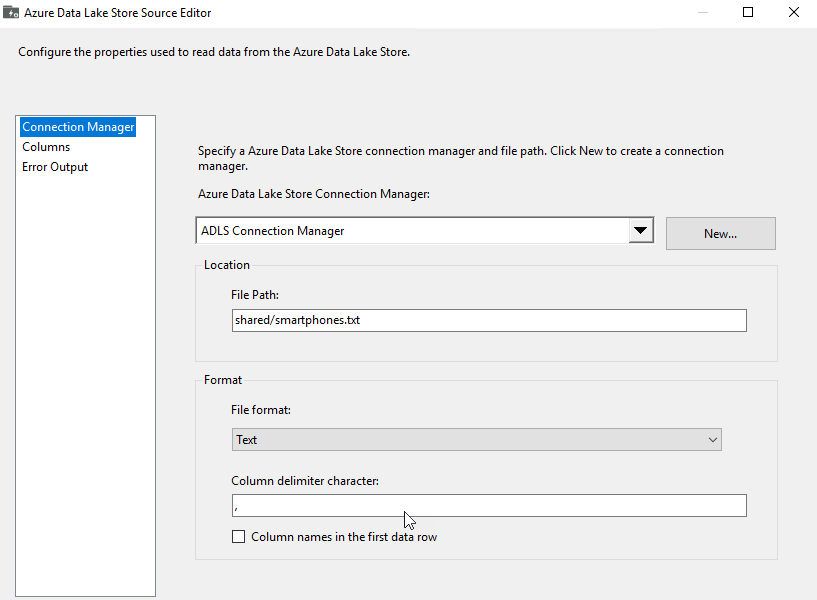
Select the ADLS Connection created in the first part of the article. In the path, specify the ADLS path (folder/file name). In this scenario the file format is text and the delimiter is a comma:
In columns, you can see the columns. If there are no columns. Default column headers are created:
Double-click the SQL Server Destination. Press New to create a connection manager:
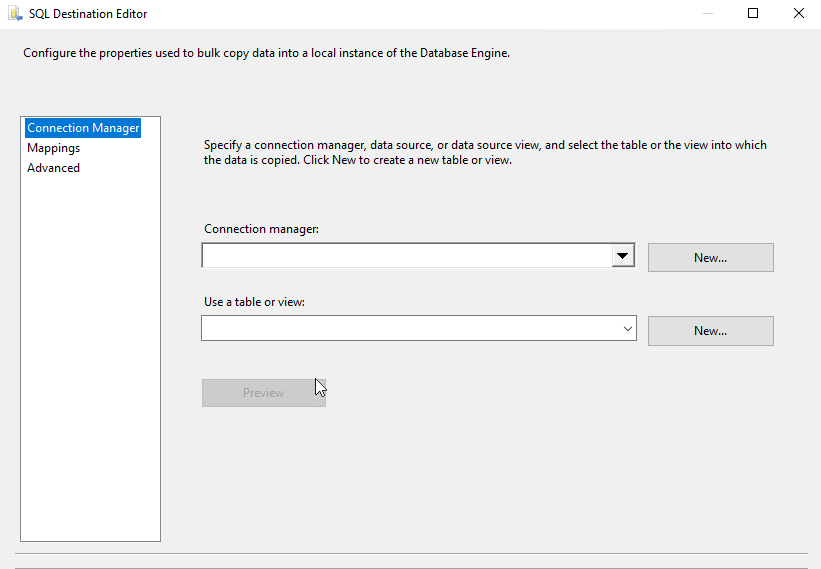
Create a new connection. Specify the SQL Server name, the authentication and the database where you want to store the data:

In table or view, press New to create a new table:

By default, you will have the following T-SQL code:
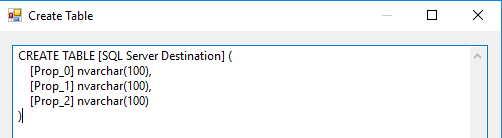
Change the code to specify a table name and give column names:
CREATE TABLE [smartphones] (

    [ID] int,

    Brand nvarchar(100),

    Version nvarchar(100)

)
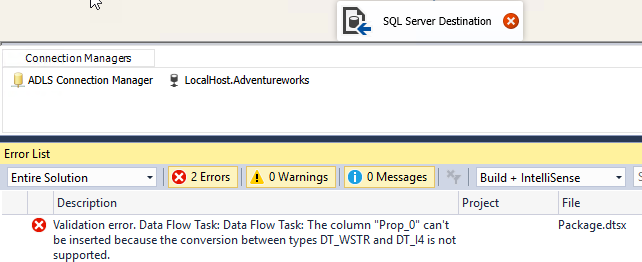
Go to Mappings page and assign Prop_0 to ID, Prop_1 to Brand, Prop_2 to Version:
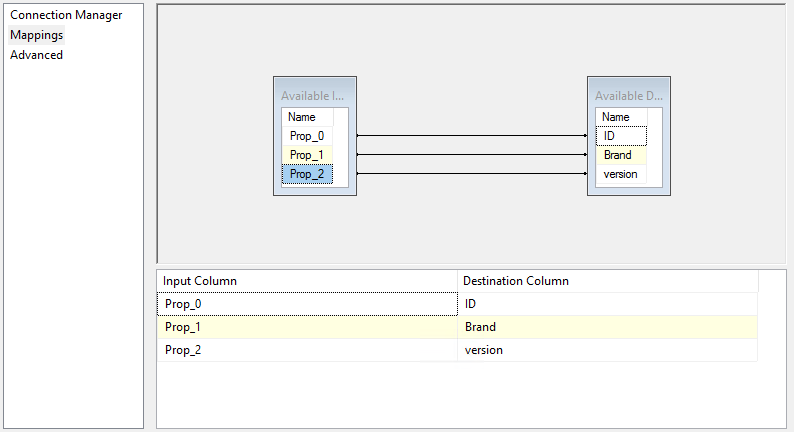
You will have an error in SQL Server Destination. That the column cannot be inserted because of a conversion problem. This is because Prop_0 is a string and the SQL Server table is an integer:
Drag and drop the Data Conversion task and connect between Azure Data Lake Store Source and SQL Server Destination:
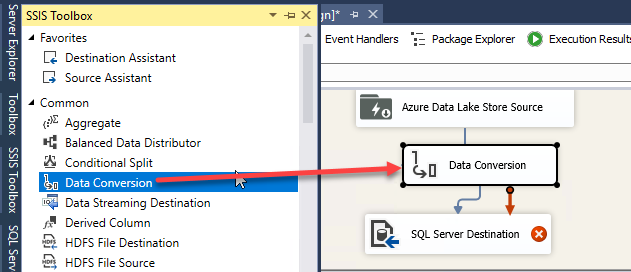
Double-click data conversion, select Prop_0 and convert the Data Type to four-byte signed integer [DT_I4] and assign an alias. Data conversion creates another column with a different data type:
![]()
Return to SQL Destination Editor and match Prop_0int to ID:

Run the SSIS package. In SSMS, verify that the dbo.smartphones tables are created and check if the data was imported:

If you have questions or problems feel free to write your comments.
Conclusions
Azure Data Lake is a special storage with high performance to handle Big Data. To migrate data from local Servers to Azure, you can use SSIS. To do that, you need the new Feature Pack for Azure. This pack installs new Tasks to connect to ADLS.
To connect to ADLS using SSIS we created an AAD App registration with permissions to it.
SSIS allows uploading the files to ADLS easily. You only need to specify the ADLS URL and the App registration key and application ID.
We also show how to extract data from ADLS to a table in SQL Server on-premises.
References
For more information about SSIS, Data Lake Store, App registration use the following links:
- Introducing Azure Data Lake
- Azure Data Lake Store Connection Manager
- Azure Feature Pack for Integration Services (SSIS)
- Integrating applications with Azure Active Directory
- Azure Data Lake Store File System Task
- Register your application with your Azure Active Directory tenant


This is a great addition to the SSIS toolset. Do you perhaps know how you would combine this with a ADLS Foreach Loop enumerator feeding the filepath to the Data Flow’s ADLS Source component. I don’t see any expressions under the properties of the ADLS Source component.