In my previous article, I have explained the process of installing and creating a failover cluster and how to enable the AlwaysOn availability group.
In this article, I am going to explain the step-by-step deployment process of SQL Server AlwaysOn Availability groups using wizards. The deployment configurations look the following way:

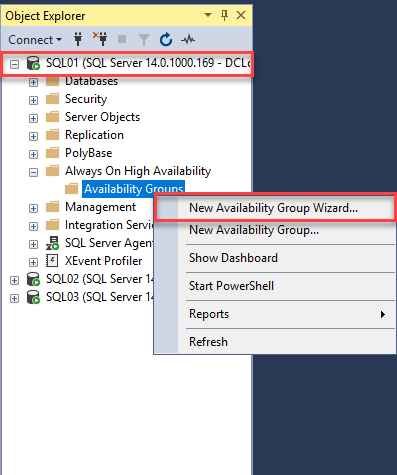
We have installed SQL Server 2017 and SQL Server management studio on all the servers. First, connect to SQL01.DC.Local and open SQL Server management studio. In SSMS, connect to the database engine. In the object explorer window, expand AlwaysOn High Availability, Right-click on Availability groups, and select “New Availability Group Wizard.” See the following image:
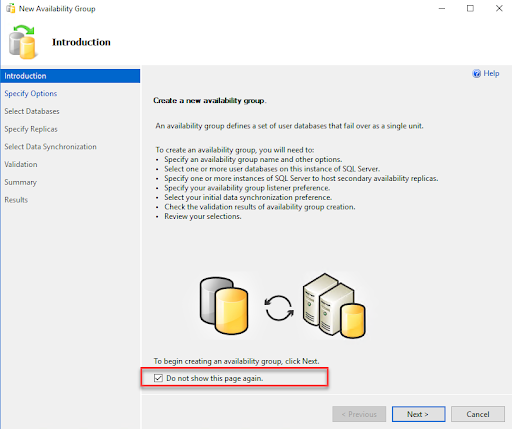
The first screen is Introduction, which provides the details of the availability group wizard and what tasks we can perform using it. If you do not wish to see this screen again, you can skip it by selecting “Do not show this page again.” Click Next to move on to the next screen. See the following screenshot:
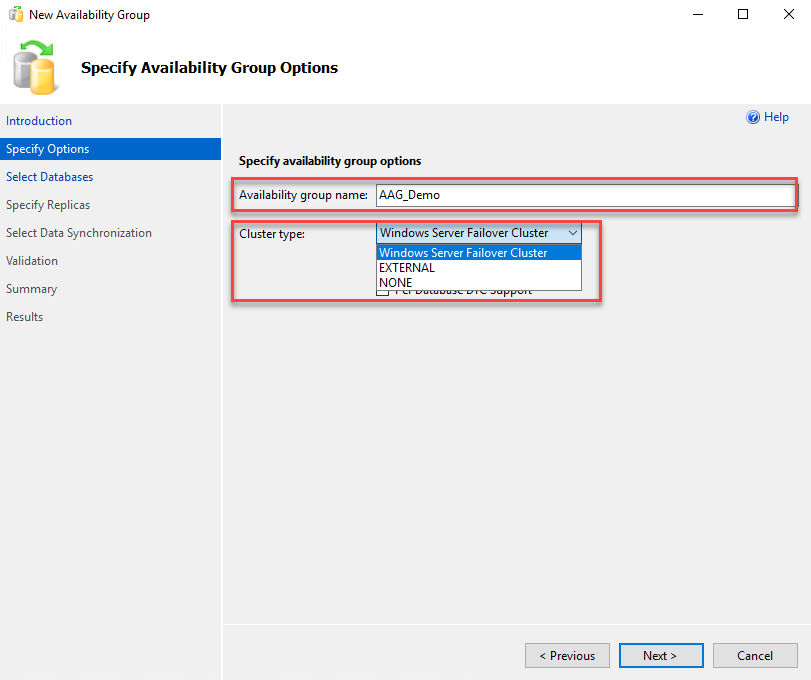
On the specify availability group screen, enter the desired name of the availability group. In the “Cluster Type” drop-down menu, you can choose any of the following values:
- Windows Server Failover Cluster: This option is used when you want to create an availability group using a traditional Windows Server failover cluster.
- External: This option is used when you create an availability group on the Linux operating system. It uses the Linux operating system by integrating it with PACEMAKER (Linux Cluster resource manager).
- NONE: This option is used when you do not wish to enable high availability option. It can be used for both Windows and Linux.
We are deploying AAG on a Windows cluster hence select “Windows Server Failover Cluster” from the cluster type drop-down box. Click Next to move on to the next screen. See the following screenshot:
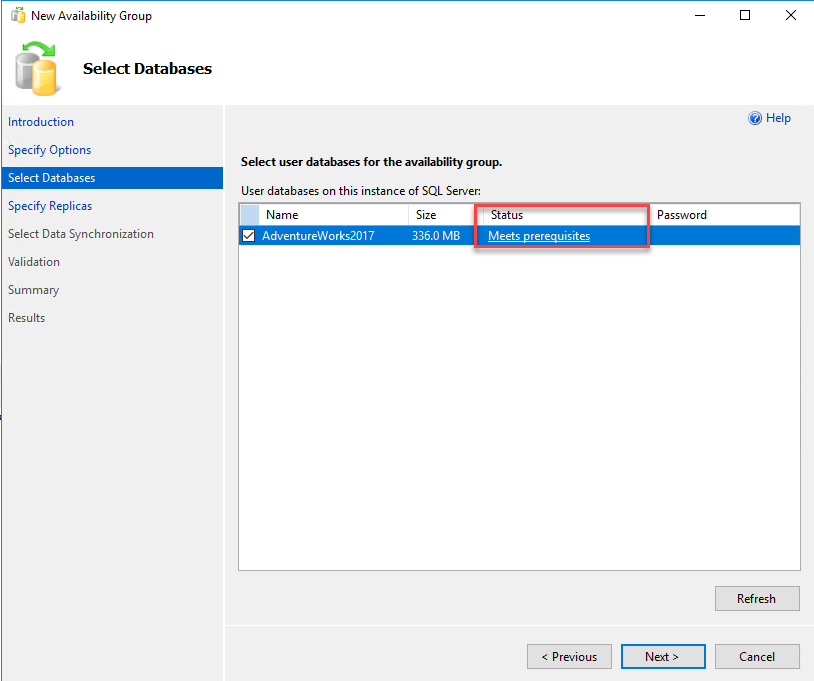
On the Select databases screen, choose the databases you want to include in your availability group. The databases must fulfill the following prerequisites to be a part of the availability group:
- The database must be in the Full Recovery Model.
- The Full Backup of the database must be taken.
If the above pre-requisites are met, you can see “Meets Prerequisites” in the Status column of the grid. Choose the name of the database by clicking on the checkbox and click on Next. See the following image:
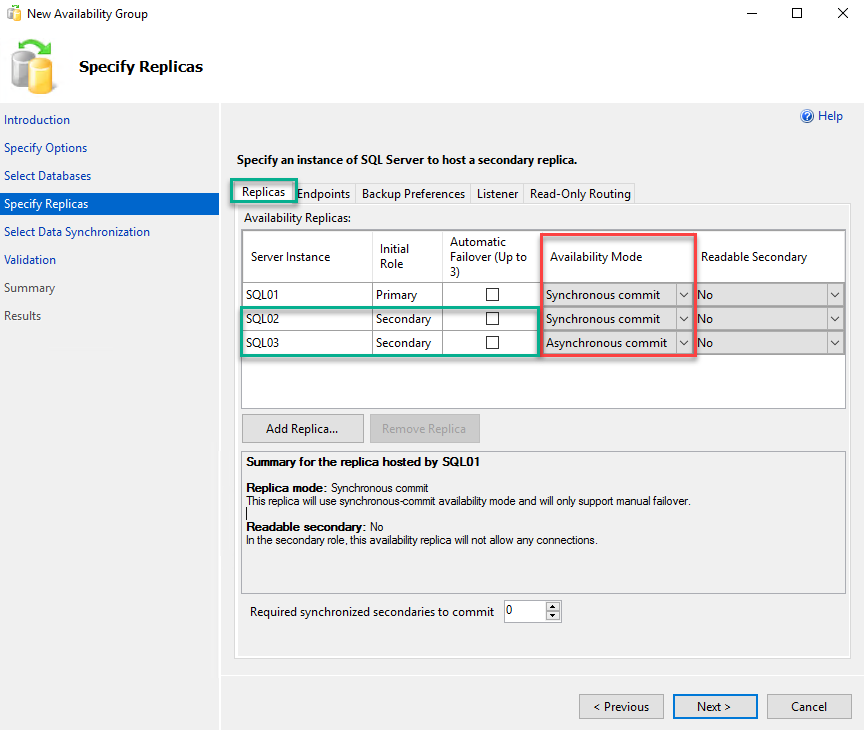
On the Specify replica screen, we will configure the following options:
- List of availability replicas.
- Endpoints.
- Backup preference.
- Availability Group Listener.
- Read-Only routing.
Let me explain all the options.
First, in the replica tab, you can specify the list of replicas that you want to include in the availability group. We are going to include SQL02.Dc.Local and SQL03.DC.Local as the secondary replicas. To add a replica, click on the “Add Replica” button.
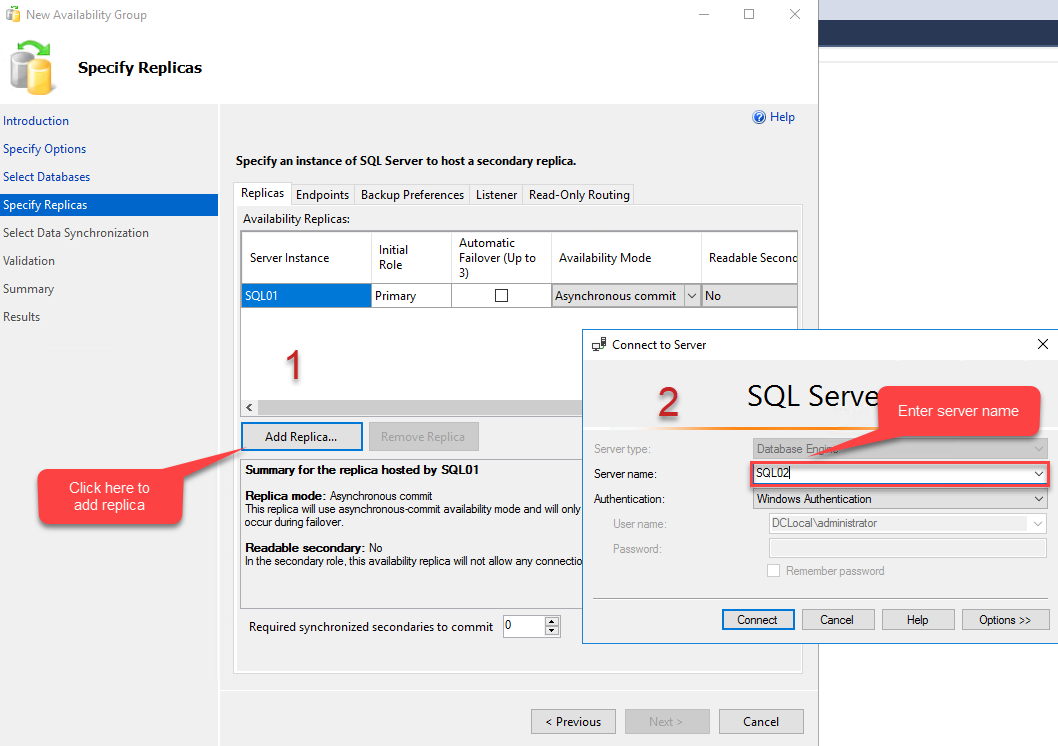
When you click on “Add replica”, the Connect to Server dialog box opens. In the Server name text box, enter the name of the server that you want to add in the availability group, then click on Connect. Add SQL02 in the server name text box and click on Connect. Similarly, add SQL03.Dc.Local in availability replicas. As I mentioned at the beginning of the article, SQL02.Dc.Local will be the synchronous replica and SQL03.Dc.Local will be the asynchronous replica; hence, choose Synchronous to commit from the Availability mode column mode for SQL02.Dc.Local and choose Asynchronous commit for SQL03.Dc.Local. See the following image:
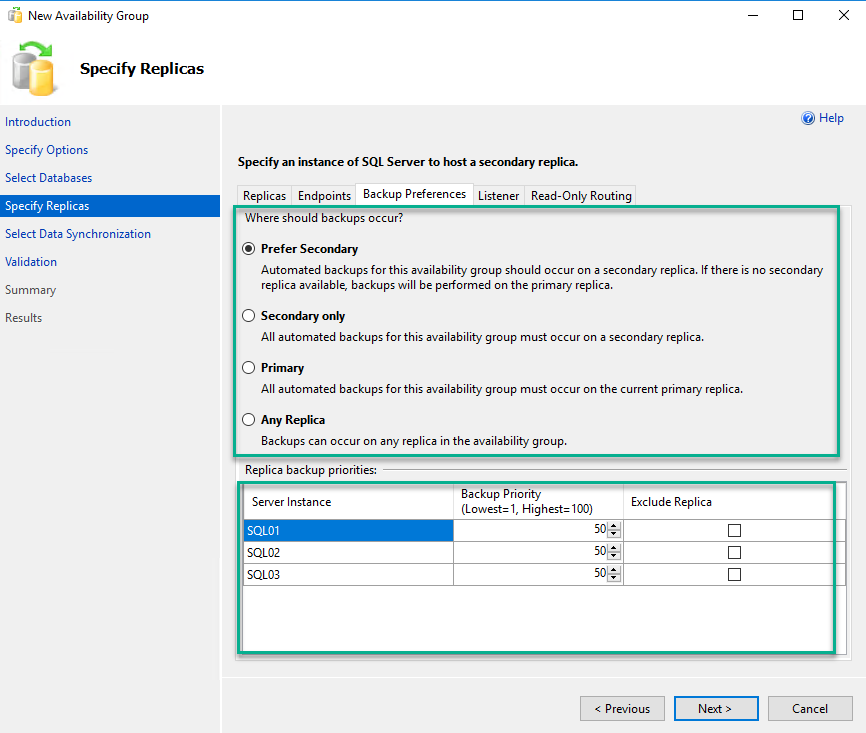
To configure the backup preference, click on the Backup preference tab. In the backup preference screen, you can see four options. The details of each option are provided on the screen, which is self-explanatory. As I mentioned, choose the “Prefer secondary” option. Backup priority will come up when you have configured the availability group with multiple secondary replicas, and the backup preference is secondary. Backup priority will be determined based on the number entered in the backup priority textbox. For example, if the backup priority is 70 for the SQL03.Dc.Local replica, the backup will be generated on the SQL03.Dc.Local replica. If you don’t want to generate a backup on any specific replica, you can exclude a replica by clicking on the “Exclude Replica” checkbox. For now, do not make any changes to the backup priority. See the following image:
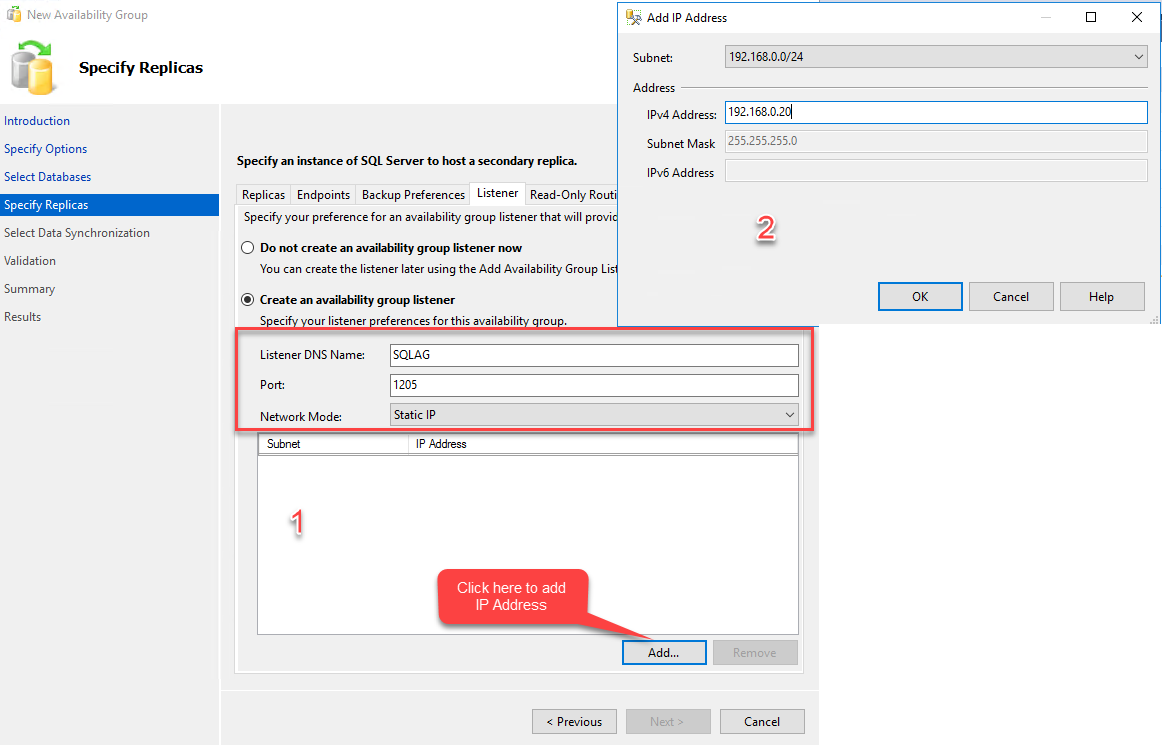
To create an availability group listener, click on the Listener tab. On the listener tab, select “create new availability listener.” In the DNS Name text box, provide the desired DNS name. This DNS name will be used to connect to the availability group. Enter the desired port in the Port number dialog box. Make sure the port is open in the windows firewall. Choose Static IP Address from the Network mode drop-down box. Click on the Add button to add IP Address. When you click on Add, the “Add IP Address” dialog box opens. In the dialog box, enter the desired IP Address. Click OK to close the dialog box. See the following image:
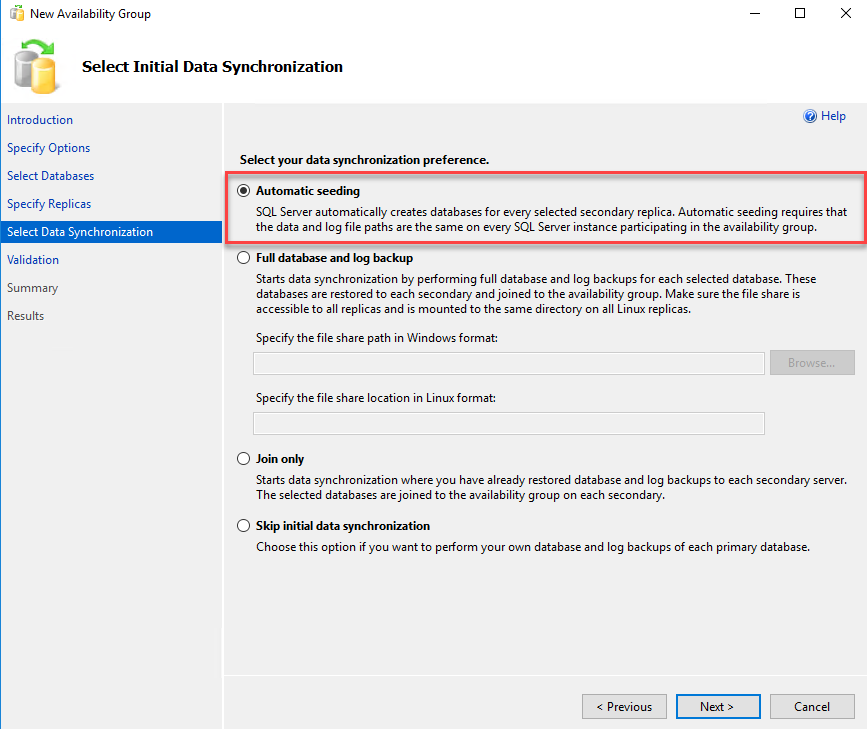
Once all parameters are configured, click on Next. On the “Select initial data synchronization” screen, you can see multiple options. They look the following way:
Automatic Seeding: When you choose this option, the wizard will automatically create an availability database on all secondary replicas. To use this option, we must make sure the data file and the log file paths are the same across all primary and secondary replicas.
Full Database and Log Backup: When you choose this option, Wizard will restore full database and log backups for available databases from shared locations entered in the “File Share Path” text box. To use this option, we must create a shared folder to keep full database and log backups. Your SQL Server service account must have read-write permission on the shared folder.
Join Only: When you choose this option, the wizard will join an availability database created on all secondary replicas. To use this option, we must restore a backup of the availability database on all secondary replicas.
Skip initial synchronization: When you choose this option, the wizard will skip the initial synchronization of primary and secondary replicas. We can perform it manually.
In our demo setup, data file and log file locations are the same; hence, choose the “Automatic Seeding” option from the “data synchronization preference” menu, then click on Next. See the following image:
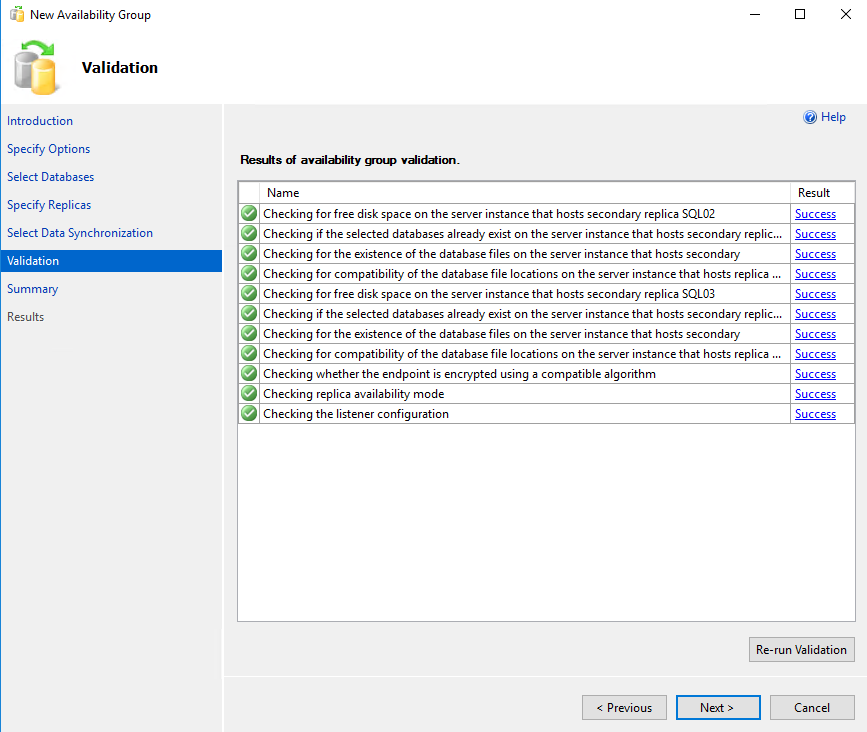
On the validation screen, the wizard will perform validation checks on the entire configuration. It must be passed successfully. If you face any error during the validation test, you must fix it and click on the “re-run the validation” button to revalidate the configuration. Once the validation test passes successfully, click on Next. See the following image:
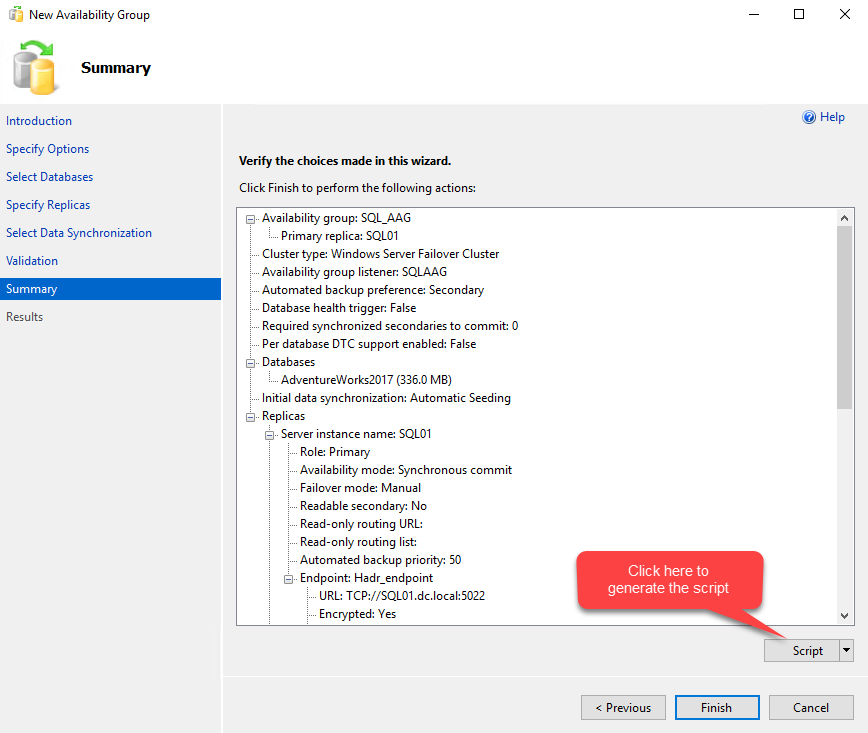
On the Summary screen, review the whole configuration of parameters and click on the Finish button. Once you click on the finish button, the wizard will start the process of creating an availability group. You can also generate a script for it by clicking on the “Script” button. See the following image:
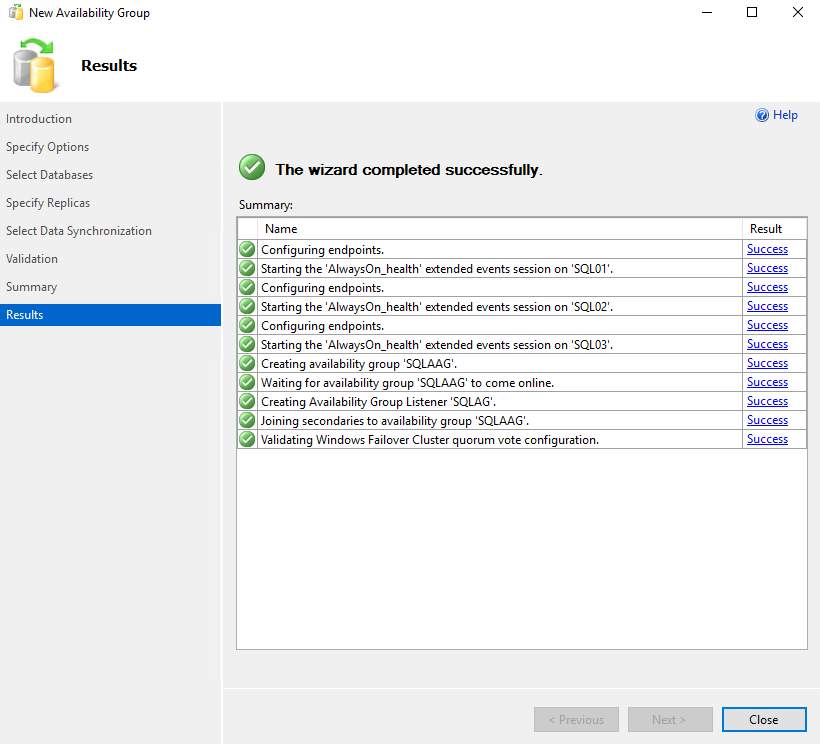
Congratulations. We have successfully created the AlwaysOn availability group. See the following image:
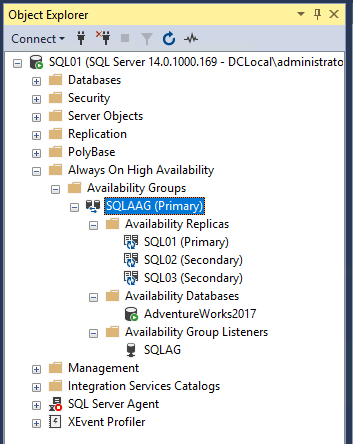
To view details of the availability group, expand AlwaysOn High Availability in object explorer ? Expand availability group. You can see the availability group named “SQL_AAG” has been created. To view the participating node, expand SQL_AAG ? Expand availability replica. To view Availability databases, expand Availability databases. And to view Listener, expand Availability group listener. See the following image:
Summary
In this article, I have explained the step-by-step deployment process of the AlwaysOn availability group using AlwaysOn availability group wizard. In the next article, I will explain different ways to monitor the AlwaysOn Availability group. I will also demonstrate the failover process and explain read-only routing. Although, a nice article covering this topic has been written by Ganapathi Varma Chekuri on Codingsight. You can read the article here.
Stay tuned!
Tags: Always On, sql server Last modified: September 20, 2021