
Machine Learning (ML) has come from a buzzword that is nice to have in your application to a must-have feature that works and adds value. Data scientists develop ML models in various ML Frameworks like TensorFlow, Scikit-learn, PyTorch, Azure ML, etc. Before ML.NET became available to all developers, adding the ML functionality to .NET applications required knowledge in some ML frameworks to build and train ML models. It also demanded additional time and effort to integrate that model into .NET applications.
ML.NET made this job all a lot easier for .NET developers with Model Builder, a graphical Visual Studio extension to build, train, and deploy custom ML models. Using the ML.NET’s Model Builder and its AutoML functionality, developers who don’t have machine learning expertise, such as myself, can still develop and use ML models within minutes.
About ML.NET
Before we dive into our example, let’s talk a bit about ML.NET history and its current state.
ML.NET draws its origins from the 2002’s Microsoft Research project named TMSN, which stands for “test mining search and navigation.” Later it was renamed to TLC, “the learning code.” ML.NET war derived from the TLC library. Initially, it was used on internal Microsoft products.
The first publicly available version ML.NET 1.0 was released in 2019. It included the Model Builder add-in and AutoML (Automated Machine Learning) capabilities.
The current version is 1.6.0. More details about all releases can be found on the official ML.NET release page.
Some tasks we can do with ML.NET are:
– Sentiment analysis
– Product recommendation
– Price Prediction
– Customer Segmentation
– Object detection
– Fraud detection
– Sales spike detection
– Image classification
– Sales forecasting
Install and Setup
The minimum required Visual Studio version is 16.6.1. The following steps are done on Visual Studio 16.9.2. Thus, if you are using a different version, some details might be different.
Install ML.NET Model Builder
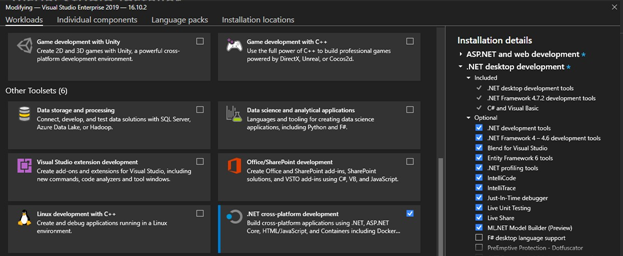
- Open Visual Studio Installer
- Check the .NET desktop development option
- In the right-side pane, expand .NET desktop development > expand Optional > check ML.NET Model Builder (preview)
Note: ML.NET Model Builder is available on the .NET cross-platform development option.
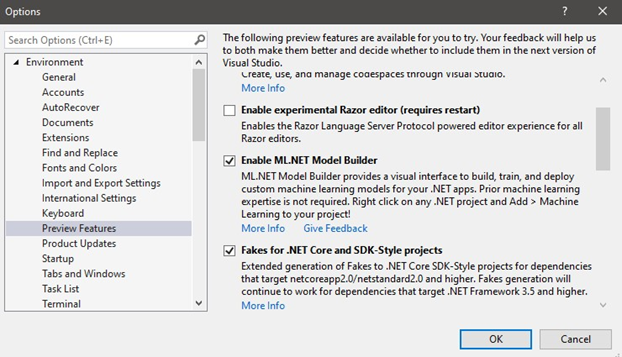
Enable ML.NET Model Builder in Visual Studio
- Go to Tools > Options > Environment > Preview Features
- Check the Enable ML.NET Model Builder checkbox
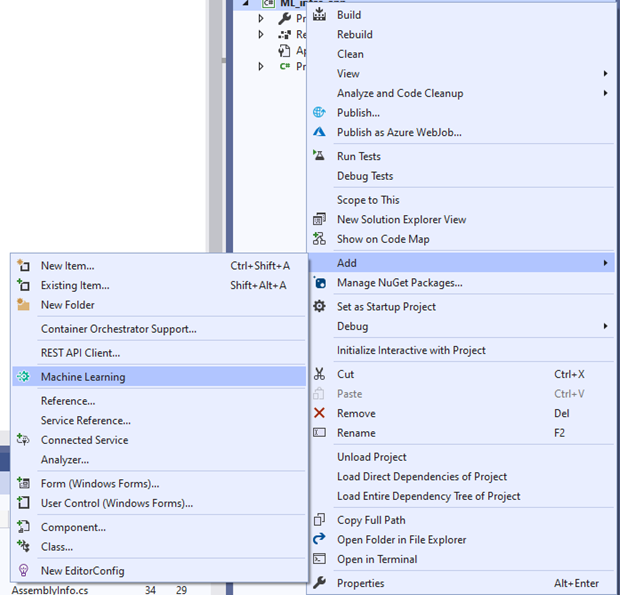
Building ML Model
Right-click on the project and select Add > Machine Learning
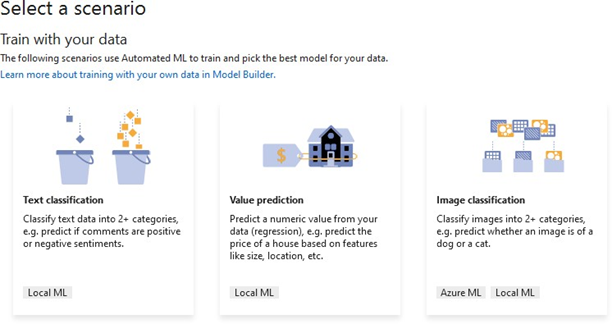
Select a Scenario
Select Text classification – we will add a simple sentiment analysis feature:
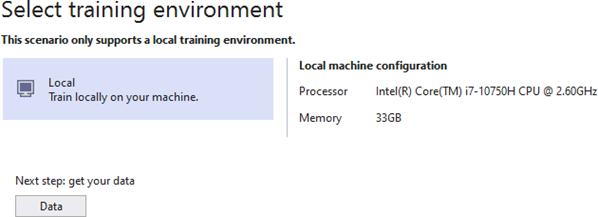
Select Training Environment
In our case, it is a local machine.
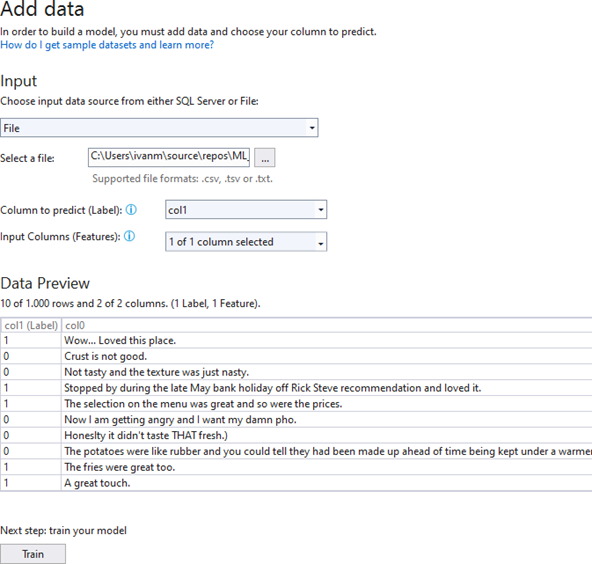
Add Data
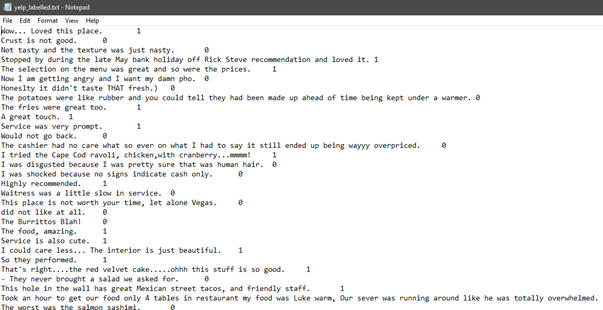
We will use the UCI Sentiment Labeled Sentences dataset ZIP file available for download.
Select the Output you Want to Predict
In our case, it is the second column so we will select col1. The Input columns are selected automatically since we only have two columns available.
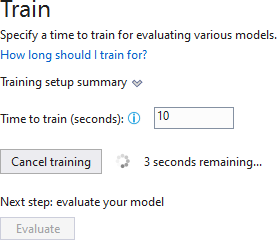
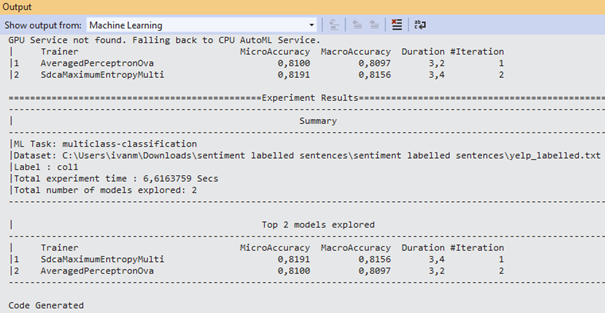
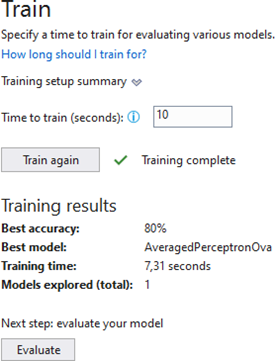
Train the Model
Select the time to train and click Start training:
The below images show the output and training results:
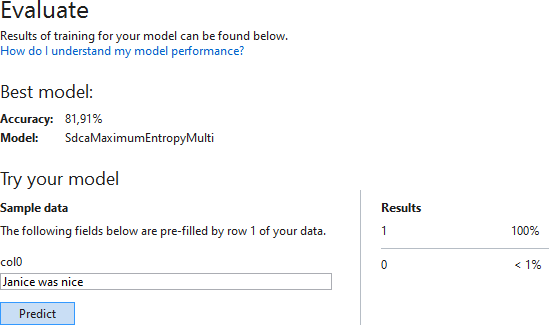
Evaluate the Model
If we enter Janice was nice into the sample data input, the output shows this sentence is positive with a 100% certainty:
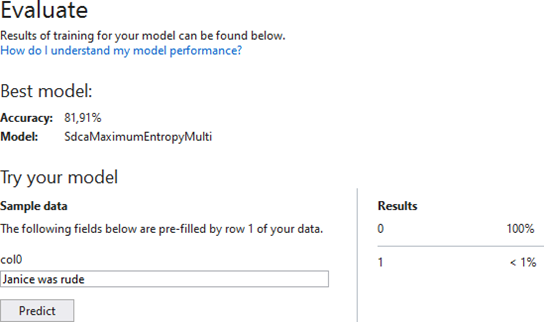
If we enter Janice was rude into the sample data input, the output shows this sentence is not positive with a 100% certainty:
Deploy and Consume the ML Model
All that is left is to use the model we build in our application. We need to add a reference to our ML model project.

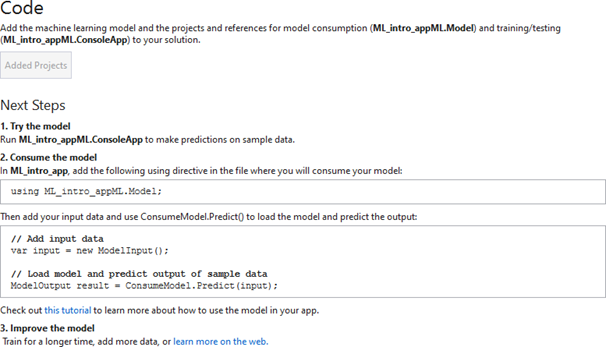
Also, we need to install Microsoft.ML from NuGet.
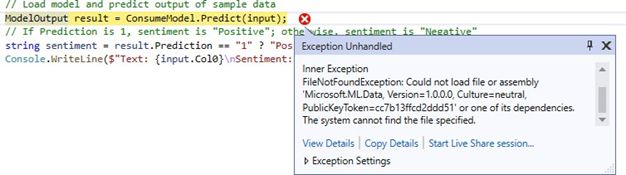

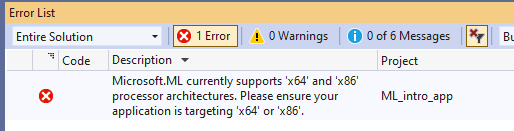
Microsoft.ML supports only x64 and x86 processor architecture. Thus, ensure to select one of those when building the app.
And that is all. Here we can see our code in action.

Conclusion
The whole process from installing ML.NET to the first application with ML functionality can be done in several minutes. Of course, it is a very basic example with the sole purpose of getting familiar with the ML.NET framework. However, even without prior experience, I could build an application that, with some adjustments and improvements, can actually work in a real-life scenario.
That said, ML.NET is a tool. You will be able to use it more efficiently with more knowledge about machine learning algorithms and principles.
Thank you for sticking to the end and hope you will join us in the next article on ML.NET.
Tags: machine learning, ML.NET Last modified: October 27, 2022