
Introduced in SQL Server 2005, SQL Server Configuration Manager is a tool that is installed by default with SQL Server Installation to manage the SQL Server-related Services and several other activities. In this article, we will take a deep dive into the purpose of SQL Server Configuration Manager and its effective usage.
Introduction to SQL Server Configuration Manager
Till SQL Server 2000, SQL Server had Enterprise Manager to manage its services like Starting or Stopping SQL Server related Services, Configure Network Protocols or aliases via Enterprise Manager along with a lot of Administrative activities. In SQL Server 2005, the Enterprise Manager tool was restructured out and SQL Server Configuration Manager was introduced to take care of Starting/Stopping SQL Server Service, set advanced configuration parameters for SQL Server-related services, Configure Network Protocols, etc. Basically, SQL Server Configuration Manager is a Microsoft Management Console (often referred to as mmc.exe) snap-in that can be accessed from the Start Menu as well.
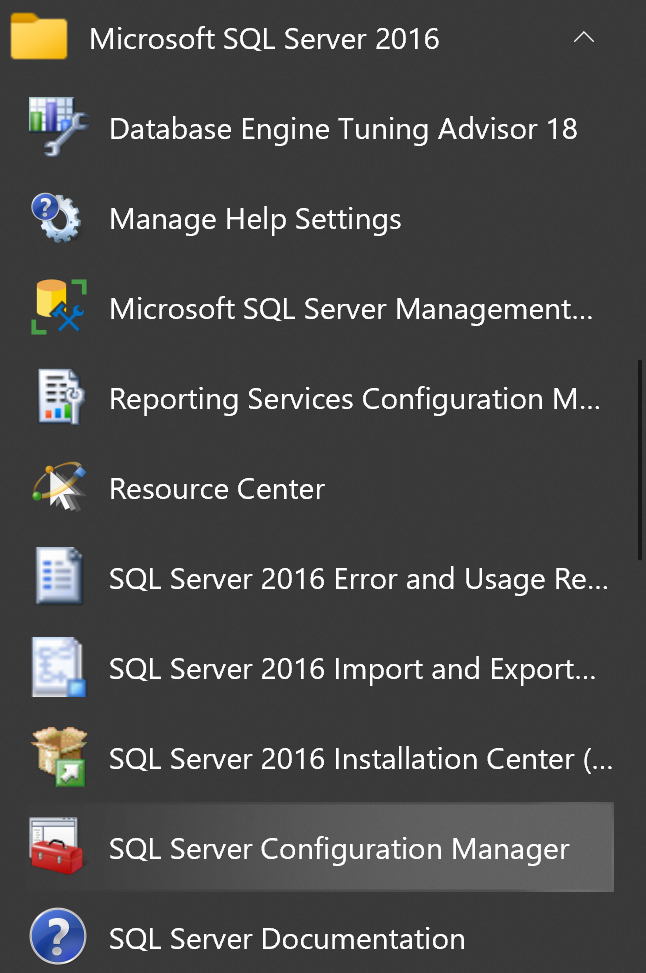
From Windows XP till Windows 8, SQL Server Configuration Manager tool will be listed as an app under SQL Server tools in the Start Menu. In Windows 10 and in future versions, SQL Server Configuration Manager won’t be listed under the Start Menu as an app. To access the SQL Server Configuration Manager, we can do it with the help of the steps mentioned below.
Add Shortcut to Start Menu
To add it as a shortcut in the Start Menu, open up the below path where the highlighted area might differ for your SQL Server version.
C:\ProgramData\Microsoft\Windows\Start Menu\Programs\Microsoft SQL Server 2016\Configuration Tools
And Create a Shortcut to C:\Windows\System32\SQLServerManager13.msc for SQL Server 2016 Configuration Manager in my case and name it SQL Server Configuration Manager as shown below.

Once done, we can see SQL Server Configuration Manager listed under the Start Menu as shown below.
Command Prompt
Open Command Prompt and type the keyword MSSQLManager13.msc and hit Enter where MSSQLManager13.msc refers to SQL Server 2016 Configuration Manager and there are the keywords matching all other SQL Server versions below.
- SQL Server 2012 – SQLServerManager11.msc
- SQL Server 2014 – SQLServerManager12.msc
- SQL Server 2016 – SQLServerManager13.msc
- SQL Server 2017 – SQLServerManager14.msc
- SQL Server 2019 – SQLServerManager15.msc
The above *.msc files will be available in the folder path C:\Windows\System32\
Once we hit Enter, we will receive the below User Account Control pop-up window.

Click Yes and have SQL Server Configuration Manager opened up as shown below.
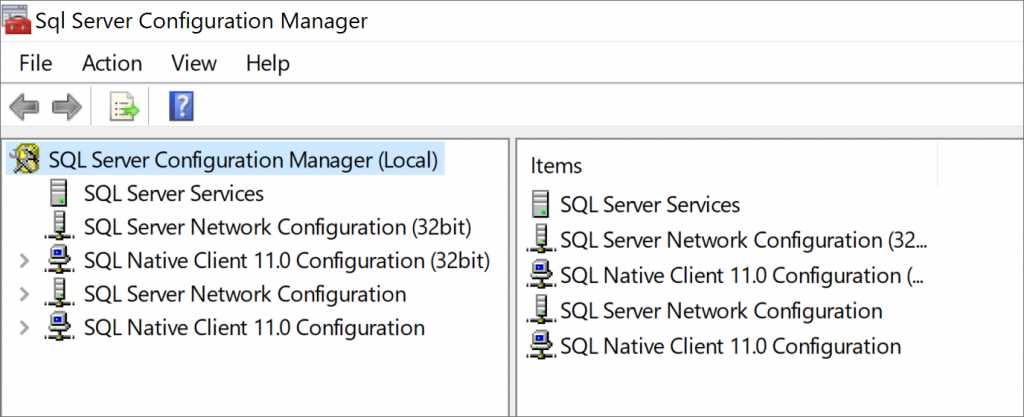
As we can see above, SQL Server Configuration Manager supports the configuration of the below SQL Server-related parameters:
- SQL Server Services – To configure SQL Server Services.
- SQL Server Network Configuration (32 bit) – SQL Server Network Configuration for 32-bit instances.
- SQL Native Client Configuration (32 bit) – SQL Native Client Configuration for 32-bit instances.
- SQL Server Network Configuration – SQL Server Network Configuration for 64-bit instances.
- SQL Native Client Configuration – SQL Native Client Configuration for 64-bit instances.
Starting from SQL Server 2016, SQL Server supports only 64-bit versions and hence the 32-bit versions are available for supporting earlier versions of SQL Server 32-bit instances.
Manage SQL Server Services
Now that we know how to open up missing SQL Server Configuration Manager in Windows 10 or in any of the Server environments, we can click the SQL Server Services menu in the above step to see the list of SQL Server Services available as shown below.
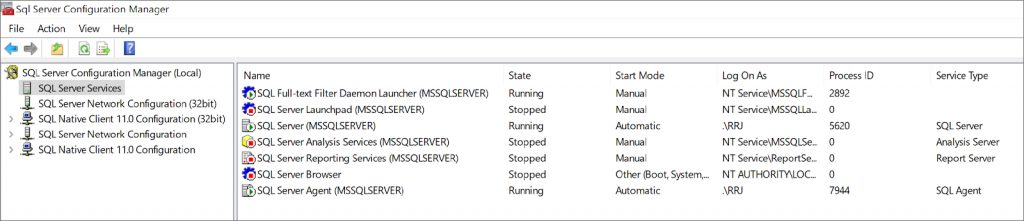
Wait for a second! It looks familiar to the services.msc listing all services available in the Server but displaying only SQL Server related services.
Let’s open up services.msc to see how it looks and verify the differences across the SQL Server Configuration Manager and services.msc to see which one is better.
Services.msc

The SQL Server Configuration Manager displays the Process ID of the services that are currently running. We could not find that in services.msc. Of course, we can get this information from the Windows Task Manager, but SQL Server Configuration Manager helped us view this in a single place.
Now, let’s take a detailed view. Right-click on the SQL Server service from services.msc. You will see the below menus: General, Log On, Recovery, and Dependencies.
SQL Server service Properties from services.msc
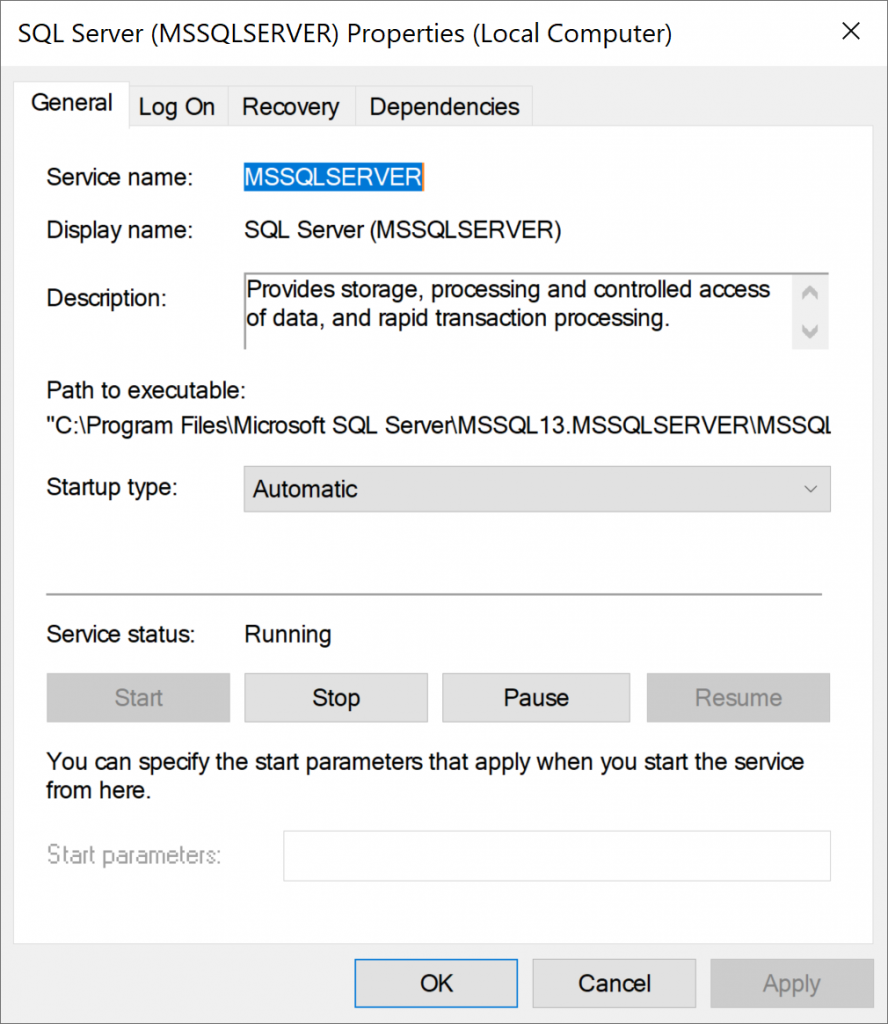
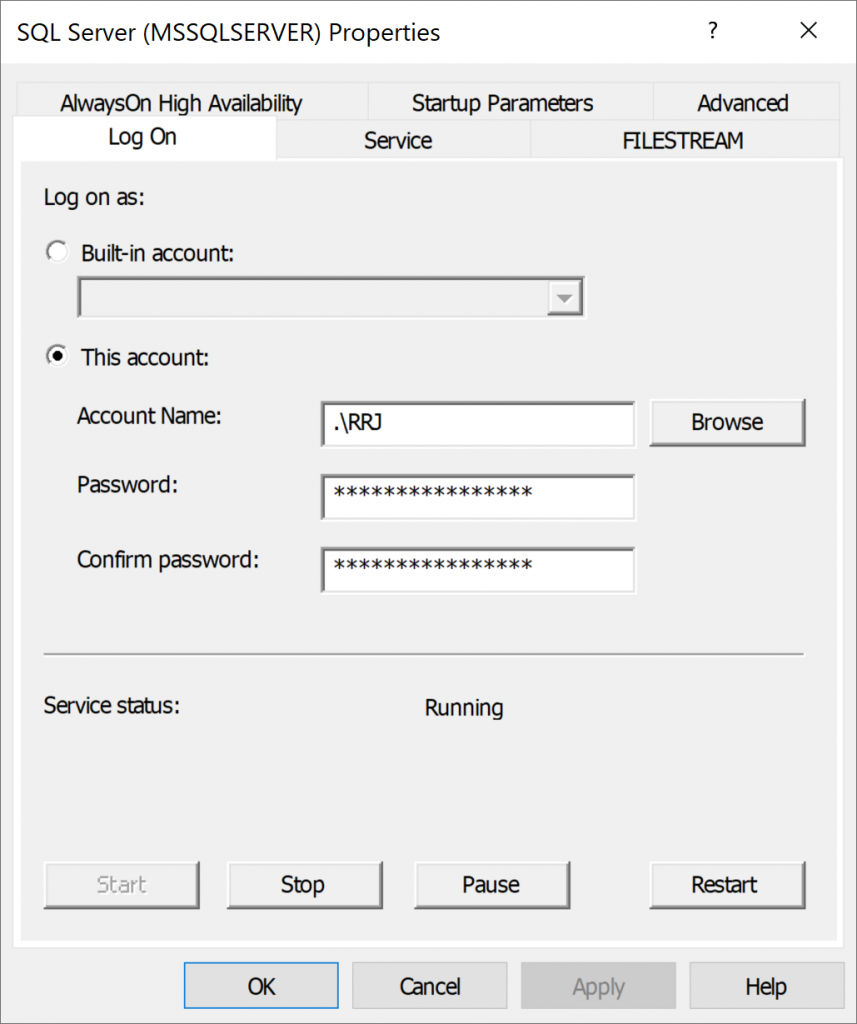
From SQL Server Configuration Manager, right-click the SQL Server (MSSQLSERVER) service > Properties. It lists out the below menus – Log On, Service, FILESTREAM, Advanced, AlwaysOn High Availability, and Startup Parameters as shown below.
Click Startup Parameters to view the Startup Parameters of SQL Server Service and it will show up the below details:
- -d indicates the physical location of the master database Data File
- -l indicates the physical location of the master database Transaction Log File
- -e indicates the physical location of the ErrorLog Folder where errors related to SQL Server Service is located.

Scrolling to the right side, we can see the complete path where the master database data and log files along with Errorlog folders are configured for this instance of SQL Server.
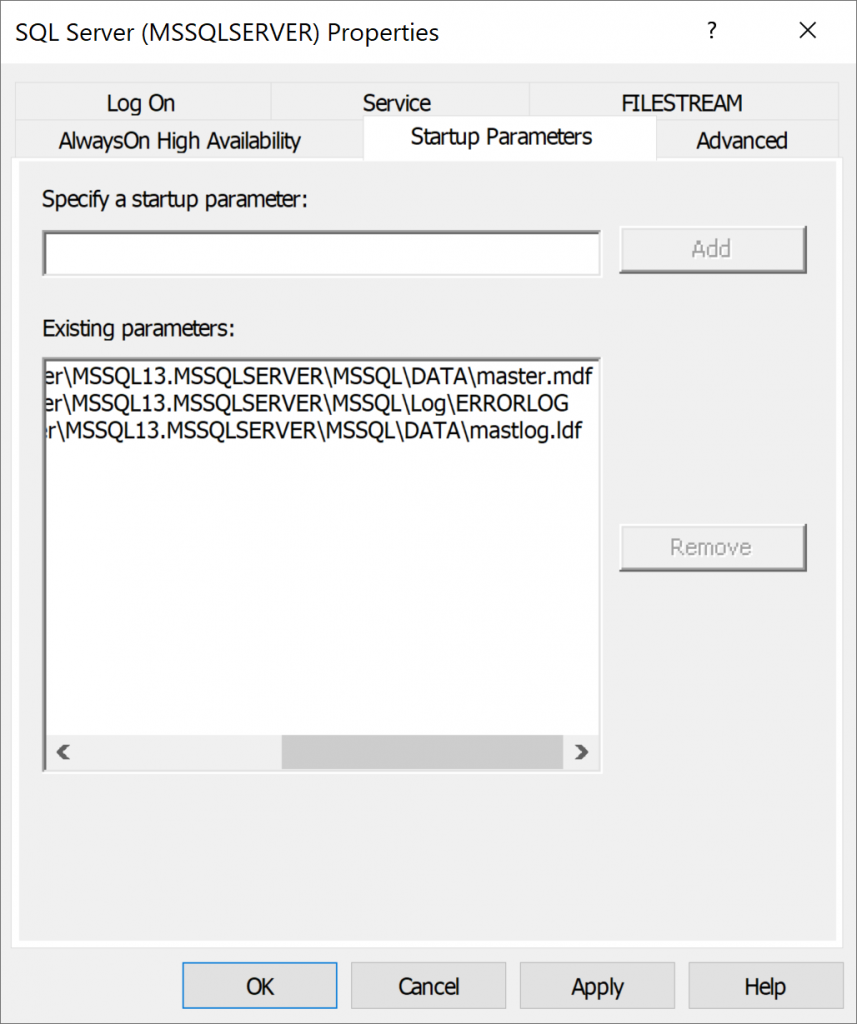
We can add more startup parameters like Single user mode (-m), Trace Flags, etc. By typing the value in Specify a startup parameter -> click Add and click OK. Once done, we would need to restart the SQL Server service to make those changes come into effect.
To Summarize, SQL Server Services under SQL Server Configuration Manager displays advanced configurations about SQL Server Services compared to the options visible in services.msc. Hence, I would personally recommend using the SQL Server Configuration Manager to Stop/Start SQL Server-related Services compared to the default Services.msc option.
Manage SQL Server Network Configuration
SQL Server Network Configuration allows us to manage the Server Network Protocols for the instances of SQL Server available in the Server. Click SQL Server Network Configuration to view the below window.
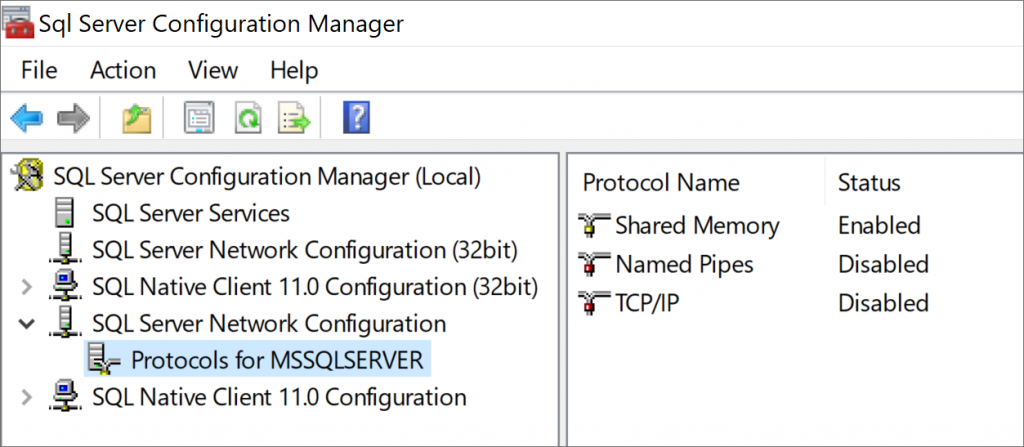
Since I’ve chosen only the default instance of SQL Server, it was listing only Protocols for MSSQLSERVER and if we have additional named instances, then it will have another option named Protocols for NamedInstanceName like that.
Under Protocols for MSSQLSERVER or for any other instances, we can see the below options available.
- Shared Memory – Shared Memory Protocol is the preferred or default protocol for establishing connection to all clients that are residing within the same Server or Computer.
- Named Pipes – Named Pipes Protocol supports Client Communication from other Server or Computers.
- TCP/IP – TCP/IP Protocol is the most commonly used Protocol for use in Production environments to establish connection from other Server or Computers.
In my Local instance of SQL Server, as we can see Shared Memory Protocol is enabled and the remaining protocols Named Pipes and TCP/IP are in a disabled state.
To Enable a disabled protocol, just right-click the Disabled Protocol and click Enable. To Disable an enabled protocol, just right-click the Enabled Protocol. For any changes to come into effect, restart the appropriate SQL Server Services.
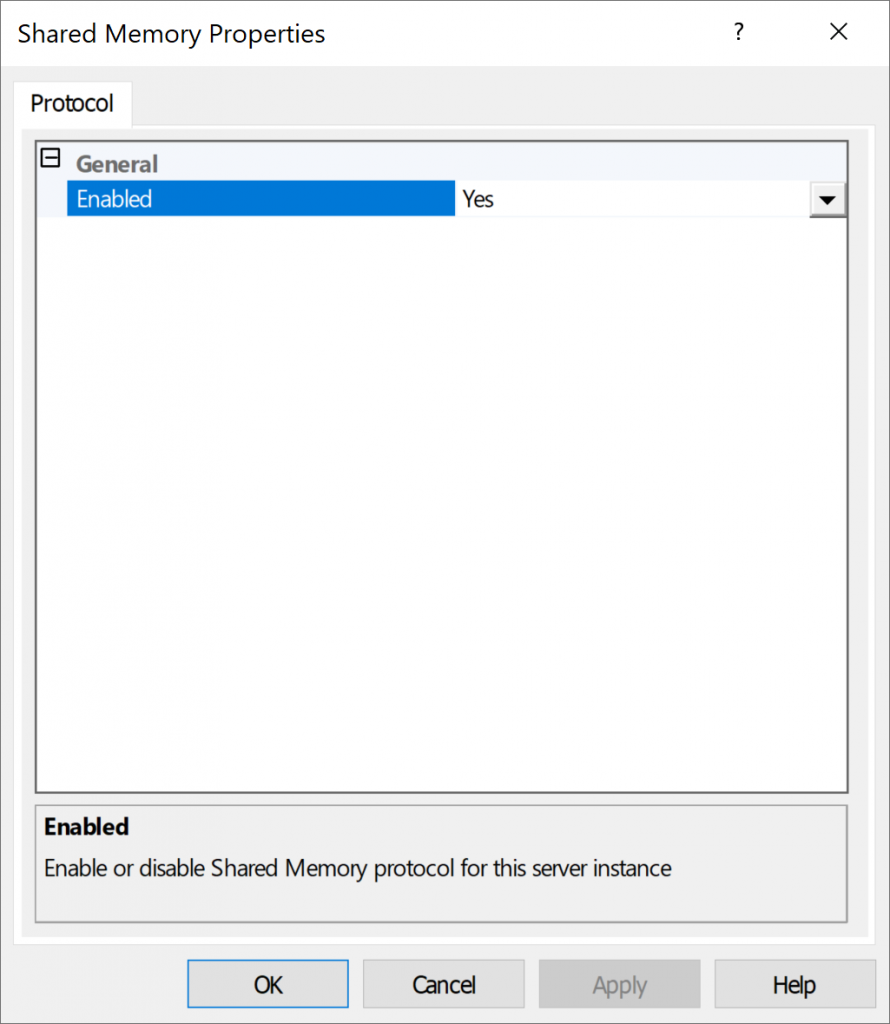
Shared Memory Protocol
Double-click Shared Memory Protocol to view the properties as shown below:
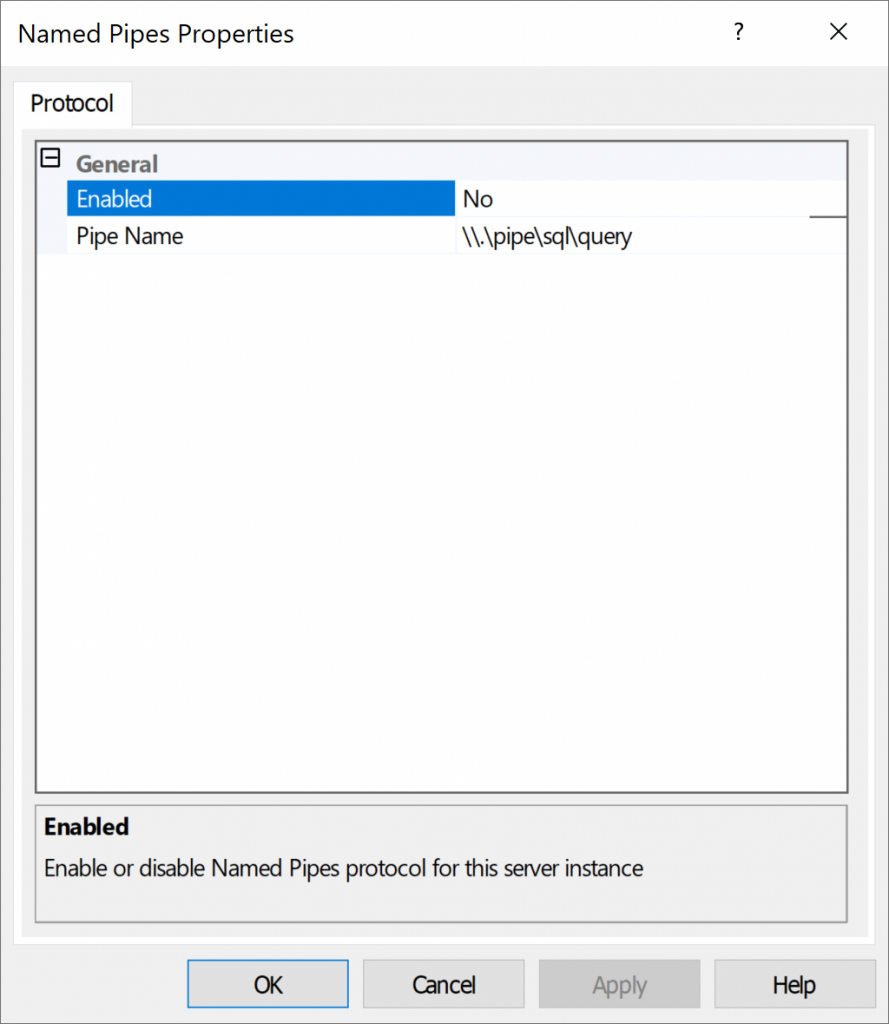
Named Pipes Protocol
Double-click Named Pipes Protocol to view its properties as shown below:
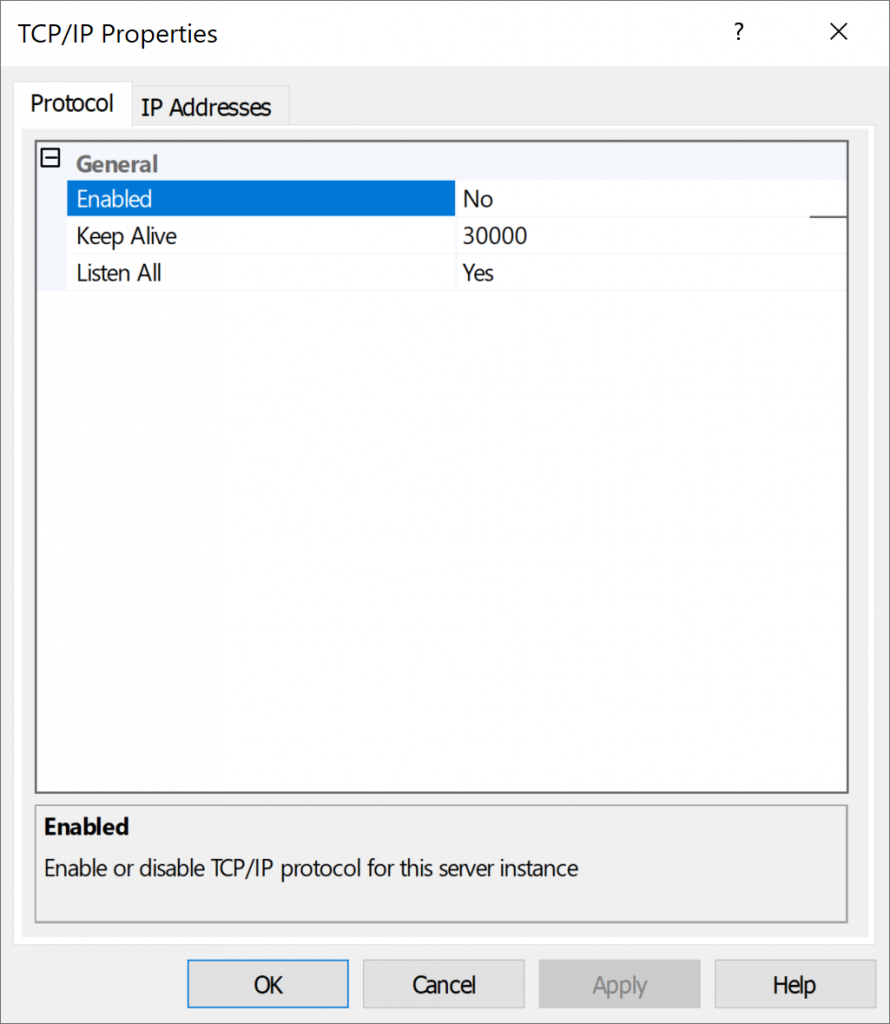
TCP/IP Protocol
Double-click TCP/IP Protocol to view its properties as shown below.
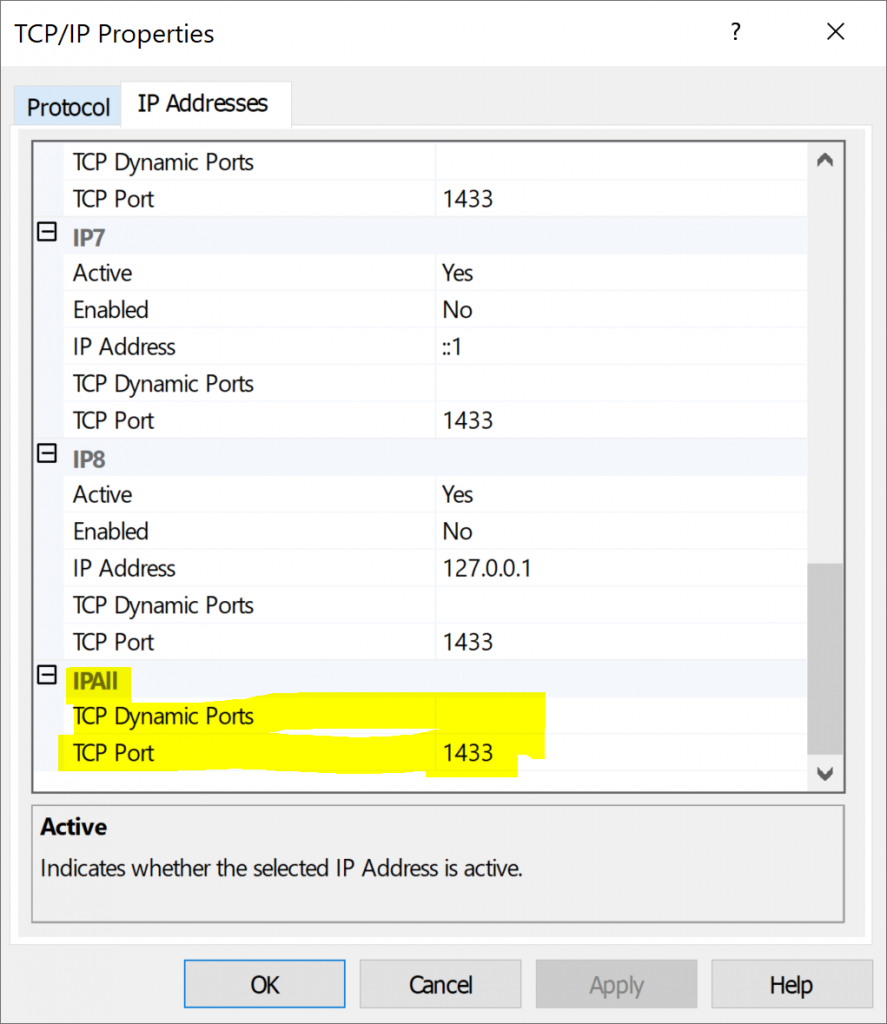
Click IP Addresses and scrolling down to the bottom, we can see the IPAll section under which we can check whether our instance of SQL Server is listening on Static Port or Dynamic Ports. If Dynamic Ports are assigned with a Port Number, SQL Server is listening on Dynamic TCP Port and if TCP Port is assigned with a Port Number, SQL Server is listening on Static TCP Port. In my case, TCP/IP Protocol is disabled, however, once enabled it would be listening on the Static TCP Port 1433 as shown in the configuration below.
In Production environments or traditional Client/Server environments, one might encounter the below Connectivity errors as shown below if the Protocols aren’t enabled or if the TCP/IP Port is being blocked by Windows Firewall or Server Firewall restrictions.
Named Pipes Protocol in a Disabled State
ERROR: (provider: Named Pipes Provider, error: 40 – Could not open a connection to SQL Server) (Microsoft SQL Server, Error:) An error has occurred while establishing a connection to the server. (provider: Named Pipes Provider, error: 40 – Could not open a connection to SQL Server) (Microsoft SQL Server, Error: 5)
TCP/IP Protocol in a Disabled State
A network-related error or instance-specific error occurred while establishing a connection to SQL Server. The server was not found or was not accessible. Verify that the instance name is correct and that SQL Server is configured to allow remote connections. (provider: TCP Provider, error: 0 – No such host is known.) (Microsoft SQL Server, Error: 11001)
To fix the above issues, we might need to turn on TCP/IP and/or Named Pipes protocol and restart SQL Server Services to fix the issues. If the Protocols are already in an Enabled state, then try restarting SQL Server Services and ensure that the Firewall is not blocking the TCP/IP port on which SQL Server is listening to.
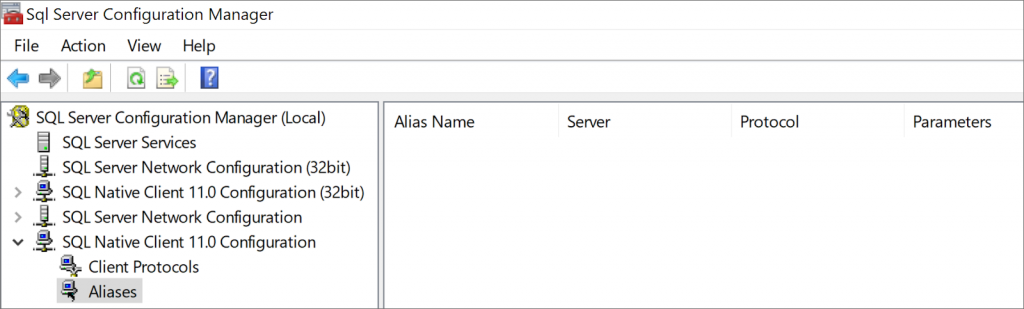
Manage SQL Native Client Configuration
SQL Native Client Configuration allows us to manage the Native Client Protocols for the instances of SQL Server available in the Server. Click SQL Native Client Configuration to view the below window.
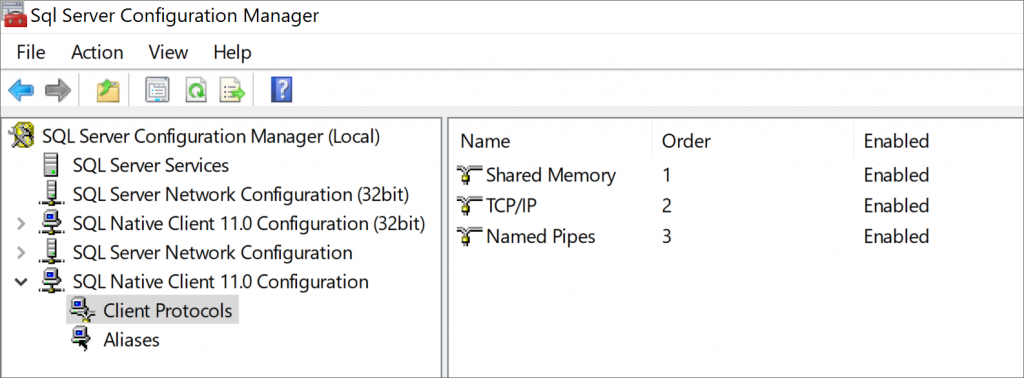
By default, all the Native Client protocols will be enabled by default and we can view the properties similar to Server Protocols and can Enable/Disable the Client Protocols accordingly. With respect to Native Client Protocols, we can set the Order of which Protocol should be used by just right-click the required Protocol and Choose Order and adjusting the Order for our requirements.
In addition to that, we have the Aliases option available under Native Client Configuration as shown below to configure an Alias name for the SQL Server instance if you wish to hide your actual SQL Server Instance name to users for Security Reasons.
To create an Alias, one can simply right-click Aliases and Select New Alias and it will open up a new screen as shown below.
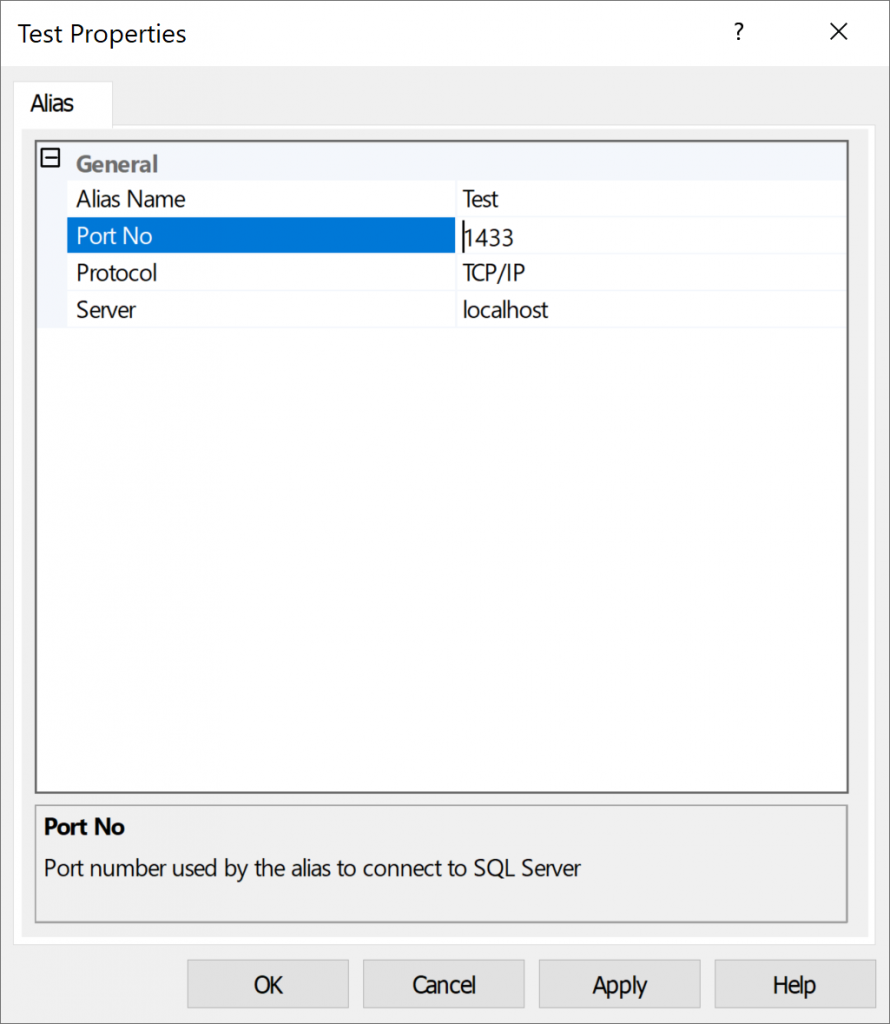
Enter the Alias Name, Port No, Protocol, and Server Name to create an Alias, and once created, we will be able to connect to the Alias Name Test in SSMS. Alias Names can be useful to either shorten the Instance name or Named Instance Name in case it is too large or to hide the actual name of the Server Instance for security reasons.
Conclusion
Thanks for going through the detailed article on SQL Server Configuration Manager and the various configurations that can be handled via SQL Server Configuration Manager either Services options or Server Network Protocols or Client Network Protocols. We have also learned how to add missing SQL Server Configuration Manager from Start Menu or open it correctly in Windows 10 as well. You can transfer the database schema and table data using dbForge Compare Bundle for SQL Server. We will meet again with another topic!!
Last modified: October 27, 2022