In this article, I will explain the process of installing pre-requisites to deploy the SQL Server AlwaysOn availability group.
For the demonstration, I have prepared a demo set up at my work station. See the following components:
| Virtual Machine | Host Name | Purpose |
| Domain Controller | DC.Local | The domain controller is installed on this machine |
| Primary Replica | SQL01.DC.Local | This machine acts as a Primary replica in the Availability group |
| Secondary Replica | SQL02.DC.Local | This machine acts as a Secondary replica in the Availability group. This replica is in a Synchronous commit mode |
| Secondary Replica with | SQL03.DC.Local | This machine acts as a secondary replica in the Availability group. This replica is in an Asynchronous commit mode |
I will explain the following actions:
- Installing a failover clustering role
- Create a failover cluster
- Enable AlwaysOn availability group features in SQL Server
Installing a failover clustering role
To deploy AAG, first, we need to install a failover cluster feature on every node. To do that, connect to SQL01.DC.Local and open Server Manager. At the top side of the Server Manager dialog box, click on Manage and select Add Roles and Features. See the following image:
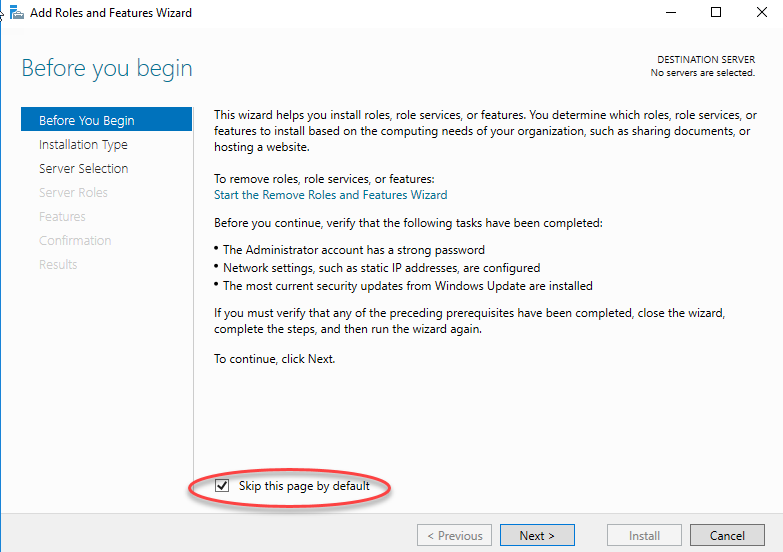
The add/remove roles and features wizard opens. On the first screen, you can see the information about this wizard. You can skip this screen by clicking on “Skip this page by default”, then click on Next. See the following image:
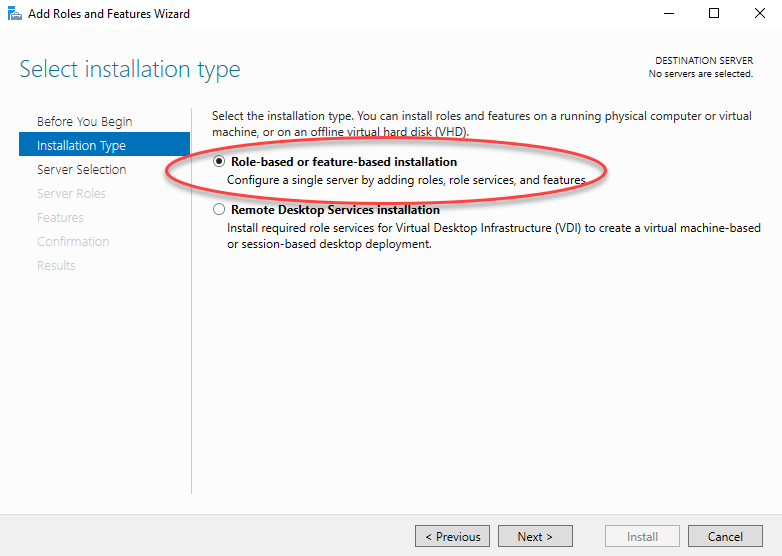
On the next screen, you can perform a role-based or feature-based installation. You can also choose remote desktop service based installation. Since we want to install a failover cluster feature on SQL01.dc.local, select role-based or feature-based installation. Select your option and click on Next. See the following image:
On the next screen, select a server on which you want to enable a failover cluster feature. Since we want to install it on SQL01.Dc.Local, choose SQL01.Dc.Local from the server pool and click on Next. See the following image:
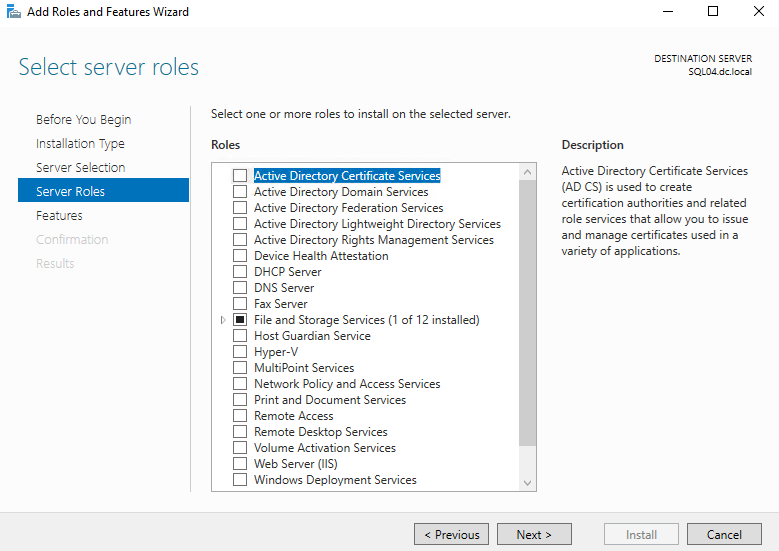
On the next screen, you can review the list of server roles. The failover cluster is a feature, hence click on Next. See the following image:
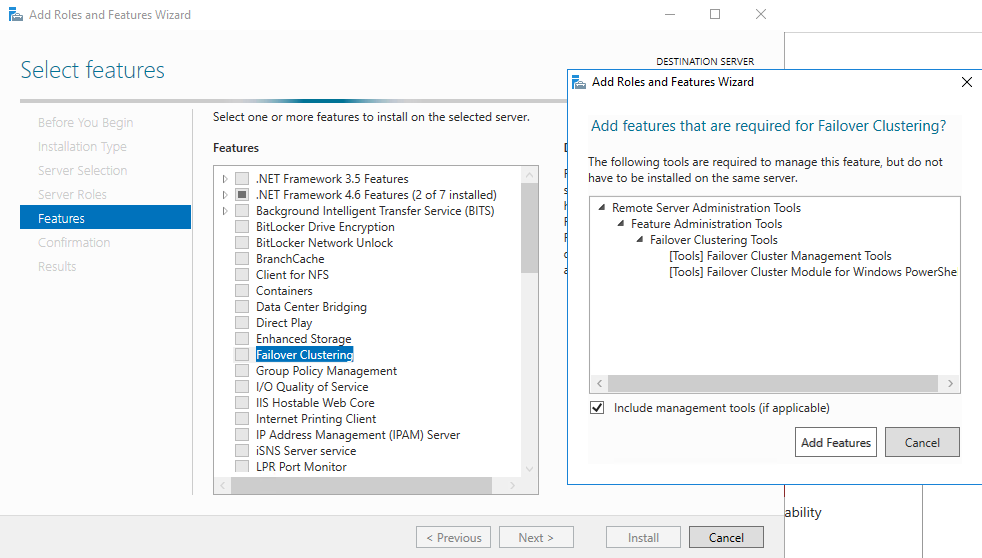
On the Select Features screen, select “Failover Clustering” from the list of features, click on Add features, and click on Next. See the following image:
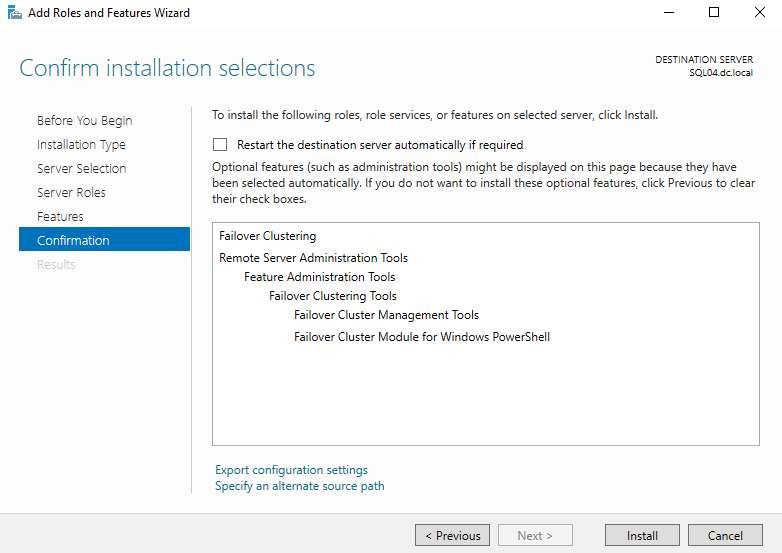
On the next screen, you can review the summary of the feature installation. Click on Install and see the following image:
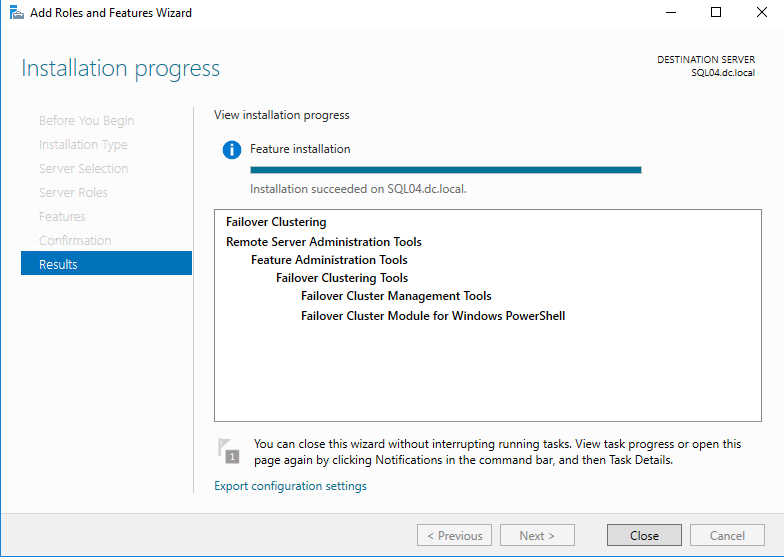
The failover clustering feature has been installed successfully. See the following image:
Similarly, follow the above process to install the failover clustering feature on all the nodes.
Create a Failover Cluster
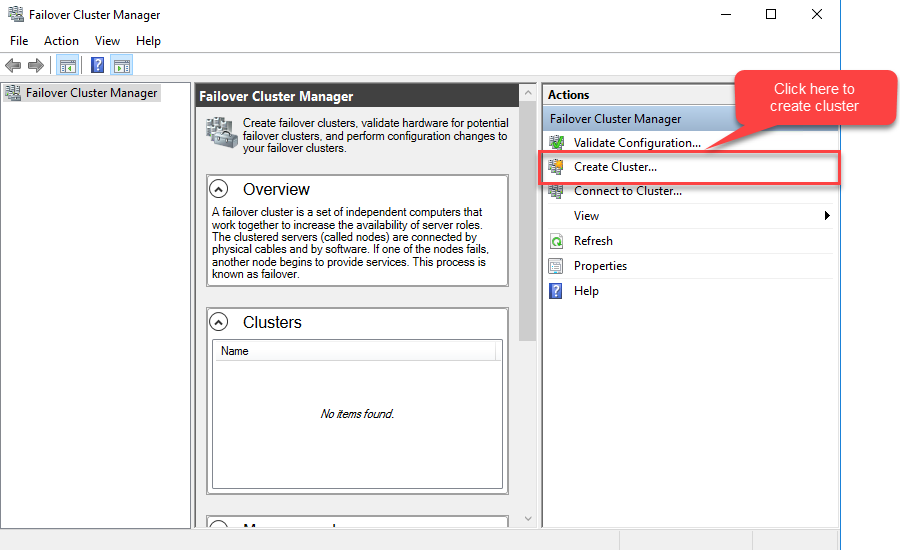
To create a cluster, open the failover cluster manager and click on Create Cluster. See the following image:
Once the wizard creates a name, a new cluster opens. On the first screen, you can review the wizard details. Click on Next.
On the Select Servers screen, you need to add a list of nodes that you want to use to form a cluster. We will create a cluster using SQL01.dc.local, SQL02.dc.local, and SQL03.dc.local. To do that, first, enter SQL01.dc.local in the enter server name text box and click on Add. See the following image:
Similarly, add SQL02.dc.local and SQL03.dc.local, then click on next. See the following image:
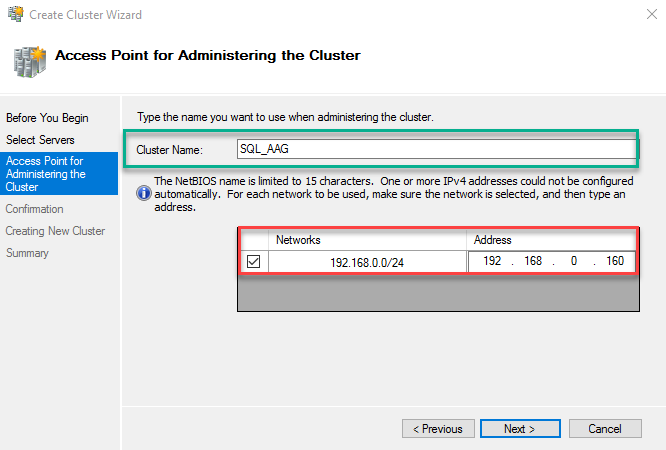
On the Access Point to Administrating Cluster screen, enter Cluster Name and IP address to access it. See the following image:
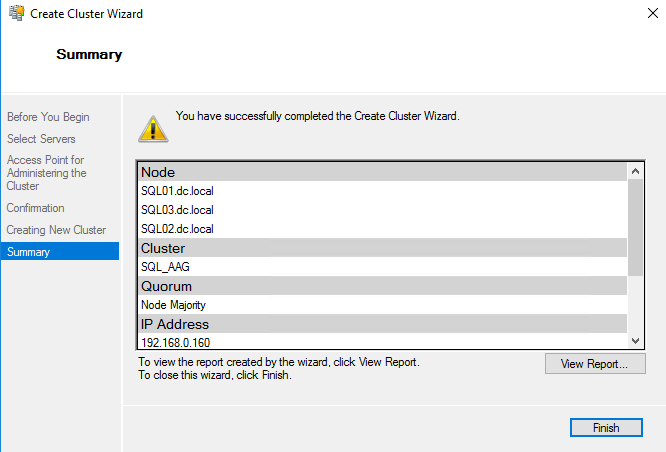
On the confirmation screen, review all the details and click on Next. The process of building a failover cluster will be started. Once the process completes, you can see the installation summary on the Summary screen. See the following image:
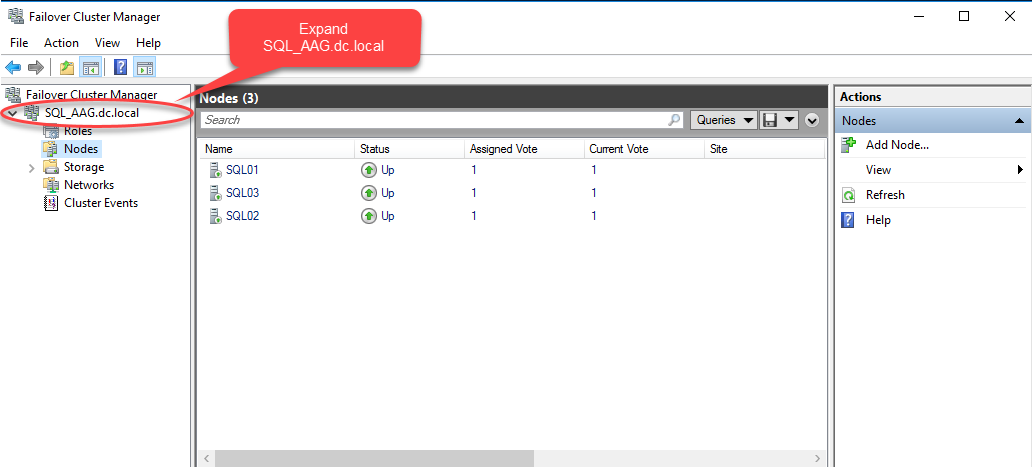
Once the cluster is created, you can review its configuration from the failover cluster manager. To view the details, connect to SQL01.dc.local, open Failover Cluster Manager, expand SQL_AAG.dc.Local, and select “Nodes” to view the underlying nodes. See the following image:
Enable AlwaysOn availability group feature on all the nodes
Once the cluster is created, we must install SQL Server 2017 on all the nodes.
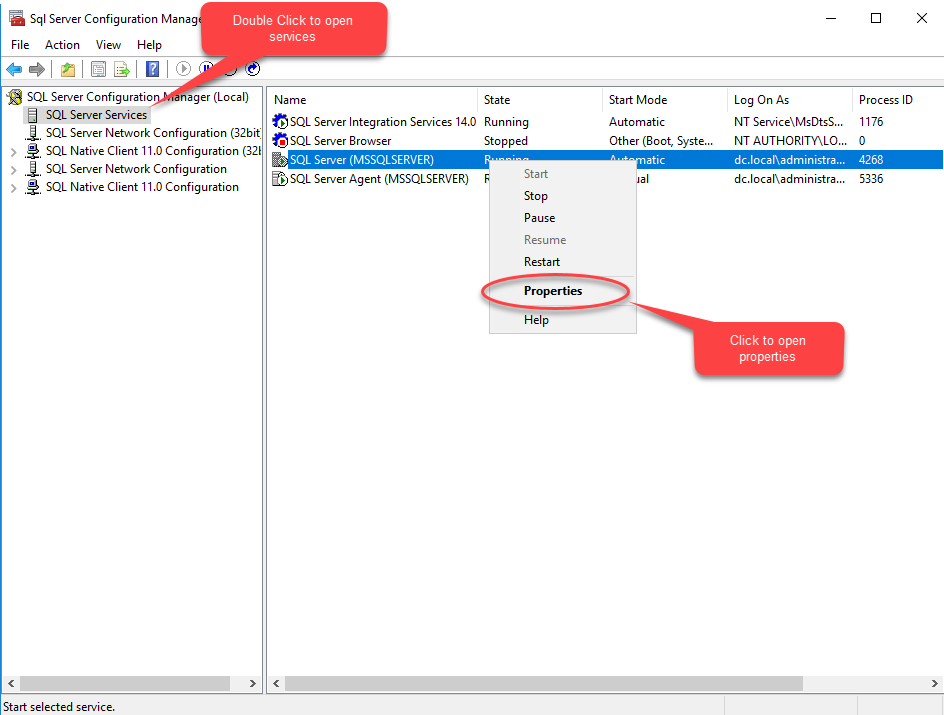
After SQL Server is installed on the nodes, we need to enable AlwaysOn availability group features on all of them. To do that, connect to SQ01.dc.local –> Open SQL Server 2017 Configuration Manager, double-click on “SQL Server Services”, and right-click on SQL Server (MSSQLSERVER). See the following image:
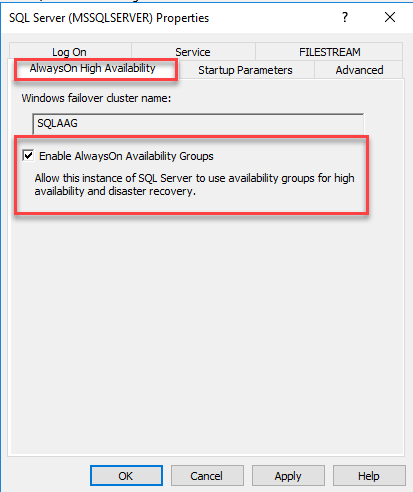
Now the SQL Server (MSSQLSERVER) dialog box opens. Once you see it, click on “AlwaysOn High Availability” and check the “Enable AlwaysOn Availability group” check-box. Click Ok to close the dialog box and restart SQL Service. See the following image:
Similarly, we must enable these features on all the nodes. To do that, follow the above process for SQL02.dc.local and SQL03.dc.local.
Summary
In this article, I have explained the lab setup to deploy the AlwaysOn availability group. In my next article, I will explain the step-by-step deployment process of the AlwaysOn availability group using AlwaysOn availability group wizard.
Stay tuned!
Tags: Always On, sql server Last modified: September 20, 2021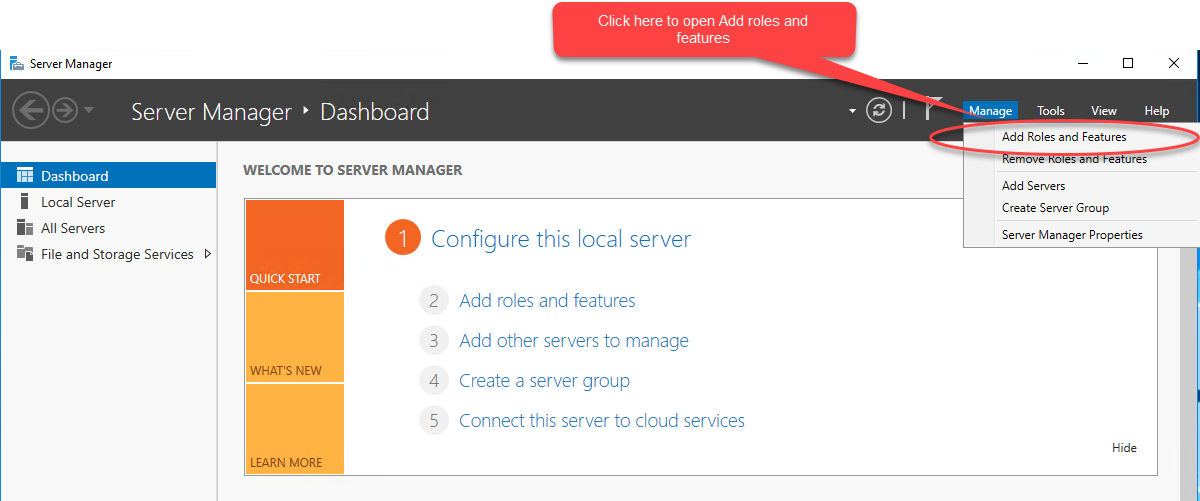





[…] In my previous article, I have explained the process of installing and creating a failover cluster and how to enable the AlwaysOn availability group. […]