In this article, I have explained how we can divide and export data of SQL Server database table into Oracle and MySQL databases. That process is based on the condition defined in SSIS as “conditional split transformation”. Conditional split transformation is like case statement of any programming language. Using conditional, we can redirect the output of a component in multiple destinations that is based on a condition defined in the conditional split component.
Demo Setup
We can retrieve data from various database platforms by using ODBC connection while using SQL Server data tools. Most of the database platforms provide their connectivity drivers that can be used to configure the connection between application and database.
I am going to export data of customer table of the “AdventureWorks2014” database to Oracle and MySQL based on the condition defined in condition split. Data will be divided on the base of the “StateProvinceName” column of “Customers” table. Records that have the value named “California” in “StateProvinceName” column will be exported to Oracle database and records that have the value named “Washington” will be exported to MySQL database.
I have installed Oracle 11g express edition and MySQL 8.0 on my local machine. I have created XE database in Oracle and “WideWorldImportors” database on MySQL server. I have created the “Customer” table on both databases. Below is the SQL code to create a table.
CREATE TABLE customers
  (
     cust_id                INT,
     cust_customername      VARCHAR(500),
     cust_contactnumber     VARCHAR(50),
     cust_contactnumbertype VARCHAR(10),
     cust_email             VARCHAR(150),
     cust_addresstype       VARCHAR(10),
     cust_address           VARCHAR(1500),
     cust_city              VARCHAR(50),
     cust_state             VARCHAR(50),
     cust_postalcode        INT,
     cust_countryname       VARCHAR(100)
  )
While using data flow component of SQL Server data tools, we can transfer data between various databases by configuring ODBC drivers. The SQL Server data tools that we can install by the connection manager already support Oracle Client, but for MySQL, we need to create an ODBC data source.
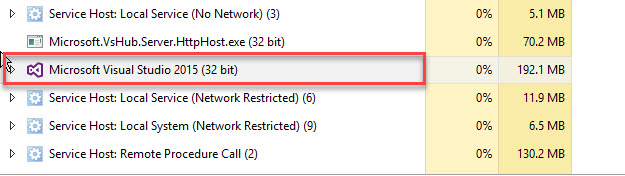
SQL Server data tools is a 32-bit application and it runs in 32-bit mode. Therefore, we have to download the 32-bit ODBC driver of MySQL. See below image for reference:
We have to install “Connector/ODBC 8.0.11” in order to connect MySQL database using ODBC driver. ODBC 8.0.11 driver is available for 64-bit OS platform. Therefore, we have to use an older version of ODBC drivers. See below image:

Instead of using connectivity drivers provided by MySQL, I have used ODBC driver for MySQL developed by Devart.
Devart ODBC Driver for MySQL is powerful and high-performance connectivity driver. It is platform independent, easy to configure and supports third-party tools for MySQL database connecting. Below are the features.
- Supports SSL and SSH secure connection.
- Сompatible with every version of MySQL. It supports MariaDB, Azure database for MySQL and Amazon Aurora.
- Compatible with many third-party analysis tools.
- Platform independent. It supports both 32-bit and 64-bit OS Platforms and many more.
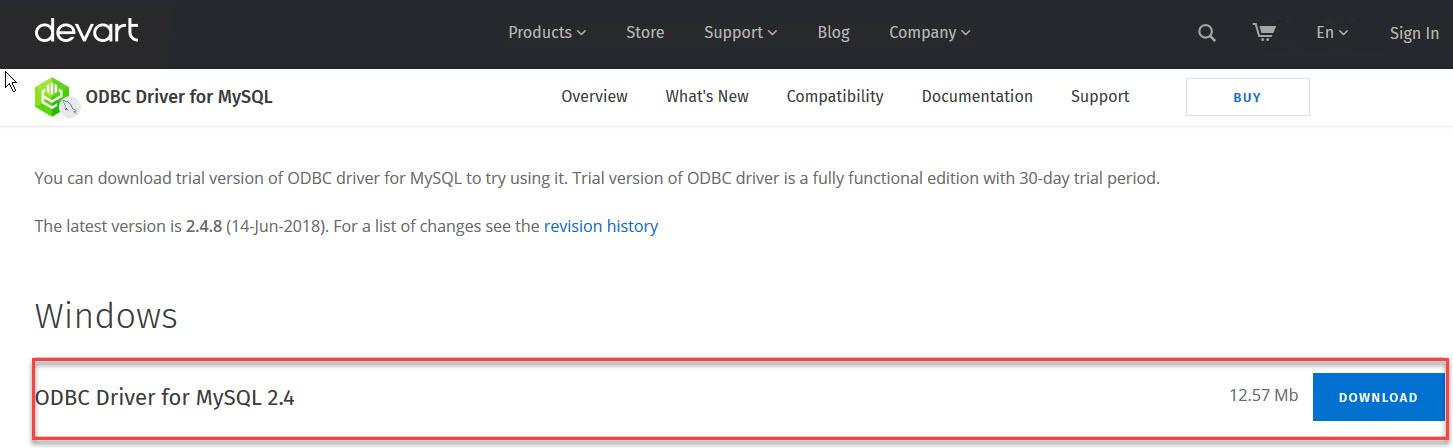
You can download 30 days’ trial version of ODBC Driver for MySQL here. See the following image for reference:
Once drivers downloads, install them by running setup.
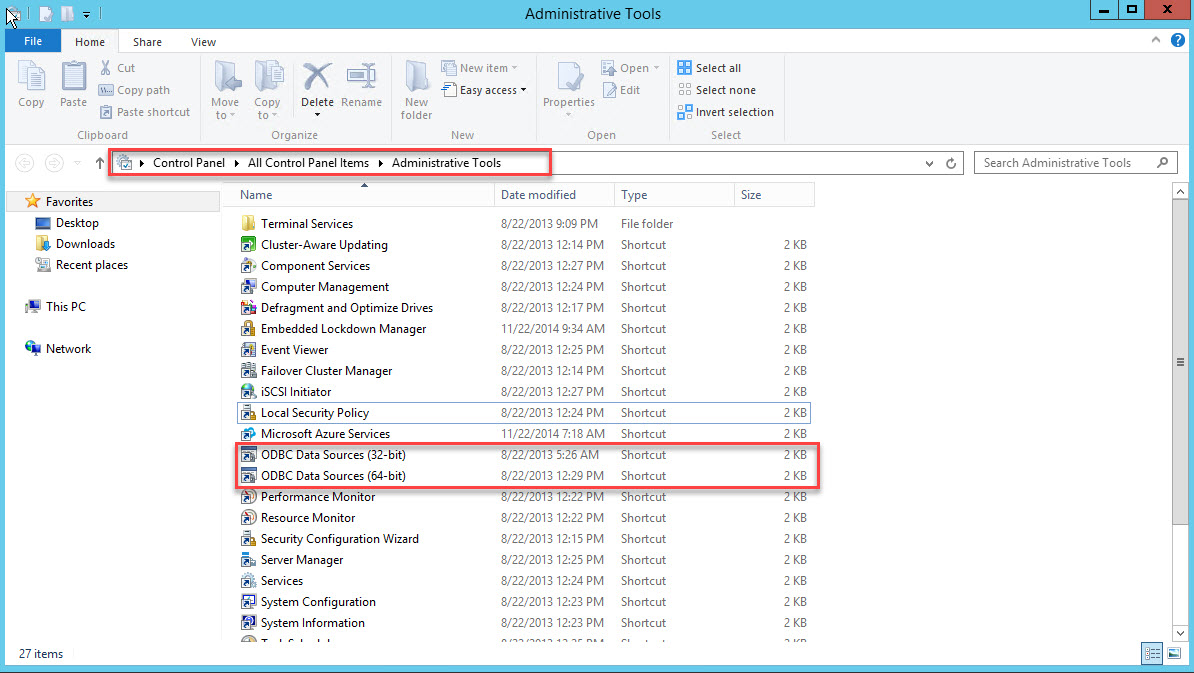
Once drivers installed, we have to configure ODBC data source to connect MySQL database. To do that, Open ODBC Data sources (32-bit). It is located at Control Panel >> Administrative Tools >> ODBC Data Sources. See below image for reference:
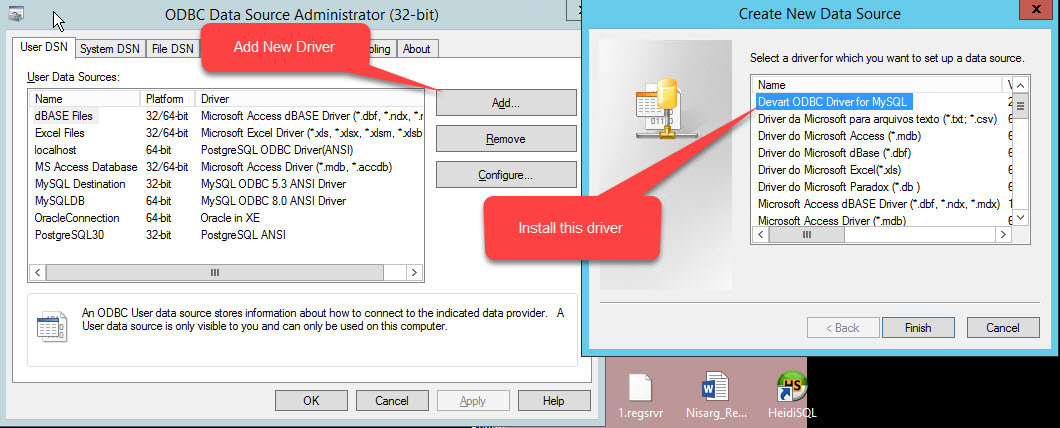
Open ODBC Data sources (32-bit). The dialog box “ODBC Data Source Administrator (32-Bit)” will open. In that dialog box click on “Add”. Another dialog box “Create New Data Source” that has all ODBC drivers installed in the computer will open. From that list, select “Devart ODBC Driver for MySQL” and click on “Finish”. See the following image for reference:
Once you click on “Finish”, a dialog box to configure MySQL connectivity parameters will open. In that dialog box, you can define the connectivity parameters. Provide the name and description to recognize data source in the appropriate fields. In “Server” text box provide the name of hostname or IP address of computer/server where MySQL is installed. Provide appropriate username and password to login to the server and select the database. See the following image for reference:
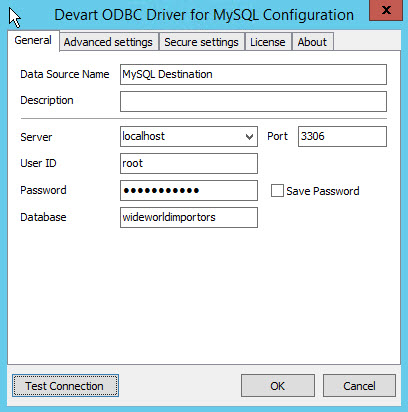
I have installed MySQL on my local machine hence I have provided “localhost” as Server text box. I am connecting to the server by “root” user hence User is “root.” Ideally, it is not preferable. Instead of root, create another user and use it to authenticate MySQL database. I have created “WideWorldImportors” database on MySQL database server hence I have provided “WideWorldImportors” in database drop-down box.
Similarly, to connect oracle database by using SSDT, we have to install Oracle client software. SQL Server data tools works in 32bit mode hence 32bit version of ODBC drivers for Oracle must be installed. You can download Oracle Client from here.
As we all know how to create an SSIS package, I will directly explain how to create the data flow task.
Create Data Flow Task
In Data flow task, we are going to use four components:
- ADO.NET Source to populate data from SQL Server database.
- Conditional Split to divide data in multiple sets.
- Configure MySQL destination and Oracle destination
- Configure Data path to store the output of Conditional split to relevant databases.
Configure ADO.NET Source
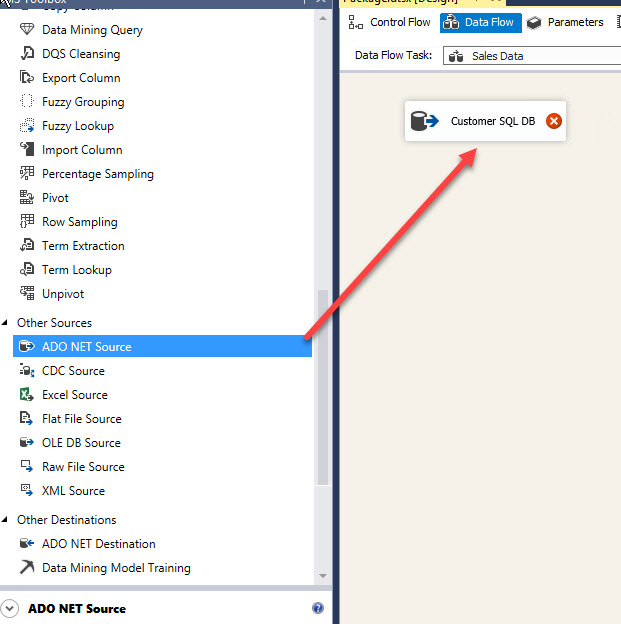
Drag and drop “ADO.NET Source” from SSIS Toolbox to “Data Flow” windows and name it “Sales Data” as shown in the following image:
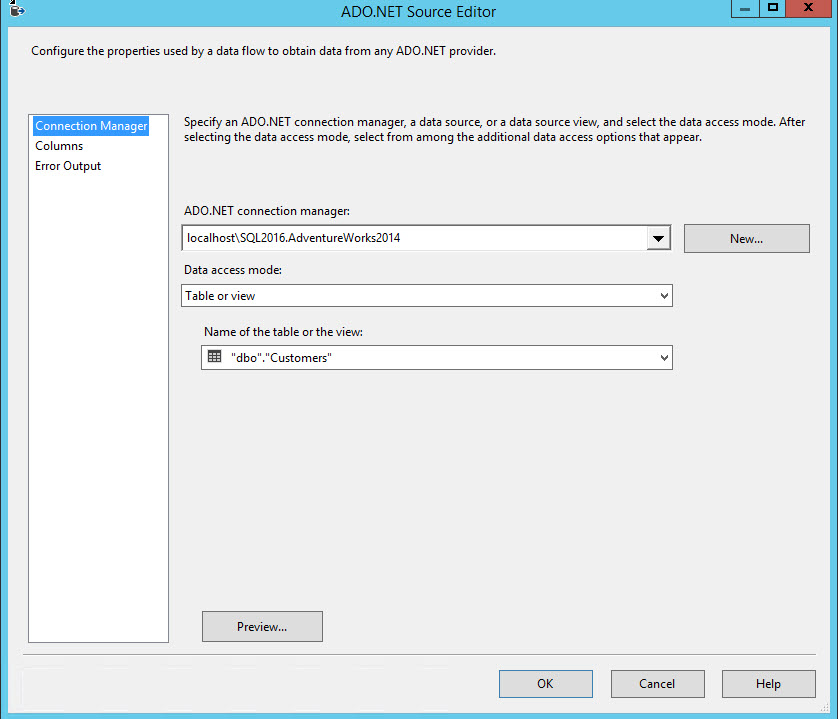
Double click on “Sales Data”. The dialog box “ADO.NET Source Editor” will open. As connection manager is not created yet, therefore “ADO.NET connection manager” drop-down box is empty. To create a new connection on that dialog box, click on “New”. Another dialog box “Configure connection Manager” will open as shown on the below image:
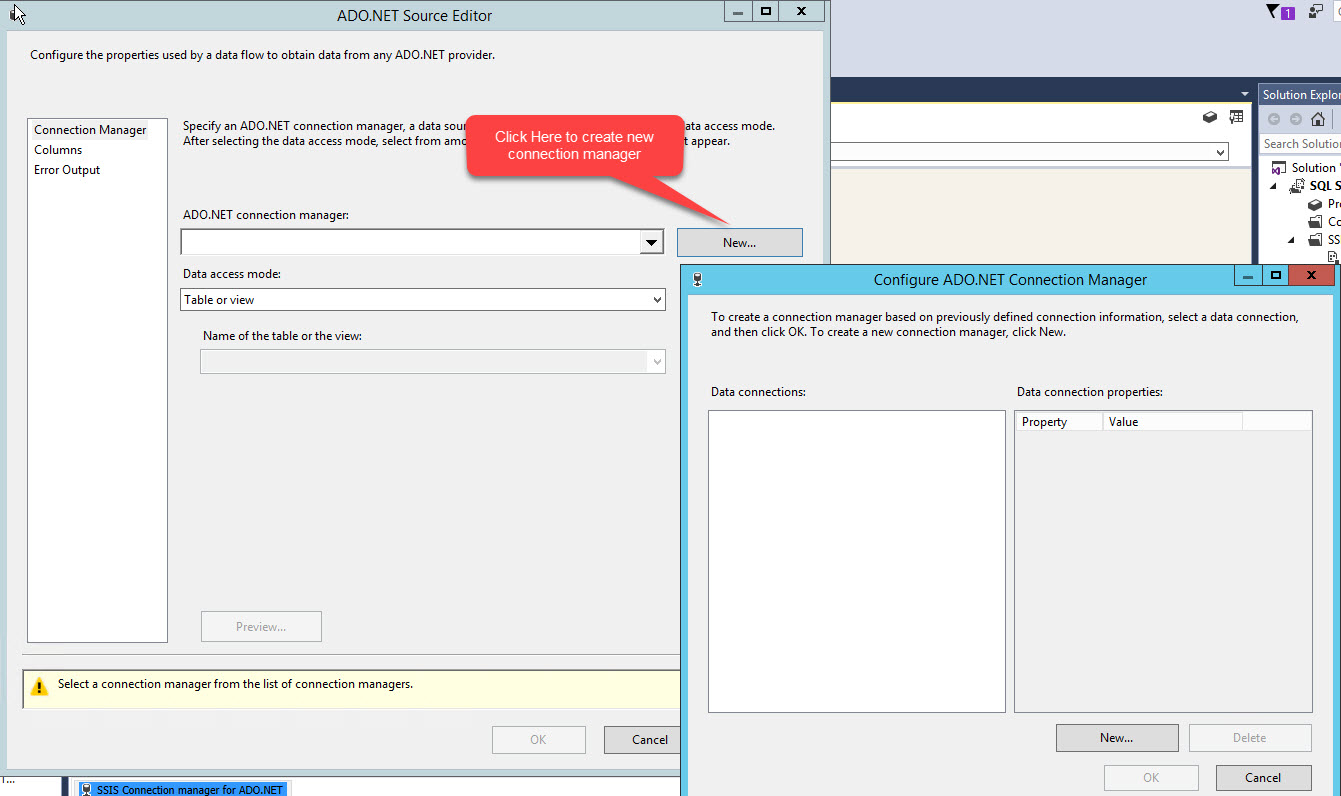
In “Configure ADO.NET Connection manager” dialog box, click on “New” to open “Connection Manager” dialog box.
In “Server Name” text box, enter name or IP-Address of the server where SQL Server has been installed. SQL Server is installed on my local machine hence I have provided “localhost\SQL2016” as server name text box. In the Authentication drop-down box, select the type of authentication used to connect to SQL Instance. I am authenticating to SQL server by using windows authentication hence I have selected windows authentication in drop down box. And finally, in the database drop-down box, select the name of the database where the table is stored. I am exporting data from the “AdventureWorks2014” database, hence I have selected it in “Database Name” drop-down box. Look at the following image:
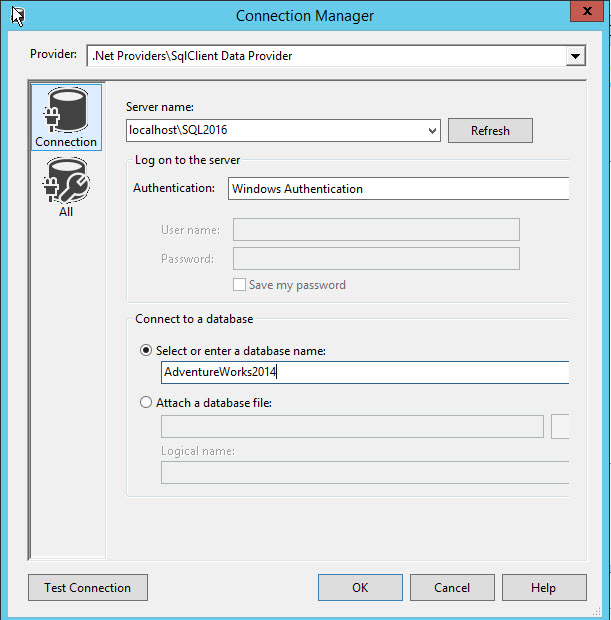
Once the configuration is completed, click on “Test Connection” to verify the connectivity with database and click “OK”.
We have configured ADO.NET connection manager hence default connection manager will be selected automatically in “ADO.NET Connection Manager” drop down. To retrieve data from a table, select “Table or View” in the data access mode drop-down box. Once you select “Table or View” option in drop down box, it brings a list of all tables created in the database. From that list, select “Customers” table as shown in the following image:
Configure Conditional Split
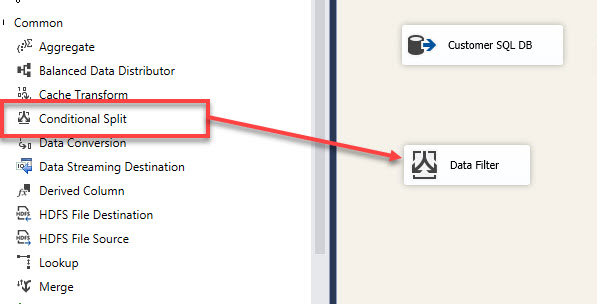
Now we will use the conditional split transformation for exporting data in different worksheets of excel based on condition. Drag the conditional split component from SSIS toolbox to Data Flow window and rename it to “Data Filter” as shown on the below image:
I mentioned earlier, the output of data of “Customers” table will be exported in multiple Oracle and MySQL databases based on the condition defined in “Conditional Split” component.
Firstly, connect ADO.Net source to Conditional split transformation. To do that, click on the blue arrow on the data flow path beneath “Customers SQL DB” component and drag it to conditional split transformation as shown on the below image:
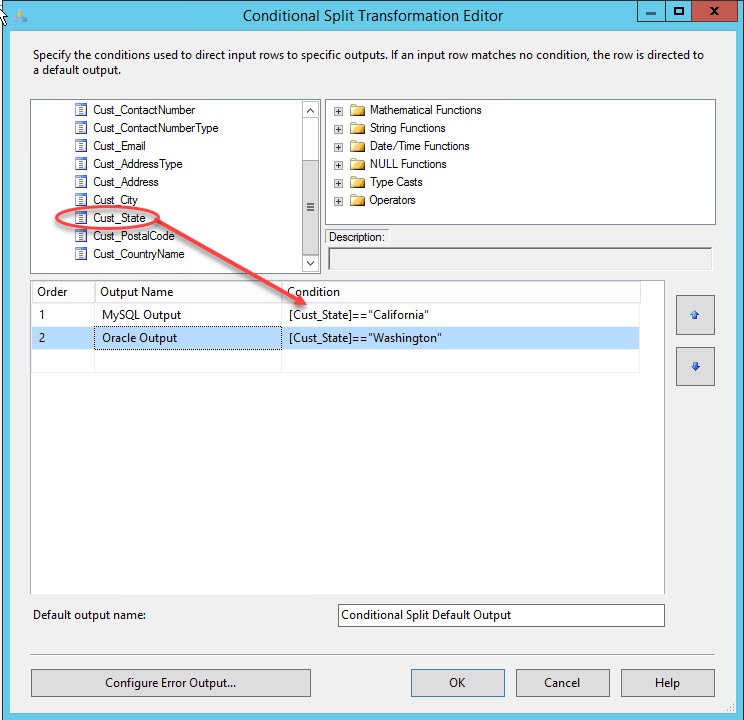
To configure conditional split, double-click on “Conditional Split Transformation Editor”. A dialogue box “Conditional Split Transformation Editor” will open as shown in the following image:
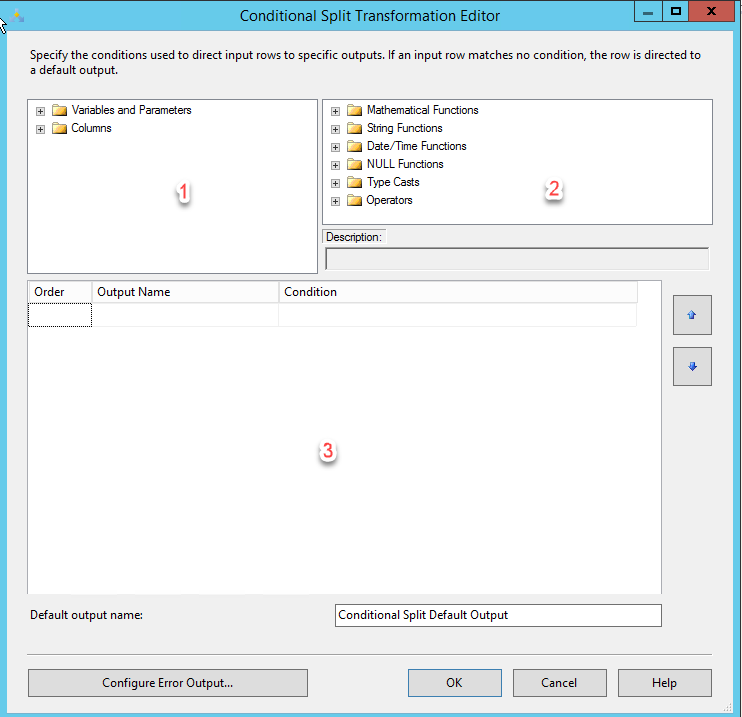
To apply a condition on “StateProvinceName” column, firstly expand the column node, drag the “StateProvinceName” column (Section 1), and drop it in the grid (Section 3). Data filtering condition is on “StateProvinceName” column. Records that have a value “California” will be exported to Oracle database and records that have a value “Washington” will be exported to MySQL database. Based on the condition, we are going to use equals to (==) operator. The equation is as below:
[Cust_State]=="California"

[Cust_State]=="Washington"
Look at the following image:
Once conditions defined, click “OK” to save and close the dialog box.
Configure MySQL destination
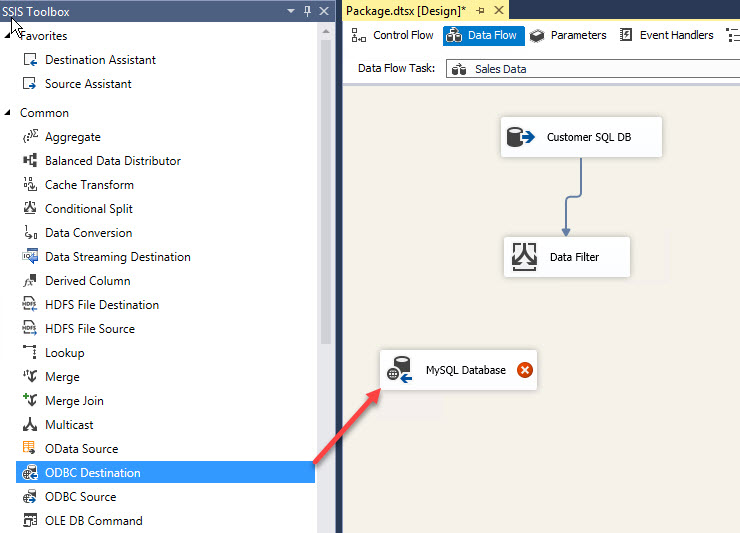
To export data from SQL Server to MySQL and Oracle hence we need to configure two destinations. First, configure MySQL destination. To do that, drag and drop ODBC destination from SSIS toolbox and rename it to “MySQL Database” as shown in the below image:
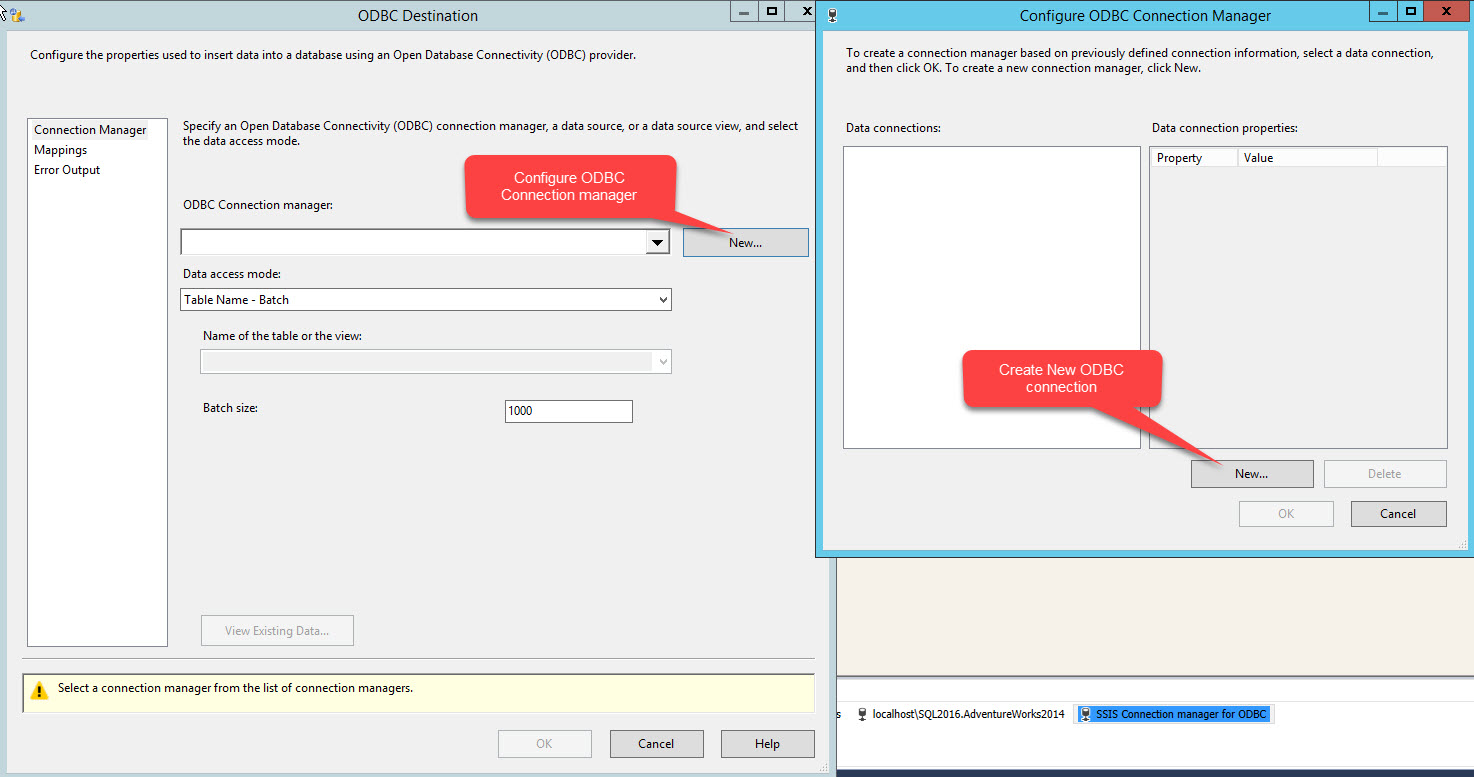
Double click on MySQL Database (ODBC Connection) destination. A dialog box “ODBC Destination” will open. In that dialog box click on “New”. Another dialog box “Configure ODBC Connection Manager” will open, as shown in the following image:
Another dialog box “Connection manager” will open. In the dialog box, list of DSNs created on the machine that is filled in “Use user or system data source name” drop-down box. As we have already configured ODBC DSN, select the “MySQL Destination” from the drop-down list as shown in the below image:

Click on “Test Connection” to verify the connection has been established successfully and click “OK”.
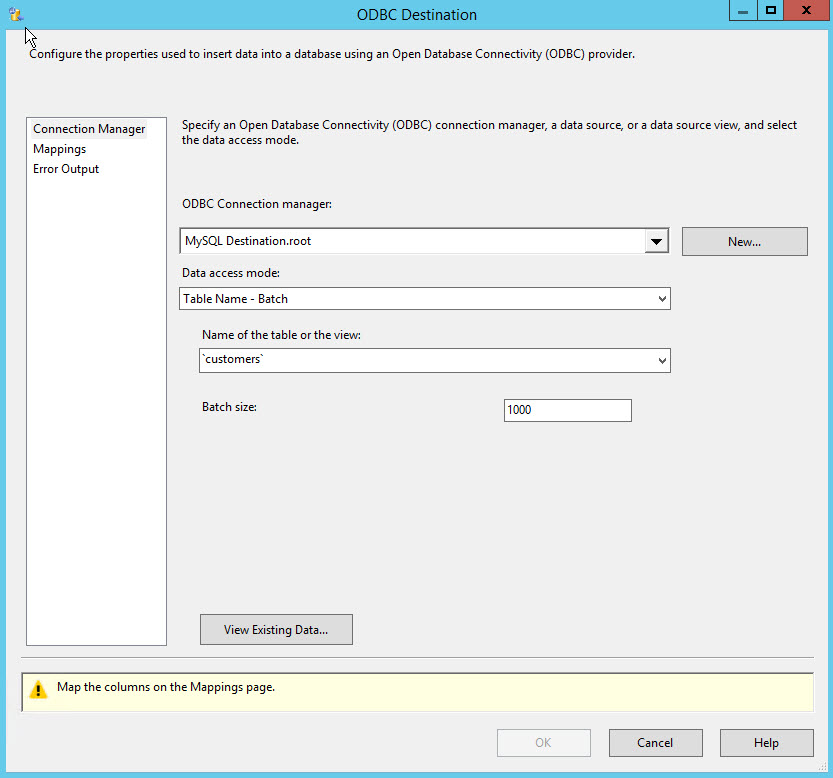
Now in “ODBC Destination” dialog box, select table name from “Name of the table or the view” drop-down box as shown in the following image:
Once MySQL database destination configured successfully, configure Oracle database destination.
Configure Oracle Destination
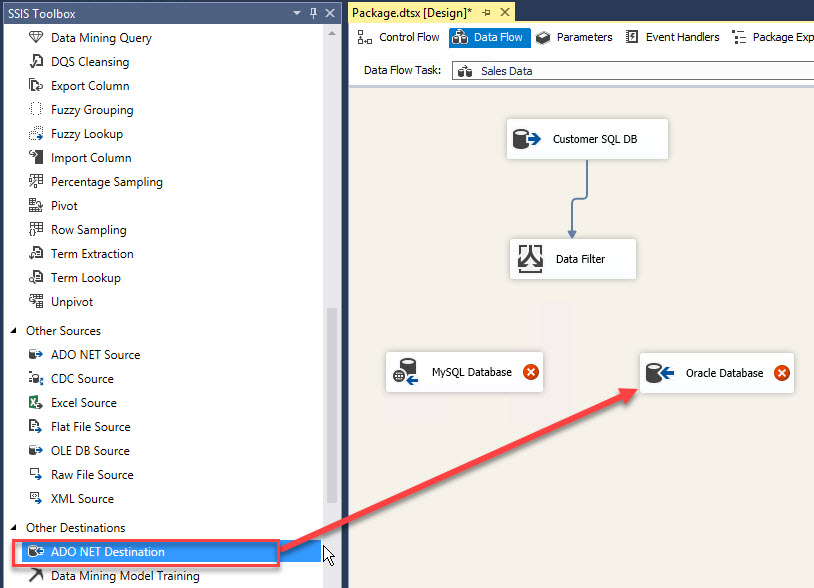
To configure Oracle destination, drag and drop “ADO.NET Destination” to data flow window and rename it as “Oracle Database” as shown on the following image:
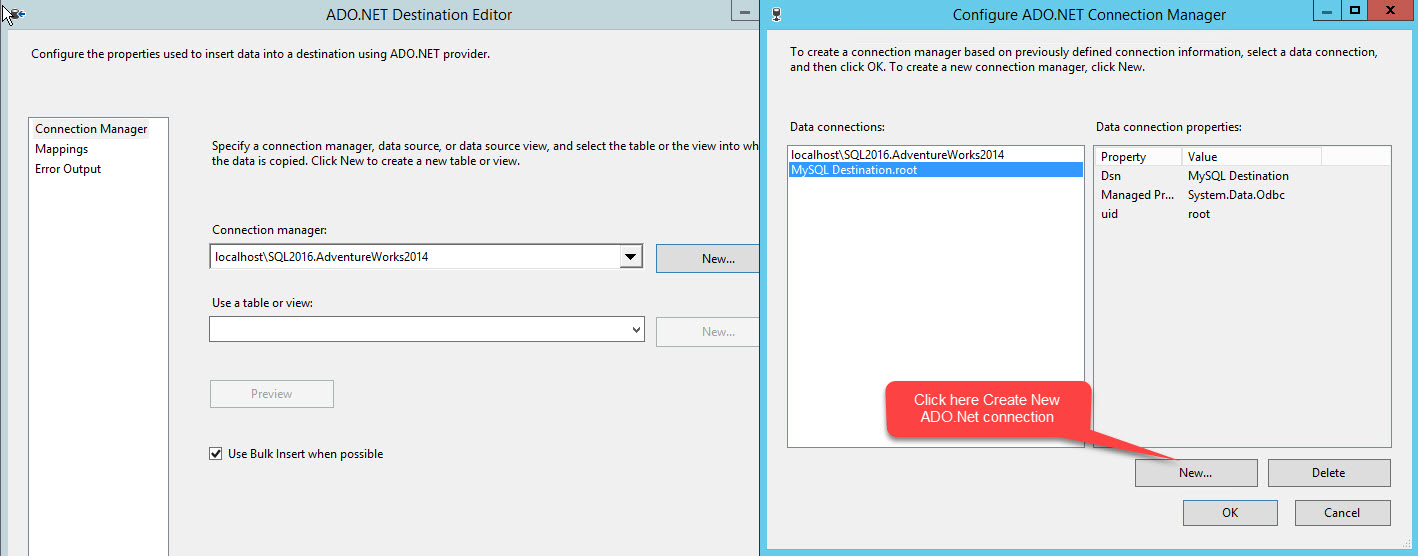
Double click on Oracle Database (ADO.NET destination). A dialog box “ADO.NET Destination Editor” will open. On the dialog box, click on “New”. Another dialog box “Configure ADO.NET Connection Manager” will open as shown in the following image:
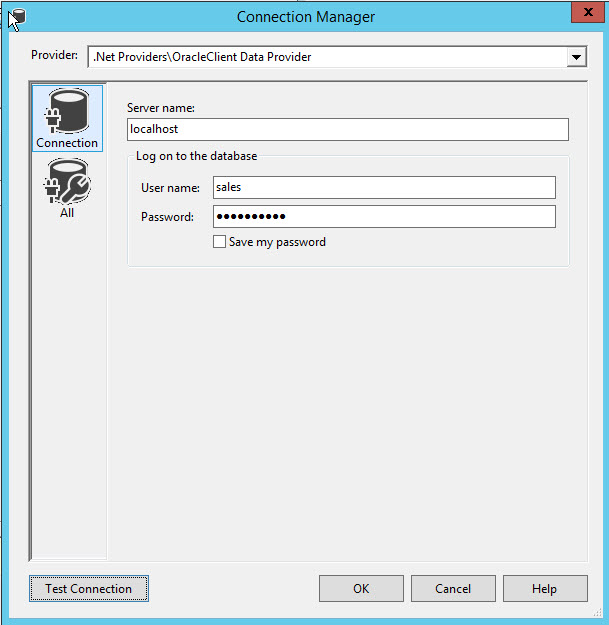
On “Configure ADO.NET Connection Manager” dialog box, click on “New”. Another dialog box “Connection Manager” will open. To configure Oracle database connectivity, we have to select “Net.Provider\OracleClient” in “Provider” dialog box. Provide host name or IP Address of the Oracle database server in “Server Name” text box. Provide username and password to connect oracle database instance. As I mentioned, I have installed Oracle instance as my local machine, hence I have provided “localhost” in server name text box. I have connected oracle database using “Sales” user, hence in “User Name” text box I have entered “Sales” as username and entered the password of it. Look at the following image:
To verify that connection has been established, click on “Test Connection” and once the connection is established click “OK” to close the dialog box.
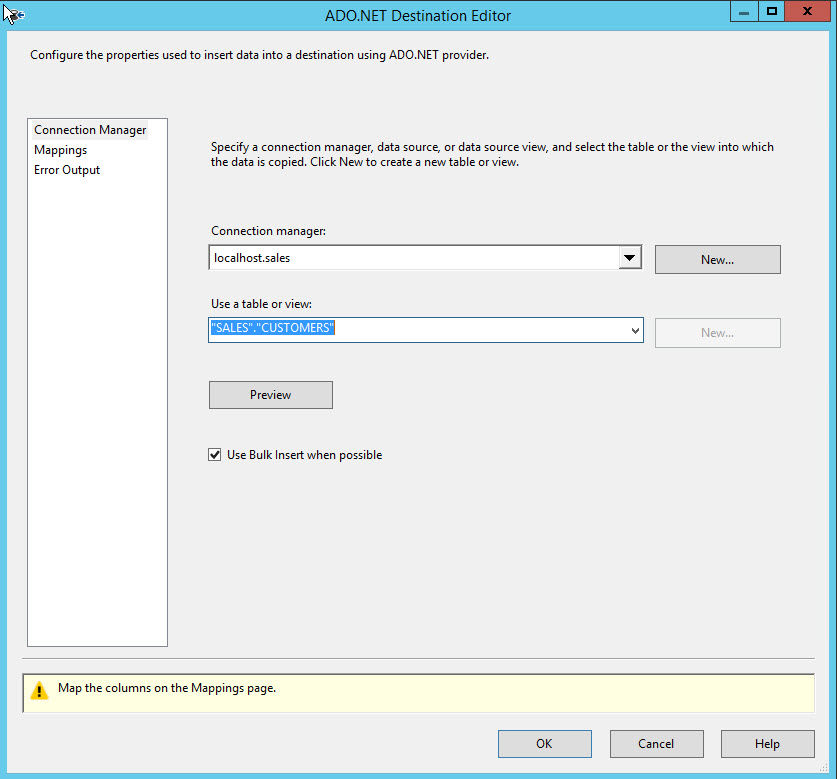
Now on “ADO.NET destination editor” dialog box, select table or view name where data should be saved. I am exporting data to the customer table, hence I have selected “Sales.Customer” table as shown in the following image:
Configure data path
Once both destinations are configured, configure data path to transfer data in respective databases. To do that, drag the blue data path arrow beneath conditional split transformation and drop it on ODBC Destination (MySQL Destination). When the data path connects to ODBC destination, a dialog box appears. Select the destination from “Output” drop-down box to direct the data that is retrieved from SQL Query. Dialog box looks like the below image:
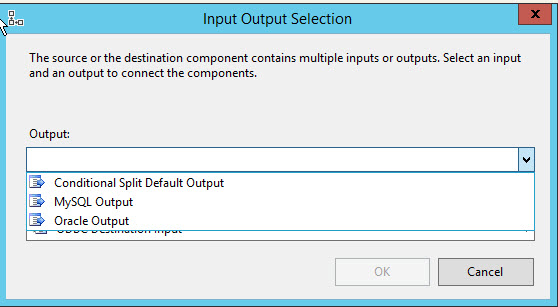
The drop-down list is filled with all conditions that are defined in conditional split transformation. In this case, a drop-down menu includes three options.
- MySQL Output
- Oracle Output
- Default Output
As mentioned above, records that have the value “Washington” of “StateProvinceName” column will be exported to MySQL database hence select MySQL Output.
Now map the output columns of conditional transformation with customers table of MySQL database. To do that, double-click on “MySQL database” (ODBC destination) and in “ODBC destination” dialog box, select “Mapping” option that is located at the left pane of the dialog box as shown in the below image:
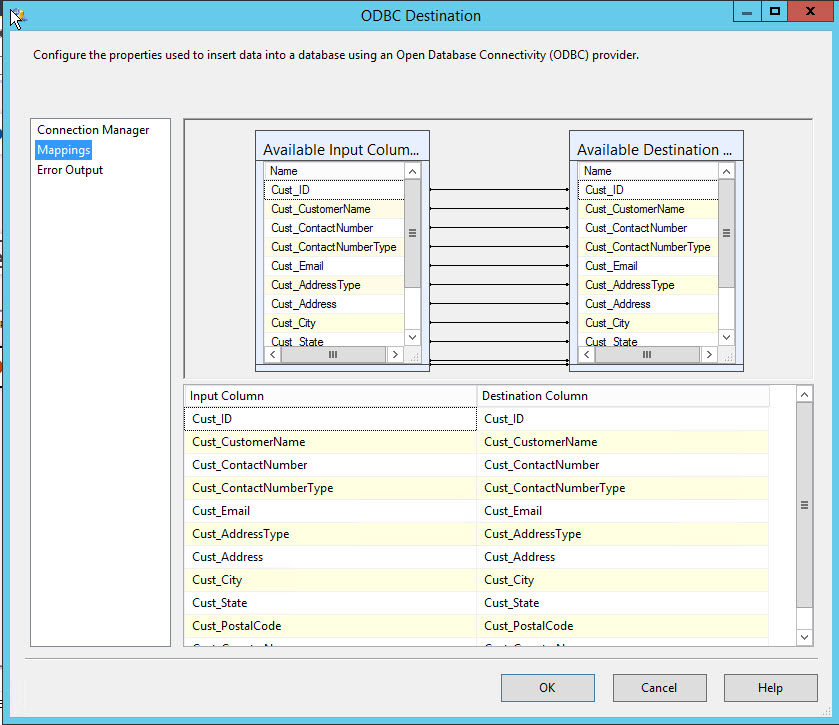
In the above image, “Input columns” are the column name of the SQL Server table and destination column will be column name of “Customers” table of MySQL sheet. In this demo, the column name of the SQL Table and MySQL tables are the same so its input and output columns are map automatically.
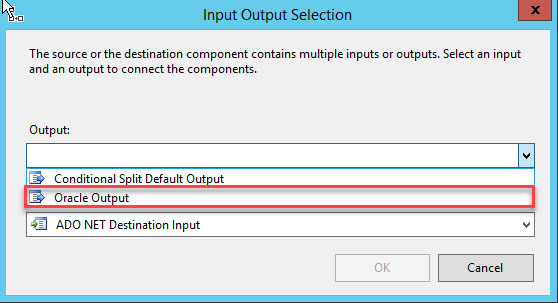
Repeat the data flow configuration process for the “Oracle Output” data path in the same way. Below are the changes.
- We need to select “Oracle Output” in input-output selection dialog box as shown in the below image:

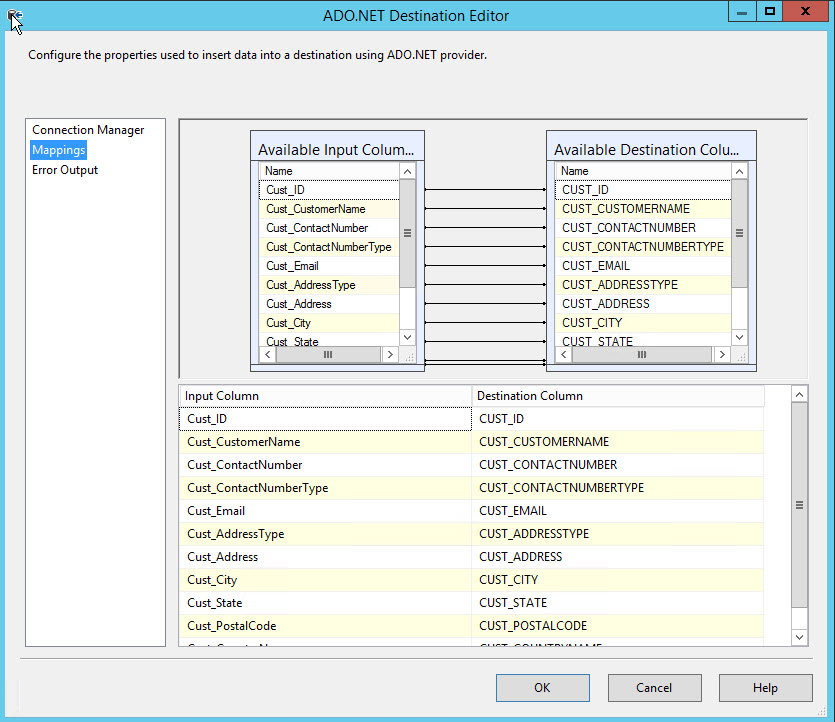
- In “ADO.NET Destination Editor”, verify that the input-output column mappings are correct as shown in the below image:
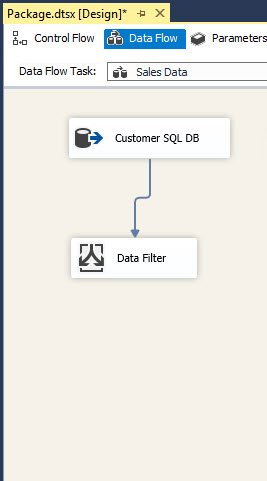
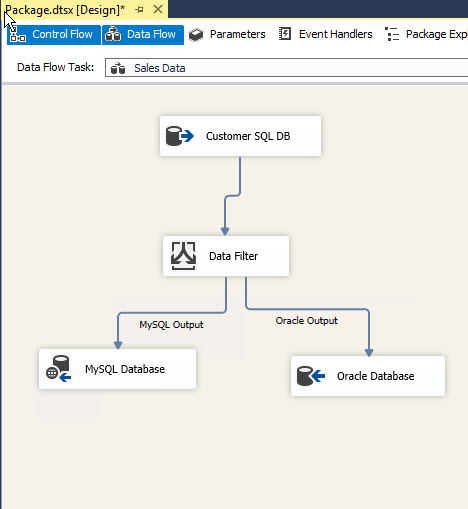
Once all configurations get completed, the entire data flow task looks like as the below image:
Testing SSIS package
Now Run the package by clicking on the “Start” button on the menu bar. If the package completes its execution successfully then it should look like the below image:
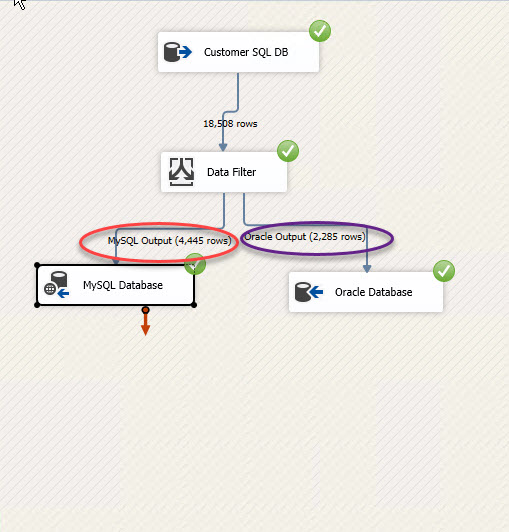
Package has divided output of SQL data by using conditional split and exported 4,445 records in MySQL database and 2,285 records in Oracle database.
Summary
In this article, we configured the ODBC connection for MySQL, created an SSIS package with a data flow. We used Conditional Split Transformation to split the output, retrieved from SQL server database and export it in Oracle and MySQL databases.
Useful tools:
Devart SSIS Data Flow Components – allow you to integrate database and cloud data via SQL Server Integration Services.
Devart ODBC Drivers – provide high-performance and feature-rich connectivity solutions for ODBC-based applications.


