The goal
Keeping two databases in sync is a task we often encounter when working on SQL database development and maintenance. One particular case is this – the versions of a database present on testing and development environments need to be consistently synchronized to make sure that tests are running on the most recent version. This should be done by detecting schema changes in the development version of a database and then automatically synchronizing them with the version from the testing environment on a scheduled basis.
How to achieve it
We’ll look into how automated synchronization of two SQL databases can be achieved by combining a schema comparison tool with PowerShell scripts and scheduling.
In the example we’re going to see, the databases will be synchronized every 15 minutes. As we’re using a schema comparison tool, we can be sure that the database will only be updated if there are some actual changes between the development and testing versions of the database – this prevents the execution of unnecessary resource-heavy operations.
We’ll use Devart Schema Compare as the utility of choice to diff and synchronize SQL Server databases. It’s a tool that allows you to compare and sync live SQL Server databases, snapshots, and backups. Let’s look at how we can implement our project below.
Setup
First of all, we’ll need to set some things up:
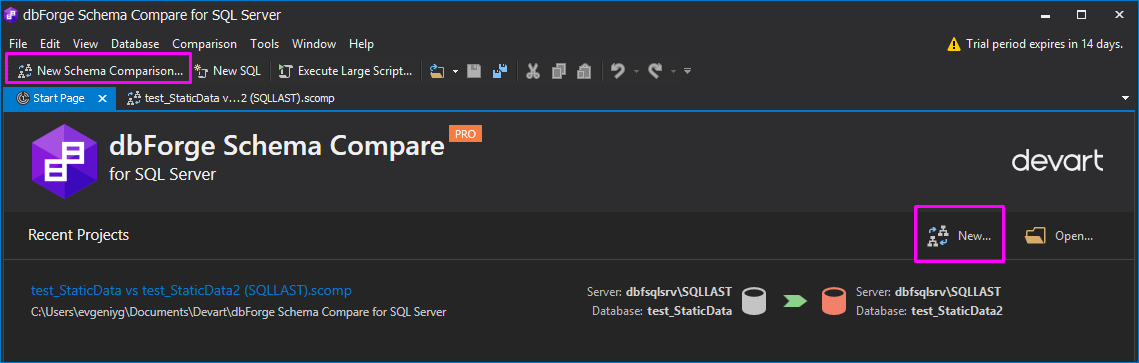
- Run Schema Compare
- Click the ‘New Schema Comparison‘ button on the toolbar or, alternatively, in the top right part of the start page:

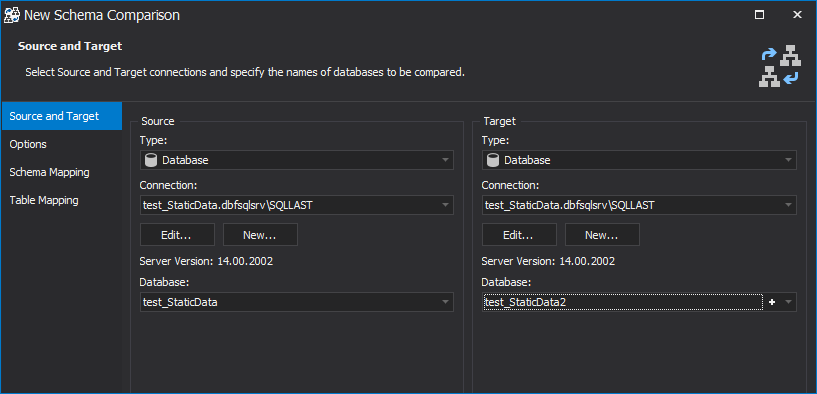
- In the Source and Target tab of the New Schema Comparison window, choose the desired source and target databases:

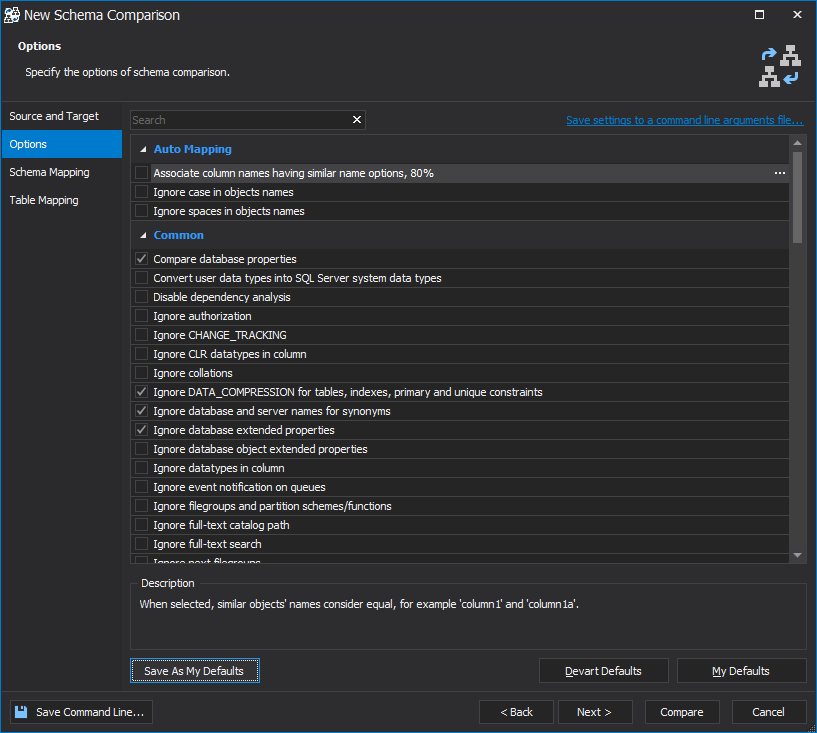
- In the Options, Schema Mapping, and Table Mapping tabs, you can set up the necessary comparison and synchronization options:

- When everything is set up, you can press the ‘Compare‘ button in the bottom right corner to start the comparison process.
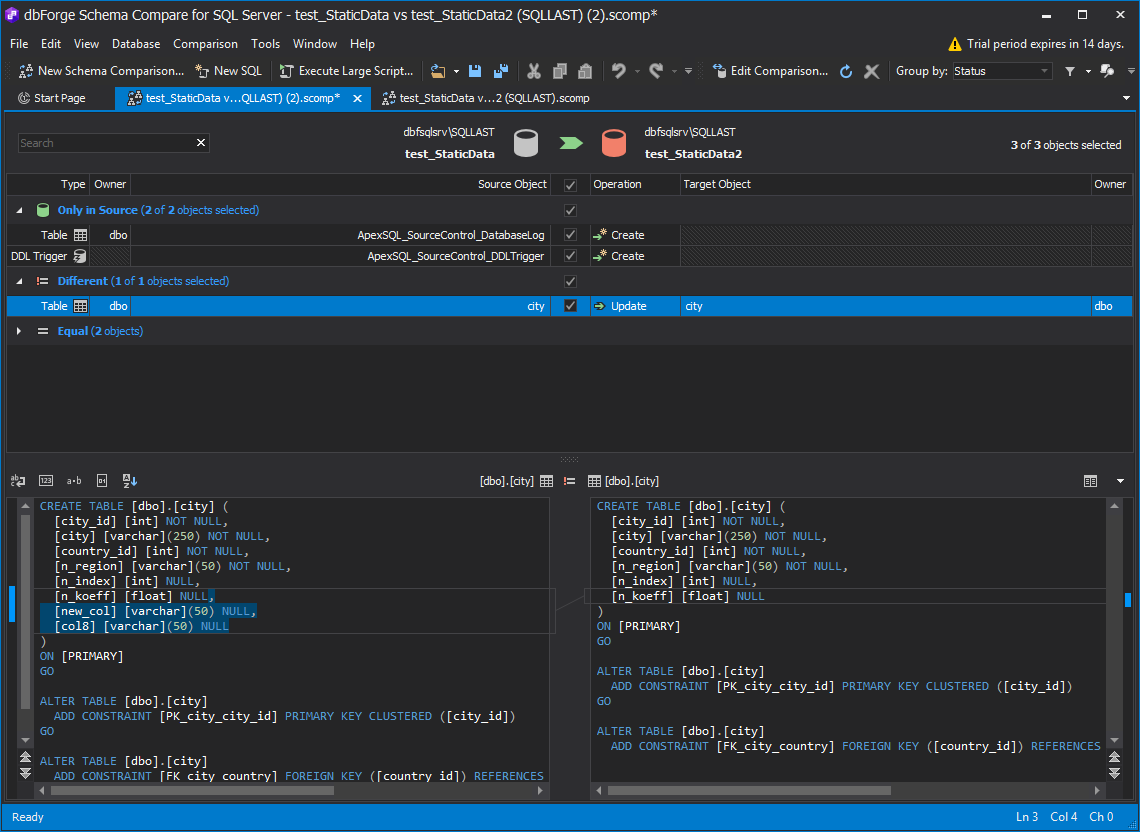
- When the comparison is finished, you can see all objects that have been compared and their respective difference status in the top part of the window, while the detailed script for each of those objects will be located at the bottom:

- Check all objects to include them into the synchronization process and click the ‘Save‘ button or press File > Save:
 This will save the project with all the information we need to start the synchronization process.
 - Once the project is saved, click the ‘Synchronize objects‘ button:

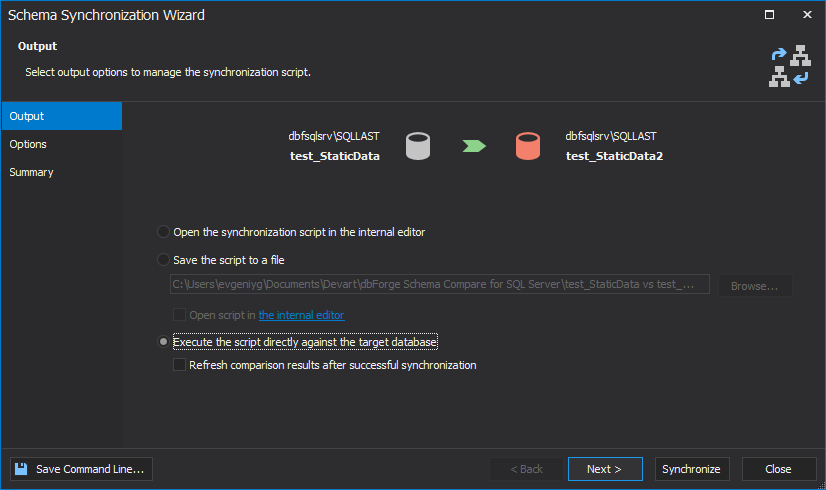
- Schema Synchronization Wizard will be opened. First, select ‘Execute the script directly against the target database‘ in the Output tab:

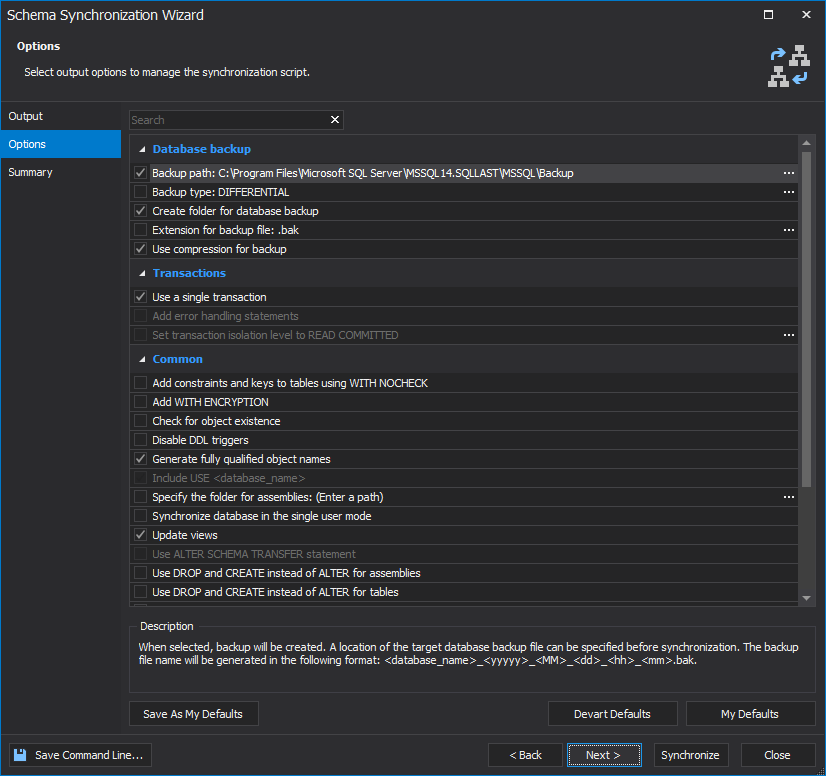
- You can choose the necessary settings in the Options tab:

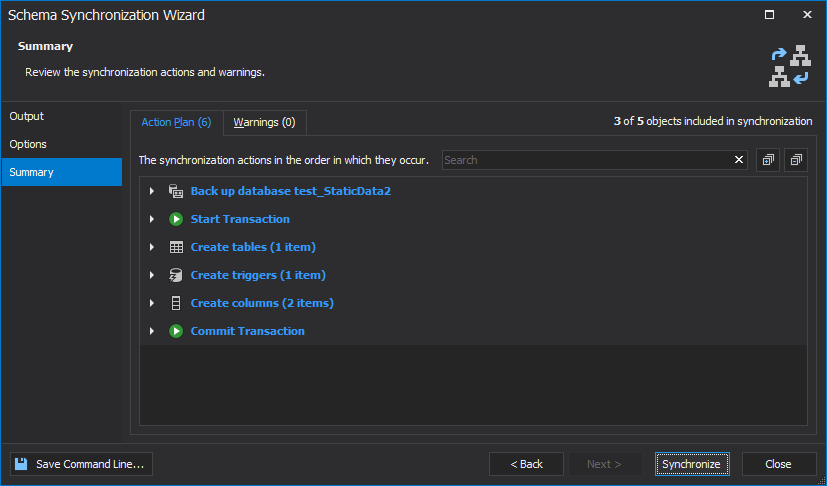
- You can check all objects that are going to be synchronized in the Summary tab:

- Click ‘Synchronize‘ in the bottom-right corner to test the synchronization process.
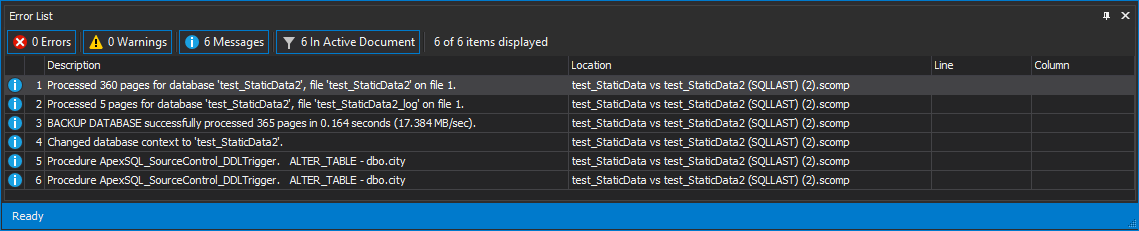
- You will see the results displayed in the bottom pane of the window:

 This will save the project with all the information we need to start the synchronization process.
Automating the process
As schema synchronization was successful and now that we have a project file with all the necessary info, let’s automate the synchronization process by using a PowerShell script.
In the following example, it is assumed that you use Integrated security but the stored and encrypted database can still be easily accessed from the project file, along with repository credentials.
We’ll look at some parts of the script creation process that may be particularly interesting, but feel free to skip this section to download and test the finished script right away.
Creating a script
First, we’ll need to create a function that checks if the Outputs folder exists. This folder’s purpose is to store data-stamped commit summaries. The function should look like this:
#check if the Outputs folder exists
function CheckAndCreateFolder($rootFolder, [switch]$Outputs)
{
$location = $rootFolder

    #setting up its location
    if($Outputs -eq $true)
{
$location += "\Outputs"
}

    #creating the folder if it doesn't currently exist
    if(-not (Test-Path $location))
{ mkdir $location -Force:$true -Confirm:$false | Out-Null }

return $location
}
Next, we’ll define the root folder and the location of schema output summaries:
#defining the root folder for the synchronization process
$rootFolder = "d:\temp\SchemaSync"

#defining the location of schema output summaries
$outsLoc = CheckAndCreateFolder $rootFolder -Outputs
Now, we’ll need to define Schema Compare’s location, the date stamp variable and parameters of the application:
#Schema Compare location and the date stamp variable are defined, as well as  the tool’s parameters
$diffLoc   = "C:\Program Files\Devart\dbForge Studio for SQL Server\dbforgesql.com"
$stamp = (Get-Date -Format "Mmddyyyy_HHMMss")
With this in place, we can set the path to the output log file:
#output log file path
$logPath = "$outsLoc\SchemaOutput_$stamp.txt"
$Params = "/schemacompare /compfile:""D:\temp\SchemaSync\Project\AdventureWorksLTDvsAdventureWorksDW.scomp"" /log:""$logPath"""
$sync = " /sync"
Next, we’ll call Schema Compare and let it execute its synchronization parameters:
#initiate the schema comparison and synchronization process
(Invoke-Expression ("& `"" + $diffLoc +"`" " +$Params))
$returnCode = $LASTEXITCODE

$message = ""
The final part of the script will serve to define all possible outcomes:
- Schema changes are detected, return code 0 – Success
- No schema changes detected, return code 100– No schema changes detected
- An error has been encountered and the output summary will be opened.
if ($returnCode -notin (100, 101))
{ #an error is encountered
$logPath = "$outsLoc\SchemaOutput_error.txt"

$message >> $logPath
clear-content $logPath
$message = "`r`n $returnCode - An error is encountered"

#output file is opened when an error is encountered
Invoke-Item "$logPath"
}
else{
if ($returnCode -eq 101)
{
clear-content $logPath
(Invoke-Expression ("& `"" + $diffLoc +"`" " +$Params+$sync))
$returnCode = $LASTEXITCODE

#schema changes are detected
}
if($returnCode -eq 0)
{
 $message = "`r`n $returnCode - Schema changes were successfully synchronized"
}
else
{
 #there are no schema changes
 if($returnCode -eq 100)
{
$message = "`r`n $returnCode - There are no schema changes. Job aborted"
}
}
}
$message >> $logPath
Scheduling
With the PowerShell script ready and the process automated, we can schedule this in a few different ways, e.g. via the Windows Scheduler.
Viewing results
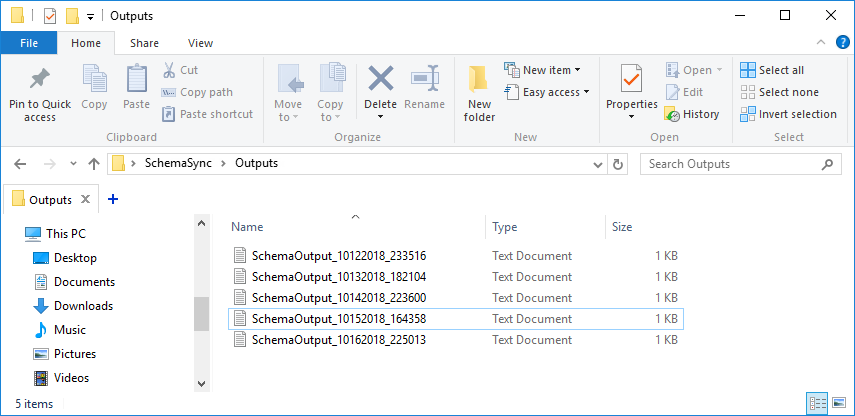
Now that the scheduled job is up and running, you can view schema output summaries anytime you need. In the example we just saw, $outsLoc variable defined the location of schema output summaries. As a result, such summaries will be saved to $rootFolder\$outsLoc – in this particular case, SchemaSync\Outputs:
 If any error is encountered, e.g. a project file’s extension is entered incorrectly, the corresponding error message will be displayed in the output summary.
The list of return error codes will help us to better understand the specific error we encountered.
[expand title =”FULL SCRIPT“]
#check if the Outputs folder exists
function CheckAndCreateFolder($rootFolder, [switch]$Outputs)
{
$location = $rootFolder

    #setting up its location
    if($Outputs -eq $true)
{
$location += "\Outputs"
}

    #creating the folder if it doesn't currently exist
    if(-not (Test-Path $location))
{ mkdir $location -Force:$true -Confirm:$false | Out-Null }

return $location
}

#defining the root folder for the synchronization process
$rootFolder = "d:\temp\SchemaSync"

#defining the location of schema output summaries
$outsLoc = CheckAndCreateFolder $rootFolder -Outputs

#Schema Compare location and the date stamp variable are defined, as well as  the tool’s parameters
$diffLoc = "C:\Program Files\Devart\dbForge Studio for SQL Server\dbforgesql.com"
$stamp = (Get-Date -Format "Mmddyyyy_HHMMss")

#output log file path
$logPath = "$outsLoc\SchemaOutput_$stamp.txt"
$Params = "/schemacompare /compfile:""D:\temp\SchemaSync\Project\AdventureWorksLTDvsAdventureWorksDW.scomp"" /log:""$logPath"""
$sync = " /sync"

#initiate the schema comparison and synchronization process
(Invoke-Expression ("& `"" + $diffLoc +"`" " +$Params))
$returnCode = $LASTEXITCODE

$message = ""

if ($returnCode -notin (100, 101))
{ #an error is encountered
$logPath = "$outsLoc\SchemaOutput_error.txt"

$message >> $logPath
clear-content $logPath
$message = "`r`n $returnCode - An error is encountered"

#output file is opened when an error is encountered
Invoke-Item "$logPath"
}
else{
if ($returnCode -eq 101)
{
clear-content $logPath
(Invoke-Expression ("& `"" + $diffLoc +"`" " +$Params+$sync))
$returnCode = $LASTEXITCODE

#schema changes are detected
}
if($returnCode -eq 0)
{
$message = "`r`n $returnCode - Schema changes were successfully synchronized"
}
else
{
#there are no schema changes
if($returnCode -eq 100)
{
$message = "`r`n $returnCode - There are no schema changes. Job aborted"
}
}
}
$message >> $logPath
[/expand]
Additionally, if you want to learn how to automate database schema changes for the CI process during database deployment, feel free to watch this video.
If any questions or issues arise during the process of setting this up, feel free to contact us anytime at [email protected]
Tags: sql server, tools Last modified: July 14, 2023


