The concept of snapshot replication is simple. It generates and distributes the snapshot of schema and data of articles, appeared at a specific time and updates the changes on subscriptions. When we create snapshot replication, SQL Server creates a Snapshot Agent Job which generates a snapshot of publication database objects. Snapshot is stored on either network location or on the hard drive. You can define the interval to generate the snapshot using the SQL Job schedule.
Demo Setup
For this demo, I have created two SQL Server instances in one database server. Instance names and details are the following:
[table id=54 /]
In the demo setup, I haven’t created a distributor hence the publisher instance will also act as a distributor. I am going to replicate tables and data that belongs to the Person schema of the AdventureWorks2014 database.
Configuring Publisher
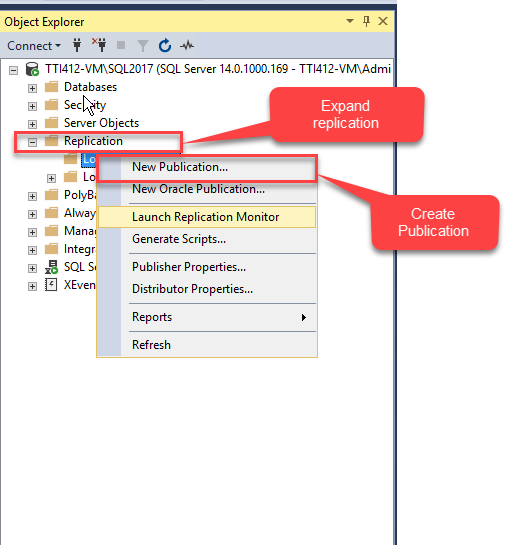
To configure publisher, open SQL Server management studio, expand database instance, expand the Replication node, right-click Local Publication and select New Publication. See the following image:
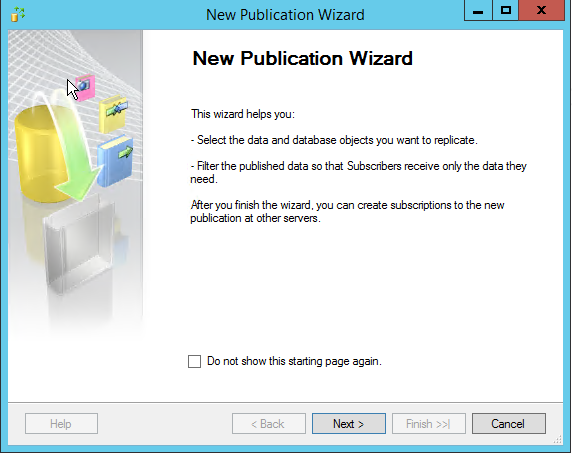
New Publication Wizard starts. On the screen, a short summary of the wizard has been given. You can skip this screen by checking the Do not show this starting page again checkbox. Click Next to move to the next screen. See the following image:
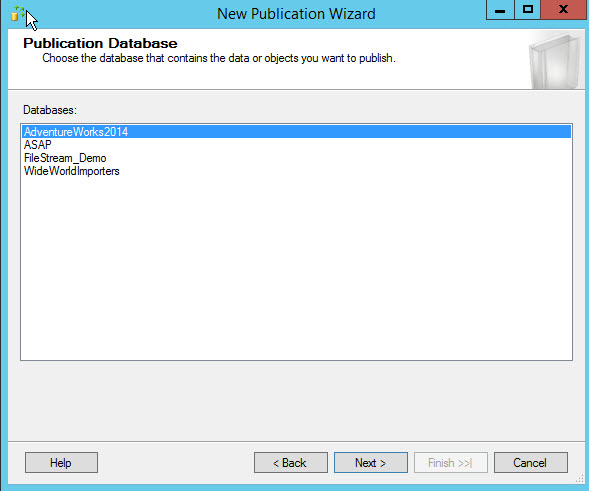
On the next screen, select the database which acts as a publisher. In this demo, I am using the AdventureWorks2014 database, hence select the AdventureWorks2014 database from the database list and click Next. See the following image:
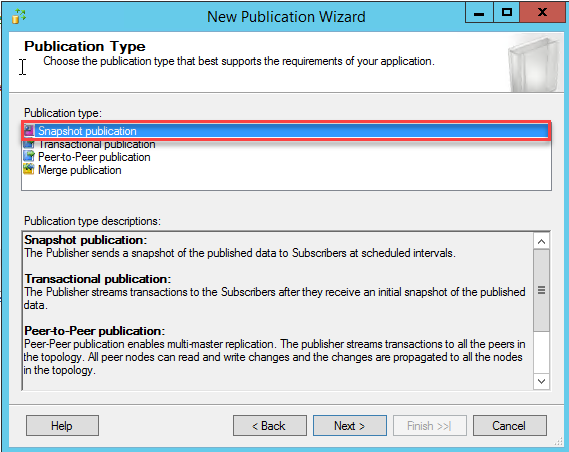
On the next screen, select a publication type. The types are listed in the Publication types list box, and for individual publication type, its descriptions are also explained in Publication type description text box. Select Snapshot Replication and click Next. See the following image:
In replication, the database objects are known as Articles. On the Articles screen, the list of database object within the publication database is shown. I am going to replicate data of all tables that belong to the Person schema, hence select the tables that belong to the Person schema from the list of articles and click Next. See the following image:

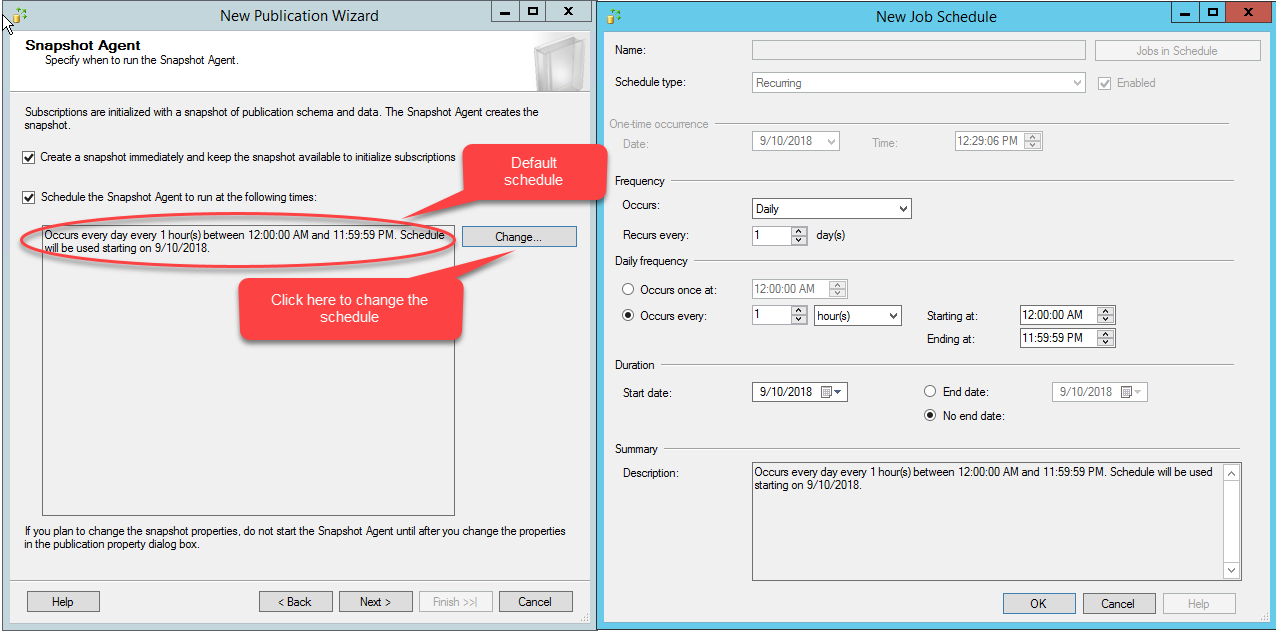
To initialize replication, we need to generate a snapshot. On the Snapshot Agent screen, configure the snapshot generation interval. You can immediately generate the snapshot, or you can schedule the specific time to generate the database snapshot. By default, the snapshot is generated every hour, but we can change it. To generate a snapshot on a specific interval, click Change. The New Job Schedule dialog box opens. Configure the desired schedule and click OK. See the following image:
In this demo, I will generate snapshot immediately, hence check the Create a snapshot and keep the snapshot available to initialize subscription option and click Next.
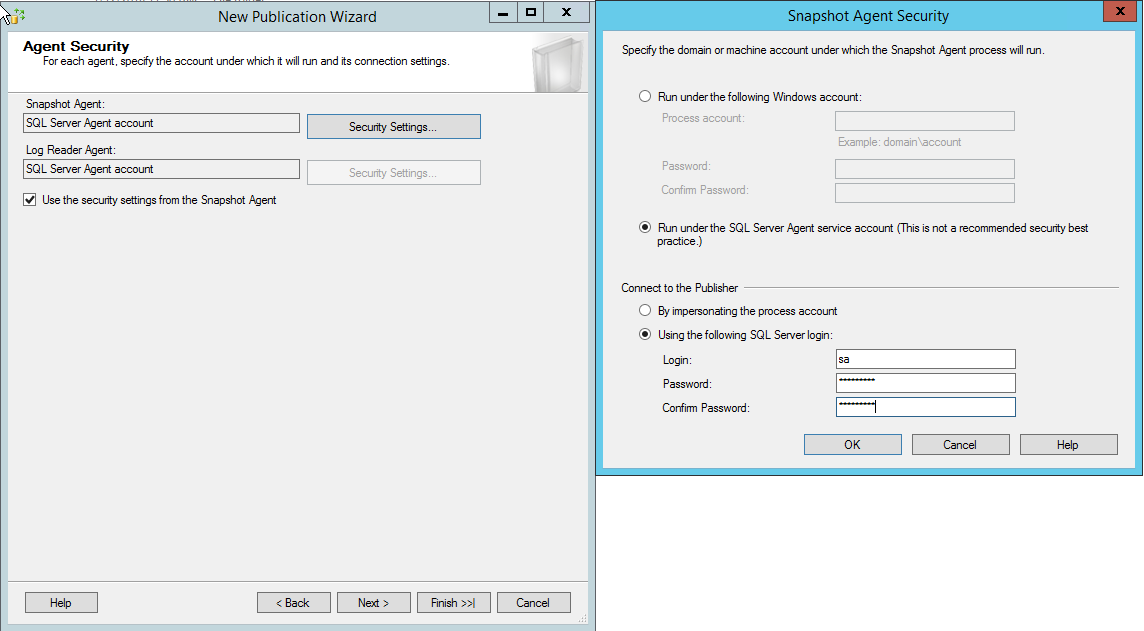
On the next screen, configure the SQL Agent security. To configure the Agent security, click the Security Settings button. The Snapshot Agent Security dialog box opens. In the dialog box, provide the account under which the subscriber connects to the publisher. Moreover, provide the account information under which the SQL Server agent job will be executed. For this demo, SQL Server jobs are executed under the SQL server agent service account, hence select the Run under the SQL Server Agent service account option. Subscribers will be connected to the publisher using SQL login, hence select the Using the following SQL Server login option and provide SQL login and password. In this demo, connect using the sa login. Click OK to close the dialog box and Click Next. See the following image:
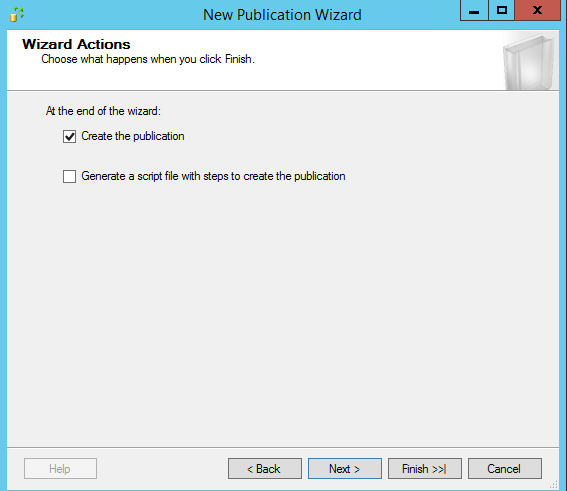
On the next screen, you can choose to create a publication or generate the scripts to create the publication. Select the Generate a script file to create the publication option to generate the scripts of replication steps. We will create a publication, hence select the Create the publication option and click on Next. See the following image:
On the next screen, provide the name of publication, review the summary of tasks to be performed to create replication and click Finish to create the publication and close New Publication Wizard. See the following image:

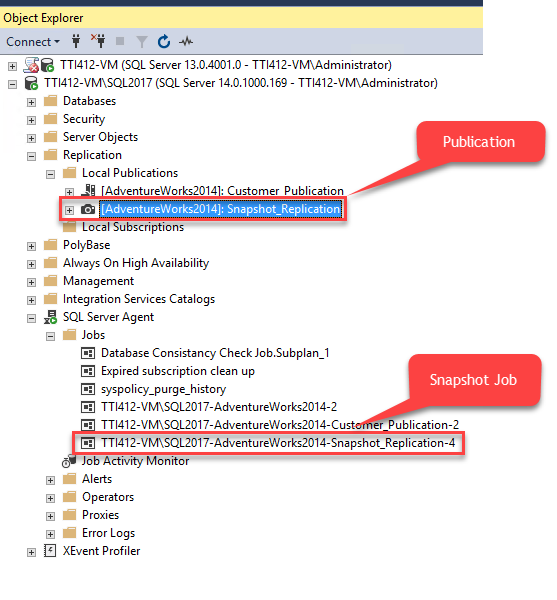
As I mentioned at the beginning of the article, when we create a snapshot replication, SQL creates a job that creates a snapshot and stores the snapshot files in the default directory.
To view them, expand SQL Server Agent >> expand Jobs. See the following image:
Once Publication is configured, configure subscribers.
Configuring Subscriber
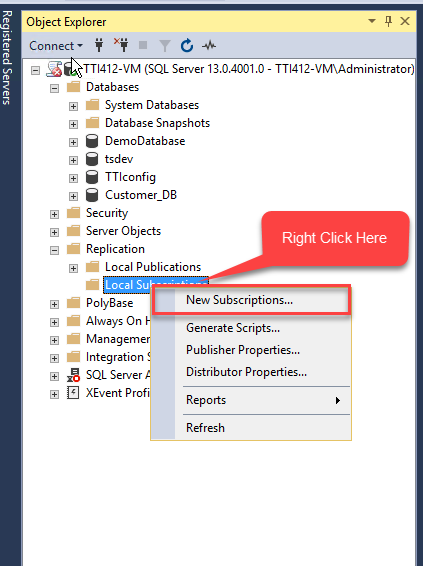
To configure subscriber, first, connect to another SQL instance. After connecting to the instance, expand replication and right-click Local Subscription. See the following image:
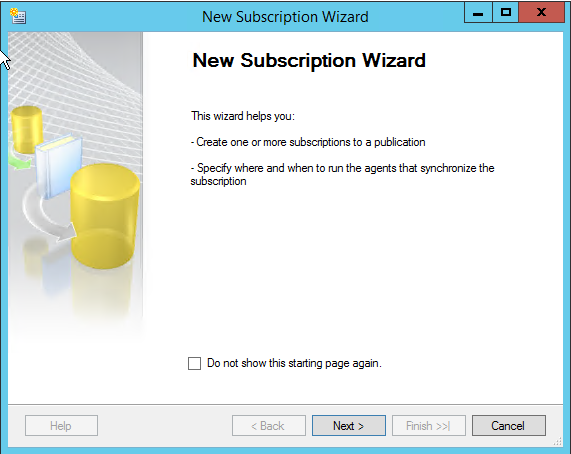
New SubscriptionWizard opens. On the screen, a short summary of the wizard has been given. You can skip this screen by checking the Do not show this starting page again checkbox. Click Next to move to the next screen. See the following image:
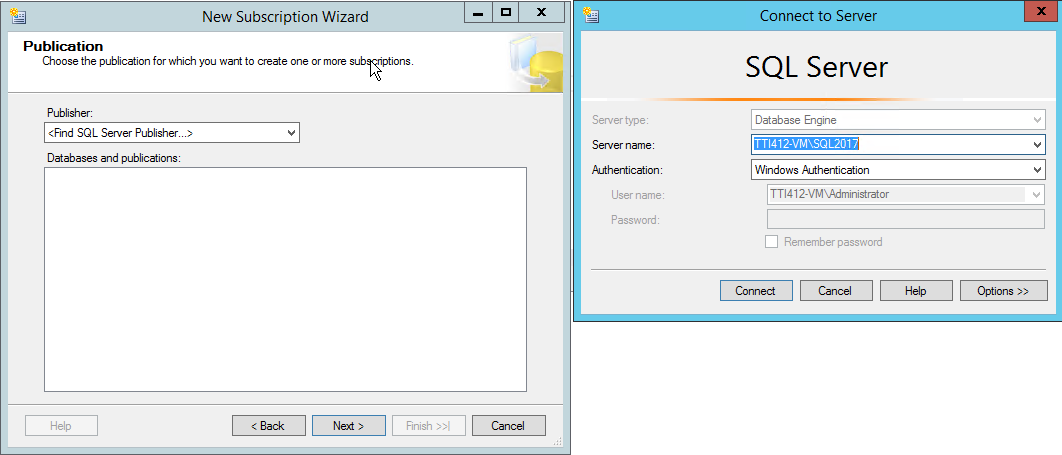
On the next screen, choose the publication server. Click the Publisher drop-down box and select Find SQL Server Publisher from the list. A dialog box to connect the publisher opens. In sever name text box, provide the hostname of the publisher server and click on connect. See the following Image:
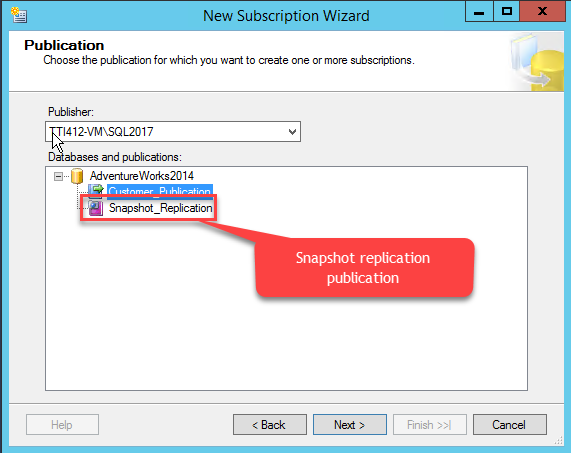
Once the connection with the publisher is established, the Snapshot_Replication publication and the AdventureWorks2014 database will be shown in the Databases and publication text box. Select Snapshot_Replication and click Next. See the following image:
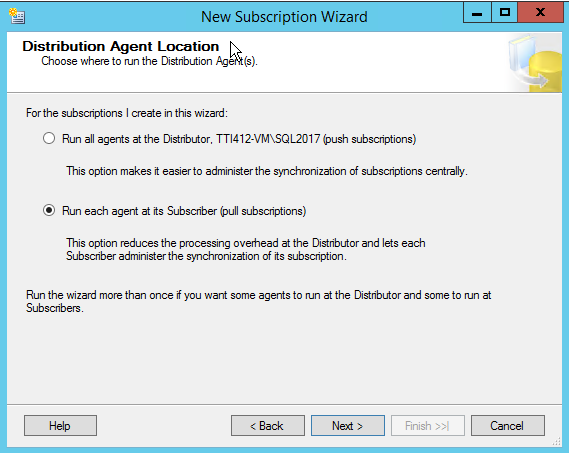
On the next screen, choose the distribution agent location. For this demo, I will use Pull Subscription, hence select the Run each agent at its subscriber option and click Next:
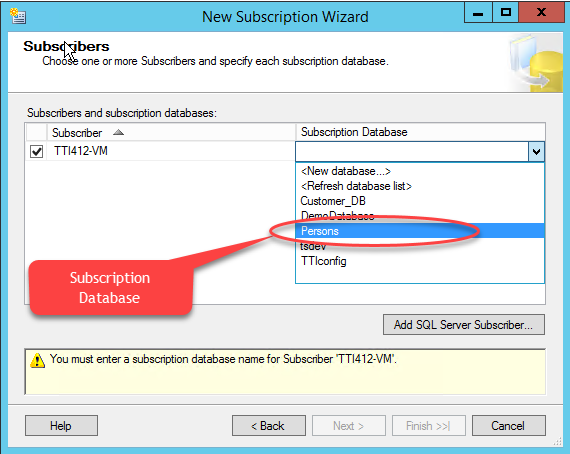
On the next screen, select a subscription database. I have created a database named Persons which acts as a subscriber database. In the Subscription Database drop-down box, select the Persons database from the list. After selecting a subscription database, click Next. See the following image:
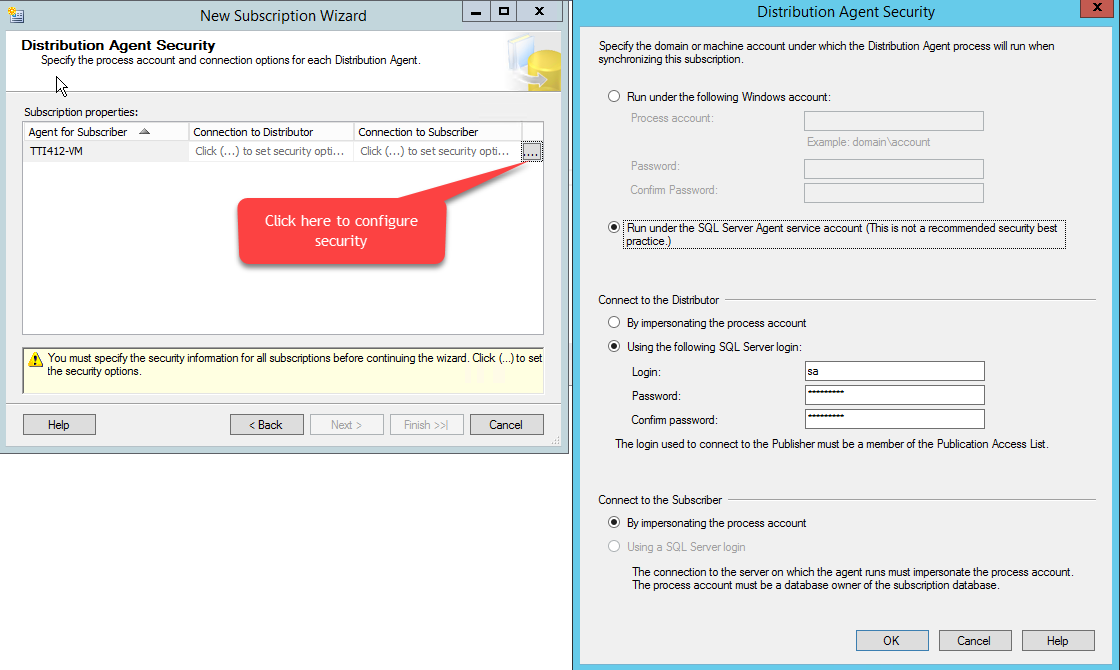
On the next screen, configure distribution agent security. To configure security, click on the […] button. The Distribution Agent Security dialog box opens. In the first section, provide the domain account under which the distribution agent process will run. Distribution agent will run under SQL Server agent service, hence select the Run under the SQL Server agent service account option.
Here I did not configure the distribution server hence publisher acts as a distributor. Subscriber will connect to Publisher / Distributor using SQL Login. To connect the distributor, use the sa login and password. See the following image:
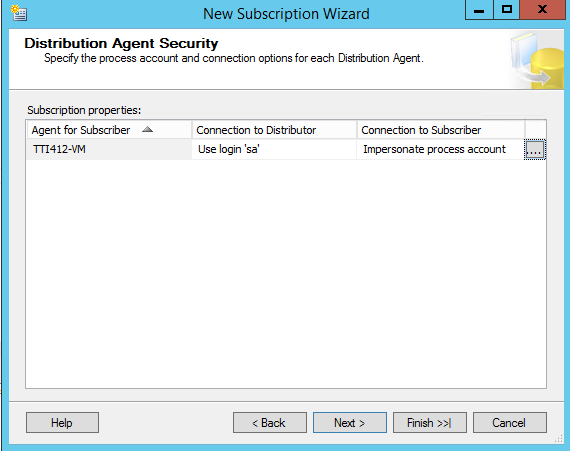
Click OK to close the dialog box. And on the Distribution Agent Security screen, click Next. See the following image:
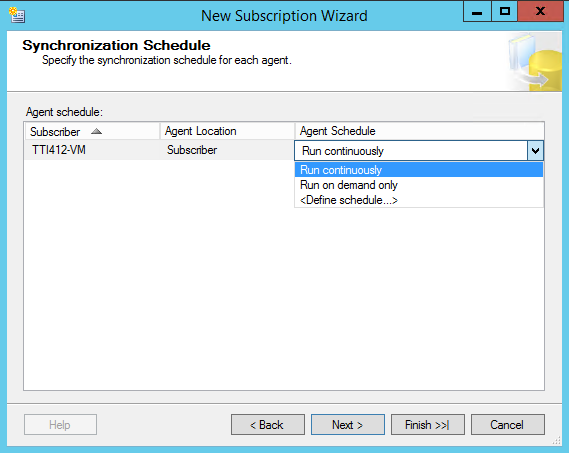
On the next screen, configure the subscription synchronization schedule. You can choose it to run continuously or configure the scheduled execution. Select Run Continuously in the Agent schedule drop-down box. Click Next. See the following image:
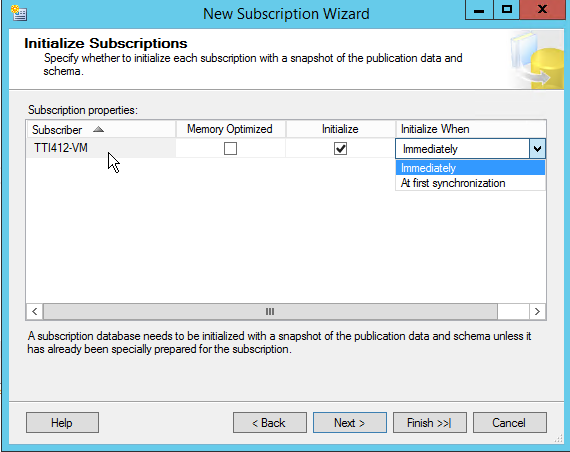
On the next screen, choose whether to Initialize subscription immediately with the snapshot of publication data and schema or after the first synchronization. We will initialize subscription immediately, hence choose Immediately from the Initialize When drop-down box. Click Next. See the following image:
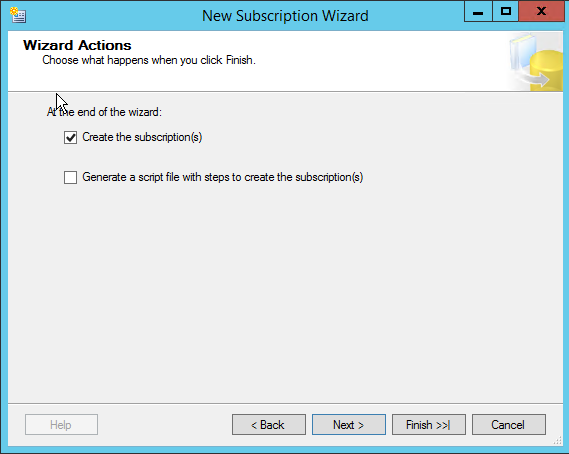
On the next screen, you can choose to create subscription immediately or generate the scripts to create a subscription. Select Generate a script file to create the subscription. Option to generate the scripts of replication steps. We will create a publication, hence select the Create the subscription option and click Next. See the following image:
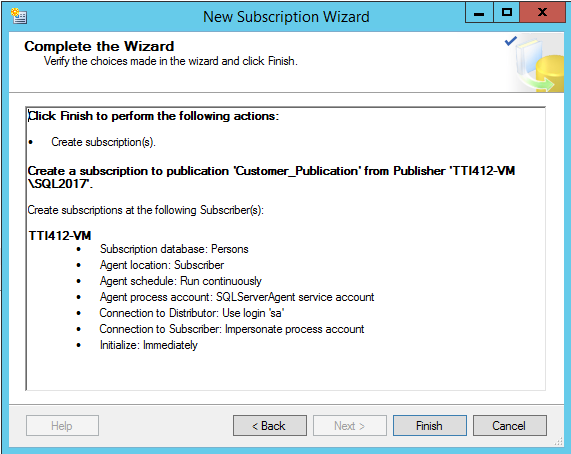
On the next screen, a list of tasks, performed to create subscription is given. You can review them and click Finish. See the following image:
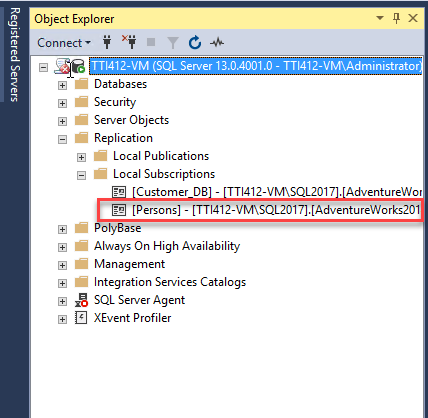
Once the subscription is created, you can see the subscription under the Local Subscription node. See the following image:
Changing Snapshot Schedule
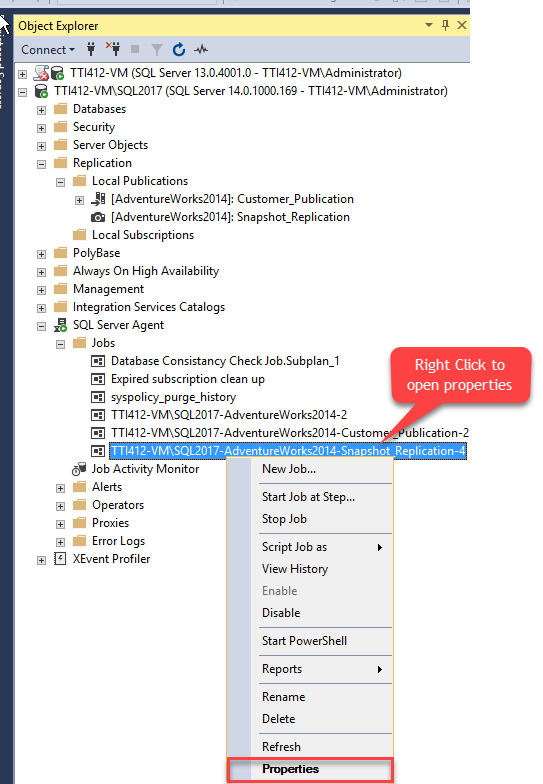
As I mentioned, when we create a publication, we can configure a snapshot interval from the Snapshot Agent screen. We can change the snapshot interval by changing the schedule of a snapshot replication SQL job. To do that, on the publisher server, expand SQL Server Agent >> Expand Jobs and right-click the Snapshot replication Job (TTI412-VM\SQL2017-AdventureWorks2014-Snapshot_Replication-4) and select Properties. See the following image:
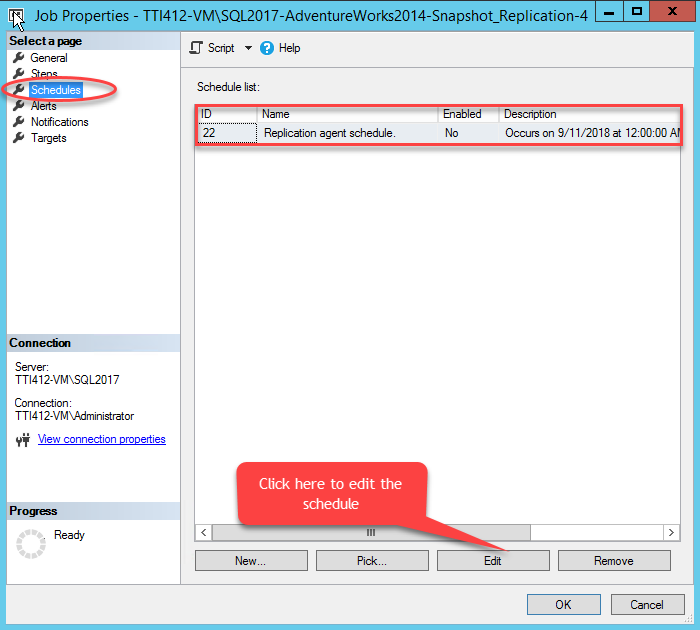
The Job Properties dialog box opens. Select the Schedules page, select the schedule and click Edit. See the following image:
The Job Schedule dialog box opens. configure appropriate schedule and click OK.
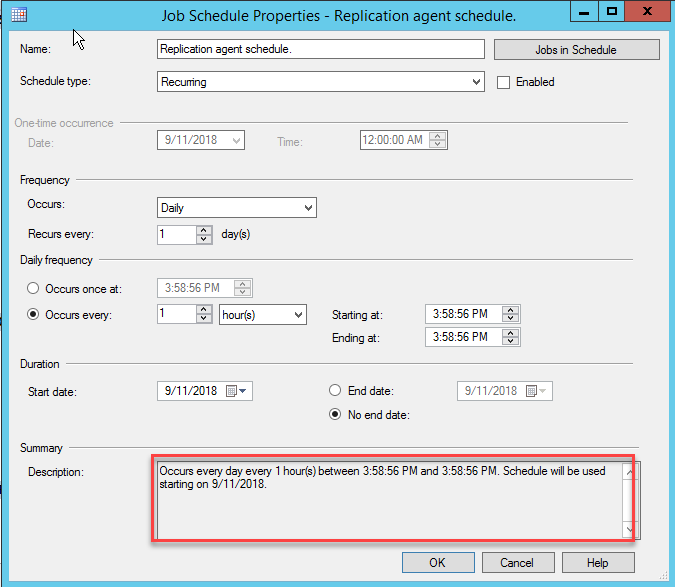
The above configuration generates a snapshot every hour.
Changing Location of the Snapshot Files
We can also put the snapshot files in a different folder. For this demo, the snapshot files are stored in the default folder which is E:\ReplicationSnapshot. I will change the location snapshot files. The new location will be E:\Snapshot\PersonsSchema.
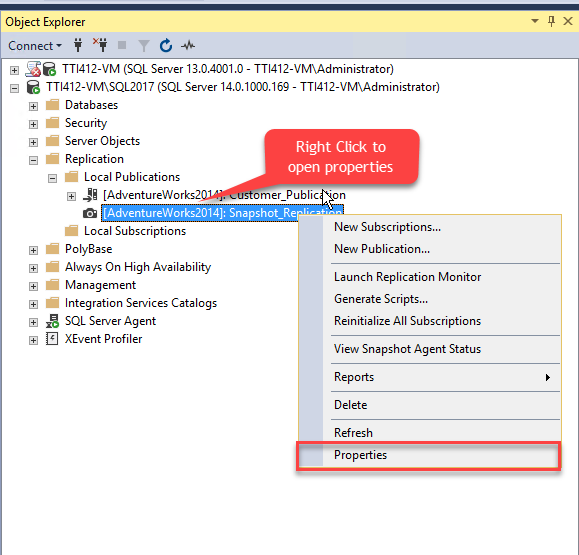
We can change the snapshot location from the publication properties. To open publication properties, right-click Local publication on the publisher server and select Properties. See the following image:
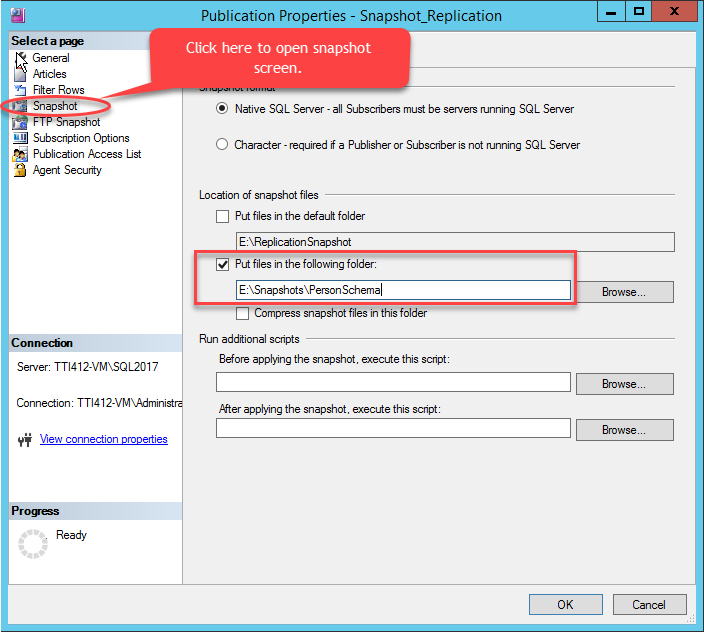
The Publication Properties dialog box opens. In the dialog box, select Snapshot. On the Snapshot screen, clear the Put files in the default folder option and select the Put files in the following folder option. Provide a new path in the text box and click OK. See the following image:
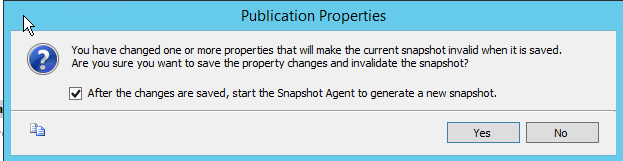
When we perform this change, the current snapshot becomes invalid. Hence after changing this setting, you will get a warning as shown in the following image:
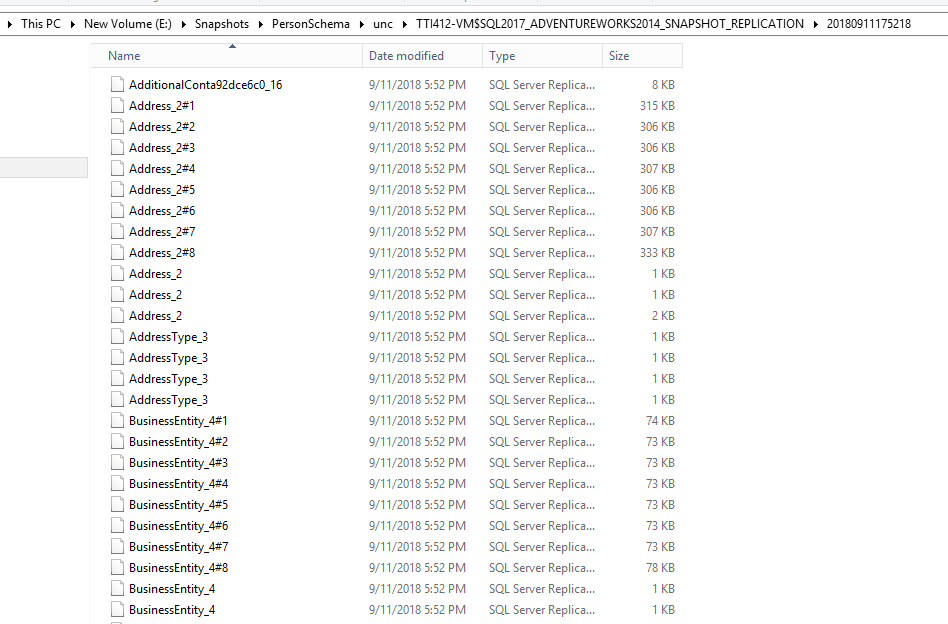
Click yes. It will generate a new snapshot and save snapshot files on E:\Snapshots\PersonsSchema\unc. See the following image:
Viewing Replication Status
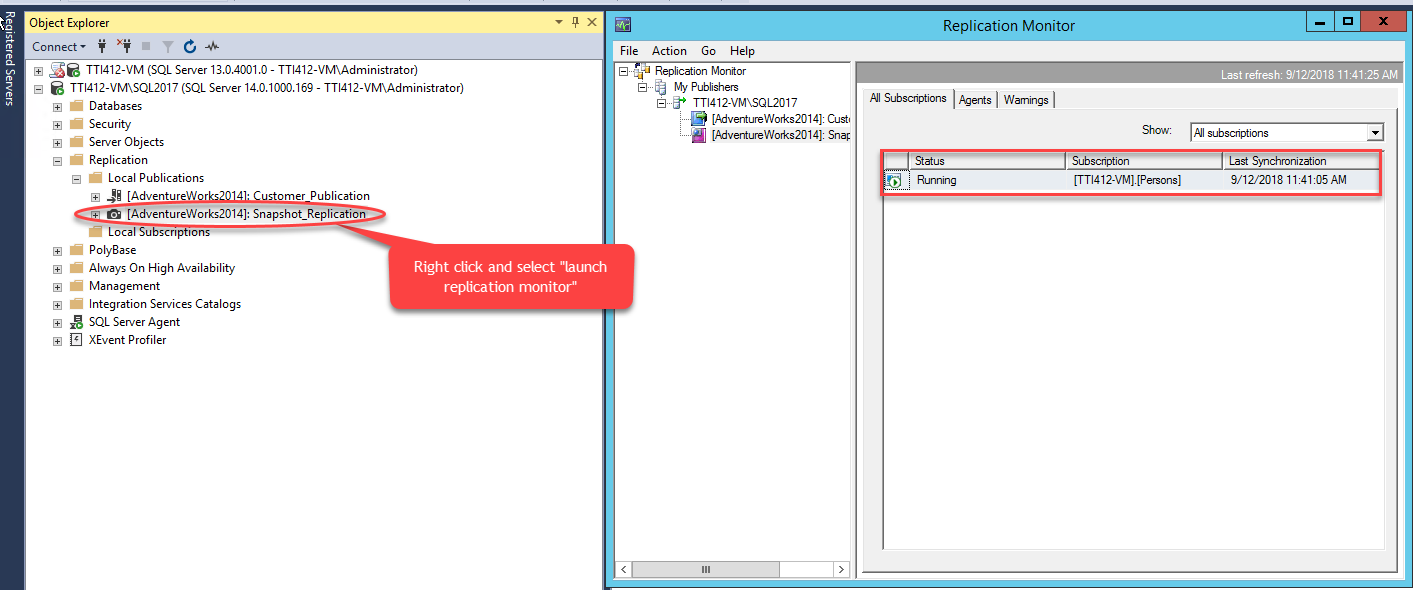
You can use Replication Monitor to view the replication status. To open the replication monitor, expand the Replication node >> expand Local Publications >> right-click Snapshot_Replication and select Launch Replication Monitor. See the following image.

Using the replication monitor, you can view:
- Status of replication
- List of subscription
- Last synchronization date and time.
Using the replication monitor, you can view that status of agent and jobs related to the job. To view it, select Agent on the Replication Monitor dialog box. See the following image:
Under the Agent tab, you can view the following details:
- Status of publication job.
- Name of publication job.
- Last start date and time of publication job.
- Duration to complete time of publication job.
- The last action was taken by publication job.
Summary
In this article, I had explained:
- High level is summary of snapshot replication.
- How to configure publisher and subscriber.
- Replication monitor and its usage.
Useful tools:
dbForge Data Compare for SQL Server – powerful SQL comparison tool capable of working with big data.
dbForge Schema Compare for SQL Server – reliable tool that saves your time and effort when comparing and synchronizing databases on SQL Server.