Azure data studio is a cross-platform database management tool. This tool is used to connect, configure, and administrate SQL Server instances installed locally or in the cloud. This tool can be installed on the following operating systems:
- Microsoft Windows
- Linux
- Redgate
- Debian
- Ubuntu
- macOS
Initially, Microsoft introduced this tool as the “SQL Server operations studio.” Later they renamed it Azure Data Studio. You can get more information about it here.
In this article, I am going to explain the step-by-step installation process of SQL Server 2017 and Azure data studio on Ubuntu. I have divided the article into two parts. Firstly, we will install SQL Server 2017, and later I will explain the process of installing Azure Data Studio. For demonstration purposes, I have created a virtual machine and installed Ubuntu 18.04 on it. You can download Ubuntu here.
Install SQL Server 2017 vNext
The entire installation process will be performed using the command-line. SQL Server installation is entirely different. An active internet connection is required because all required packages and repositories will be downloaded directly. Before starting the installation process, make sure that the server is connected to the Internet.
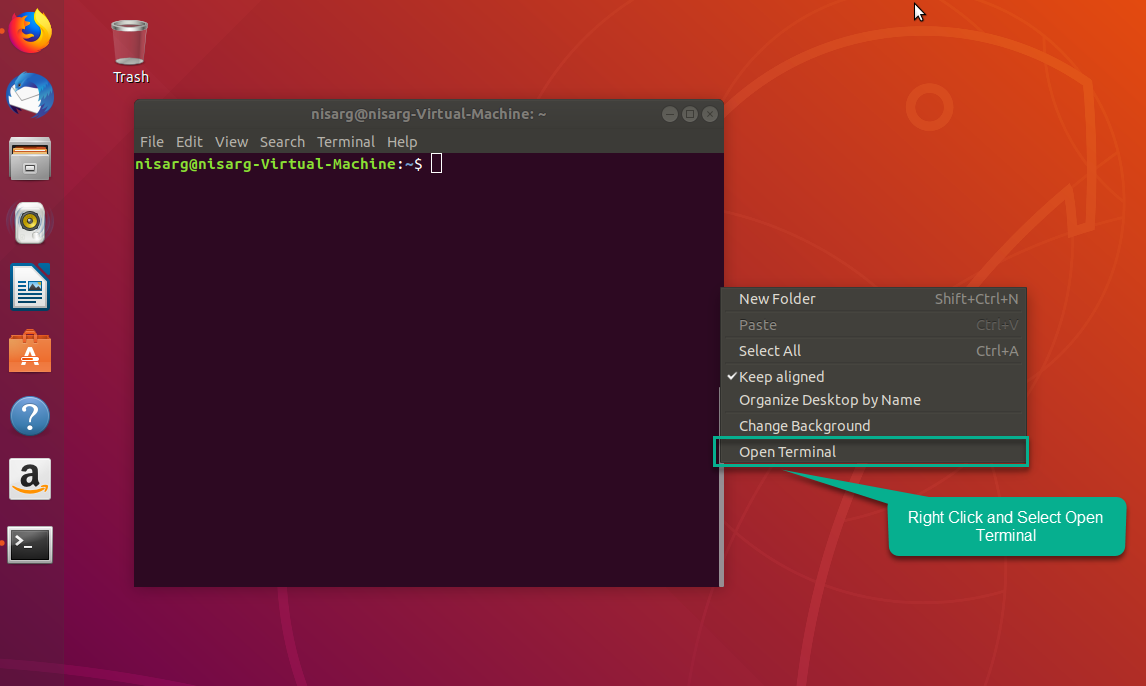
To Install SQL Server on Ubuntu Linux, you would first need to open the terminal. To do that, right-click on the desktop and select Open Terminal. See the following image:
We will perform the following tasks:
Step 1: Import GPG keys. These keys will be used to establish a trust relationship between Ubuntu and the Microsoft SQL Server repositories. To do that, execute the following command in the terminal:
-qO- https://packages.microsoft.com/keys/microsoft.asc | sudo apt-key add -
Step 2: Install curl. To do that, execute the following command in the terminal:
sudo apt-get install curl
Step 3: Install networking tools. Execute the following command in terminal:
sudo apt-get install curl
Step 4: As we are installing the preview version of SQL Server 2017, we must register the SQL Server repository for Ubuntu. To do that, execute the following command in the terminal:
sudo add-apt-repository "$(wget -qO- https://packages.microsoft.com/config/ubuntu/16.04/mssql-server-preview.list)"
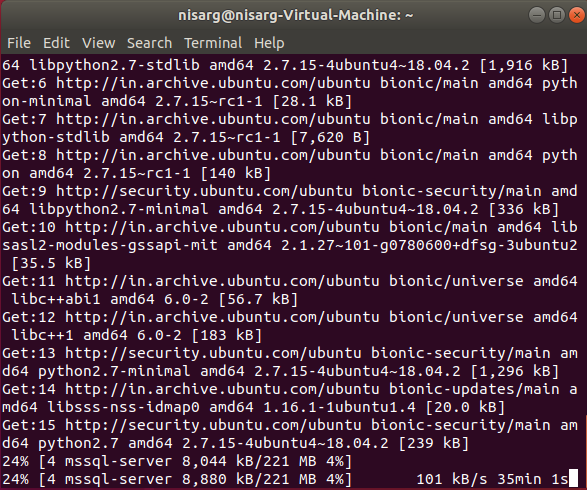
Step 5: Execute the following command to install SQL Server. The installation process will take some time.
sudo apt-get install -y mssql-server
Step 6: Once the installation is completed, we must configure the SQL Server Instance. To do that, we will execute the following command in the terminal:
sudo /opt/mssql/bin/mssql-conf setup
The configuration script will prompt you to enter the SQL Server edition, Language, and SA password. Enter the desired values and press Enter.
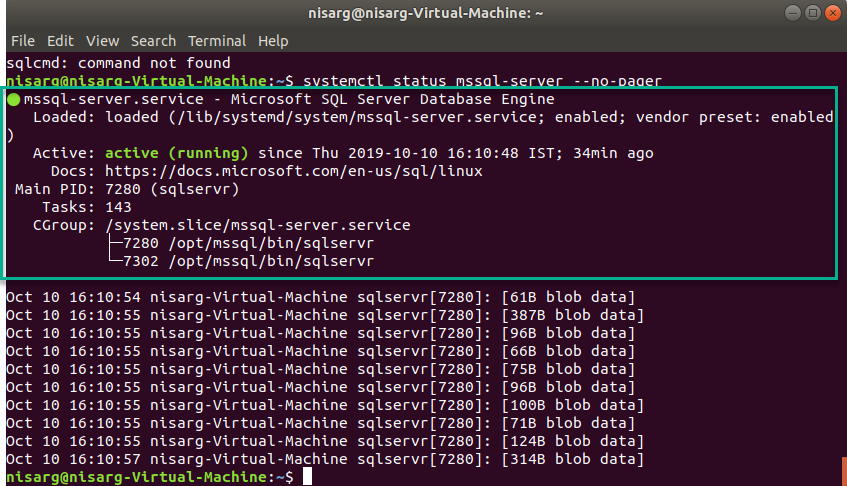
Once the SQL Server installation is completed successfully, execute the following command to verify that the SQL Server service is running properly.
systemctl status mssql-server --no-pager
Following is the output:
Install SQL Server command-line tools
Once SQL Server is installed, we will install SQL Server command-line tools, which will allow us to connect SQL Server using the command line (Terminal). To do that, perform the following steps:
Step 1: Import the public key. We have already installed curl, so we will use curl commands instead of wget commands. Execute the following command in the terminal:
curl https://packages.microsoft.com/keys/microsoft.asc | sudo apt-key add -
Step 2: Register the MSSQL Ubuntu registry. Execute the following command in the terminal:
curl https://packages.microsoft.com/config/ubuntu/16.04/prod.list | sudo tee /etc/apt/sources.list.d/msprod.list
Step 3: Run the following command to install SQL Server command-line tools with unixODBC developer:
Sudo apt-get update
sudo apt-get install mssql-tools unixodbc-dev
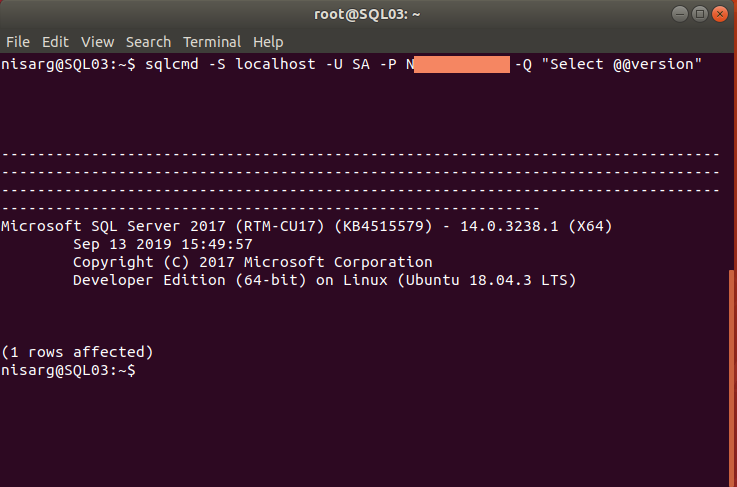
Once the tools are installed, try to connect to SQL Server using the following command:
Sqlcmd -S localhost -P <YourPassword> -Q “Select @@version”
The output should be like the following:
Install Azure Data Studio
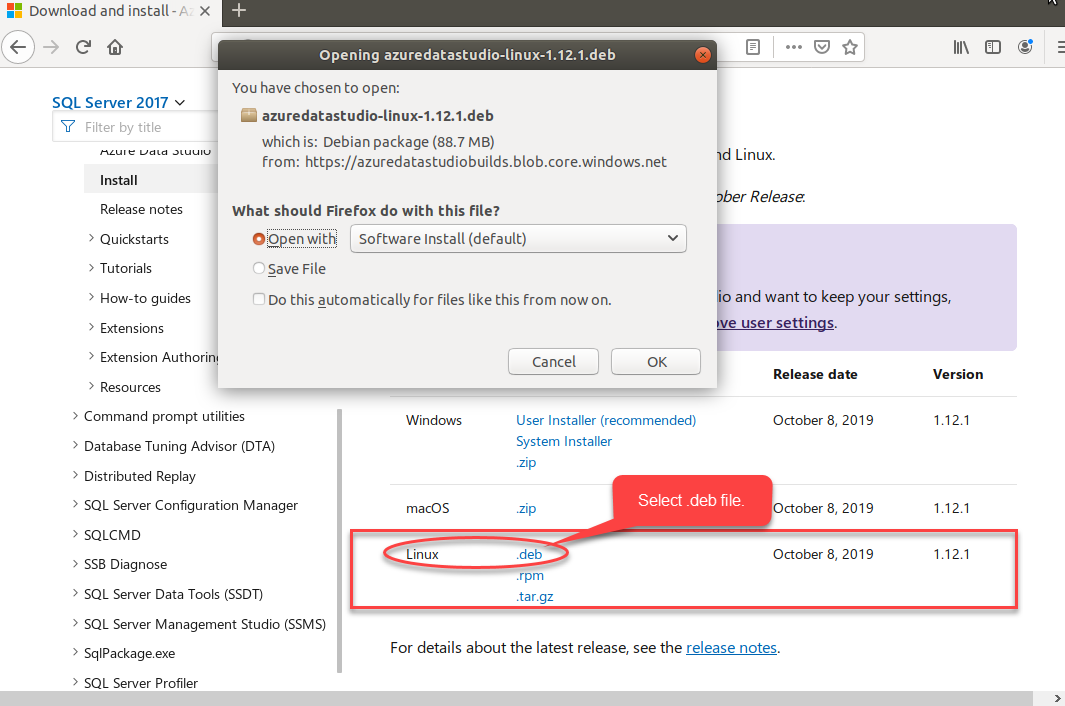
Now, Let’s install Azure data studio. First, we must download the Azure Data Studio from here. See the following image:
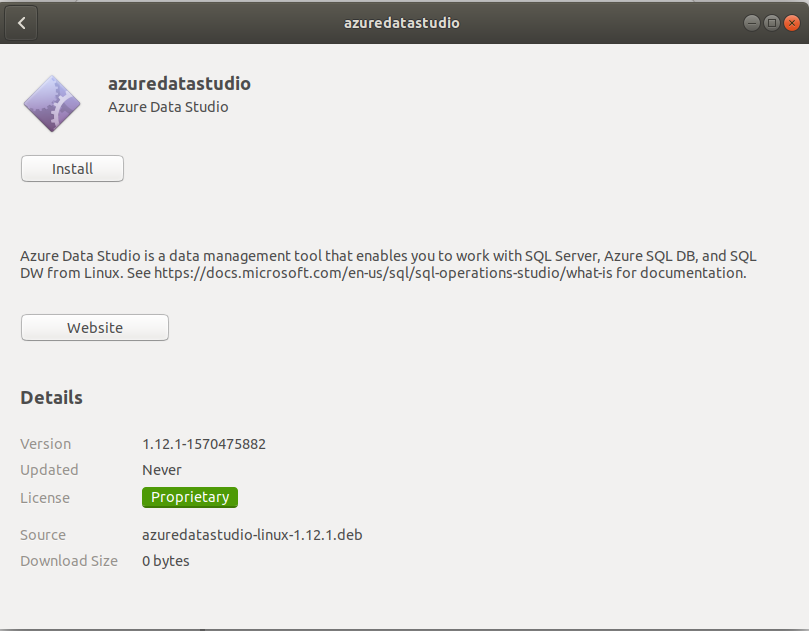
Once the download is completed, double-click the file. A Linux software installation wizard opens. In the wizard, click Install. See the following image:
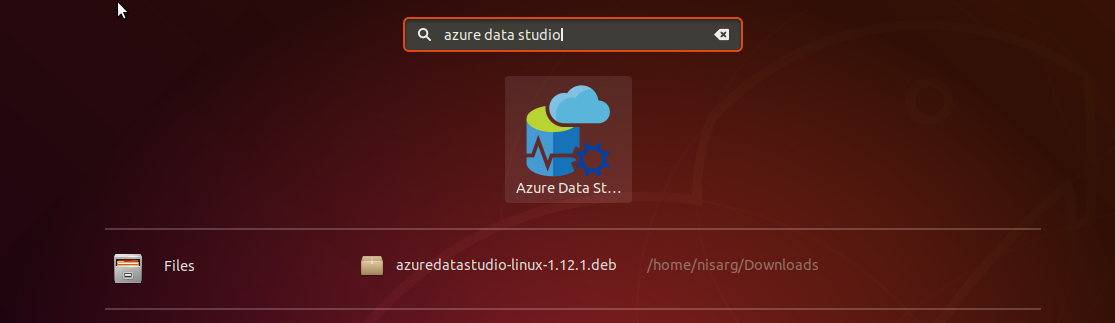
Before starting the installation process, you will need to provide the password for the current user. Once the installation is completed, let’s open it. Press the <Windows> key and type “Azure data Studio” in the search box. See the following image:
Connecting to SQL Server using Azure Data Studio
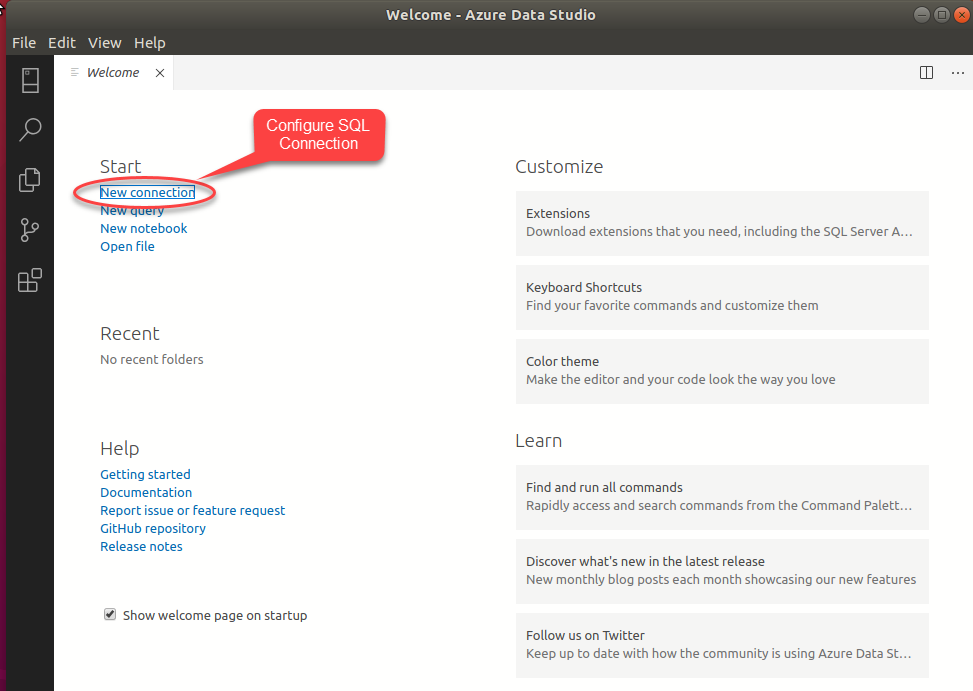
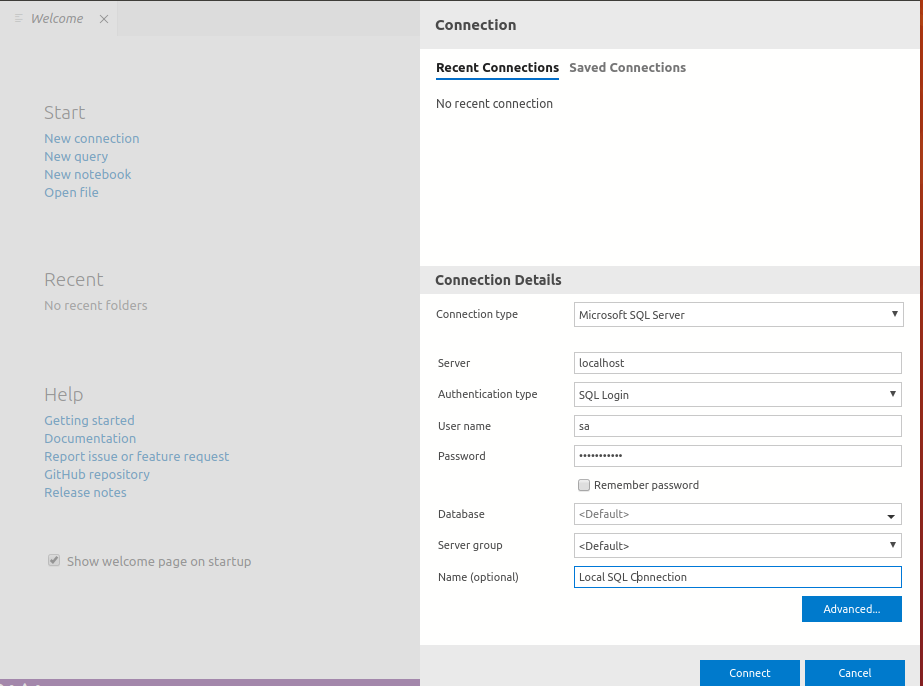
To connect to SQL Server, we will first need to configure the connection in Azure data studio. To do that, open Azure data studio and click New connection. See the following image:
In the Connection properties window, provide SQL Server name in the Server text box. Choose SQL Login in the Authentication drop-down box. Enter the user name and password in User name and Password text boxes respectively. If you want to connect to a specific database, then choose the database name from the Database drop-down box. If you have created a server group, then you can choose the name from the Server Group drop-down box. Click Connect. See the following image:
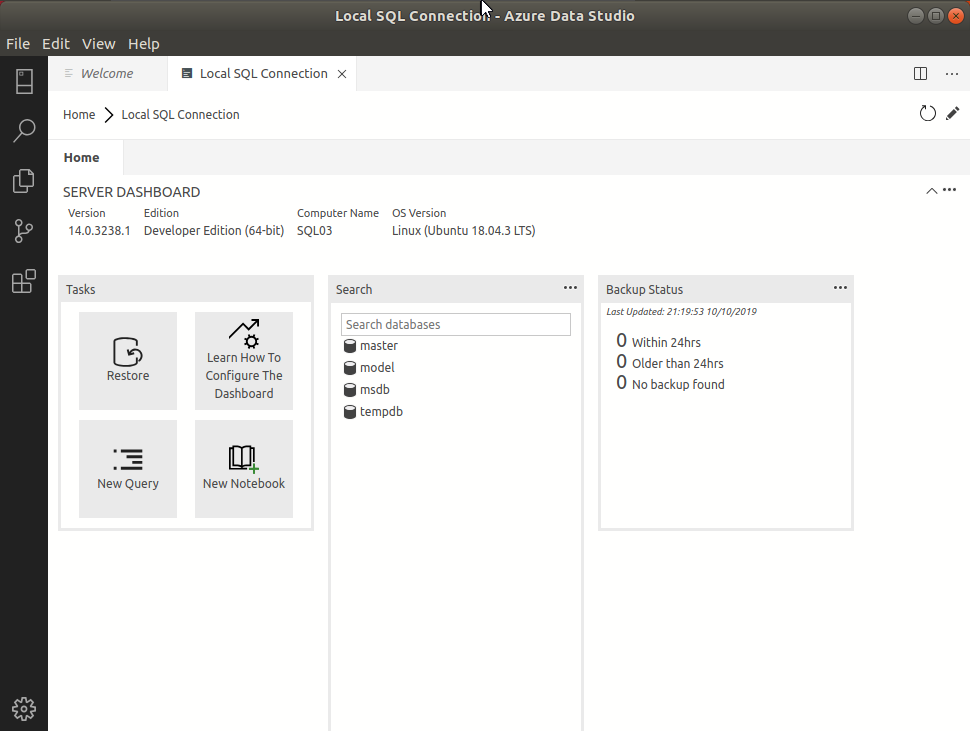
Once the connection is created, a dashboard will be opened. On the dashboard, you can see information on database servers, including the SQL Server version, edition, computer name, and operating system summary. See the following image:
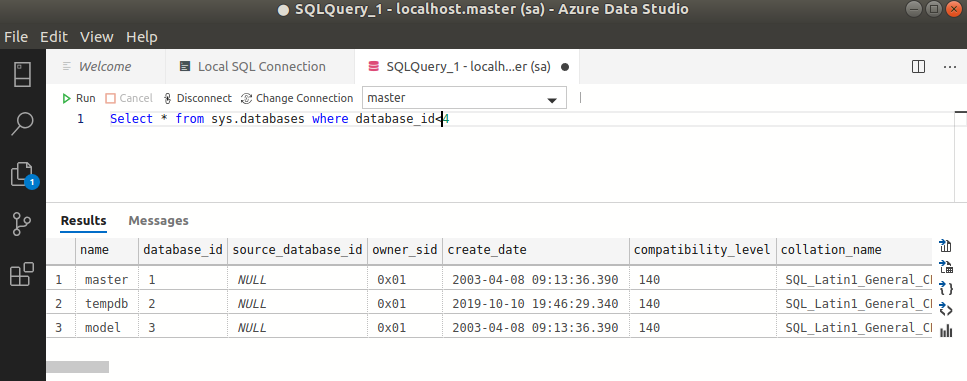
Now, let’s execute a query. To do that, click New Query. A query editor window will be opened. Write the following query and click Run to execute the query. See the following screenshot:
Summary
In this article, I have explained the process of installing SQL Server 2017 and Azure Data Studio on Ubuntu 18.04.
Tags: azure, sql server Last modified: September 20, 2021


