The current article focuses on setting up and testing the necessary environment for multicasting data with SQL Server Integration Services (Project) commonly known as SSIS Packages. Additionally, we are going to learn the concepts behind multicasting data and the ways of testing the environment.
About SSIS Packages
First, we should get familiar with SSIS Packages and their usage.
What is an SSIS Package?
An SSIS Package is like a software package that you create in an Integration Services Project for doing the data or business intelligence-related tasks.
What does SSIS stand for?
SSIS stands for SQL Server Integration Services and generally refers to SSIS Packages.
What is an Integration Services Project?
An Integration Services Project (IS) is a type of project that allows you to create SSIS Packages.
Which Tool serves to create an Integration Services Project?
The most commonly used tool for creating Integration Services Project(s) is Visual Studio – it allows creating as many projects as you like.
Where can I get Visual Studio?
The Visual Studio community edition is free to use for individual developers, subject to terms and conditions. You can download it from Microsoft’s official website or directly at the below link (it is active at the time of writing this article):
Visual Studio 2019 Community Edition
How can I set up Visual Studio to create an Integration Services Project?
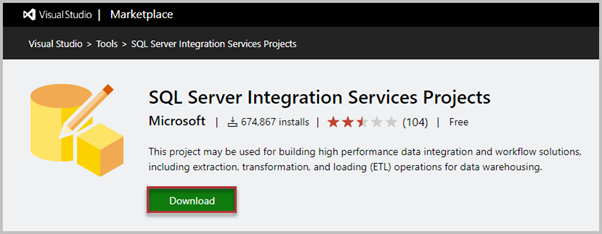
To create SSIS Packages, you need to add the SQL Server Integration Services Projects extension to Visual Studio. The extension is available at the Microsoft marketplace:
What is Data Integration?
Data integration is a process that lets you integrate (join) data from different sources (databases) into one place for further manipulations. The Data Warehouse Business Intelligence solutions demand data integration constantly.
The process includes one or more tasks that we can process by creating SSIS Packages in the Integration Services Projects.
What is multicasting data?
Multicasting data is the possibility to load data to more than one destination (databases).
Why do we need multicasting data?
Multicasting data is necessary when you have to copy exactly the same data to two different destinations. It is quite a common practice in business intelligence or database solutions.
How can we multicast data?
We can multicast data with the help of the transformation available in the SSIS Package – the Multicast Transformation.
Setting up the environment for the SSIS Multicast Transformation
Before we multicast data to multiple destinations with SSIS Package, we have to set up and test the environment.
Prerequisites
The article assumes that the readers have fulfilled the following requirements:
- Visual Studio with the SQL Server Integration Services extension is installed.
- A local or remote instance of SQL Server is installed.
- Basic know-how of writing and running T-SQL scripts.
- Understanding the basics of Visual Studio and SSIS Packages.
Besides, it would be beneficial to have any conceptual or practical understanding of Business Intelligence solutions.
Create a Source Database
First, let’s create a source database called DesksSource containing the information about different types of desks available for sale.
Write and execute the following T-SQL script to setup the source database:
-- Create sample database DesksSource
USE MASTER
GO

CREATE DATABASE DesksSource
GO

USE DesksSource

-- Creating a reference table DeskType
CREATE TABLE dbo.DeskType
(
	DeskTypeId INT IDENTITY(1,1),
	Name VARCHAR(50)NOT NULL,
	Detail VARCHAR(200)NULL
	CONSTRAINT PK_DeskType_DeskTypeId PRIMARY KEY (DeskTypeId)
)
GO

 -- Populating (adding rows to the) table DeskType
 SET IDENTITY_INSERT dbo.DeskType ON
 GO
 INSERT INTO dbo.DeskType
 (
   DeskTypeId
  ,Name
  ,Detail
 )
 VALUES
 (
   1  -- ID - INT Primary Key
  ,'Office Desk' -- Name - varchar(50) NOT NULL
  ,'This is Office Desk' -- Detail - varchar(200)
 ),
 (
   2  -- ID - INT Primary Key
  ,'Writing Desk' -- Name - varchar(50) NOT NULL
  ,'This is Writing Desk' -- Detail - varchar(200)
 ),
 (
   3  -- ID - INT Primary Key
  ,'Drawing Desk' -- Name - varchar(50) NOT NULL
  ,'This is Drawing Desk' -- Detail - varchar(200)
 );
 GO
 SET IDENTITY_INSERT dbo.DeskType OFF
 GO
View the Source Data
To view the data in the source DesksSource database, execute the following query against it:
-- View data from the source database table
SELECT dt.* FROM dbo.DeskType dt
The output is:
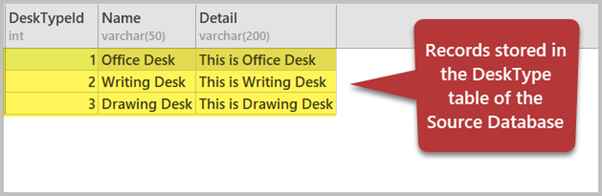
Note that I am using dbForge Studio for SQL Server, and the output layout may differ from SSMS (SQL Server Management Studio). However, there is no difference in terms of the result set returned.
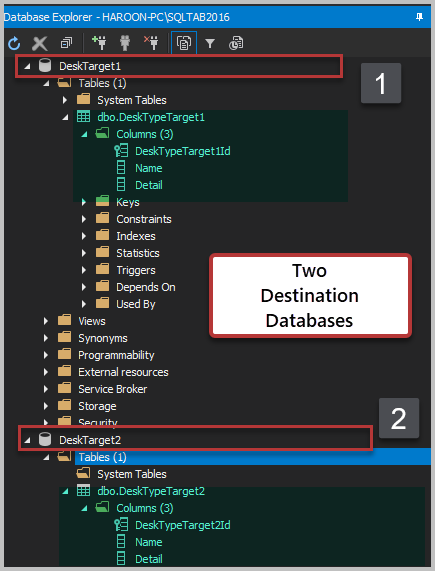
Create the Destination Databases
Next, we are going to create two destination databases:
- DeskTarget1
- DeskTarget2
At this point, we must ensure having a similar sort of table matching with the source database table in both destination databases. It is necessary for a successful data transfer.
We create the first destination database with a table as follows:
-- Create sample database DeskTarget1
USE MASTER
GO

CREATE DATABASE DeskTarget1
GO

USE DeskTarget1

-- Creating a reference table DeskTypeTarget1
CREATE TABLE dbo.DeskTypeTarget1
(
	DeskTypeTarget1Id INT IDENTITY(1,1),
	Name VARCHAR(50)NOT NULL,
	Detail VARCHAR(200)NULL
	CONSTRAINT PK_DeskTypeTarget1_DeskTypeTarget1Id PRIMARY KEY (DeskTypeTarget1Id)
)
GO
Then we create the second target database:
-- Create sample database DeskTarget2
USE MASTER
GO

CREATE DATABASE DeskTarget2
GO

USE DeskTarget2

-- Creating a reference table DeskTypeTarget1
CREATE TABLE dbo.DeskTypeTarget2
(
    DeskTypeTarget2Id INT IDENTITY(1,1),
    Name VARCHAR(50)NOT NULL,
    Detail VARCHAR(200)NULL
        CONSTRAINT PK_DeskTypeTarget2_DeskTypeTarget2Id PRIMARY KEY (DeskTypeTarget2Id)
)
GO
View the Destination Databases (DeskTarget1 and DeskTarget2)
To view the recently created databases, check the Database Explorer for the server where those databases are:
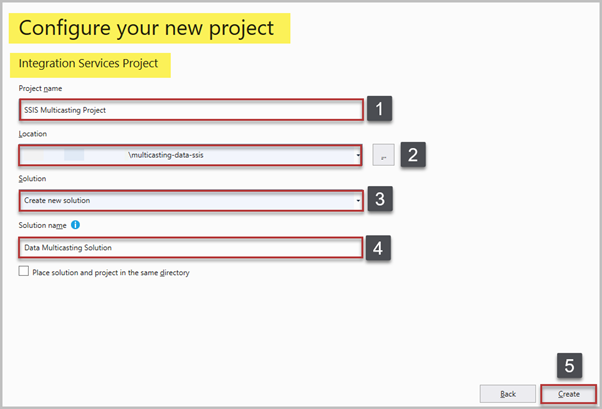
Create a new Integration Services Project in Visual Studio
In Visual Studio, we create a new Integration Services Project called SSIS Multicasting Project under the new Data Multicasting Solution name:
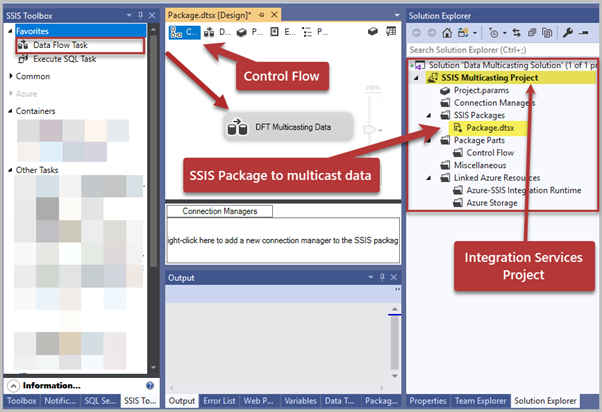
Setup the Data Flow Task
Once we are in the project, we need to plan the data flow task.
In SSIS Toolbox, drag Data Flow Task and drop it onto the surface of the Connection Flow designer. There, we rename the Data Flow Task to DFT Multicasting Data – click on the name and enter the new one:
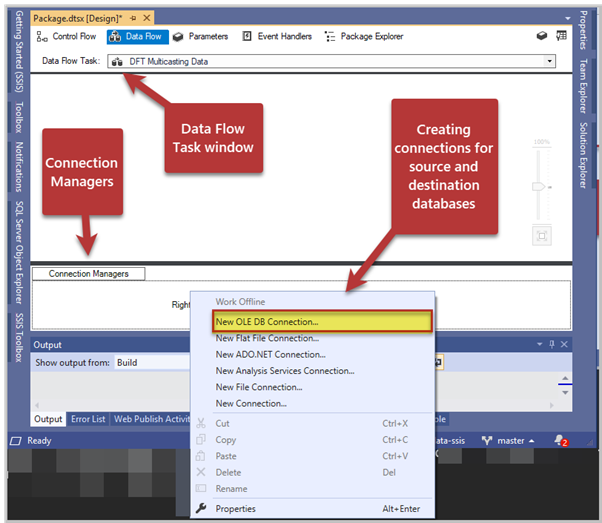
Create the Source and Target Connections
Double-click the DFT Multicasting Data task to get to the Data Flow Task window.
We need to create connections for the source and destination databases to use them to perform our tasks.
- Go to the Connection Managers section at the bottom of the Data Flow Task window.
- Right-click anywhere on the Connection Managers space > New OLE DB Connection…
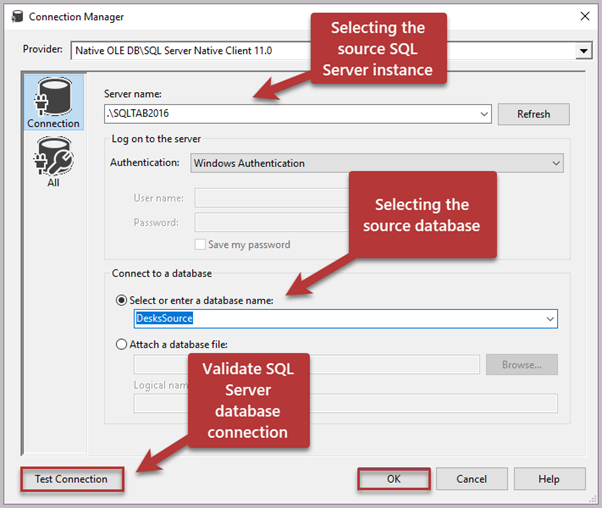
Click New > Server name (select the server where your source database is located along with selecting the source database).
Note: Test the connection – click Test Connection. If everything is fine, click OK.
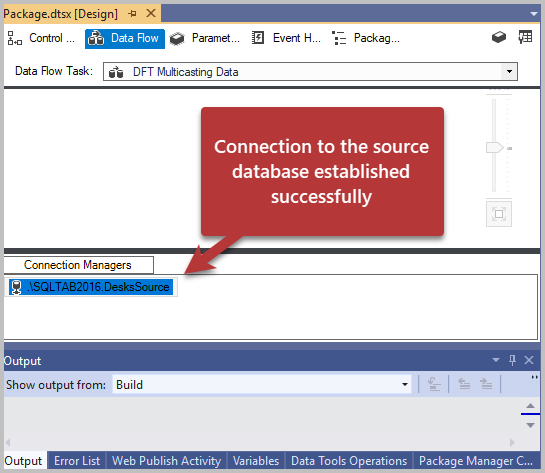
The connection to the source database should be ready for any data flow tasks:
Create Connections for the Target Databases
Similarly, you have to add two more connections for the target databases.
First, create a connection for the Target1 database. Then create a connection for DeskTarget2.
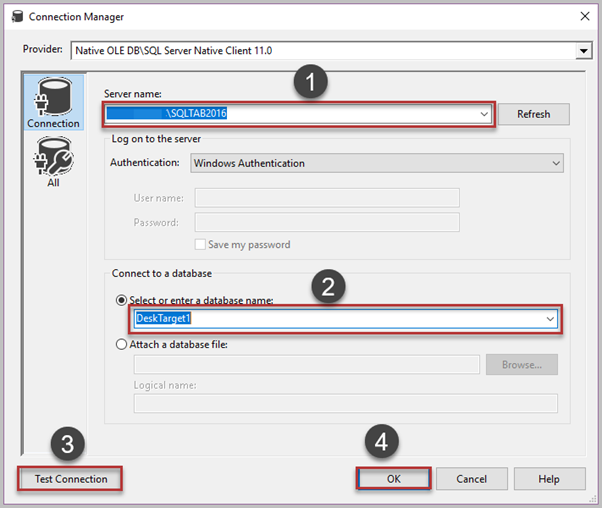
Once both connections are set, you should see them in the Connection Managers window:

Important: You can copy-paste an already created connection and modify it to create a new connection.
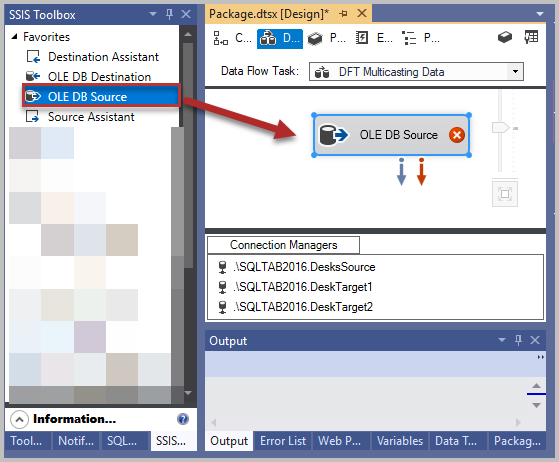
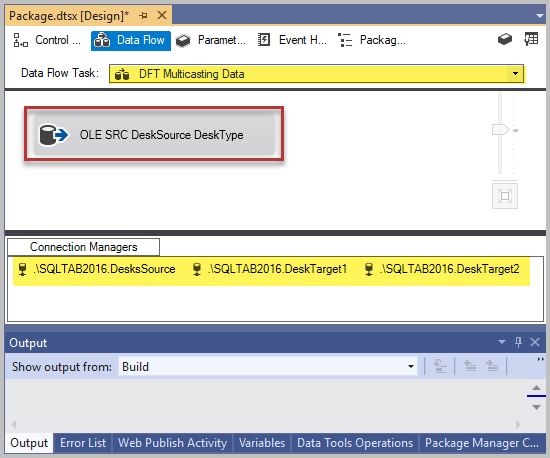
Add the OLE DB Source Component
Now bring the OLE DB Source component from SSIS Toolbox to the Data Flow Task designer surface:
Configure the source component by double-clicking it – select the DeskType source table once you’ve selected the source connection from the Connection Manager:
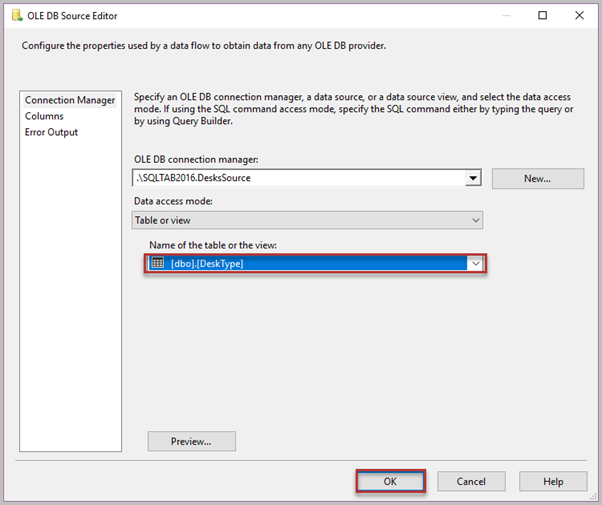
Rename the component to OLE SRC DeskSource DeskType:
Learn more about SSIS components here!
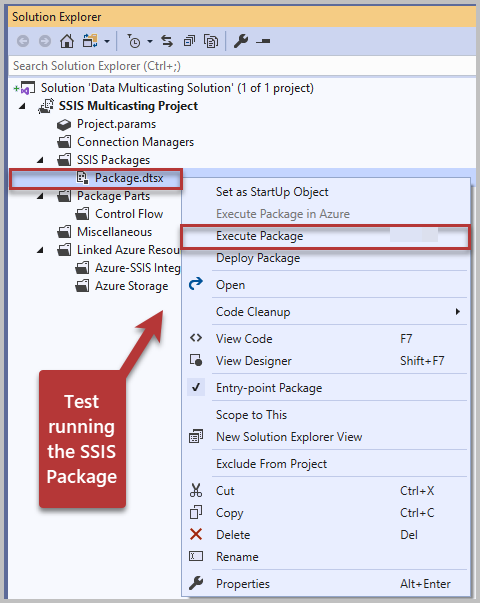
Test-Run the Package
Right-click on the package (Package.dtsx) in Solution Explorer and click on Execute Packageto test-run the package:
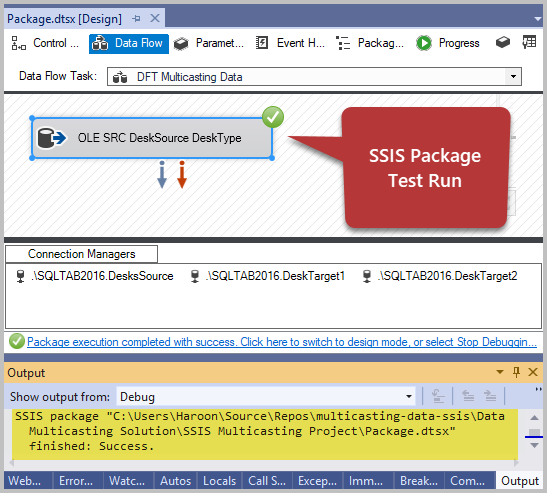
Now if the source connection is set up carefully, there is no reason for the package to fail. You’ll watch the successful package run:
An Important Tip about saving the SSIS Project
Always keep on saving your project while you work by pressing CTRL+S or clicking on the disk icon.
An even better way is to choose the Save Alloption by clicking on the two disks icon on the toolbar or choosing this option from the menu bar.
This way, you ensure you won’t lose your work if any technical failures happen.
ADD Multicast Transformation
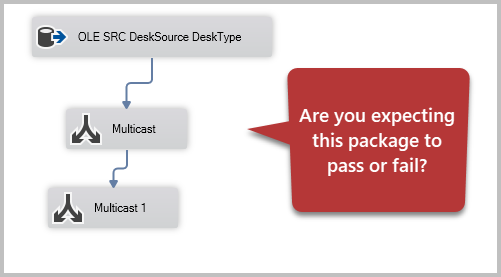
Drag Multicast Transformation from SSIS Toolbox and drop it onto the Data Flow Task surface.
Join the source component with the Multicast transformation by joining the success arrow also known as the success constraint of the source component. Remember to save your work!
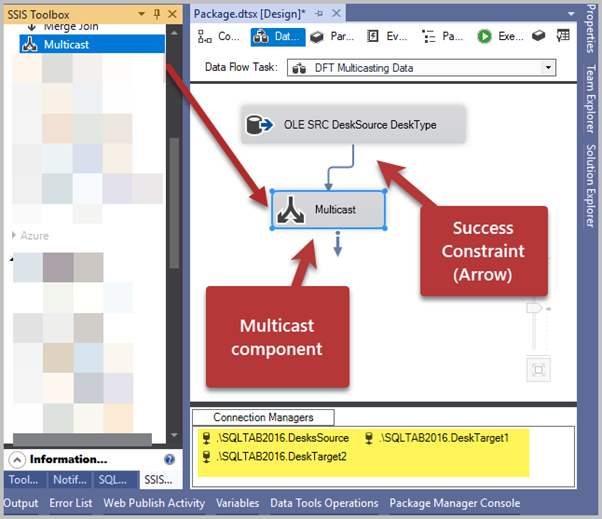
The basic setup to the Multicast data is ready, except for adding and connecting destination components with the Multicast transformation.
Test-Run Setup
Execute the package to test-run all the components including the Multicast Transformation:
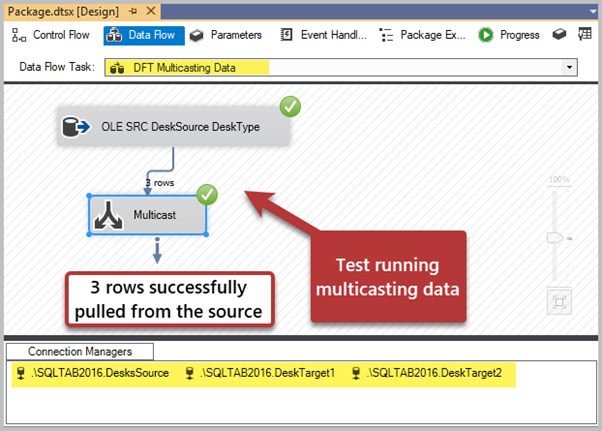
The test results indicate that SSIS Package has successfully pulled all the 3 rows from the table of the source database to be fed into the Multicast Transformation component which we can then send to multiple destinations.
Congratulations! You have successfully understood the concepts behind multicasting data as well as setting up and testing the environment to multicast data.
Things to do
We can set up and test the environment to multicast data with SSIS Package. So, try the following exercises to improve your skills:
- Try to set up another environment by creating another Integration Services Project. Use the BooksSample sample database which contains the Book table mentioned in SQL Server DELETE – Removing One or More Rows from a Table article.
- Add one more row to the DeskType table and test-run the multicasting environment to see if you are getting 4 rows this time.
- Try removing all the data from the DeskType table and see what happens if you execute the package to test it.
- Try adding one more Multicast Transformation by joining the existing transformation with it. Test-run the package.