
SQL Server is one of the most popular databases used in modern applications. Over the past few decades, it has established itself as a leading database provider that drives most of the applications in the Microsoft ecosystems. It provides unique features and easy integration with technologies.
SQL Server was previously released as a Microsoft Windows application that could be installed on desktops or servers and then connected via the GUI or any client application. Now, with the rise of cloud computing, SQL Server can be used directly without complex installations and setups. You can hop onto the cloud provider of your choice like Azure or AWS and start configuring SQL Server.
In Azure, it is provided as a service called Azure SQL Database, and in AWS, the name of the service is RDS, Relational Database Service.
Prerequisites for Configuring SQL Server on the Amazon RDS
To configure SQL Server on the Amazon RDS, we need to have the following prerequisites.
- A valid AWS Account
- SQL Server Management Studio
Once they are ready, we can head over to the next section.
Configuring Amazon RDS for SQL Server
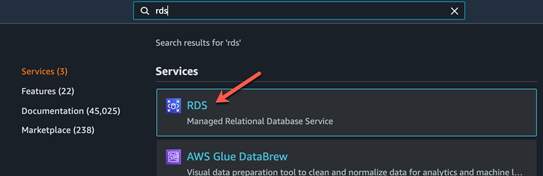
Navigate to the AWS console and sign in or register as a new user. Once logged in to the console, search for RDS by entering the term into the search bar. When the system picks it, click the service.
This will open the dashboard for the Amazon RDS.
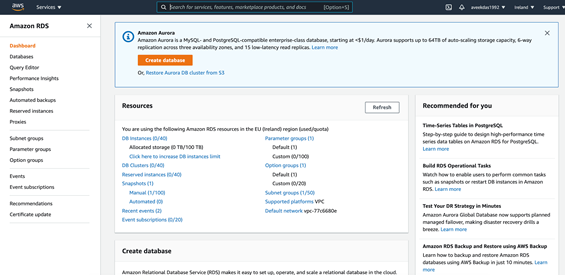
In the Amazon RDS Dashboard, you can view an overview of all databases that have been created and are running under your AWS Account. Since this is a new account, I do not have any RDS instances running at the moment. Let’s create one.
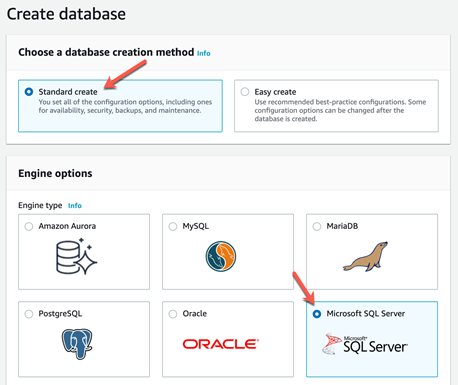
Click Databases on the left panel and click Create Database. This will bring up the new database creation page. Select Standard Create as a database creation method. For the Engine options, select Microsoft SQL Server.
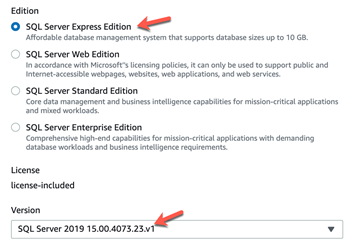
Once the database engine was selected, the next is to select the SQL Server edition. In this article, we are going with the SQL Server Express Edition.
Also, select the latest version of the SQL Server Engine from the Version dropdown menu.
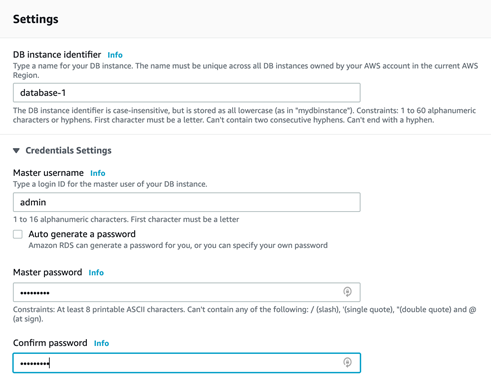
In the next step, you need to configure settings for the SQL Server instance. Here, we are to provide the DB Instance Identifier, i.e. the name of the SQL Server instance. We also need to set the database credentials. Select a username and a password of 8 or more characters.
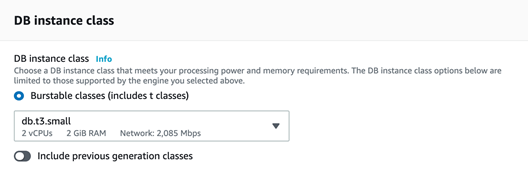
Next, we select the database instance class that decides how many resources will be allocated to the SQL Server instance. Select Burstable classes and the db.t3.small option from the dropdown.
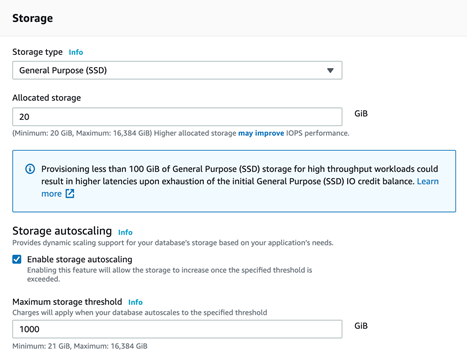
Storage is an essential part of configuring an SQL Server instance. The throughput that the database provides depends on the type of storage used in the database instance.
Here, we need to select the General Purpose (SSD) as the Storage type and the Allocated Storage as 20 GB. Check the box for Enable storage autoscaling as this will automatically increase the space when the database grows.
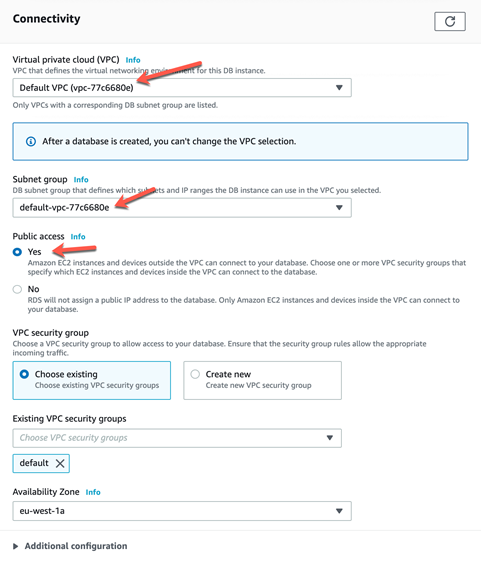
Once the Storage section is configured, we can set up the networking and connectivity details such as:
- VPC – stands for Virtual Private Cloud. It is a virtual private network in which all your instances will be launched in AWS. It can isolate similar resources from those that should reside in other networks.
- Subnet Group – a division within the VPC. You can select the default value for this.
- Public Access – defines if the SQL Server instance that you are creating needs to be accessed via the internet. If set to No, only resources from the VPC can access it. We should set it to Yes to connect to it using the SQL Server Management Studio.
- VPC Security Group – It is a security group that governs the security for the VPC. Set it by default.
- Availability Zone – physical data centers within the AWS region in which you want your resource to be created.
Now we can create the RDS database. Review the Estimated Monthly Costs and click Create Database.

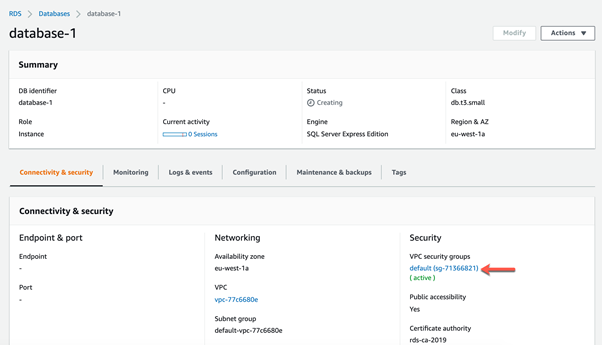
Once the resource is created, you can see it on the dashboard.
Configuring Ports for Public Access
Now we need to allow connections to the port that the SQL Server will listen on. This is necessary for connecting the SQL Server instance from outside the VPC, i.e. from our local machine.
Open the database page and click VPC Security Groups. Then click the Security Group ID under the VPC Security Group.
Click Edit Inbound Rules and then Add Rule.
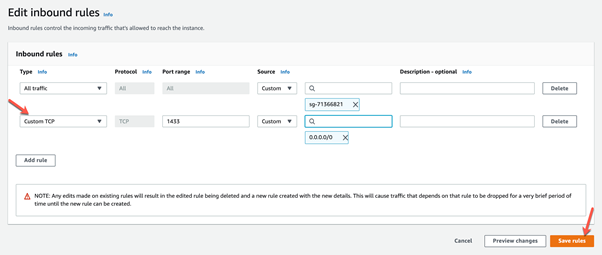
Select Custom TCP and enter 1433 in the Port range. This is the default port on which SQL Server accepts connections. Select the Source as Anywhere 0.0.0.0/0 and click Save Rules.
Connecting the SQL Server Database Engine
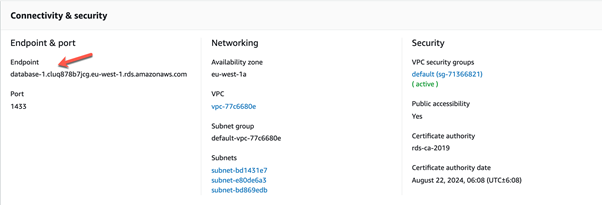
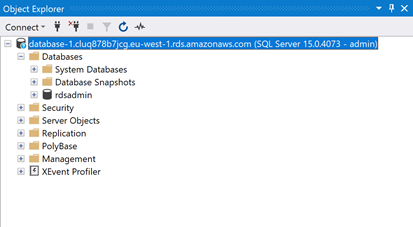
When all the configurations are in place, we can use SQL Server Management Studio to connect to the database instance. Copy the Endpoint from the console and paste it as the Server Name into the SSMS Connection box.
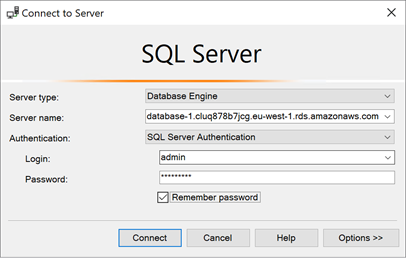
Define the Authentication as SQL Server Authentication and provide the credentials. It will connect to the instance and then you can use the database as required.
Conclusion
In this article, we have configured SQL Server in Amazon RDS using the free tier available. Amazon provides 750 hours of free database services for the users during their first year of using AWS.
Once you have configured the database service, it is essential to open ports to connect to the database engine from the Internet. In this article, we have used SQL Server Management Studio. To learn more about the Amazon RDS, please refer to the official documentation.
Tags: amazon rds, sql server, ssms Last modified: October 27, 2022