Managing numerous database servers in an organization is difficult. Either we must maintain a list or maintain an Excel file that has a list of database servers. To retrieve basic information about SQL Instance or databases, DBA must query on individual database servers. If a developer wants a DBA to execute an SQL Script on all database servers, DBA must review the list of servers and execute them one by one, which is time-consuming and error-prone. It might happen that DBA missed any server where it was required to execute. Imagine the cases when DBA must execute the script on specific database servers. It becomes very painful. This task can be performed using the PowerShell scripts but again, it requires some complex PowerShell coding. This task can be managed more efficiently using “Registered Servers”.
Registered servers are ones of the SQL Server Management Studio’s hidden gems. Using registered server, DBA gets the ability to execute SQL Query on multiple servers. It helps to administrate multiple database servers. DBA can generate various database reports without accessing an individual database server. We can give a name to each server to easily identify it from a large number of servers.
Below are the benefits of using registered servers:
- Viewing the status of SQL service on registered servers.
- Evaluation of SQL Server policies on multiple servers.
- Creation of a group of servers and provide a user-friendly name.
- Opening object explorer and query editor window of the individual registered server or the entire group.
Registered servers can be created in two ways:
- Using Central Management Servers.
- Using Local server group.
Central Management Server
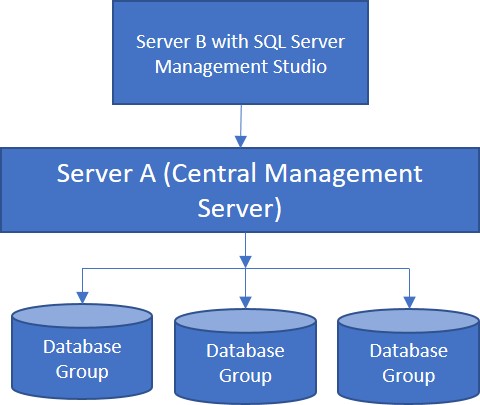
Central Management Server is an SQL server instance which organizes one or more central management server groups. It stores the list of registered SQL instances in a Central management server instance. Whatever action is performed on the central management server group, it applies to all the servers. We can connect servers by using Object Explorer and execute T-SQL queries across multiple servers. And the best thing is that we can connect from other servers using SQL Server Management Studio. For example, SQL instance of server A has been designated as a central management server with multiple SQL servers registered which can be accessed using SSMS of Server B. See the image below:
ServerGroupAdministratorRole and ServerGroupReaderRole Roles
Central Management Server uses the Windows authentication. To configure CMS, a user must have the “ServerGroupAdministratorRole” and “ServerGroupReaderRole” database roles on the MSDB database. Members of ServerGroupAdministratorRole can configure and administrate central management server and membership of “ServerGroupReaderRole” is required to connect the central management server.
Configuring Centralized Management Servers
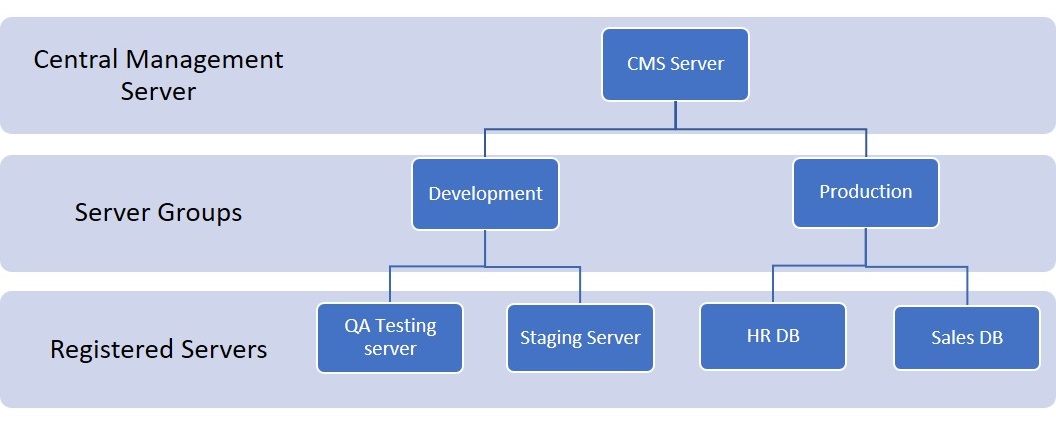
As I mentioned, using CMS, we can create a hierarchical group of registered servers. This configuration can be accessed and configured via T-SQL. In this demo, I am going to explain the process of configuring CMS. We are going to create a hierarchy as shown in the image below:
We will:
- Designate a SQL Server instance as “Central Management server”.
- Create server groups named Production servers and Development servers under CMS server.
- Register “QA Testing server” and “Staging server” under the development server group, and “HR DB” and “Sales DB” under the production server group.
- Connect and access the CMS server from another server inside the same domain using SSMS.
How to Register Central Management Server in SSMS
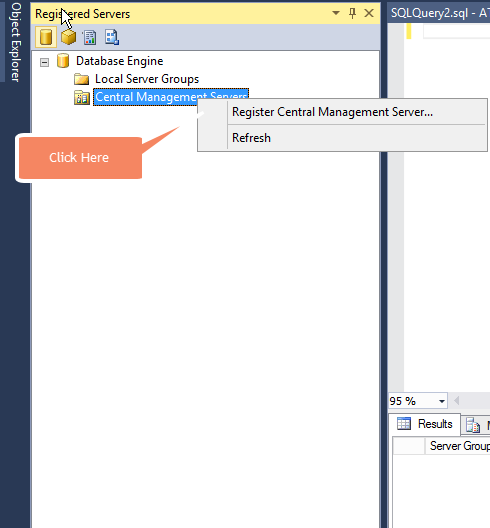
I have created an instance specifically for designating it as a CMS. First, we will register Central Management server. To do that, right-click “Central Management servers” underneath the Local server group and click “Register central management server”, as shown in the following image:
Once you click “Register Central Management Server”, the “New Server Registration” dialogue box will open for configuring connection properties. See the following image:
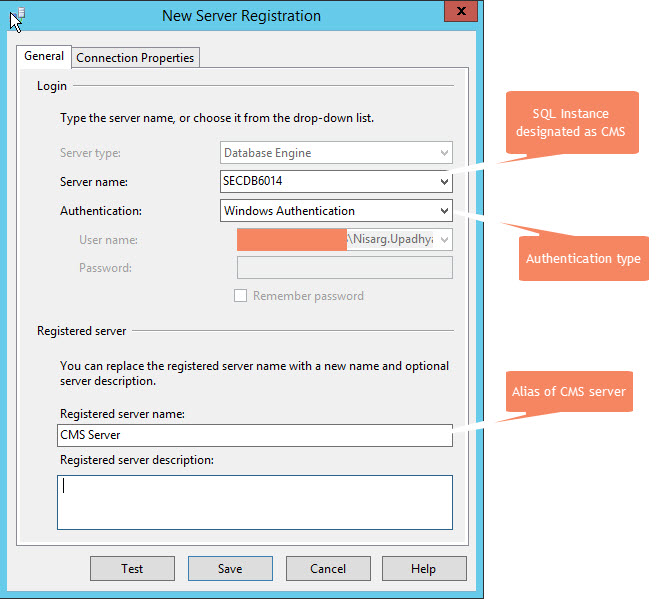
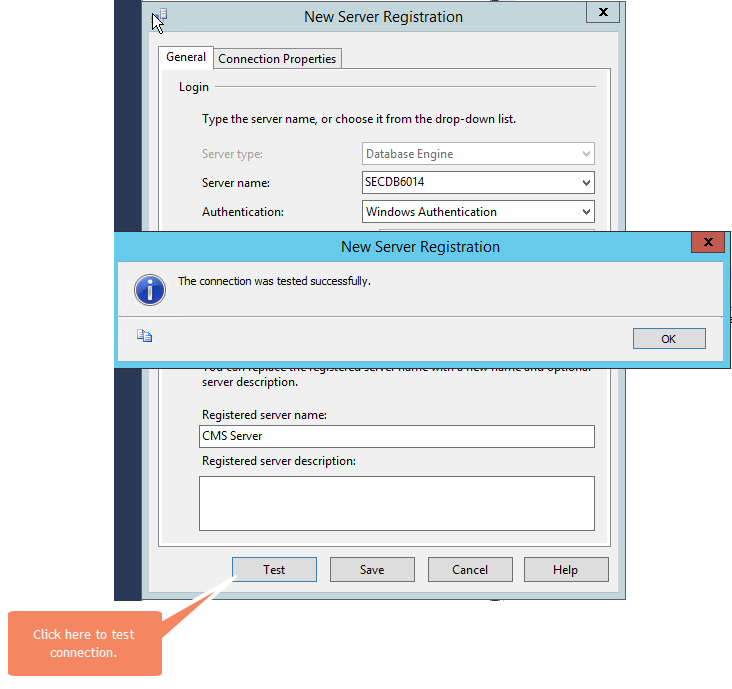
As shown in the above image, in the “Server Name” drop-down, select the hostname or IP address of the server, designated as “Central Management Server”. In the Authentication drop-down box, Select “Windows Authentication”. We can give an alias to CMS instance, e.g. “CMS Server”. To verify the configuration, click Test. If the connection is configured properly, the connection test will be successful. See the following image:
Creating Server Groups under Central Management Server
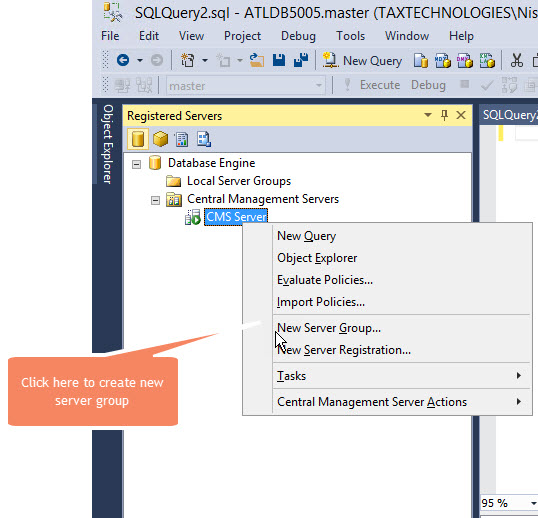
After designating instance as a CMS, we will create multiple groups under CMS, and under the respective groups, we will register servers. To do that, right-click “CMS server” and select “New Server Group”. See the image below:
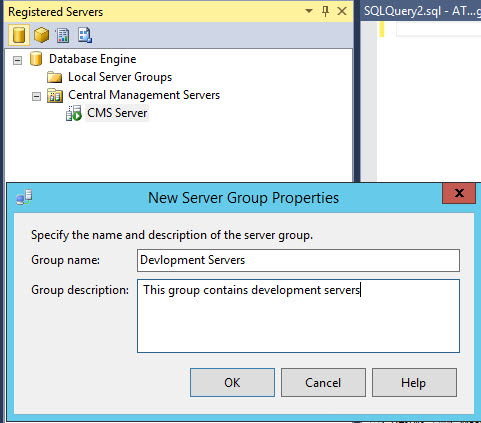
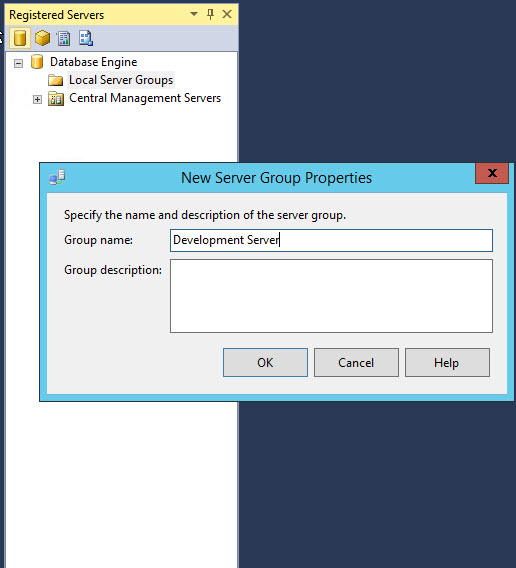
The “New server group properties” dialog box will open. In the “Group name” text box, give an appropriate name of the server group and click OK. I am going to register development servers under this group, hence the group name will be “Development servers”. See the following image:
Registering Server under Server Group
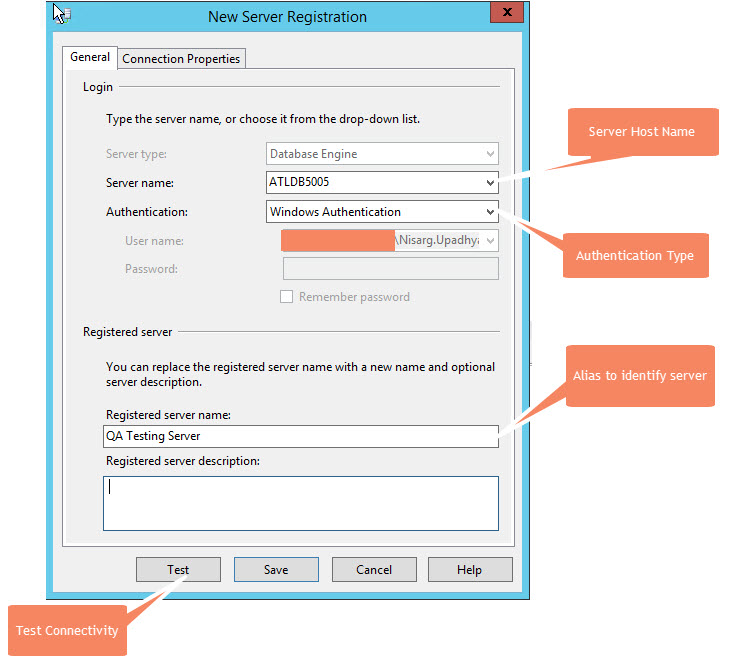
Once the group is created, we will register servers under those groups. To register the servers under the “Development Servers” group, right-click the “Development server” folder and select “New server registration”. The “New server registration” dialog box will open. In the dialog box, select a hostname / IP address of a server from the “Server Name” drop-down box. In the “Authentication” drop-down, select “Windows authentication”. Name registered server as “QA testing server”. Click “Test” to test the connectivity and close the dialog box as shown in the following image.
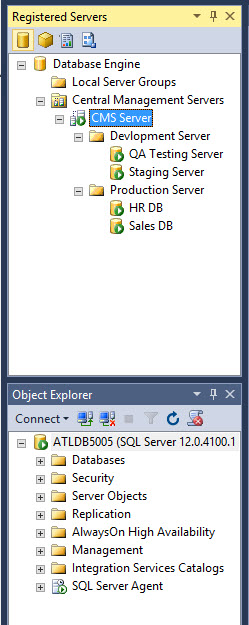
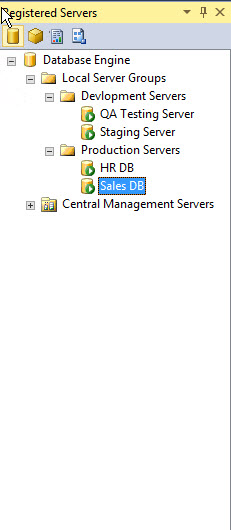
Same way, I will register another server named “Staging Server” under the “Development server” group. Then I will create another server group named “Production Server” and register two servers named “HR DB” and “Sales DB”. The entire hierarchy will look in the following way:
Accessing Central Management Server from Another Server
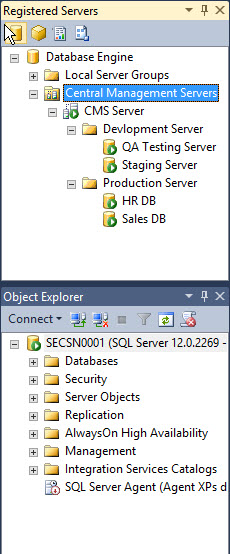
Once CMS configuration is completed, we will connect CMS server from a different host and verify the list of registered servers. To do that, we will register CMS server from another host. Follow the same process which we performed to register the CMS server. The only difference is that in the “Server Name” drop-down box, we select hostname of the server designated as Central Management server. SQL will read configuration automatically and you’ll access the entire hierarchy from the different host. See the following screenshot:
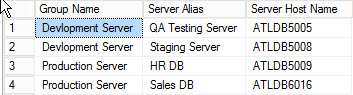
We can review the configuration of central management server by executing the query below. Below SQL, will show the registered servers and their groups.
SELECT
      G.name AS [Group Name],
      S.name as [Server Alias],
      S.server_name AS [Server Host Name]
FROM    msdb.dbo.sysmanagement_shared_server_groups_internal G
LEFT JOIN msdb.dbo.sysmanagement_shared_registered_servers_internal S
      ON G.server_group_id = S.server_group_id
WHERE G.server_type = 0 --only the Database Engine Server Group
AND server_name IS NOT null
Below is the output:
Central management servers have a disadvantage. CMS does not use SQL server security because passwords are not stored. Hence accessing it from outside of domain is impossible from SQL Server Management Studio. So, we must use local server groups on the individual registered server.
Local Server Groups in SSMS
As the name suggests, Local server group should be created locally on the database server. Using the local server group, we can create a hierarchical list of database servers. Unlike central management server, it cannot be accessed directly from another server. To do that, we should export the configuration and import it to another server.
Creating and Configuring Local Server Group
For this demo, I am going to create the same hierarchy, explained above. In the demo, I will:
1. Create server groups named Production servers and Development servers under the Local server group.
2. Register “QA Testing server” and “Staging server” under the development server group, and “HR DB” and “Sales DB” under the production server group.
Creating Server Groups
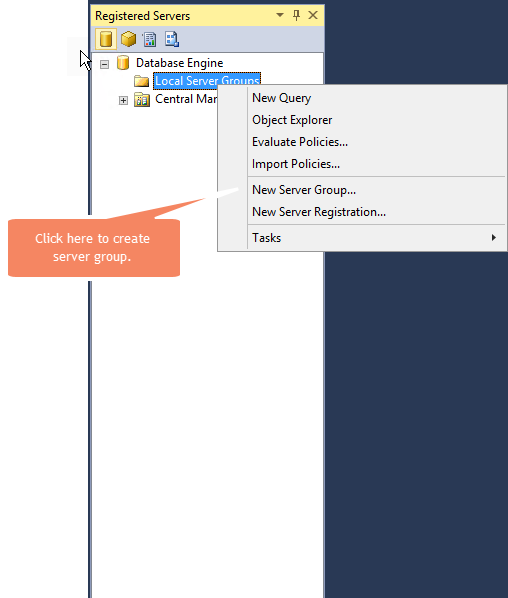
First, let’s create an SQL Server group under “Local server group”. To do that, right-click the “Local server group” folder underneath the Database engine, select the “tasks” option and select “Register Local Servers” as shown in following image:
A dialog box will open. In that dialog box, we will enter the details of the local server group. We are going to register DEV servers hence Group Name will be “Development Server” as shown in the following image.
Registering SQL Server Under Server Group
Once the group is created, we will register servers under those groups. To register the servers under the “Development Servers” group, right-click the “Development server” folder and select “New server registration”. The “New server registration” dialog box will open. In the dialog box, select hostname / IP address of the server from the “Server Name” drop-down box. In the “Authentication” drop-down, select “Windows authentication”. Name registered server as “QA testing server”. Click “Test” to test the connectivity and close the dialog box as shown in the following image.

Same way, we will register another server named “Staging Server” under the “Development server” group. Then I will create another server group named “Production Server” and register two servers named “HR DB” and “Sales DB”. The entire hierarchy will look as the following:
In next article, I will explain:
- Export and import configurations of CMS and Local server groups.
- How to execute T-SQL Query and generate database reports using CMS.
Summary
In this article, I have covered:
- What are registered servers and their usage.
- Configure Local server group and Central Management server.