
When you develop an application or write a code in the SQL database system, it is crucial to understand how data will be sorted and compared. You can store your data in a specific language, or you may want SQL Server to treat case-sensitive and case insensitive data separately. Microsoft has provided an SQL Server setting called Collation to control and address such requirements.
What is Database Collation in SQL Server?
We can set the collation at various levels in SQL Server as given below.
- Server Level
- Database Level
- Column Level
- Expression Level
The Server level collation can sometimes be called SQL Server Instance level collation.
The Database level collation will be inherited from the server level collation setting if you don’t choose any specific collation during the database creation. You can also change the database-level collation later. Note that changing database collation will be applied for only upcoming or new objects which will be created after the collation change.
New collation will not modify existing data stored in tables that were sorted with the last collation type. The application team needs further planning to handle this stored data conversion due to the new collation setting.
There are several ways to do it. One is to copy the data from the existing table to a new table created with the new collation and then replace the old table with the new one. You can also move your table data to a new database by having a new collation, and replace the old database with the new one.
NOTE: Changing collation is a complex task and you should avoid it unless you have a mandatory business case.
How to Find and Change Database Collation in SQL Server?
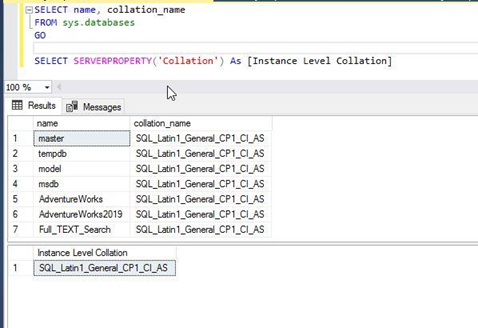
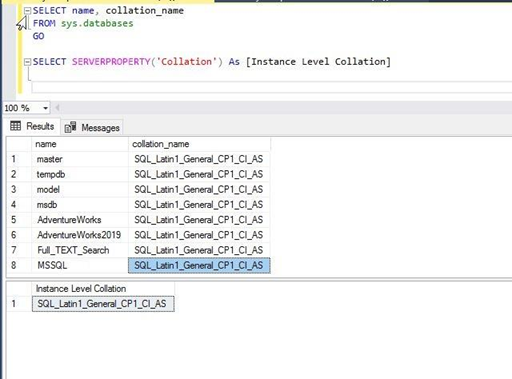
Let’s go ahead and check the collation of SQL Server Instance and all databases hosted on that instance. You can check collation by accessing the database or instance level properties window using SQL Server Management Studio or by simply executing the below T-SQL statement. The Collation for each database is stored in the system object sys.databases – we’ll access it to get this information.
--Check Database Collation
SELECT name, collation_name
FROM sys.databases
GO
--Check Server or Instance level Collation
SELECT SERVERPROPERTY('Collation') As [Instance Level Collation]
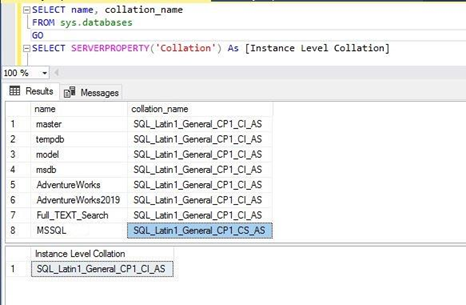
I have executed the above T-SQL statement and got the below output. We can see that all databases and server-level collation have the same settings as SQL_Latin1_General_CP1_CI_AS. It means database collations have been inherited by the server-level collation while creating them, and the default value has not been changed.
Now, let me show you how to check the database collation using GUI in SQL Server Management Studio.
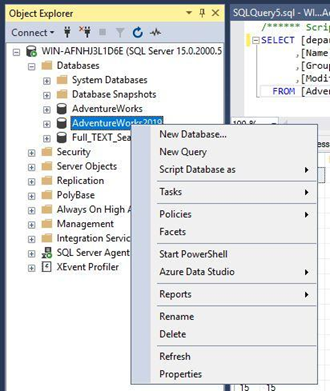
First, connect to your SQL Server instance using SQL Server Management Studio. Expand the instance node followed by the Databases folder. Right-click the target database and choose Properties:
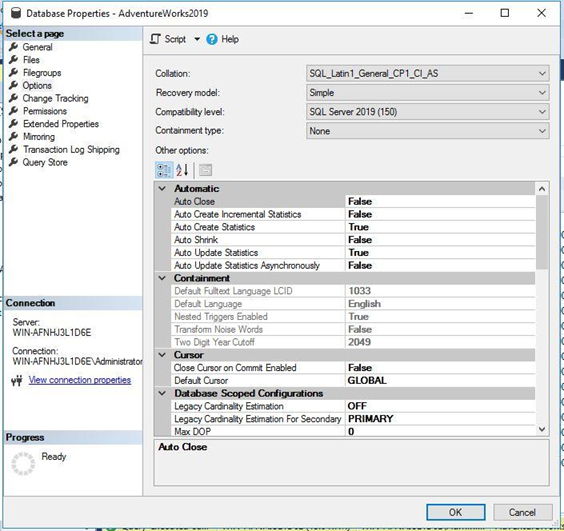
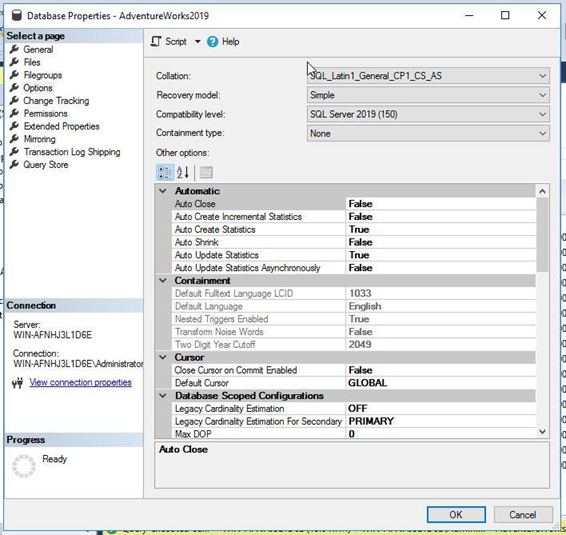
You will get the below Database Properties window.
Now click the Options tab from the left-side panel. You will get multiple properties settings in the right-side panel. Collation is the first property of this page – you can see that it is the same as it was in the above T-SQL script.
Similarly, you can click the SQL Server instance node and right-click the instance-level properties to see the server-level collation.
If you want to change this collation to a new collation, you just need to click the Collation dropdown and choose the option you need. Make sure you have done a full backup of your database before doing it.
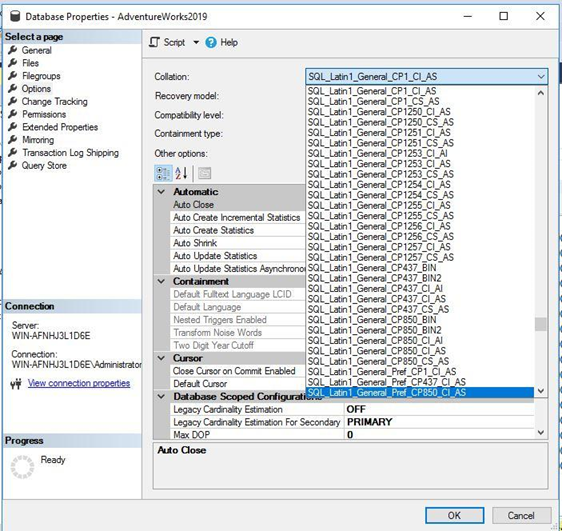
I have chosen a similar collation with case-sensitive SQL_Latin1_General_CP1_CS_AS for this database and clicked OK to apply it. Note: Ensure that nobody is connected to the target database during this procedure, otherwise, you’ll need to switch the mode into single user one and change this configuration.
You can also change this database collation using the T-SQL statement. For that, use the COLLATE clause of the ALTER DATABASE statement.
First, we have switched the database into the single-user mode, then changed the collation, and, finally, moved the database to the multi-user mode.
--Change Database Collation using T-SQL
USE master;
GO
Alter DATABASE [AdventureWorks2019] SET SINGLE_USER WITH ROLLBACK IMMEDIATE
GO
ALTER DATABASE [AdventureWorks2019]
COLLATE SQL_Latin1_General_CP1_CI_AS;
GO
Alter DATABASE [AdventureWorks2019] SET MULTI_USER
List Out All Supported Collations in SQL Server
This section will show you how to find all available collations in SQL Server. First, let me show you how to get the list of all supported collations for the SQL Server instance.
SQL Server has a system function called fn_helpcollations() which you can use to fetch all collations.
Run the below command to display the list.
--Display the list of all collations
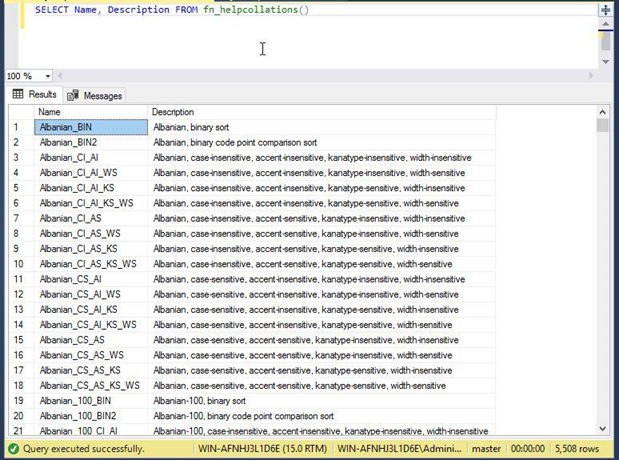
SELECT name, description FROM fn_helpcollations()
We can see all 5508 supported collations in the output section. If you are not sure which collation to choose, you can use the WHERE clause in the below script to filter out all possible collations that can be set to the database.
Let’s say you need to store your data in the US English language and want the SQL Server to handle it in a case-sensitive format. You can use the below command to fetch the list of possible and supported collations for your query:
--Display the list of all collations with WHERE clause
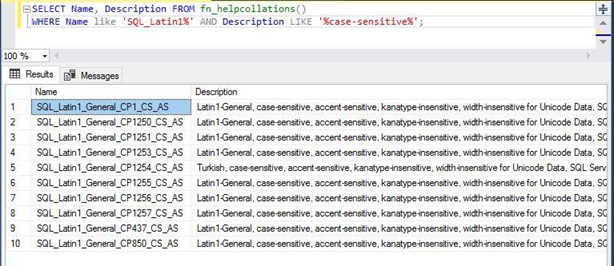
SELECT Name, Description FROM fn_helpcollations()
WHERE Name like 'SQL_Latin1%' AND Description LIKE '%case-sensitive%’
The output shows only 10 collations satisfying your query. You can use the above script to filter out various collations.
Impact of Changing Database Collation on Query Output
In this section, I will show you the difference between the two outputs of the same query when they are executed with different collations.
First, I will create a database named MSSQL with a collation (SQL_Latin1_General_CP1_CS_AS). Then I will run the same query twice to get the output. Later, I will change the collation to SQL_Latin1_General_CP1_CI_AS and again run the same queries to get their output. You can compare both outputs and understand the impact of changing a database collation. So, let’s start with database creation.
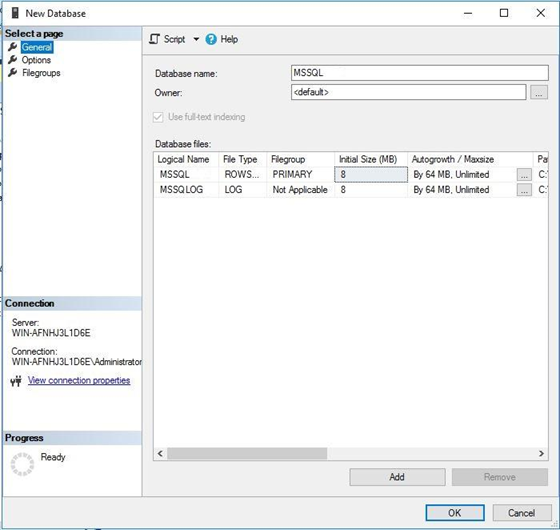
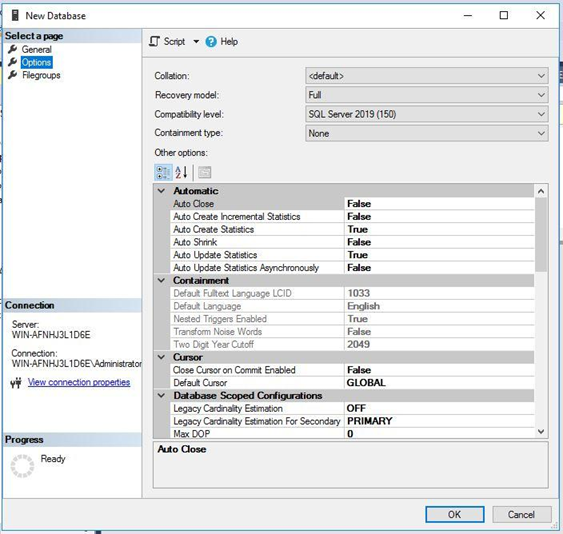
Launch the new database creation window as shown in the below image. You can also create this database using T-SQL. After that, you can see the database name and its data files. Now, click the second tab on the left-side panel to switch to the collation property window.
You can see that the collation name for this database is the default. It means this database will inherit collation from the server-level collation type. Click the Collation dropdown to choose your new collation.
I have selected the below collation SQL_Latin1_General_CP1_CS_AS for this database – not the default one. Click OK to proceed with the database creation.
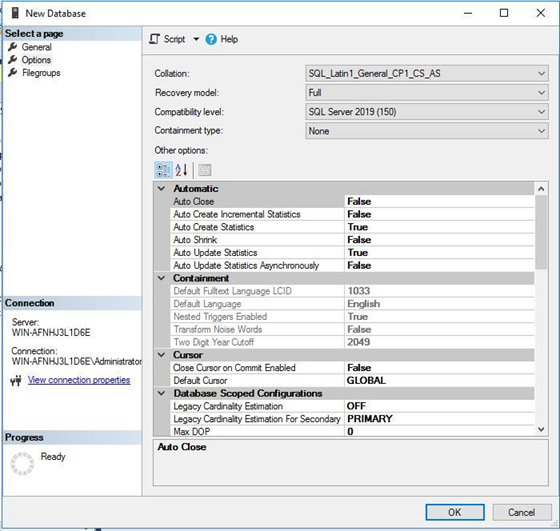
Now, check the database collation for a newly-created database. We can see it is SQL_Latin1_General_CP1_CS_AS as we have selected in the previous step.
In SQL_Latin1_General_CP1_CS_AS, CS stands for the case-sensitive mode, and CI stands for the case-insensitive mode. Now you can run either the below T-SQL code or any code to get the output.
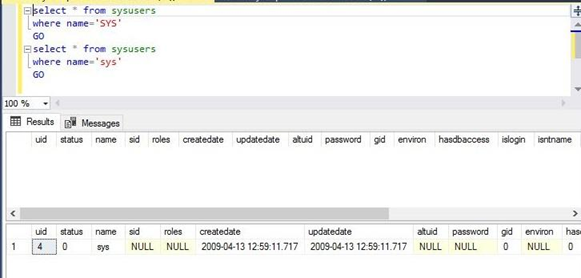
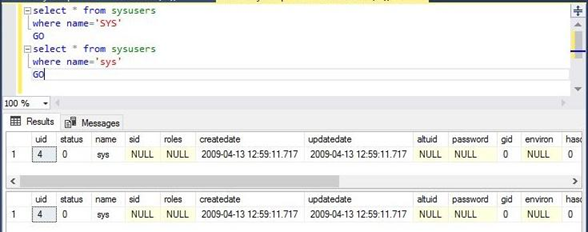
I have executed the same command twice. The first script filters the column names with a value SYS in capital letters, whereas the second script will filter the same column with the same value sys in small letters. The output section demonstrates that the first script has not shown any output, whereas the second script has displayed the output because of its case-sensitive behavior.
Select * from sysusers
Where name=’SYS’
Go
Select * from sysusers
Where name=’sys’
GO
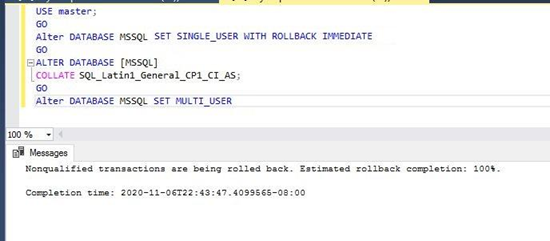
Now, we will change the collation of this database to the case-insensitive collation SQL_Latin1_General_CP1_CI_AS by executing the below T-SQL statements. You can also change it via GUI by accessing the Database Properties window in SQL Server Management Studio.
--Change database collation to SQL_Latin1_General_CP1_CI_AS
USE master;
GO
Alter DATABASE [MSSQL] SET SINGLE_USER WITH ROLLBACK IMMEDIATE
GO
ALTER DATABASE [MSSQL]
COLLATE SQL_Latin1_General_CP1_CI_AS;
GO
Alter DATABASE [MSSQL] SET MULTI_USER
I have executed the above script in one shot, and the database collation was successfully changed to a new collation having case-insensitive support.
You can verify this change by running the below scripts to check the collation of the newly-created database MSSQL. We can see that the new collation is set for this database in the below image.
We will again run the same T-SQL statement before changing the collation to see the impact of this change. As we can see now, both T-SQL statements are in the output.
Conclusion
I hope it is evident that the collation in SQL Server is crucial. We’ve defined what impact it leaves if you make changes in collation at any level in SQL Server. Always do proper planning and test the modifications in your lower life cycle environment first.
Stay tuned for my next article, where I will show you a step-by-step method to change server-level collation.
Please share this article and give your feedback, it helps us improve.
Tags: collation, SQL Server collation Last modified: March 31, 2023