Azure SQL offers different types of business continuity solutions. One of these solutions is Geo-Replication that provides an asynchronous database copy. You can store this copy in the same or different data center locations (regions). There can be four readable database copies. In the documentation of Microsoft notes, the recovery point objective (RPO is the maximum acceptable amount of data loss measured in time) is less than 5 seconds. If we want to automate and make (users will not affect) failover mechanism transparent, we have to create the auto-failover group.
At this point, we need to pay attention that when the primary database is down, we are at risk of losing data, because data transfer works asynchronously to a secondary database. In the asynchronous replication, transactions are committed on the primary server and then replicated to the secondary database. If you need to transfer data synchronously between the primary and secondary databases, Microsoft recommends a solution for this case, the sp_wait_for_database_copy_sync stored procedure. We have to run it after the transaction is committed in the primary database. At the same time, the application waits until all the committed transactions are replicated and acknowledged by the active secondary database.
exec sp_wait_for_database_copy_sync @target_server = 'Name of Secondary Logical SQL Server',@target_database ='Target Database Name'
Settings for Geo-Replication
Now, we will look at how to configure the geo-replication.
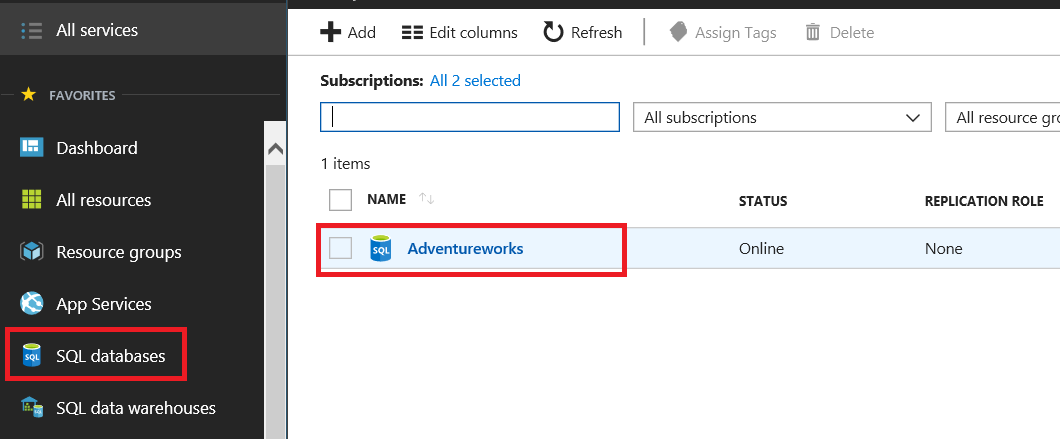
First, log in to Azure Portal and click SQL databases. Then, select the database you want to replicate.
To do this, click Geo-Replication. On the map that appears, you can select a data center in different regions.
Azure recommends a data center region either. However, we can select any location on the world map.

At the same time, we can choose the data center from the list under the map.
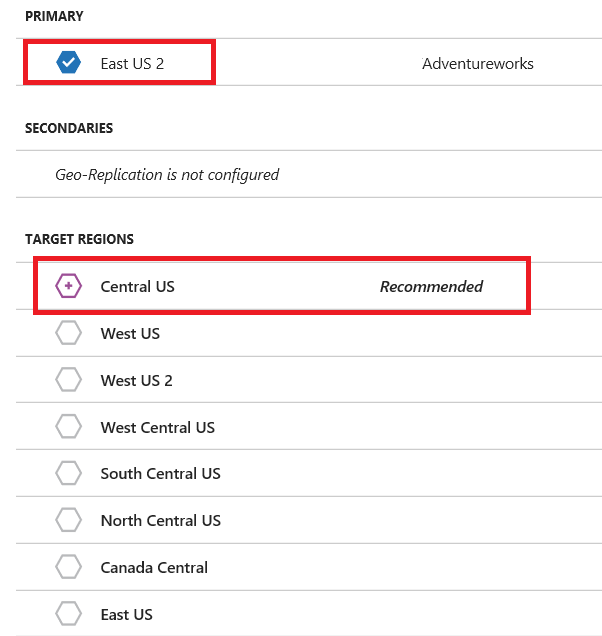
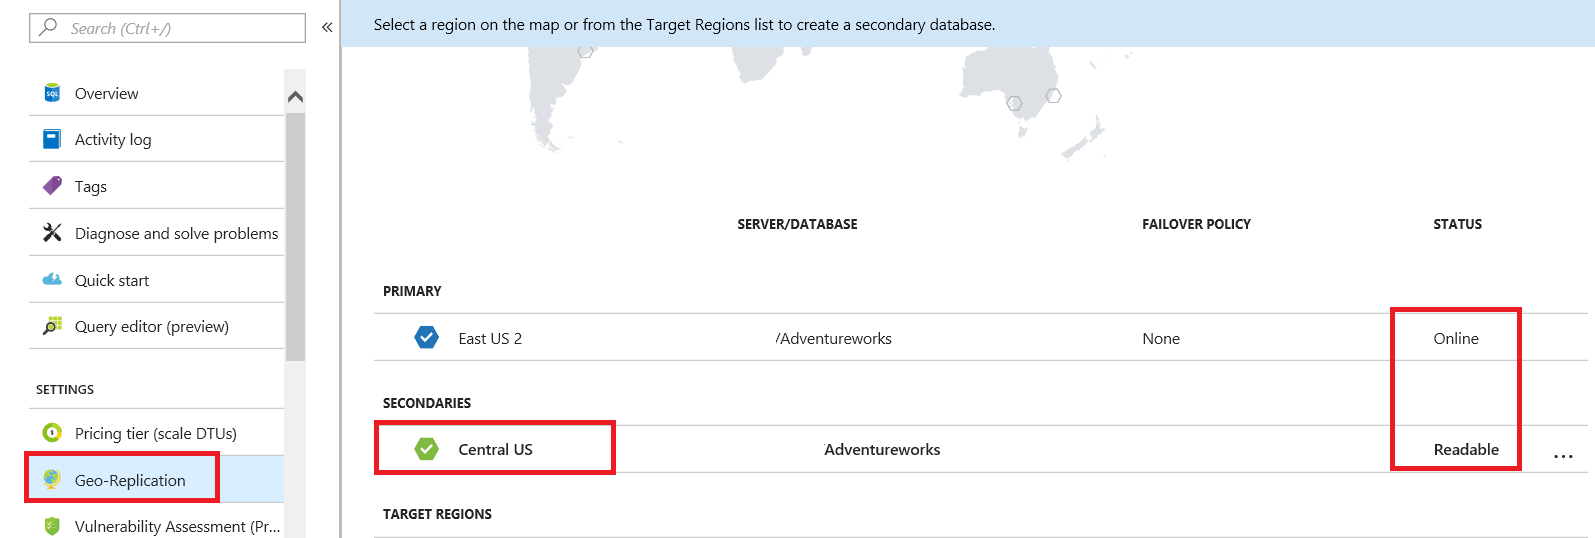
As you can see, the database is located in East US 2, while Azure recommends us using “Central US”.
Now, set the Central US target server to create a secondary database.
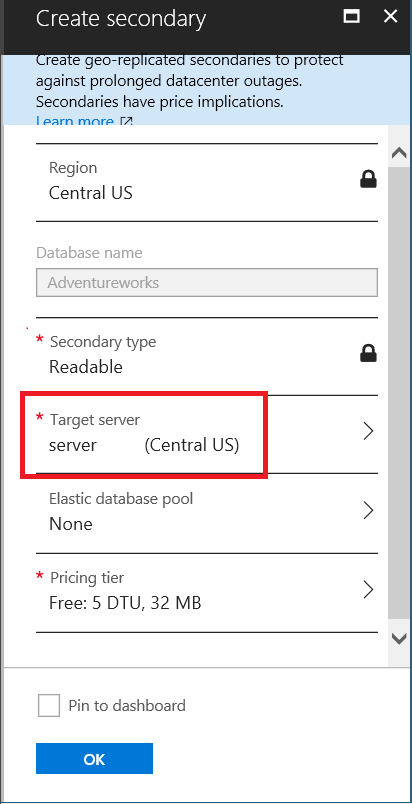
This process will take some time that depends on the database size.
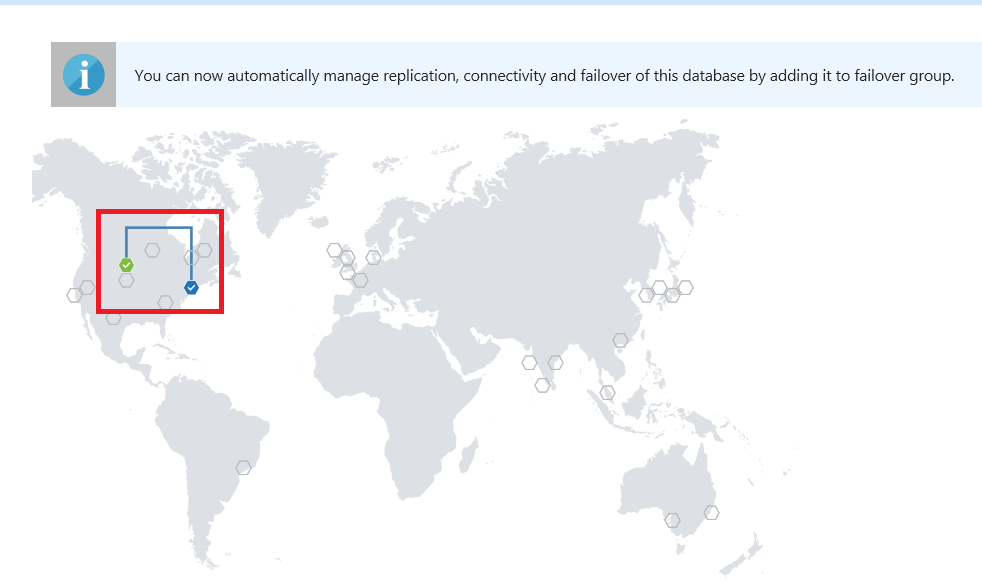
Our replication is ready and the replicated databases are shown on the map. At the same time, we can find some information about the primary and secondary databases.

When we click Geo-Replication and select SECONDARIES,
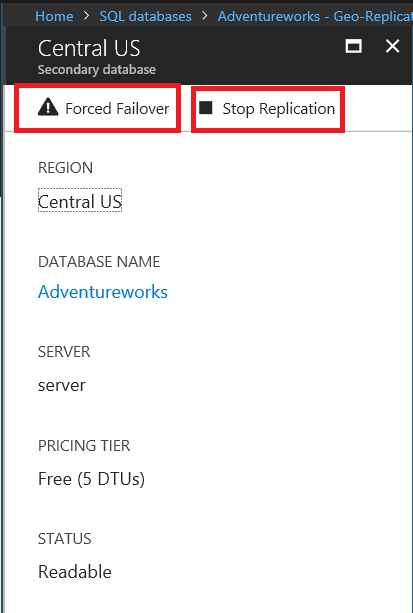
the secondary database options will open. In addition, we can force the failover or stop replication.
Testing Geo-Replication
Now, we will create a table and insert a row into the primary database. Once done, we will test the secondary database.
/**********************
PRIMARY DATABAE
********************/
CREATE TABLE TestForReplication
(Id INT PRIMARY KEY IDENTITY(1,1)
,Val VARCHAR(20) )
INSERT INTO  TestForReplication VALUES('TestData')
SELECT * FROM TestForReplication
/**********************
SECONDARY DATABAE
********************/
SELECT * FROM TestForReplication

Automatic Failover
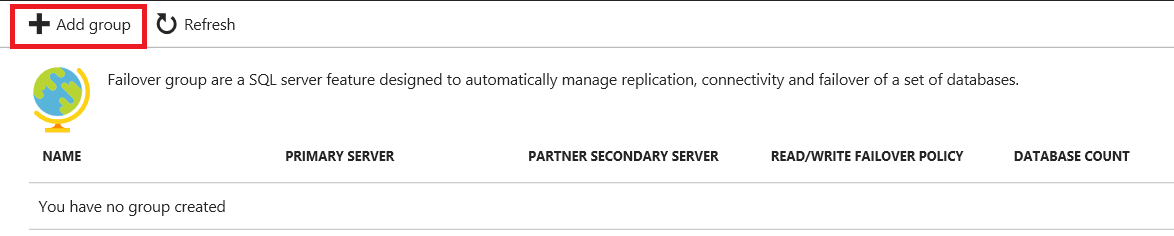
Let’s create failover groups. This feature will gain the automatic failover capability.
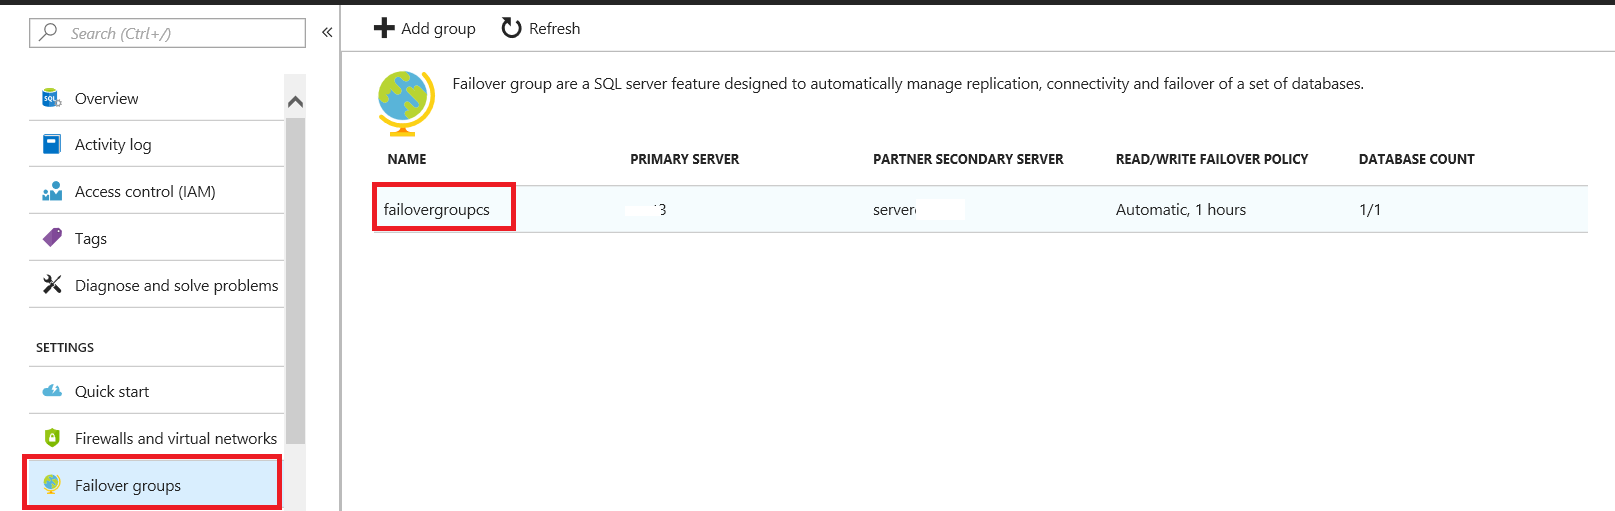
Select Failover groups in the Azure SQL databases tab.

Then, click Add group.
The Failover group window opens.
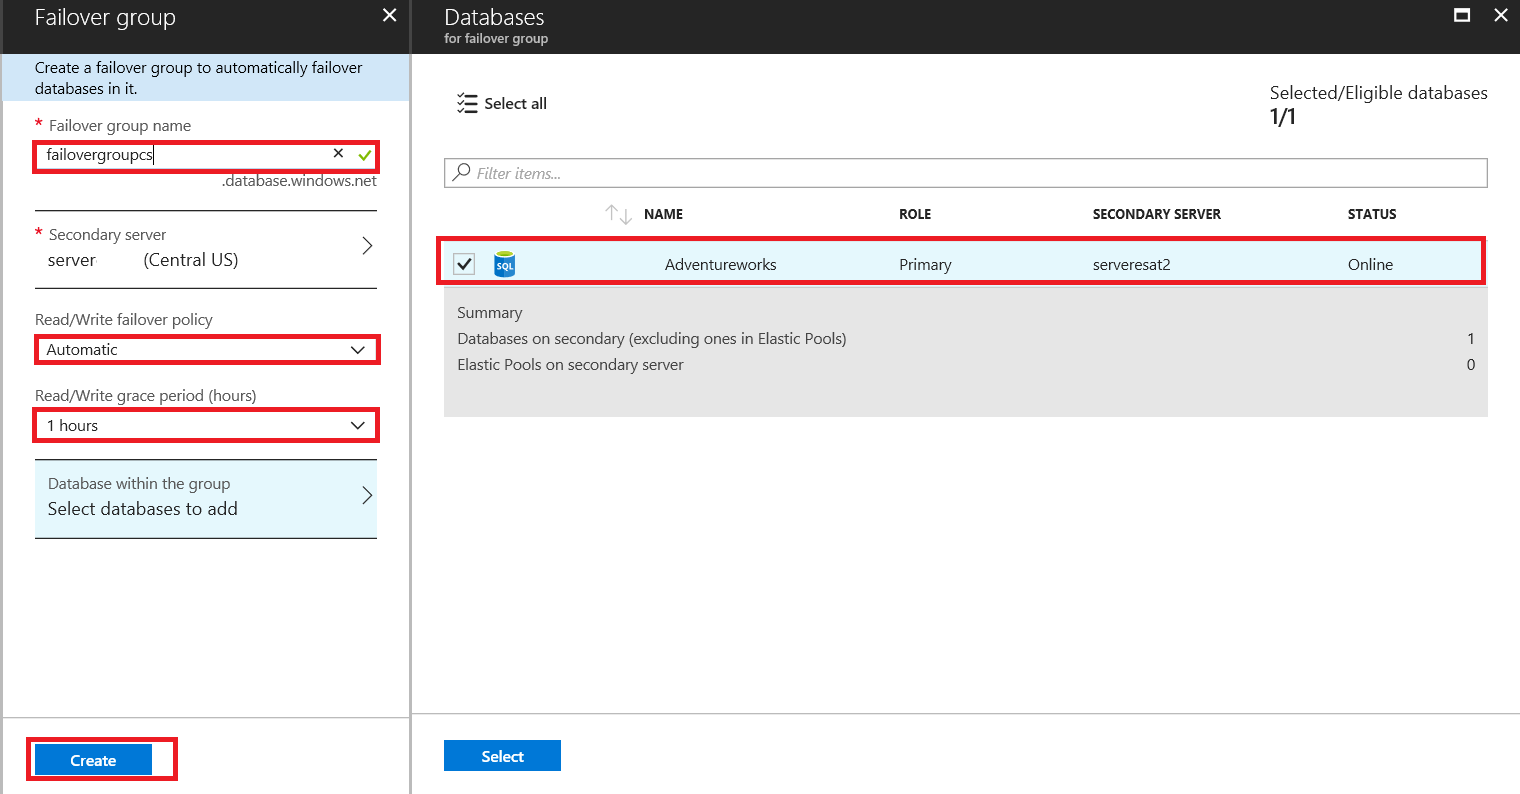
The image below shows the Read/Write grace period (hours) parameter that defines how long the system waits before initiating the failover that is likely to result in the data loss.
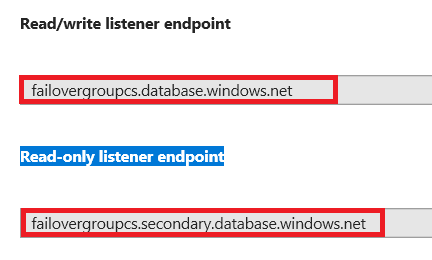
Once these steps are performed, the Read/write listener endpoint and Read-only listener endpoint addresses appear. The listener address is not changed after the failover. For this reason, you have to use this listener address for application connection strings.
If you have a read-only workload Microsoft recommends using the ApplicationIntent=ReadOnly parameter.
When we need the automatic failover, our application has to connect to a new primary server. For this reason, we will create a contained user.
To do this, run the following query. In addition, it will assign the db_owner role to a user.
CREATE USER CodingSightUser WITH PASSWORD = 'xxxxxxxx';

ALTER ROLE db_owner ADD MEMBER CodingSightUser;
Note that the contained user will be automatically created in the secondary database. Therefore, we will avoid the login dependency at the database level.
Now, we can connect to the failover group listener endpoint.
Another best practice about Geo-Replication is to apply firewall settings to the database level because this will not affect the secondary server.
To create the database level firewall rule, execute the following query:
EXECUTE sp_set_database_firewall_rule @name=N'NewFirewallSetting' ,@start_ip_address = '0.0.0.1', @end_ip_address ='0.0.0.9'
The query below will help you to delete the database level firewall rule.
EXECUTE sp_delete_database_firewall_rule N' Example DB Rule2'
To list database rules, use the following query:
select * from sys.database_firewall_rules

When we run this query in the primary database, it will return some information about all the replication databases and server information.
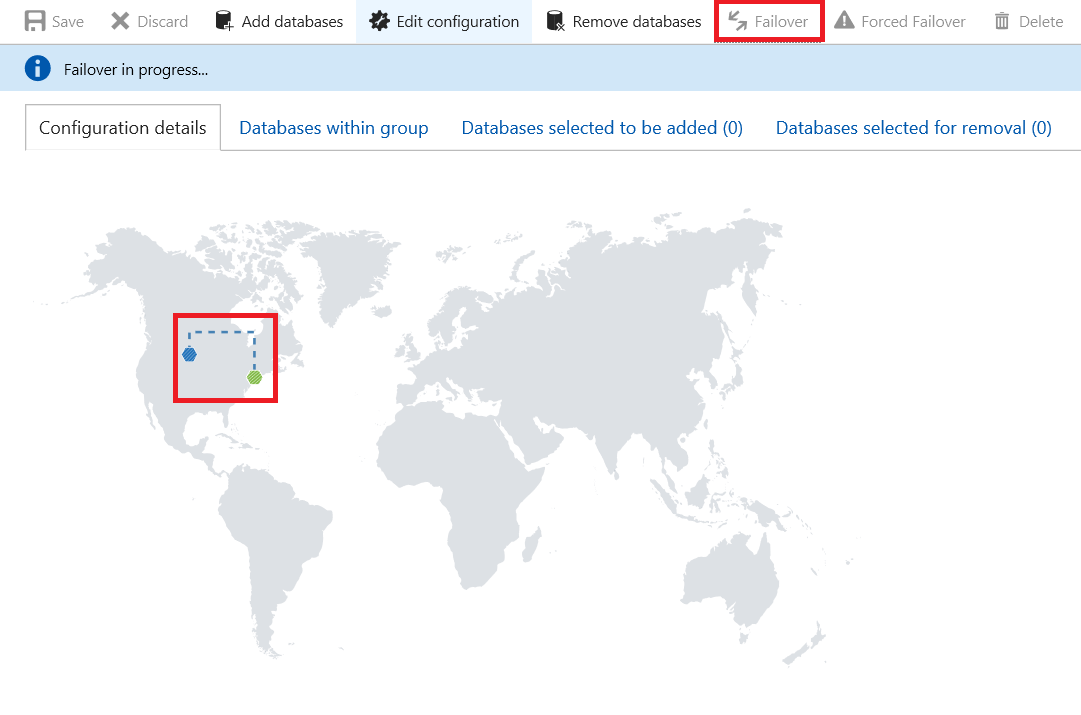
Now, we will explore how to trigger the manual failover in the Azure portal. First, select Failover groups.
Then, click Failover.
As you can see, the geo-replication line changes to the dashed one.
Conclusions
In this article, we explored Azure SQL Geo-Replication and Failover groups. In my opinion, it is an advantage when you have an opportunity to easily configure up to four secondary replicas. It is great to be able to scale out your read-only workload on the Azure.
References
Configure active geo-replication for Azure SQL Database in the Azure portal and initiate failover
Overview: Failover groups and active geo-replication
Designing highly available services using Azure SQL Database
Configure and manage Azure SQL Database security for geo-restore or failover
Tags: azure sql Last modified: September 22, 2021