
Microsoft Azure offers many PAAS services for addressing the database requirements based on the nature of data and transaction workload. Azure SQL Database is one of the popular PAAS services for RDBMS, always based on the latest stable version of the SQL Server database engine release.
Databases from this service are highly available, fully managed, and secure. Fully managed means you don’t need to take care of DBA-related activities like database maintenance, backups, patching, monitoring, database upgrades, high availability. You don’t even need to worry about SQL Server or OS patching because you don’t own the underlying infrastructure.
When you provision Azure SQL databases, a single database will be created along with the Azure SQL logical server that works as a container for SQL databases to control logins, firewall rules, and security policies. Also, you can create additional SQL databases on one Azure SQL logical server.
What is SQL Elastic Pool?
Let’s assume you have a business requirement to set up multiple databases for the application. The resource consumption by some of those databases is very low, but they have high resource utilization during some activities. That could be running specific reports, batch jobs, etc.
You need to provision Azure databases considering high utilization despite having infrequent spikes in resource utilization to run the database activities smoothly. Such over-provisioning of system resources considering their peak load would not be cost-effective because your maximum of resources will sit ideal most of the time.
Microsoft has provided a service called SQL Elastic Pool to address this scenario. It is more cost-effective and suitable for infrequent high utilization workloads.
SQL Elastic Pool allows us to group more than one SQL database as a pool and then use all resources allocated to that pool on sharing basis as per the min & max limit set on a specific SQL database. It brings the flexibility to purchase resources for the group like a set of computing and storage resources shared among all the databases in the pool. We can set minimum and maximum resource limits for the databases within the pool. Each database can use the needed resources within the limits set, depending on the current load.
How to Create an SQL Elastic Pool
Azure SQL Elastic Pool lets us under-provision system resources between a group of SQL databases to save cost at a satisfactory performance level. This is more effective if you add more databases to the Elastic Pool. The candidate databases must have specific utilization patterns like low average utilization with some infrequent high spikes.
Here, I will demonstrate how to create SQL Elastic Pool and then add Azure SQL databases to it. I assume you have already identified few Azure SQL databases as the target candidates. If you don’t have any, you can create them later, after creating the Elastic Pool. You can use Microsoft learning sandboxes to learn the Azure cloud services.
Let’s go ahead and start with SQL Elastic Pool creation.
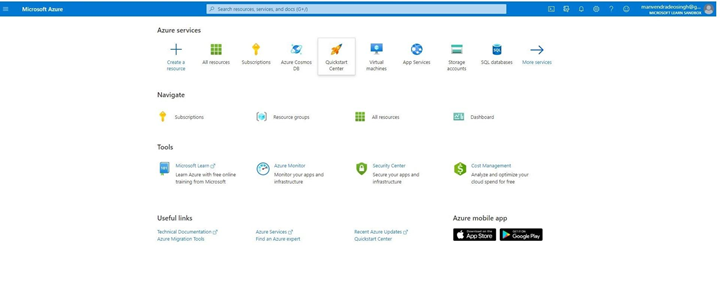
Log in to the Azure portal (see the illustration below:
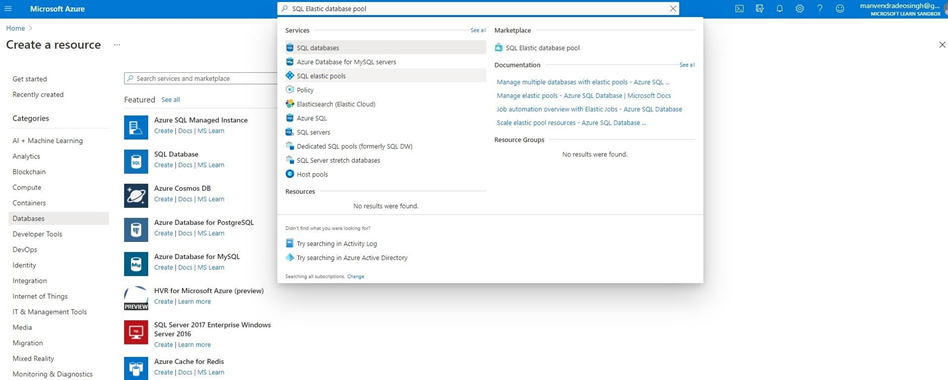
Type SQL Elastic database pool in the search box on the top. Have a look at the below image where the Azure portal provides related suggestions in the dropdown. We can see SQL Elastic Pool shown there. Just click on it.
Also, you can create the Elastic Pool by navigating to an existing server and clicking + New Elastic pool. This way, you are creating the Elastic Pool directly on that server.
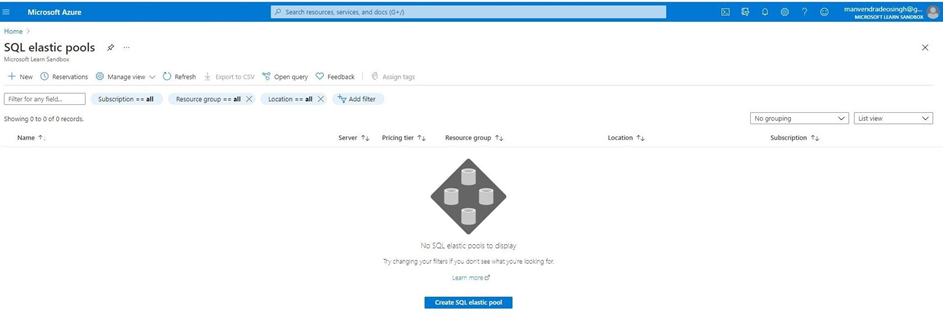
When you select the SQL Elastic Pool, the below screen appears. As we don’t have any Elastic Pools configured yet, the list will be blank. Click Create SQL Elastic Pool to start the process.
A new screen will appear. We must enter and validate the necessary details to initiate SQL Elastic Pool creation. Have a look at the tabs that we need to fill:
- Basics
- Additional settings
- Tags
- Review + create
Basics
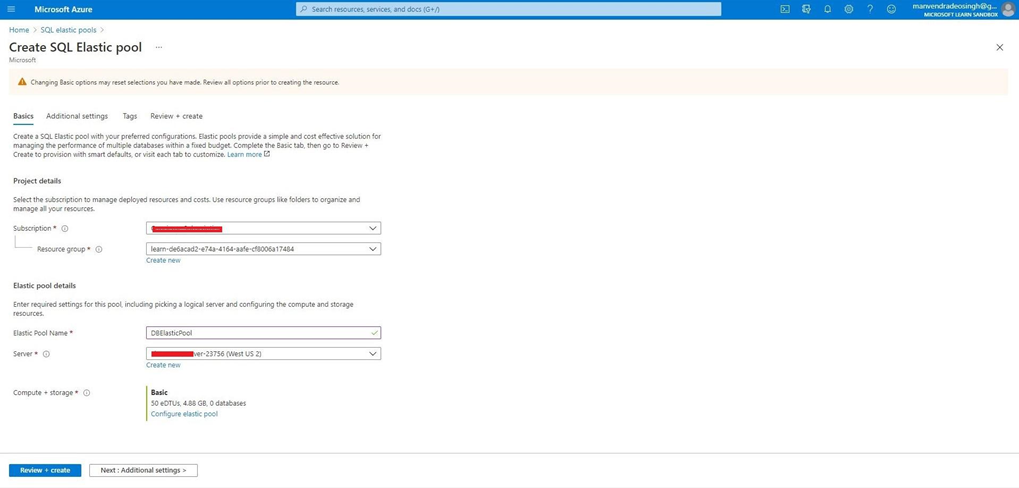
Select the subscription name and resource group name under which you want to create this SQL Elastic Pool. Select the subscription from the drop-down list followed by the resource group name. You can also create a new resource group name by hitting Create new. Next, fill in Elastic Pool details.

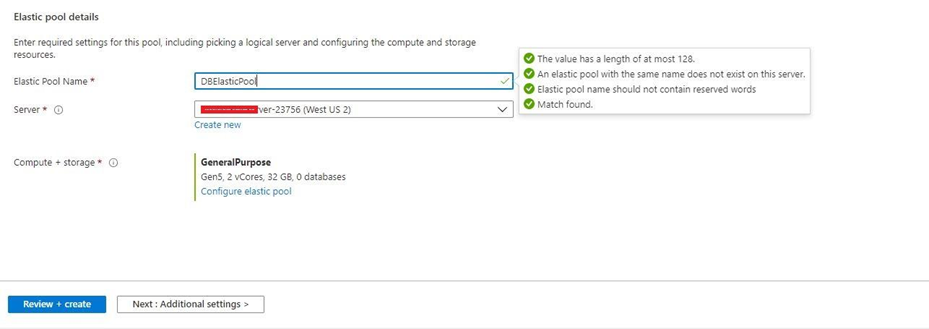
I have entered the Elastic Pool name as DBElasticPool. You choose the server name from the drop-down list. If you don’t have any server names so far, I would suggest you click the Create new button and configure a new server for Elastic Pool.
Ideally, if you have provisioned any Azure SQL databases, you will get the respective server name in the drop-down menu. You must create your Elastic Pool on the same server where you host the target Azure SQL databases.
Now, validate the compute and storage configurations. Or, if you want to modify them, click the Configure elastic pool link to choose the appropriate capacity and pricing model.
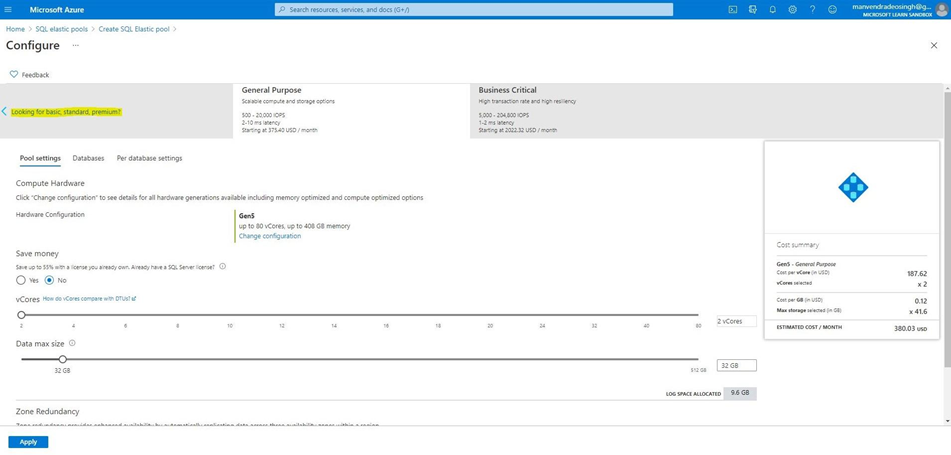
You will get the below screen to proceed. Azure SQL Database supports two types of pricing models. One is vCores-based and another one is DTU-based.
vCores pricing model supports 2 tiers for Elastic Pools – General Purpose and Business Сritical. On the screen, you can see them. To view the capacity of each tier, click on the respective tab. You will see the number of vCores, data size limit, and other available settings.
If you require a bigger capacity, choose the Business Critical tier.
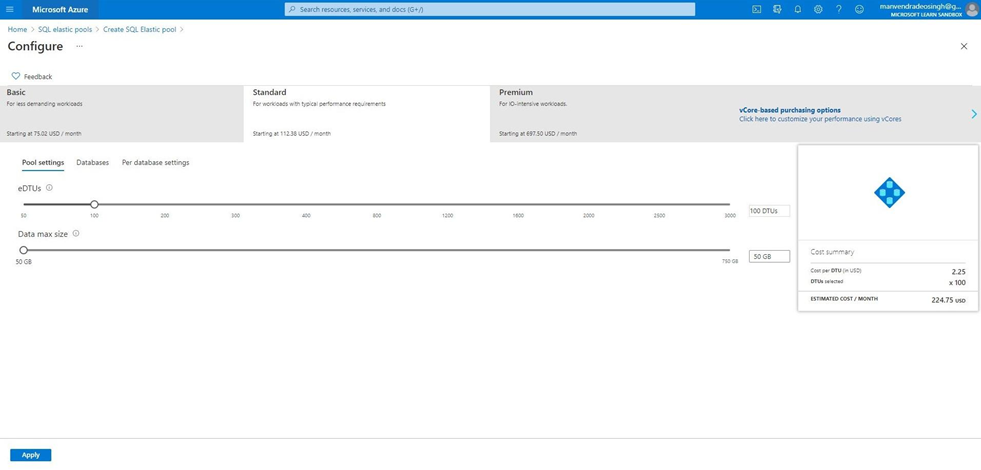
DTU stands for database transaction units. If you are configuring Elastic Pool, note that the DTU pricing model has changed to eDTU pricing model – elastic database transactions units for resource sharing among all databases added to that pool.
I am creating this Elastic Pool for demonstration purposes. Thus, I don’t need vCores. I’d rather choose the eDTU-based pricing model. Have a look at the image above – you need to click the first tab, highlighted in yellow. This will switch you to the DTU-based pricing tiers. There are 3 of them, Basic, Standard, and Premium
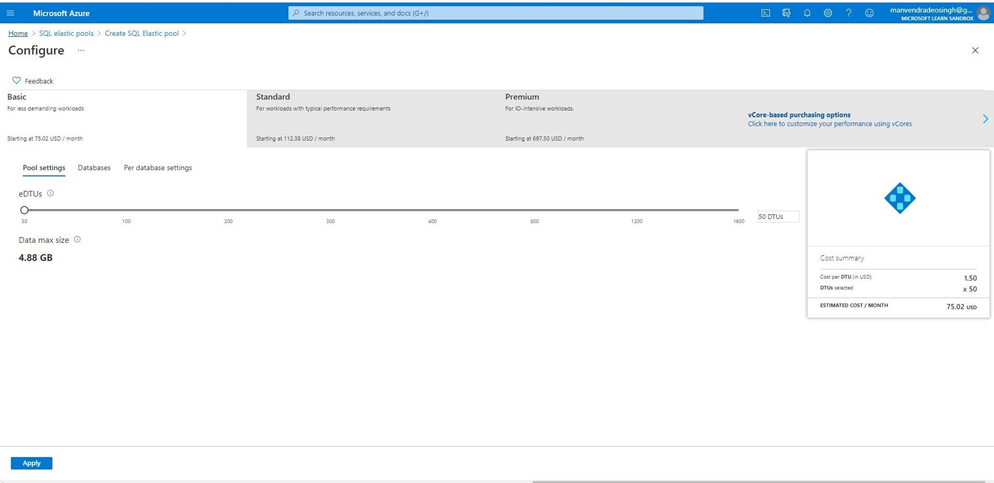
Note: This pricing model does not allow you to customize or configure system capacity or compute sizes individually. Each tier has a preconfigured system resource capacity that will be allocated according to the number of DTU/eDTUs. You just need to configure an appropriate DTU/eDTUs, and you will get allocated system capacity for your Elastic Pool.
I have chosen the Basic tier.
Once you have chosen the appropriate pricing model, click Apply to switch back to the Create SQL Elastic Pool window.
Pay attention to the Compute + Storage values – they are changed now, and it is showing in eDTUs.
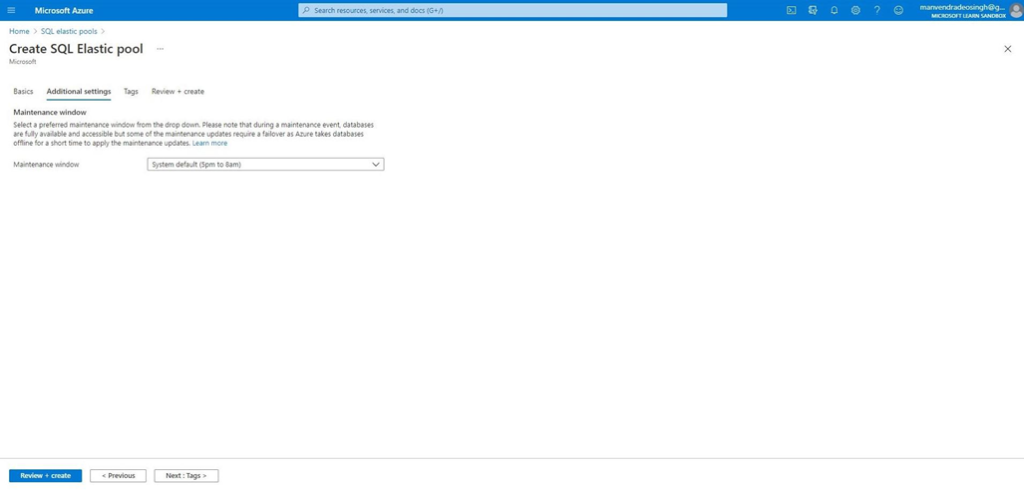
Additional settings
On this tab, we verify details. I have not made any changes here. If you want to add some tag policy, you should proceed to the Tags tab and configure the policy accordingly.
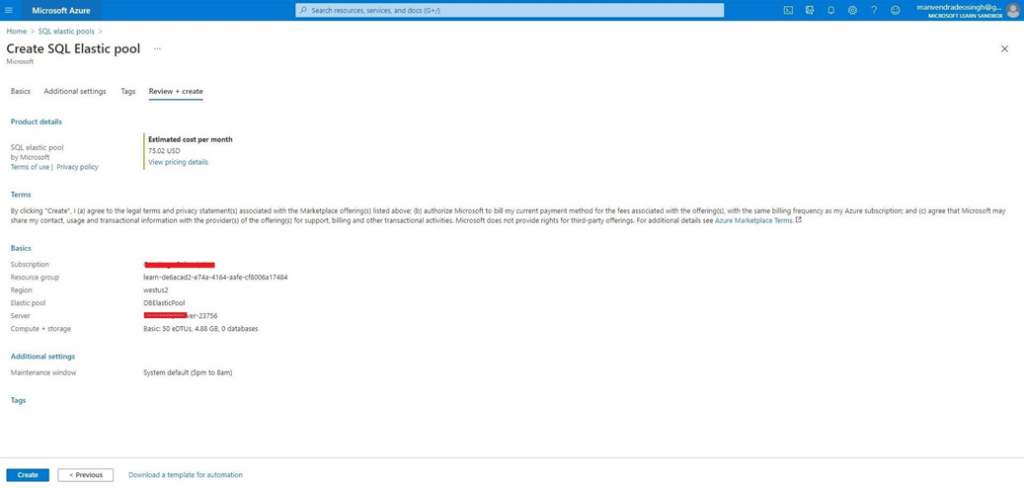
Review + create
It is the final stage. Click the Review + create button to review all configurations before starting to create your Elastic Pool. You can see the estimated cost of this service. If everything looks fine, hit the Create button.
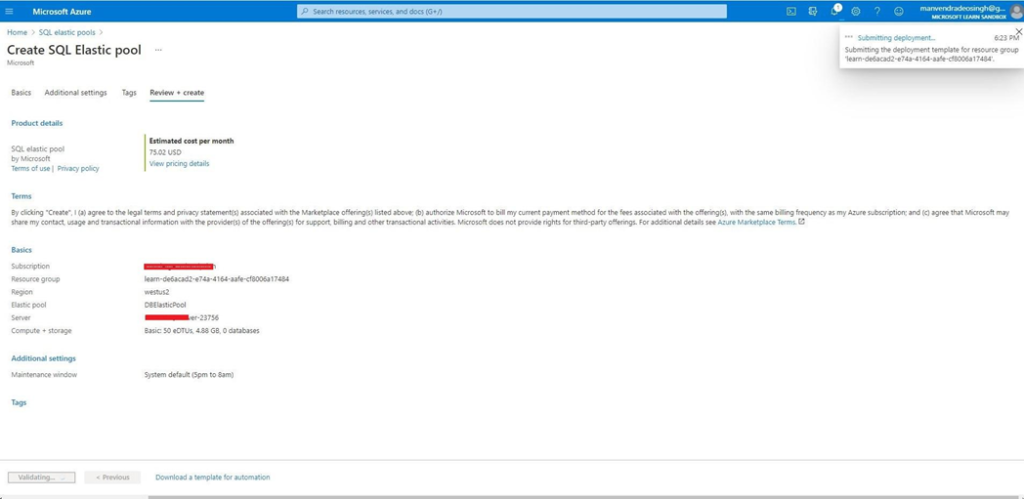
Azure will start the deployment process. You can watch and track it in the top-right corner of your screen:
The Deployment progress window will appear and show you the creation of each component of provisioning.
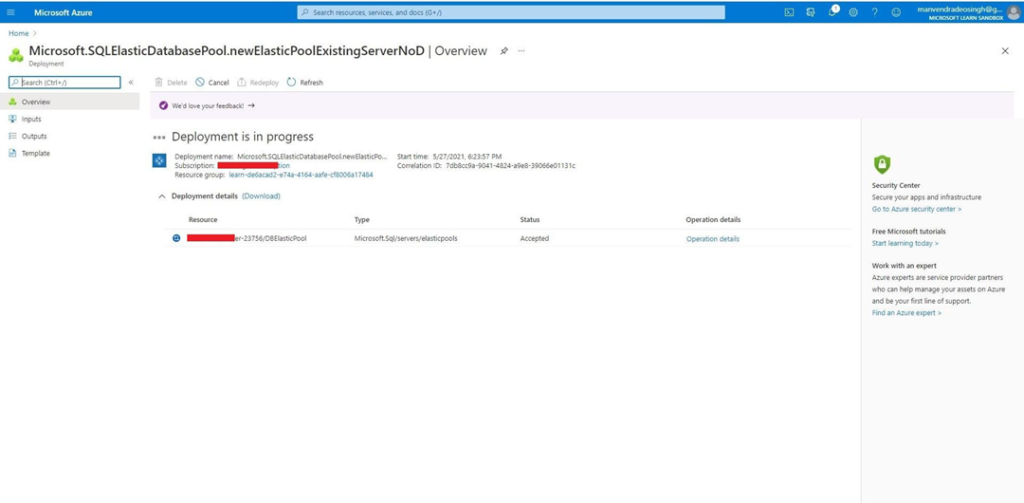
Once deployment has been completed, you will see the below screen with the confirmation message.
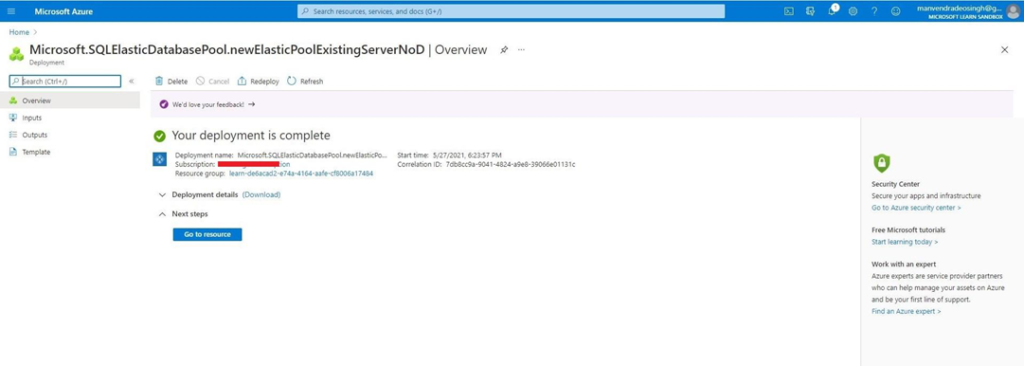
Thus, we have provisioned SQL Elastic Pool. Click on it to display the details. We can see that there are no databases added to this Elastic Pool yet. So, I will show you how to add SQL databases.
Add Azure SQL Databases to Elastic Pool
If you haven’t provisioned any Azure SQL database yet or have not identified any target Azure SQL database, you can create a new Azure SQL database directly inside the SQL Elastic Pool.
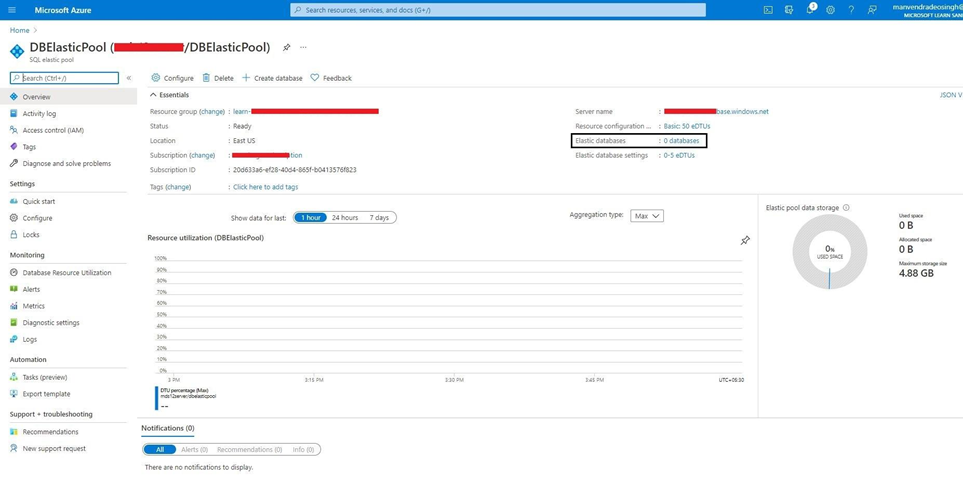
Go to the resource overview page of the newly create Elastic Pool DBElasticPool as shown below. As you see, there aren’t any databases in this Elastic Pool so far. We have two options to add existing databases:
- Click at 0 databases on the left.
- Click Configure in the menu right under the Elastic Pool name.
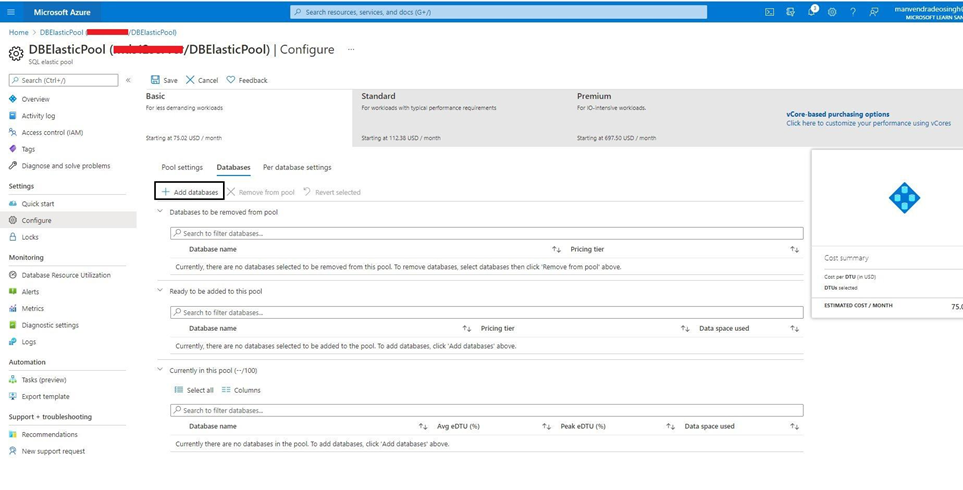
I have clicked at 0 databases. This has navigated me to the Databases tab with 3 sections:
- Databases to be removed from the pool
- Ready to be added to this pool
- Currently in this pool
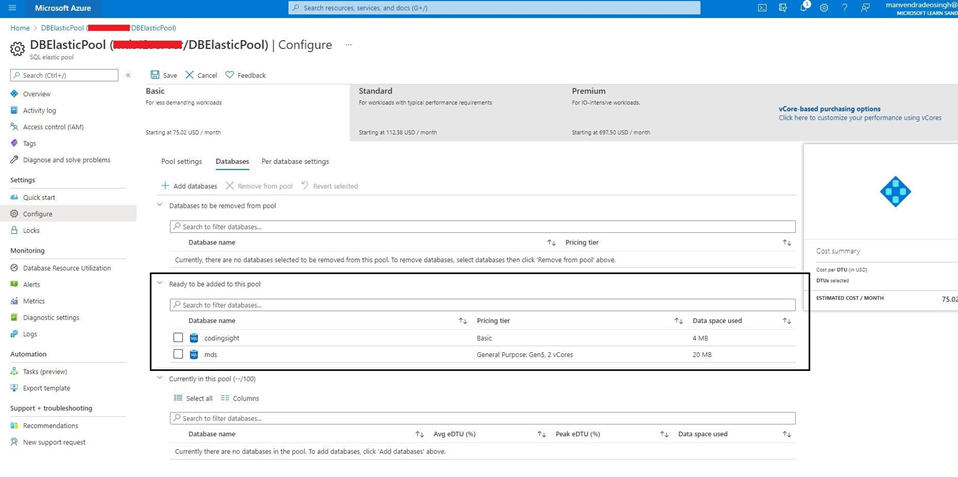
All three options are self-explanatory and blank as there aren’t databases added yet. We want to add Azure SQL databases to this Elastic Pool. Thus, we click +Add Databases (see the below screenshot).
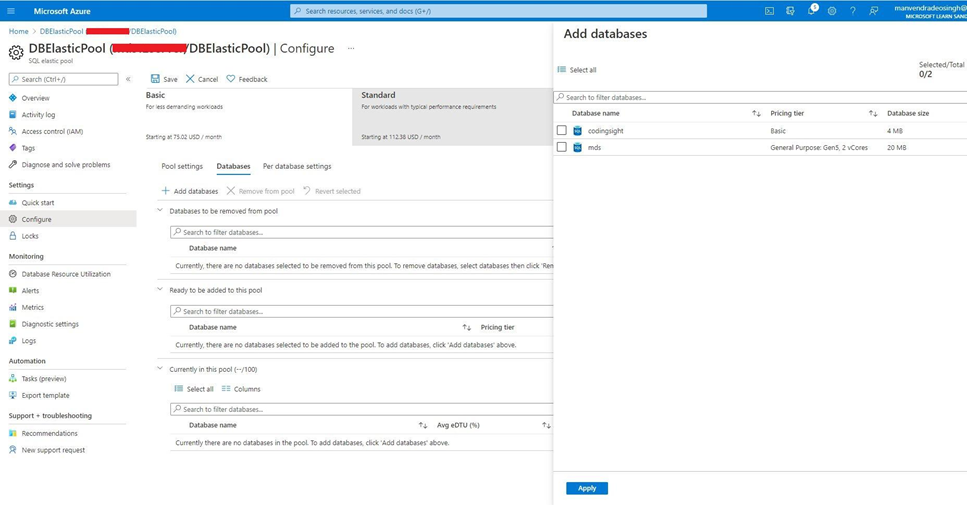
I have identified two Azure SQL databases with similar patterns of resource utilization. These two databases sit ideal, but they have specific high demands of system resources during the execution of the particular report.
After clicking +Add databases, we get another window with all possible databases that can be added to this Elastic Pool. I had only 2 databases hosted on the same server with the Elastic Pool. Thus, I choose them to add. Click at the check box next to each database and hit Apply at the bottom of the Add databases widow.
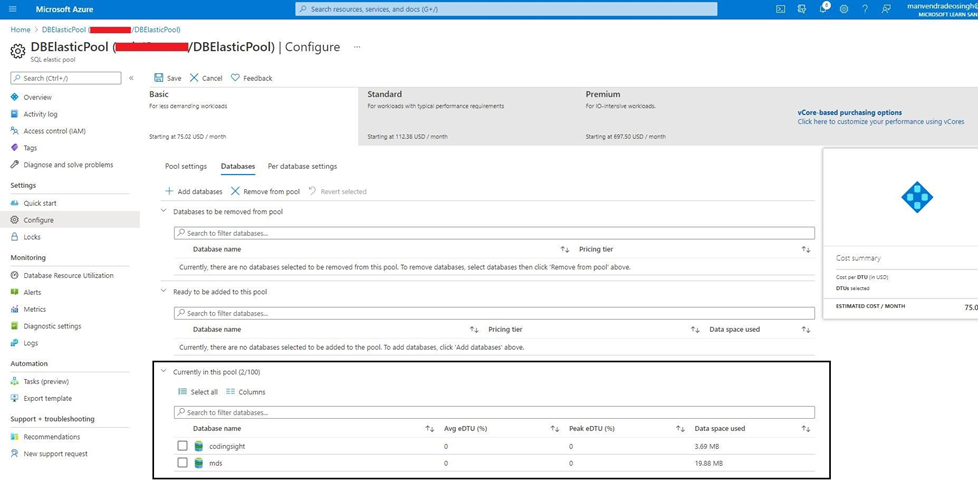
Now, both databases are added to the middle section – Ready to be added to this pool. Validate the details and click Save in the top menu.
The screen gets grayed out, and the process of the database addition to Elastic Pool starts.

When the databases are added to the Elastic Pool, you will see them moved to the Currently in this pool section:
Our Elastic Pool DBElasticPool has the target databases added. You can validate this by accessing the Elastic Pool overview page:
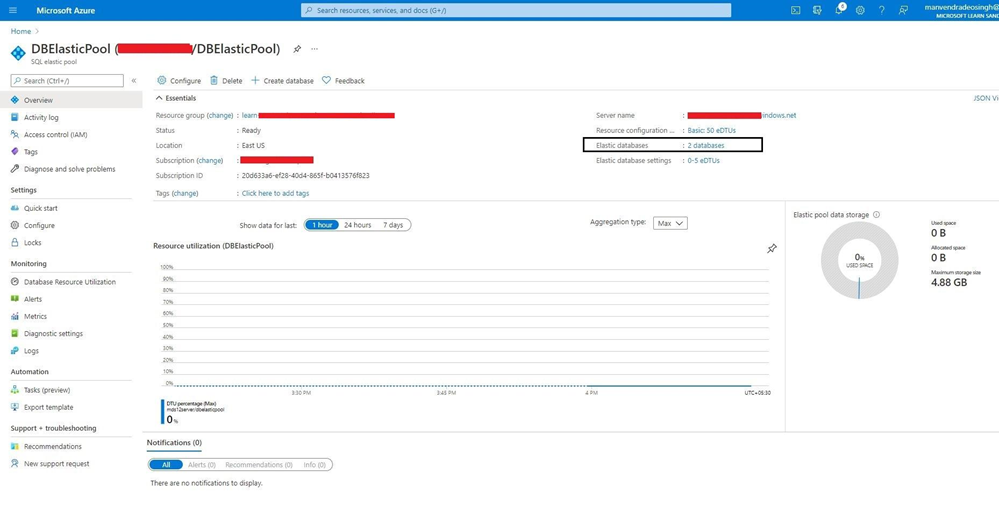
You can manage limits for each database in the pool along with their minimum and maximum limits.
Conclusion
We have explored the process of creating an Elastic Pool in the Azure cloud environment. I have presented the step-by-step procedure. Then, we have seen how to add SQL databases to an Elastic Pool. Hope that this material was of use to you. If you find it helpful – please share it on your favorite social media.
We’d also gladly discuss any specific questions, tips, and tricks that you might have in your work related to the Azure databases and Elastic Pools. Use the Comment section – your feedback is appreciated.
Tags: azure sql, elastic pool Last modified: October 27, 2022