INTRODUCTION
This document describes the steps and additional information necessary to configure AlwaysOn Availability Groups for HA and DR on MS SQL Server. AlwaysOn Availability Groups is an HA-DR solution introduced in SQL Server 2012, designed like a Transaction Log Shipping and Database Mirroring combination.
AlwaysOn AG implements HA at the database level, even though the nodes that host SQL instances and participate in the configuration are part of a Windows Failover Cluster. We refer to each node as an Availability Replica.
In a typical configuration, there is a Primary Replica and one or more Read-Only Secondary Replicas. A group of databases configured in an Availability Group can be failed over to an alternate replica together.
PREREQUISITES
1.1 Prerequisites
1.1.1 Two or more Windows 2012 or higher servers (Enterprise Edition) with the latest patches
1.1.2 Service accounts for SQL Server instances
1.1.3 A File Share on a trusted server other than the servers participating in the cluster
1.1.4 SQL 2012 or higher installation medium along with Service Packs
1.1.5 Two extra IP addresses besides the public IP Addresses of the participating servers
1.1.6 A DBA, a Windows AD Admin, a Network Admin
SUMMARY
1.2 The configuration procedure involves the following stages:
1.2.1 Enable Clustering on all Nodes
1.2.2 Validate the Nodes for Clustering
1.2.3 Create a Cluster
1.2.4 Configure Quorum
1.2.5 Install SQL Server on All Nodes
1.2.6 Enable AlwaysOn Availability Groups on All Instances
1.2.7 Create an Availability Group
1.2.8 Add an AG Listener
PROCEDURE
1.3 Enable Clustering on All Nodes
1.3.1 Open Server Manager on windows
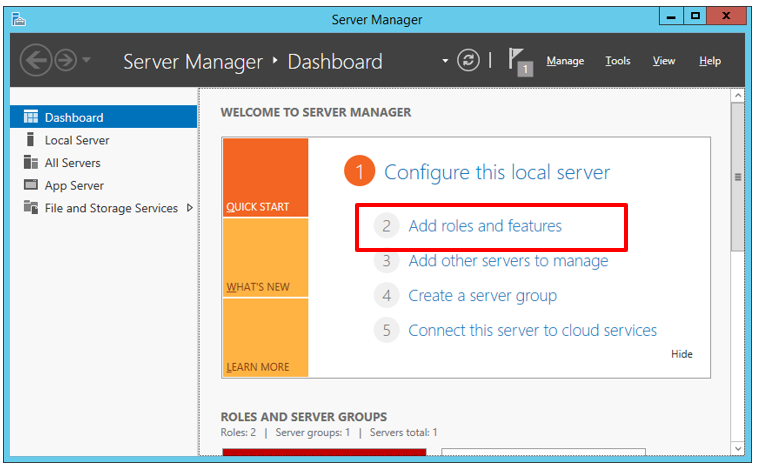
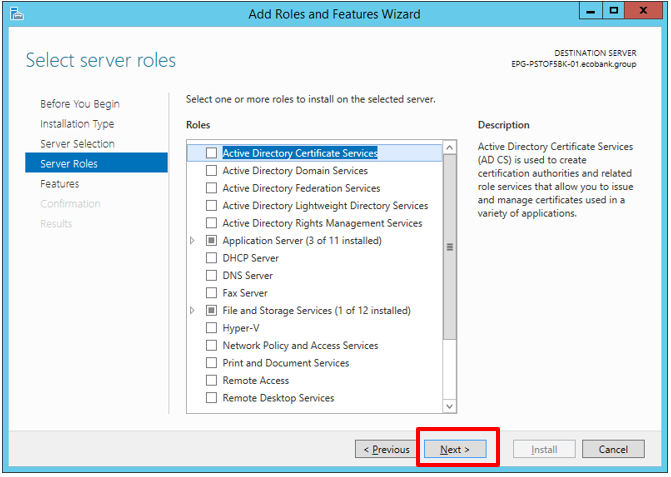
1.3.2 Launch Add Roles and Features Wizard
Windows Failover Clustering is a Windows Feature. You can enable it via the wizard.
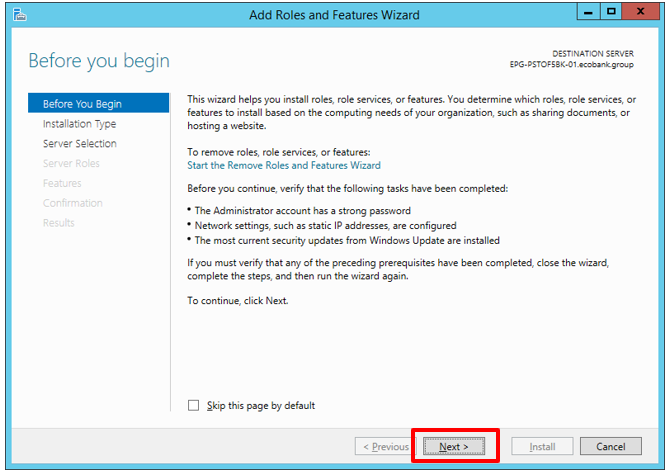
1.3.3 Accept defaults till you reach the Features stage.
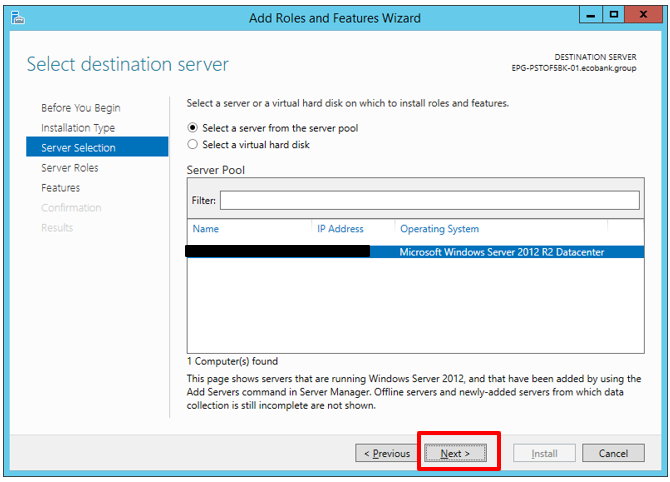
At this stage, we need to select a server to configure. In this scenario, we are dealing with the local server (see Figure 4).
We have hidden the server names for security reasons, but you will see it in the bottom pane (Figure 4).

At this time, we don’t plan to configure a role. So, we click NEXT and follow until we get to Features (Figure 6).
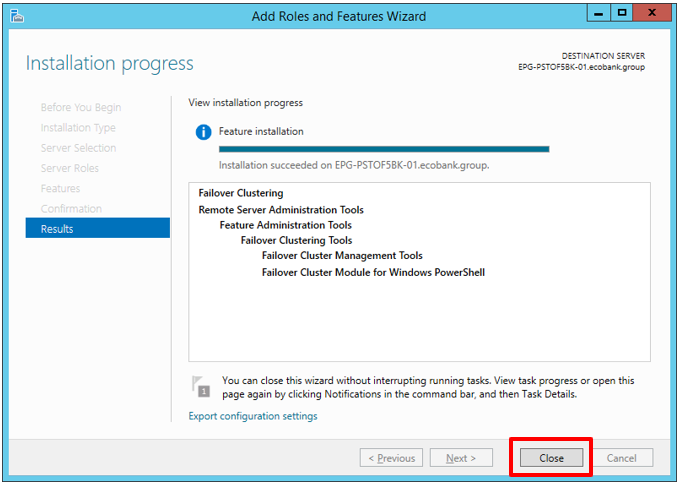
Enable the checkbox for Failover Clustering. Then, click INSTALL.
1.3.4 Select Failover Clustering in the Features stage

1.3.5 Close the wizard once done
1.4 Validate the Servers for Clustering
We have enabled clustering by following the steps in the previous section. We must repeat those steps for every server that should participate in the failover cluster.
Windows currently supports up to 64 nodes in a failover cluster. Windows 2019 enhances the usefulness of this large number by providing a feature known as Cluster Sets. Validating potential member servers of a cluster means checking if they have all been appropriately configured to participate in the cluster.
1.4.1 Open Failover Cluster Manager
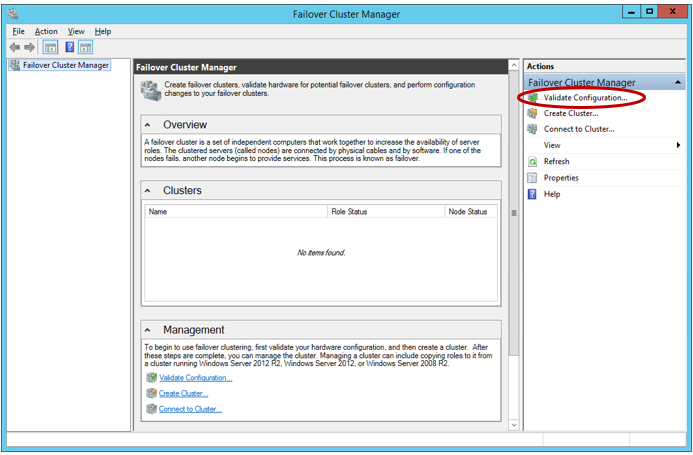
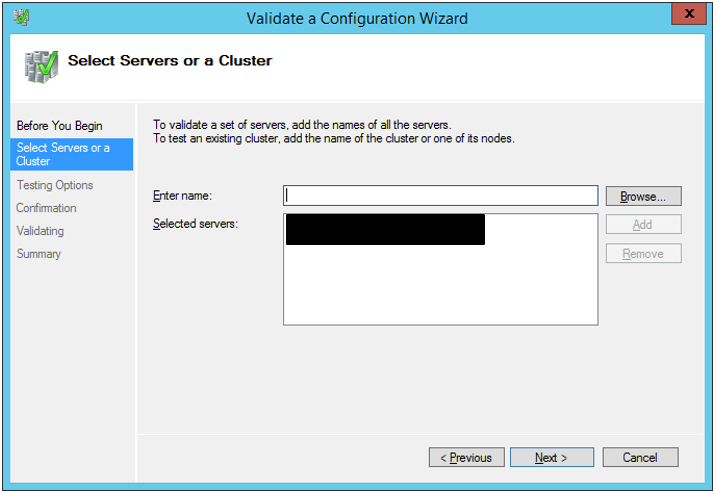
1.4.2 Open the Validate Configuration Wizard on the right.
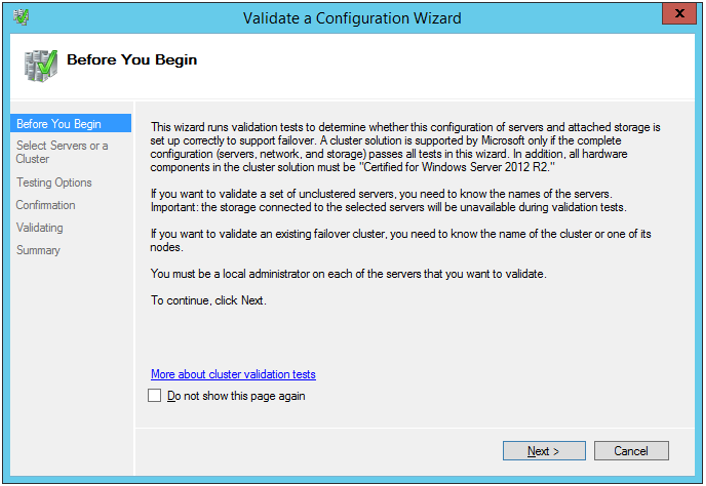
1.4.3 On the Select Servers stage, specify all servers intended for the cluster. Once again, we have hidden selected servers.
We can add all participating servers from this screen.
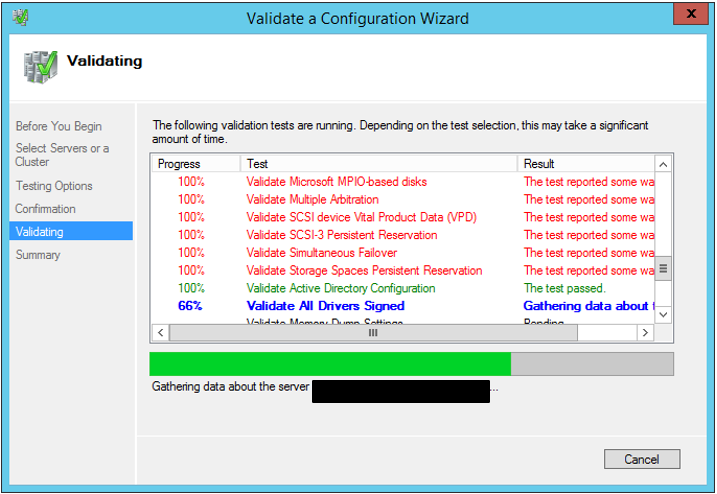
1.4.4 Accept the default “Run all tests” option.

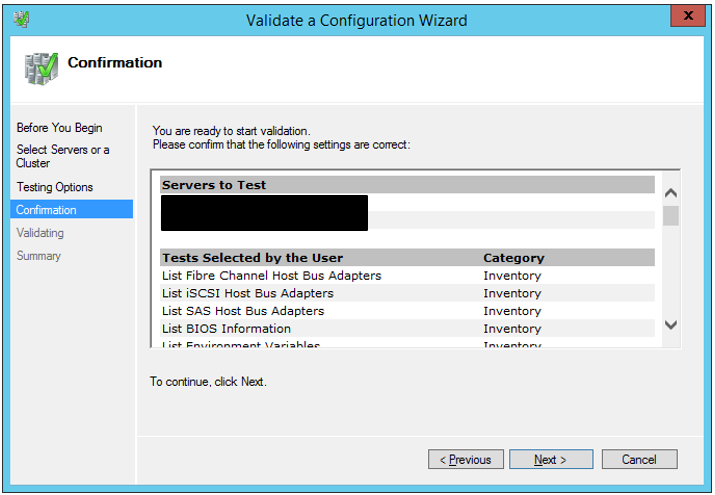
1.4.5 Ignore the disk-related warnings. You don’t require shared disks for AlwaysOn configuration.
1.4.6 Complete the Wizard
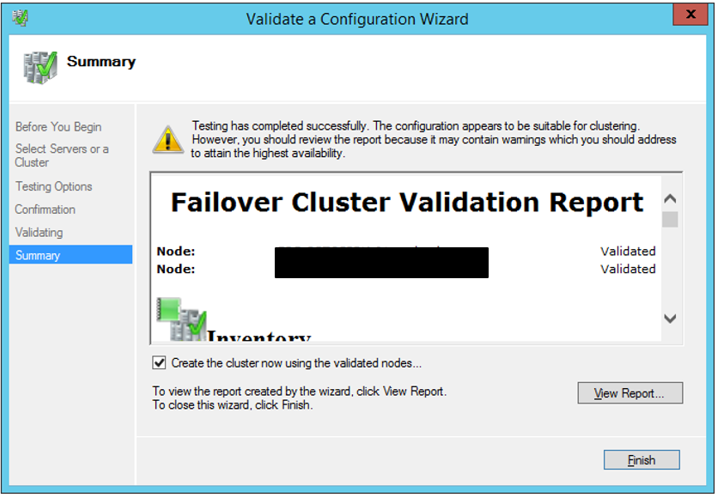
At this point, you can review the Validation Report. Should there be any issues, you can correct them before proceeding. Some warnings can be ignored, but make sure to examine their meaning.
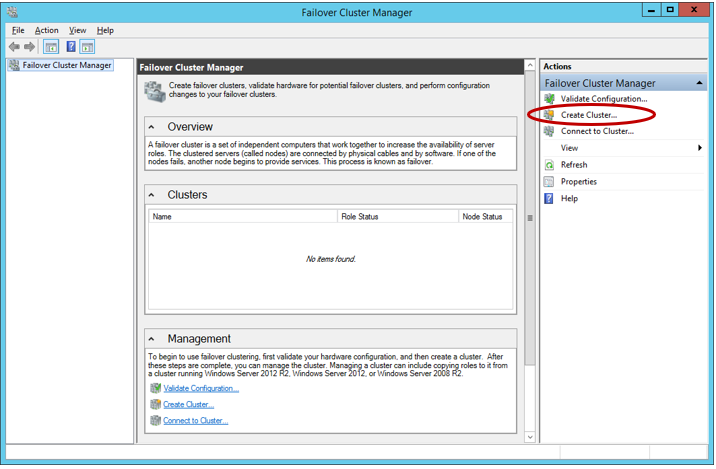
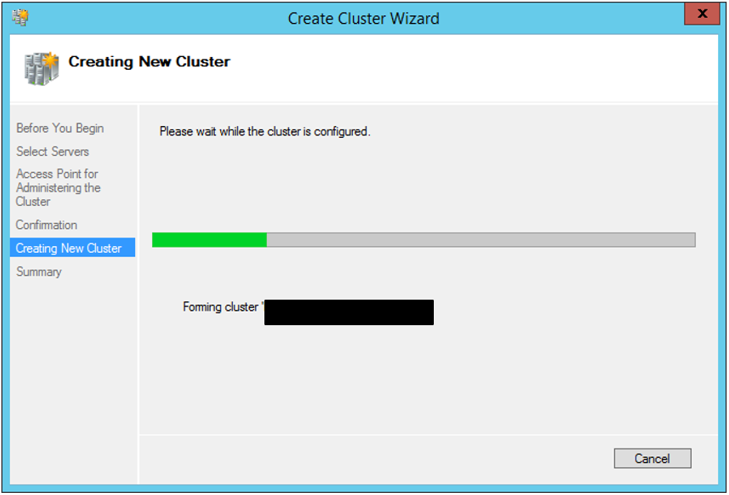
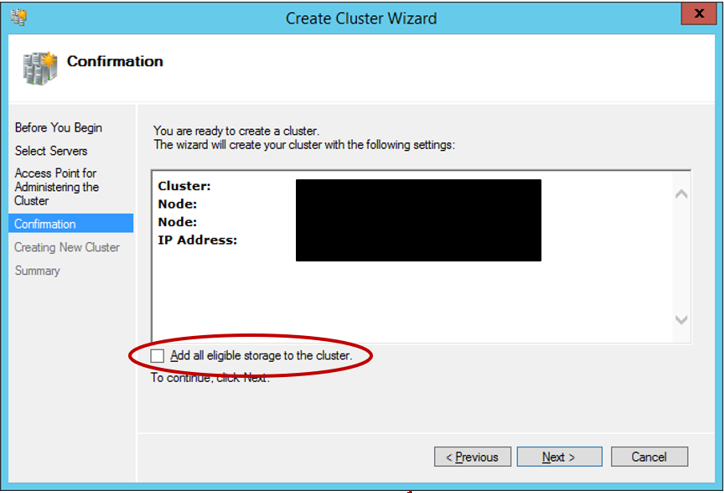
1.5 Create a Cluster
1.5.1 On Failover Cluster Manager, launch the Create Cluster Wizard.

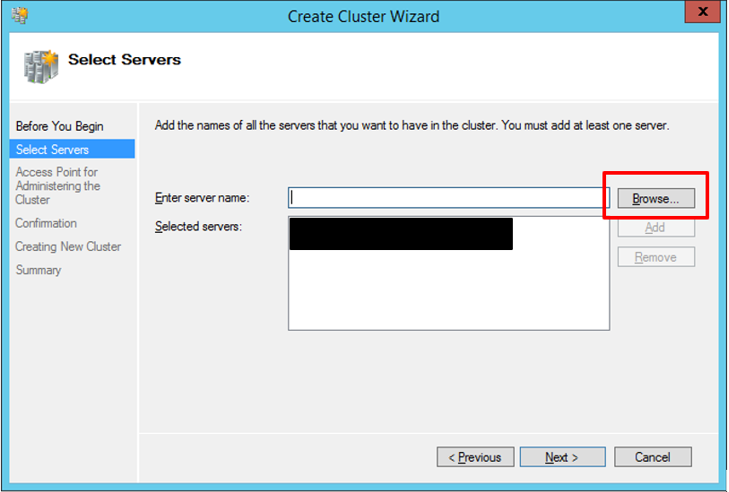
1.5.2 Add all servers intended for clustering.
This screen is like the Validate a Configuration Screen. We can also add all the required nodes at once.
To add servers, click the Browse button.
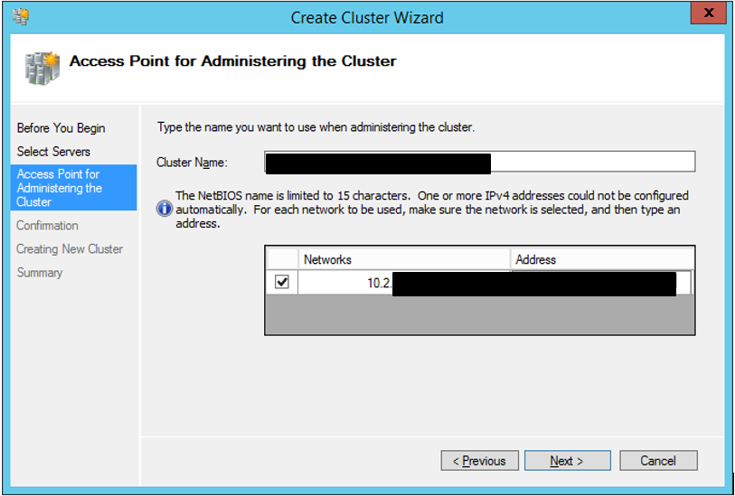
1.5.3 Provide the desired Cluster name and an associated IP Address
This name works to create a Computer Name Object on the domain. Thus, you need permissions to create computer objects for the account performing installation. Also, note that all IP Addresses used for all members of the cluster must be in the same subnet, except if you are creating a multi-site cluster.
When creating a Failover Cluster for AlwaysOn Availability Groups, we do not need adding disks to the cluster. So, leave the option unchecked (See Figure 19).
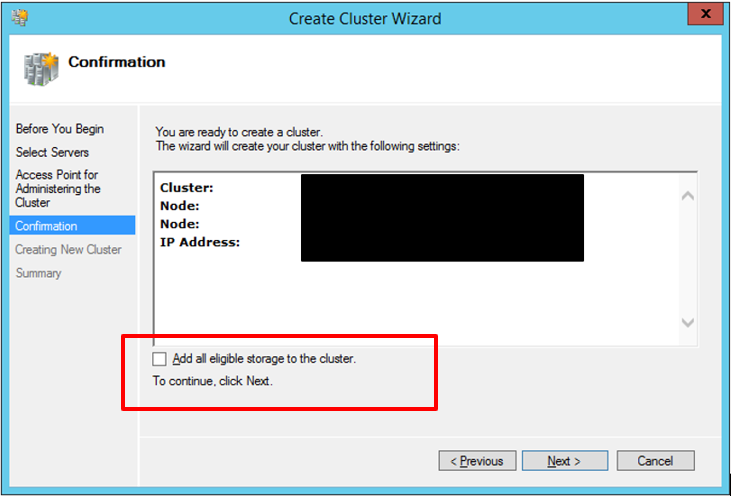
1.5.4 Complete the Create Cluster Wizard

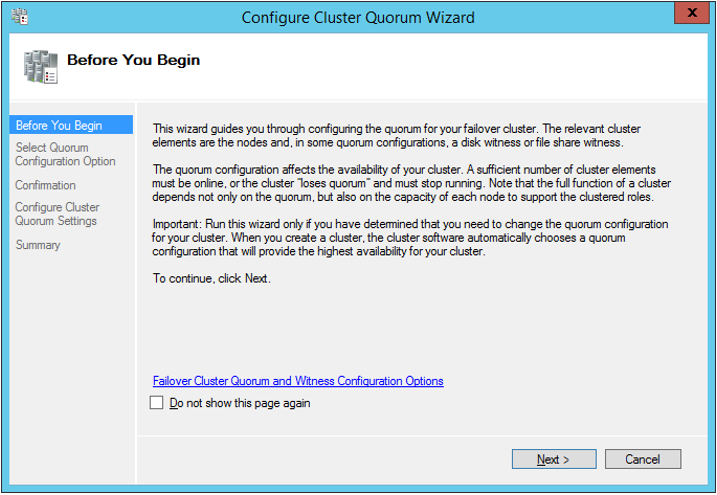
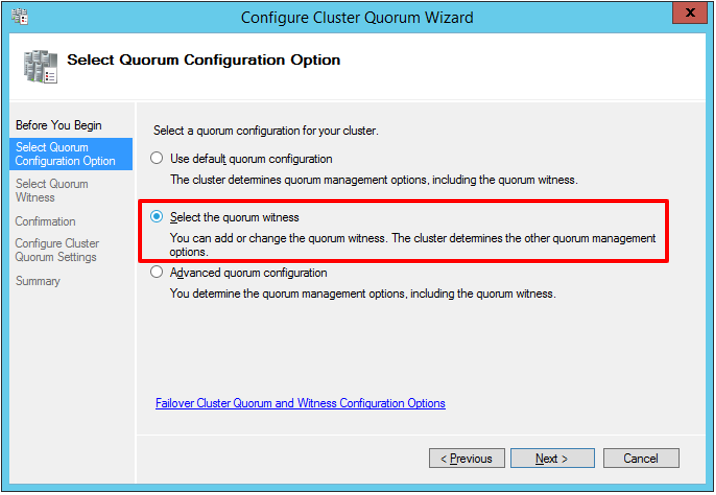
1.6 Configure Quorum
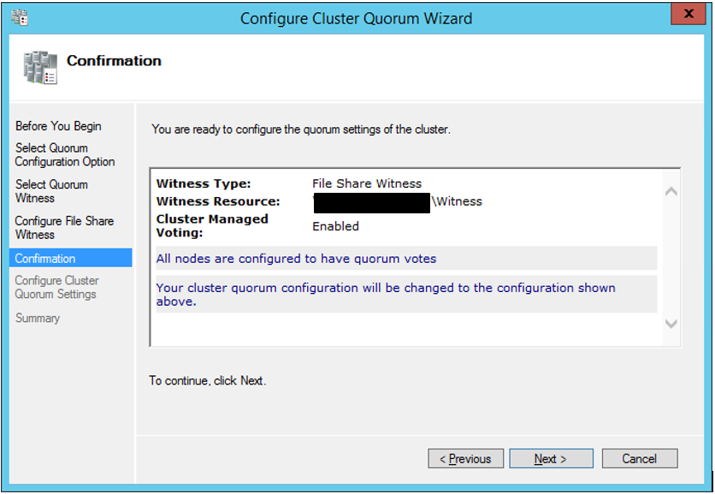
Quorum specifies the number of the cluster members that must be online to state the cluster available. Microsoft allows various quorum options. Some of them let the disks or file shares to be the cluster members.
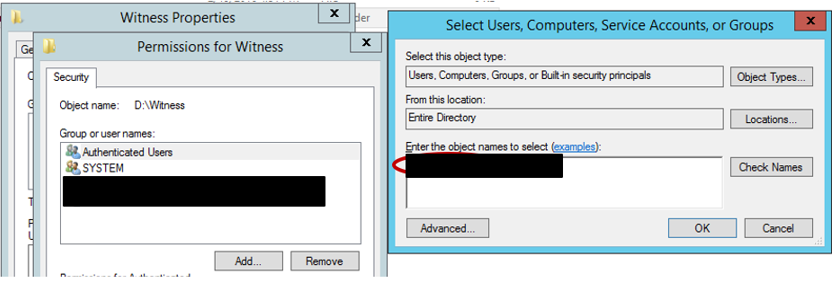
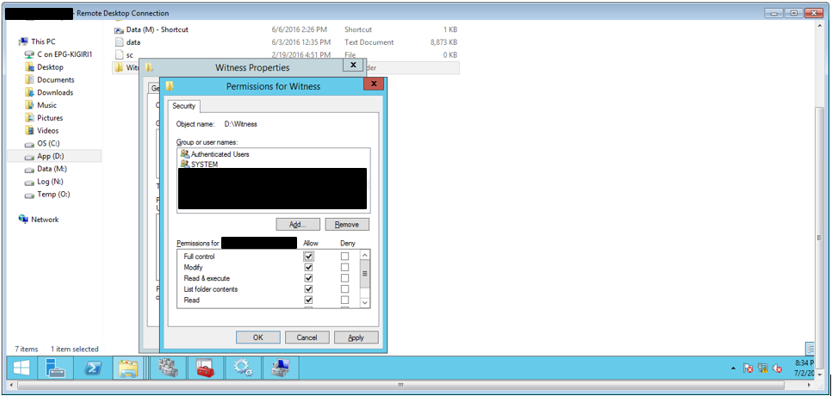
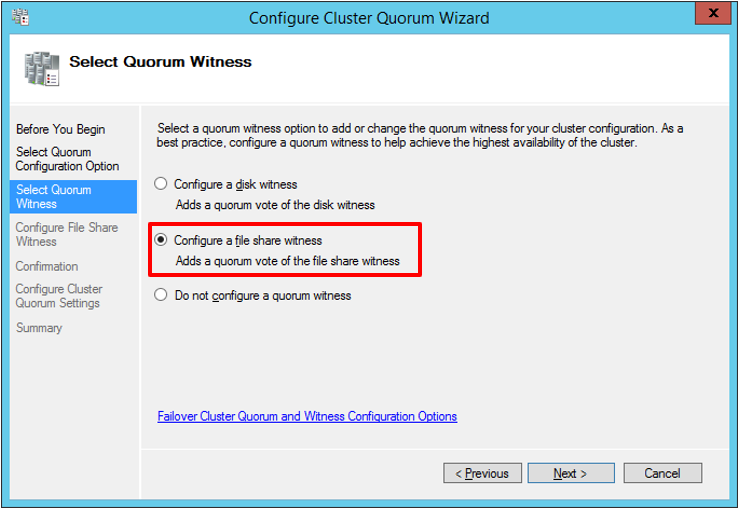
Typically, it should be an odd number of members. However, some configurations allow us to use an even number and remove voting rights from one node. A Witness is a non-server object that you can use to make up the odd number of voters. A File Share Witness gets preference in AlwaysOn configuration since there is no shared disk in an AlwaysOn configuration.
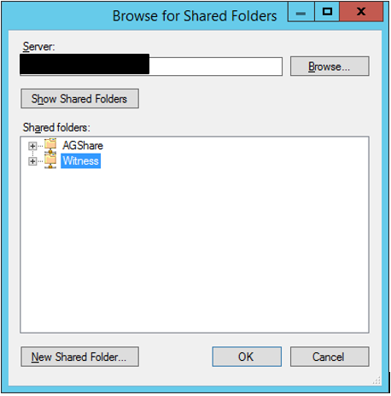
1.6.1 Create a share on a reliable server that does not participate in the cluster. Then, grant full permissions to the Computer Name Object bearing the same name as your cluster (step 4.3.3).
1.6.2 Right-click the cluster you’ve just created, and select More Actions > Configure Cluster Quorum Settings.

1.6.3 Select the option to configure a Quorum Witness
1.6.4 Select the option to configure a File Share Witness
1.6.5 Select the File Share (refer to 4.4.1):
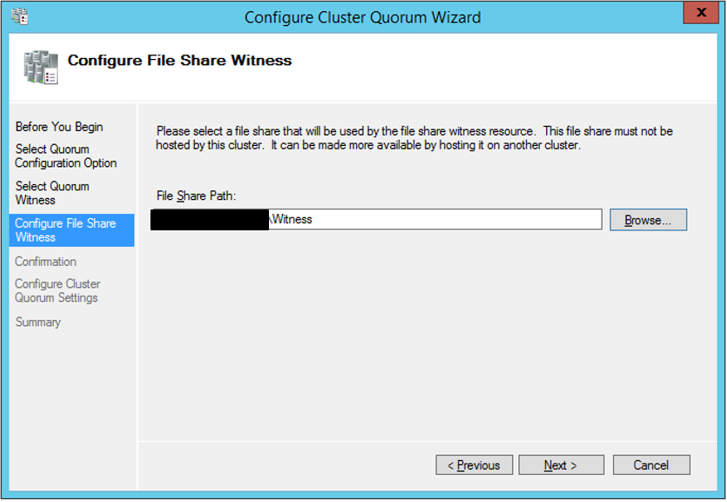
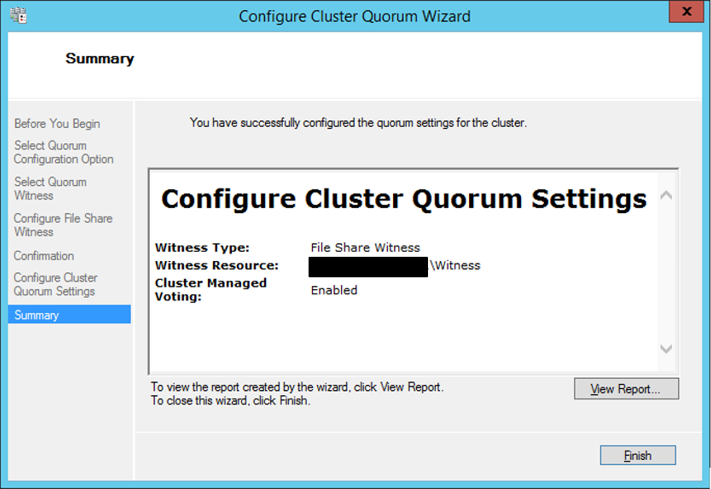
1.6.6 Complete the Witness configuration
1.7 Install the SQL Server
Install single instances of SQL Server on all servers participating in the cluster. It is possible to complete this configuration successfully, even if the previous SQL Server’s configuring took place before creating the cluster.
Note that the SQL Server instances are not clustered in an AlwaysOn configuration. You configure and manage HA at the database level for the database groups. Refer to the relevant documentation for installing the SQL Server.
1.8 Enable AlwaysOn Availability Groups
1.8.1 Open SQL Server Configuration Manager on each node
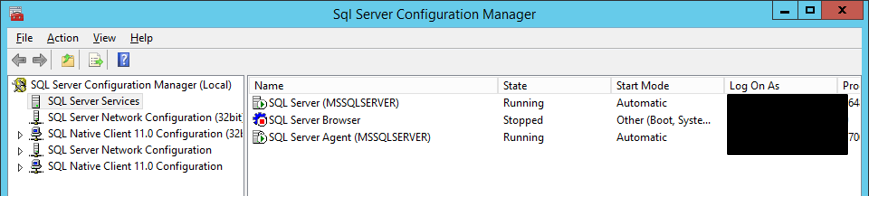
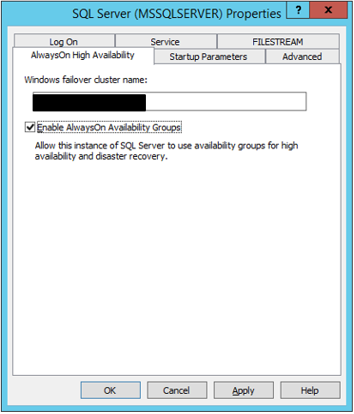
1.8.2 Right-click the SQL Server service. Open the AlwaysOn High Availability tab.
1.8.3 Select the Enable AlwaysOn Availability Groups checkbox
Note that at that stage, you already get identification of the cluster previously configured. This way, you reinforce the order of the steps. You must enable clustering on each cluster node before enabling AlwaysOn on each SQL Server instance.
1.8.4 Restart SQL Server Service
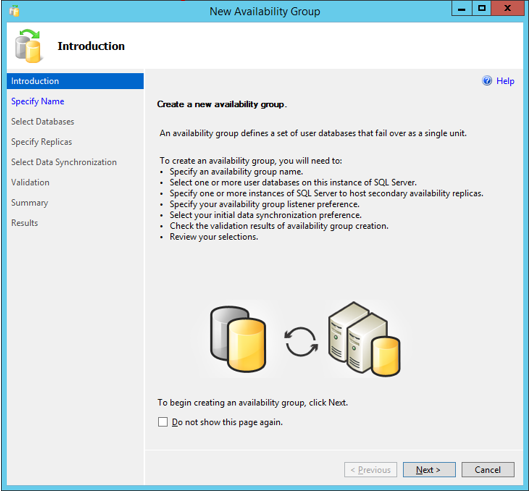
1.9 Create a New Availability Group
1.9.1 Open SQL Server Management Studio
1.9.2 Right-Click AlwaysOn High Availability > Availability Groups and select New Availability Group Wizard.

1.9.3 Follow the Wizard
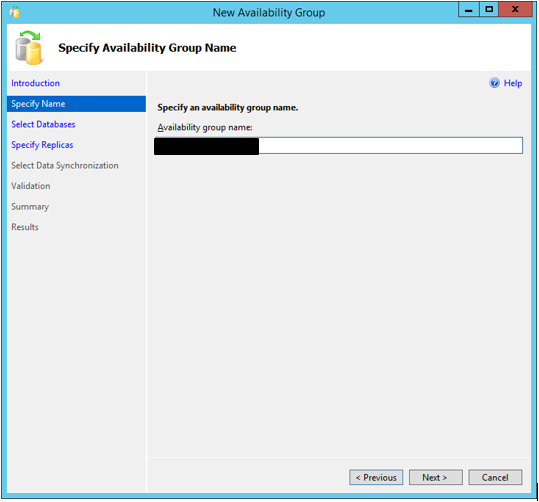
1.9.4 Specify the Availability Group name. This name will be used to create a cluster role.
The Availability Group name is also a Virtual Name Object with an entry in Microsoft Active Directory. Thus, before this works, the Computer Name Object used as the Cluster Name must have permissions to (1) Create Computer Objects and (2) Read All Properties on Active Directory.
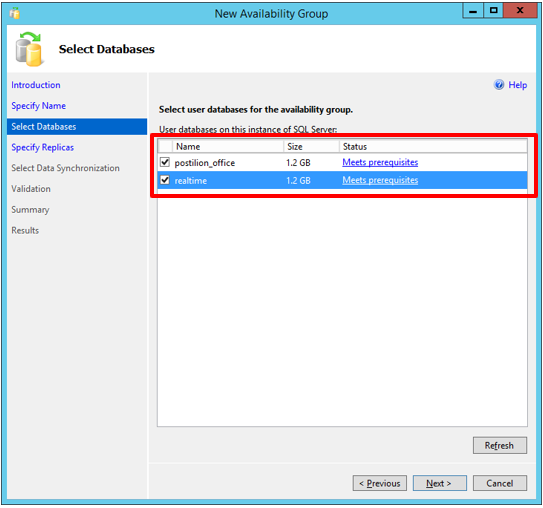
1.9.5 Select the databases desired to be part of this Availability Group. There can be several Availability Groups in one set of instances. The databases involved must be configured with the Full Recovery Model, and you have to take a backup. The wizard will check for these prerequisites.
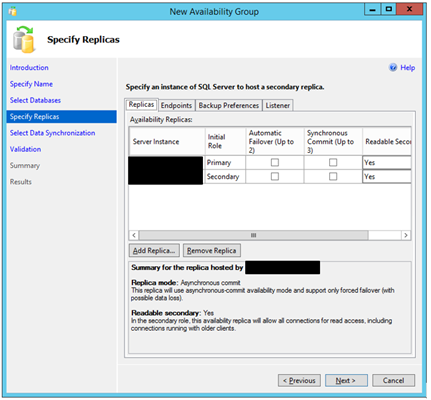
1.9.6 Select the instances that will act as Secondary Replicas
Determine whether you require Synchronous or Asynchronous replication and Automatic or manual-only failover. Details of these choices’ implications are present in Microsoft documentation defined at the end of this document.
Typically, Synchronous-Commit Mode with Automatic Failover is for local resilience, and Asynchronous-Commit Mode is for using AlwaysOn as a DR solution due to the latency concerns.
1.9.7 Create a File Share for the initial backup
This file share is used to initialize the replication. The SQL Server service account should have full permissions to this file share. It is taken for granted that the SQL Server instances participating in this configuration use the same domain account as the SQL Server service account.
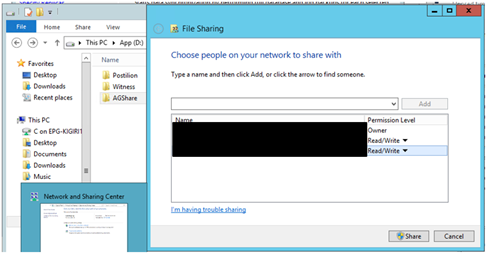
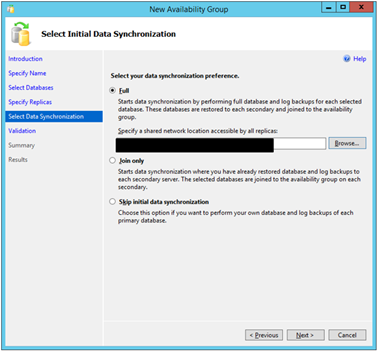
1.9.8 Select the share created in step 4.7.9 as the initial database backup location.
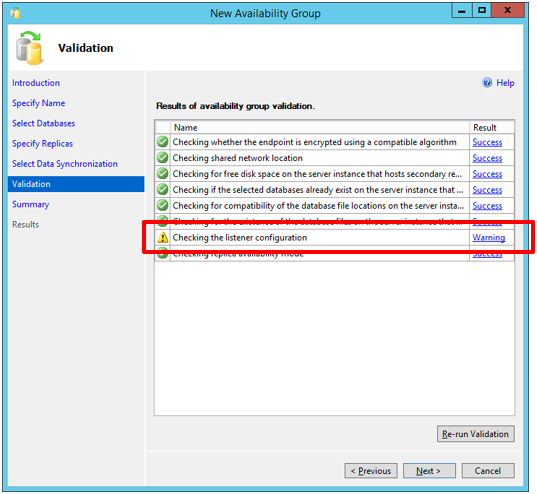
1.9.9 Review the validation stage. Note that the listener has not been created. You can do it later.
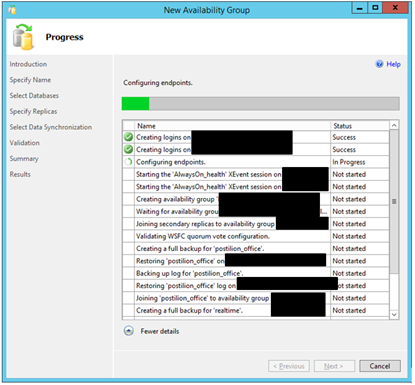
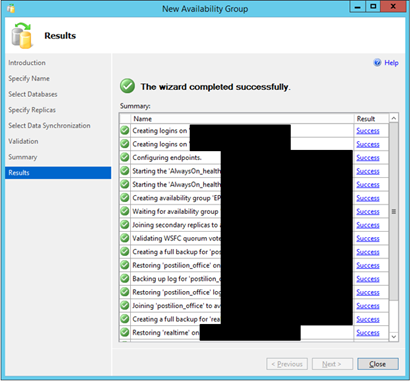
1.9.10 Review the summary of options and complete the configuration

1.10 Add an AG Listener
An Availability Group Listener lets applications connect to the primary, no matter which node is currently playing this role. It helps to make failovers transparent to applications.
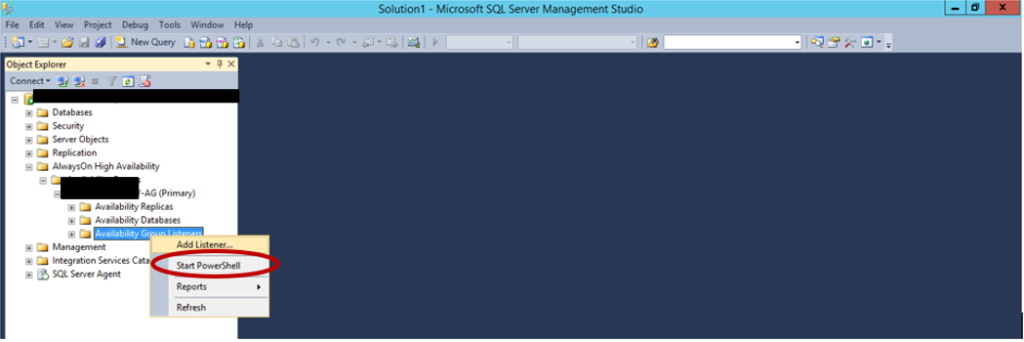
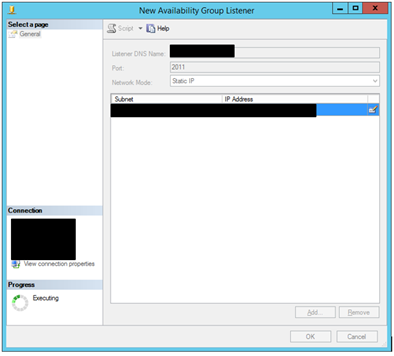
1.10.1 Right-Click AlwayOn High Availability > Availability Group Listener and select Add Listener.
An Availability Group Listener is also a Virtual Name Object (VNO) that you will create on the domain. Thus, it requires an associated IP Address.
As mentioned earlier, the Cluster Name Object (CNO) specified when creating the cluster must have two permissions on the Active Directory Domain for this to work:
i. Create Computer Objects
ii. Read All Properties
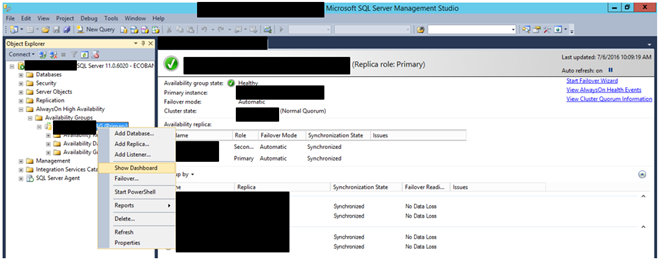
1.10.2 The configuration is complete. You can view the dashboard:
1.11 Issues Faced
Clustered Storage
During the first run of the cluster creation, you all disks on the cluster nodes are added to the cluster. It is not the desired state for AlwaysOn Availability Groups.
The solution was destroying the cluster followed by cleanup, and recreating it with the checkbox Add all Eligible Storage to the cluster cleared in step 4.3.3.
It was impossible to recreate the cluster until cleaning up the nodes with the Clear-ClusterNode PowerShell Commandlet.
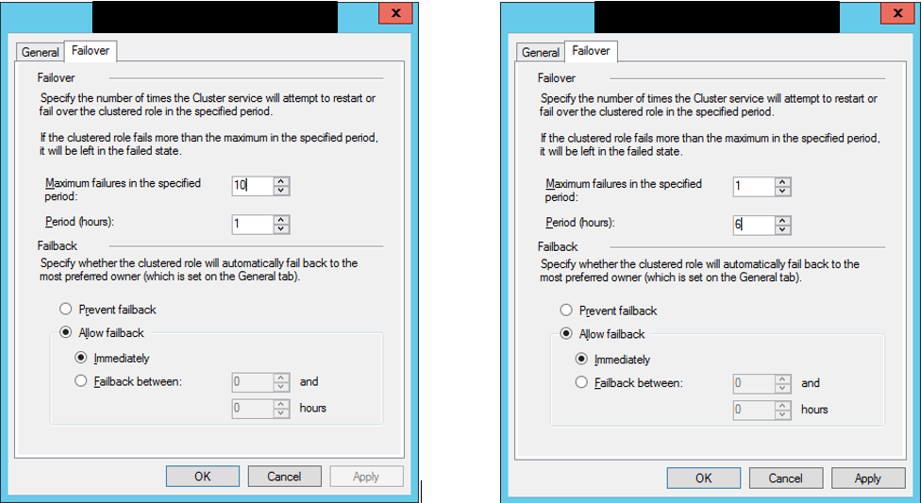
Automatic Failover
Testing Automatic Failover by stopping the SQL Server Service from SQL Server Configuration Manager did not work. The PowerShell Commandlet Get-ClusterLog generated the cluster log -Node <NodeName> -TimeSpan 10, and it identified the following error:
000007f4.00002320::2016/07/07-06:10:59.654 WARN [RCM] Not failing over group EPG-SERVER-AG, failoverCount 25, failoverThresholdSetting 20, lastFailover 1601/01/01-00:00:00.000
The solution was to change the “maximum Failures” in the specified period for the Availability Group Cluster Role to a much higher value.