Introduction
SQL Server Replication is an SQL Server feature that allows us to transfer data from one instance to another for such purposes as consolidating data into a reporting environment or migrations. I personally would not consider SQL Server Replication as a high availability technology even though some people consider it to be.
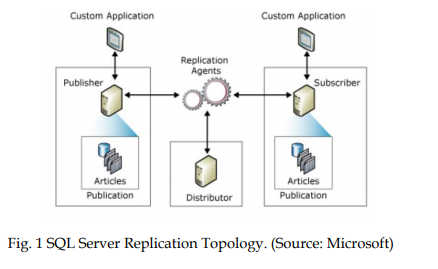
SQL Server replication uses terms similar to those in the publishing industry to describe the way data is handled from source to destination. The key terms are as follows:
- Publisher – an SQL Server instance which makes data available to be replicated to other instances (packaged as publications).
- Publication – a unit ready to be passed to the receiving instance composed of a collection of articles that are actually database objects.
- Distributor – an SQL Server instance responsible for storing data associated with one or more publishers in a database called a distribution database. A Local Distributor is stored in the same instance as the Publisher while a Remote Distributor is located in another instance.
- Subscriber – an instance that receives a replicated database. A subscriber subscription is a request for a publication copy it expects to receive from the Publisher.
- Snapshot.
In the article, I am going to share a few points I learnt from configuring the SQL Server replication to support a heterogeneous subscriber. I will create a publication and subsequently an Oracle subscription which will depend on this publication. I will also demonstrate a few points along with the flow of the process that are very important for troubleshooting problems.
The steps to configure a snapshot replication session are as follows:
- Configure a distributor
- Configure a publisher (along with the publication including the articles being published)
- Configure a subscriber
I will provide a brief explanation of each step.
Configuring a Distributor
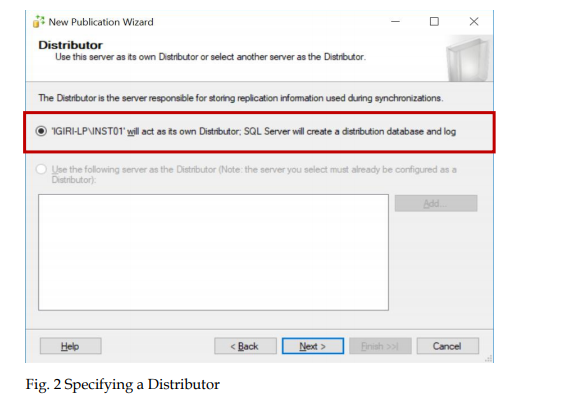
A Distributor is an instance responsible for storing information used during the replication. When you try creating a publication in the instance for the first time, SQL Server will suggest you configuring a Distributor. In this article, our Distributor is a Local Distributor.
Creating a Publication
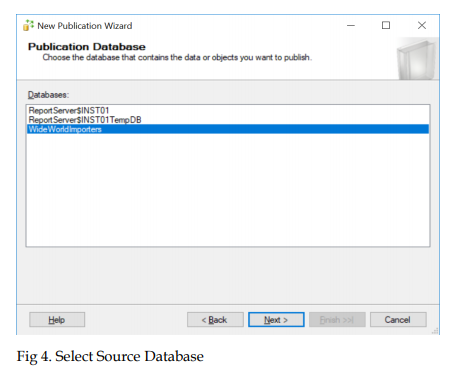
Let us identify the database that contains the objects we would like to replicate. This will be a Publication Database.
To create a publication database, follow the instructions on the screenshots below.
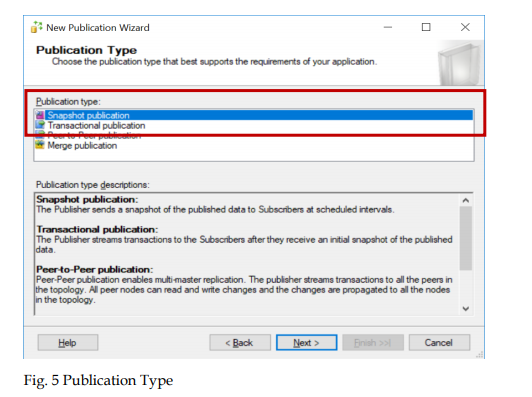
This step allows you to select a type of the publication you wish to configure. Each publication type is described in the lower pane. For simplicity and compatibility reasons, we choose a snapshot publication. Please note that we intend to replicate objects to an Oracle instance. In this case, Transactional and Snapshot Publications are supported. There are other good use cases for a peer-to-peer and merge replication.
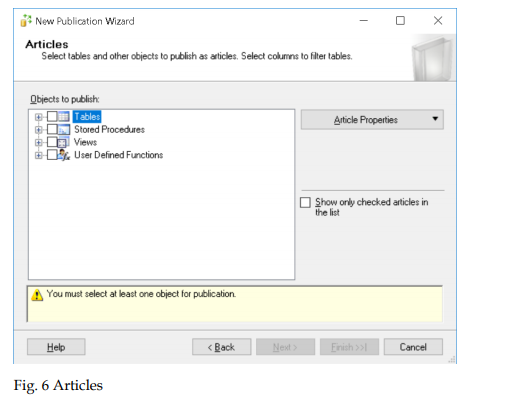
At this step, we choose the articles we want to publish. SQL Server allows us to publish four key object types such as:
- Tables
- Stored Procedures
- Views
- User Defined Functions
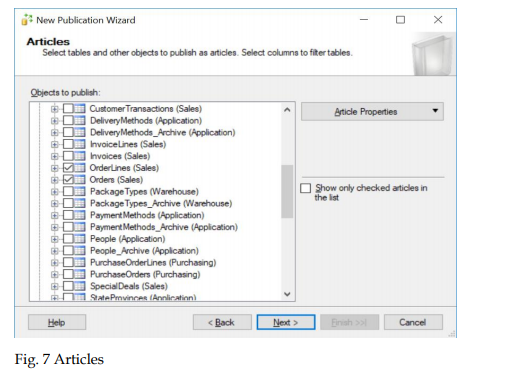
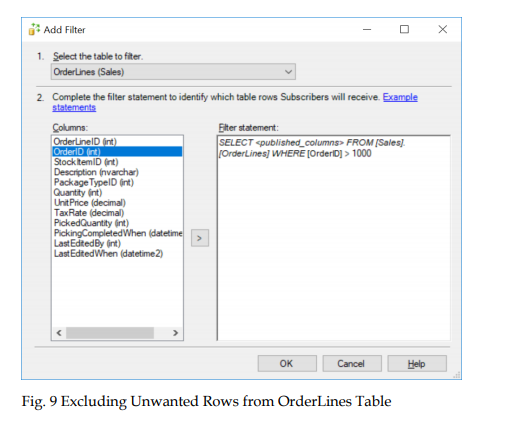
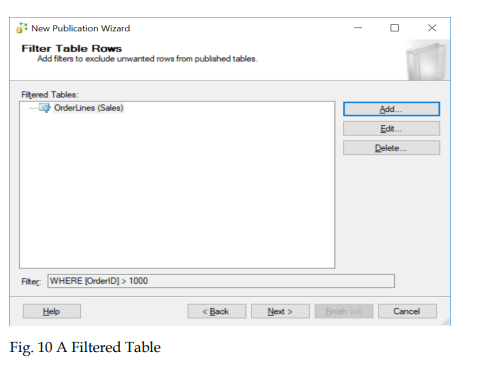
As you can see, we are going to publish two tables: Orders and OrderLines. For the purpose of demonstrating the flexibility of SQL Server replication, we will filter the records as shown below.
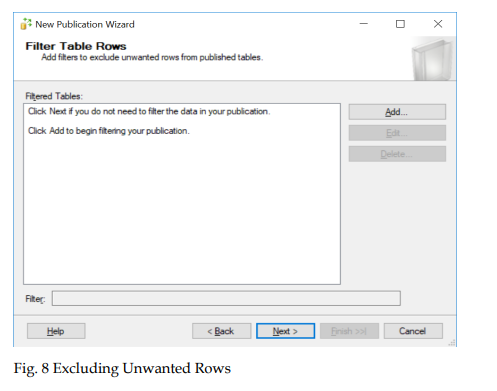
Note: We are interested in the number of OrderIDs being greater than 1000.
To exclude unwanted rows from published tables, click Add… and then Next.
The below screenshots display how to filter columns for the OrderLines table.
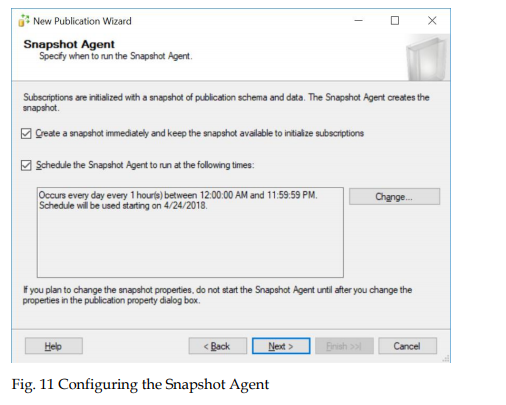
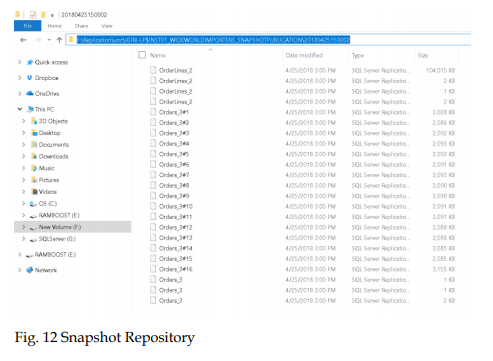
Next, configure the Snapshot Agent properties. We define an initial snapshot and the interval during which a fresh snapshot is generated. The data extracted at this step is stored in a directory specified when initially configuring the distributor.
First, set up a schedule for a snapshot agent to start. Click Next.
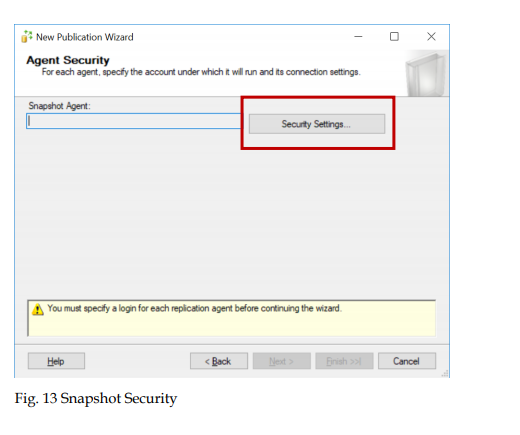
For each snapshot agent, specify the account under which it will run.
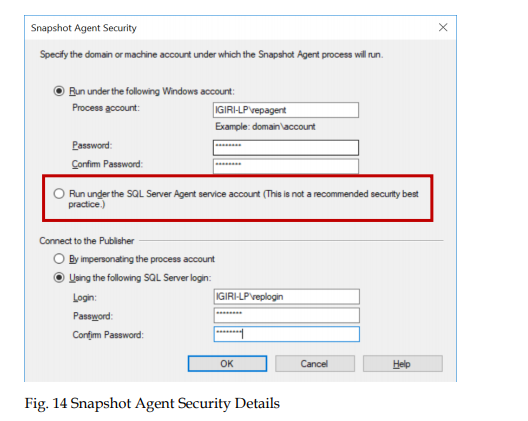
Then, configure the Snapshot Agent security settings. The Security Settings table opens another window where we define who runs the Snapshot Agent process as well as determine the SQL Server login details to be connected to the publisher. There are certain permissions required by these principals which can be a little dodgy in production. Using the SQL Server Agent Service account is a workaround to avoid complications but it is NOT actually recommended by Microsoft.
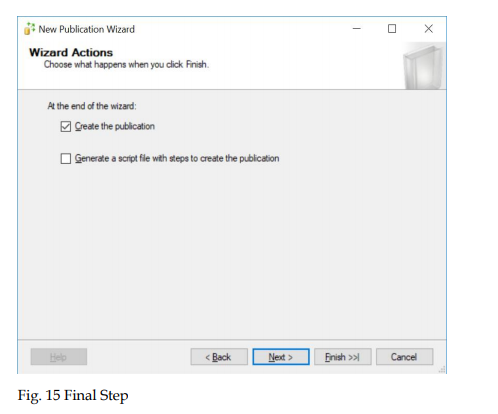
Close to the end, you will need to decide whether you want to save the configuration as a script for later use or create the publication immediately.
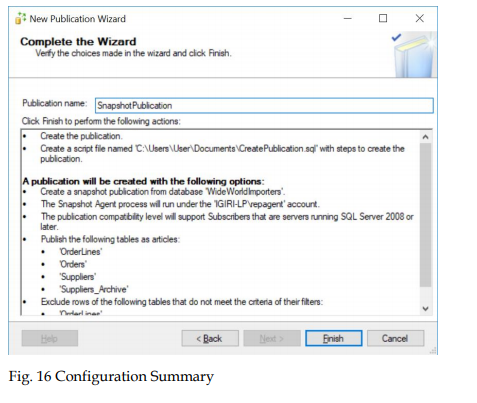
The next step (Fig. 16) summarizes all the options you have selected. It is recommended to make a quick review before clicking the Finish button.
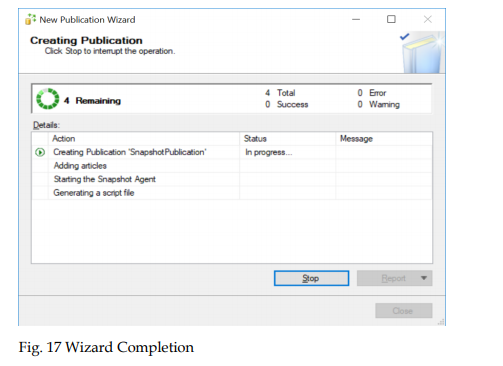
The Creating Publication process starts. You may click Stop to interrupt the process.
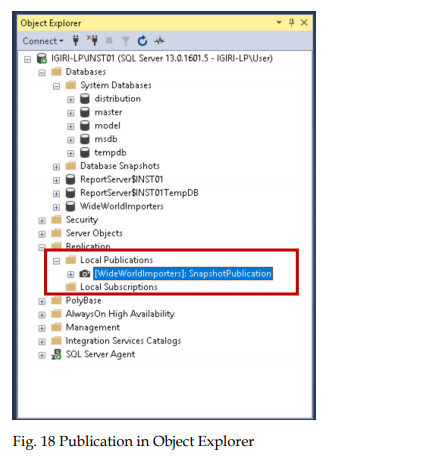
Once the process is completed, your publication becomes visible in the Object Explorer pane on SQL Server Management Studio.
Adding a Subscriber
A subscriber receives publications made available by the Publisher. The copy of the publication to be delivered to a subscriber is called a Subscription. A publisher can have many subscribers. Each
subscriber receives the articles published by this Publisher as a unit called the publication as far as the publisher is concerned and considered the subscription to the Subscriber.
By creating a subscription, we simply tell the Publisher, “I want to have copies of this publication”. As much as a Publisher can have many publications, there can also be many subscribers to one
publication. Thus, the relationship of Publishers to Subscribers is a one-to-many relationship.
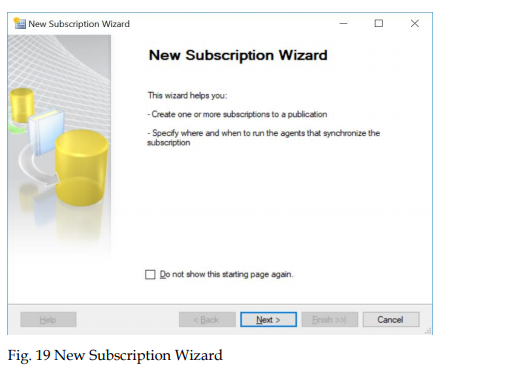
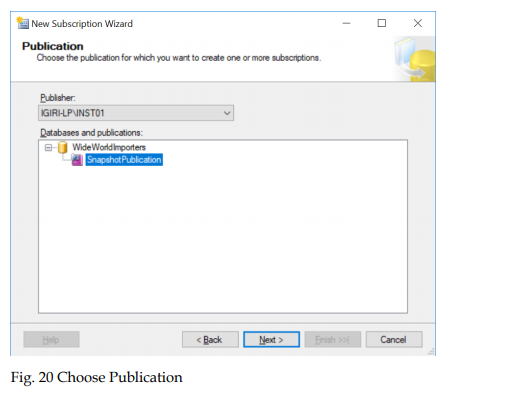
The New Subscription Wizard lets us decide what publication we would like to subscribe to. We may choose from a list of the previously created publications as shown in Fig. 20.
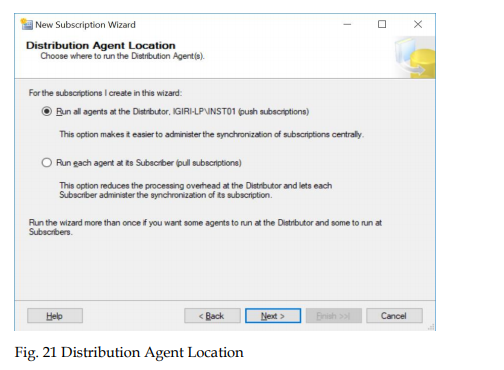
Next, we decide whether we want to run a Push Subscription instead of a Pull Subscription. While a Pull Subscription is better for performance when you envisage several subscribers, it will not
work for a heterogeneous database replication. Non-SQL Server Subscribers must use a Pull Subscription. It is worth mentioning that the articles published in this scenario are also limited to tables and indexed views.
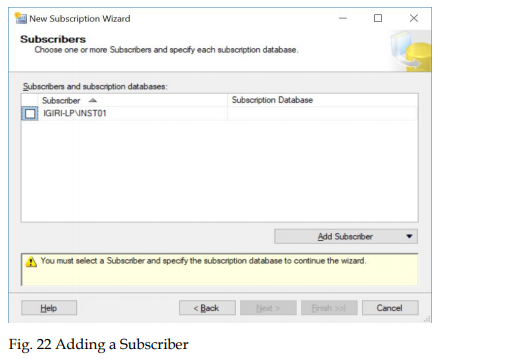
Add an Oracle subscriber using a data source name (DSN). This DSN must already have been created, tested and found out to be working in terms of being able to connect to the Oracle instance via Oracle Net. This means that you need an Oracle client installed on the SQL Server host with an entry to a file called tnsnames.ora defining the destination of the connection. This TNS Entry is in turn used to configure the data source name which the New Subscription Wizard is asking for at this stage.
The entry I have created in my tnsnames.ora file looks like this:
ORCL10G =
 (DESCRIPTION =
    (ADDRESS = (PROTOCOL = TCP)(HOST = IGIRI-LP)(PORT = 1522))
    (CONNECT_DATA =
      (SERVER = DEDICATED)
      (SERVICE_NAME = orcl10g)
    )
 )
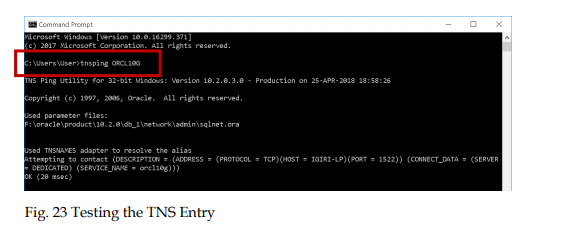
The highlighted portion is the alias while the other details define the destination of the connection. We can confirm whether this entry is working properly and whether my Oracle Environment Variables are configured correctly by using the tnsping utility as shown below.
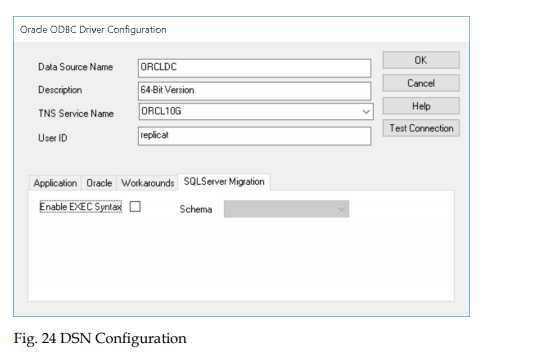
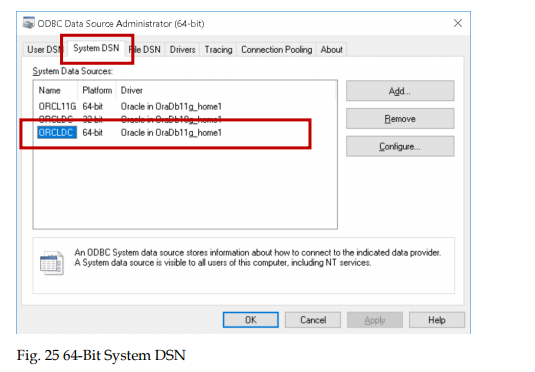
Once confirmed, this TNS Entry is used to configure the DSN we intend to use. Our TNS Service Name is called ORCL10G while the DSN is called ORCLDC. It is the DSN we use in the New Subscription Wizard.
Note that we have used the 64-Bit version of ODBC to configure the DSN and it is a system DSN, not a user DSN. The configuration does not depend on who is logged on to the computer.
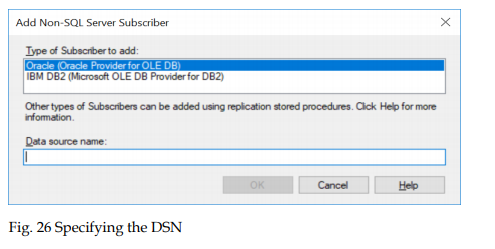
Select a subscriber type to be added and enter the data source name. Click OK.
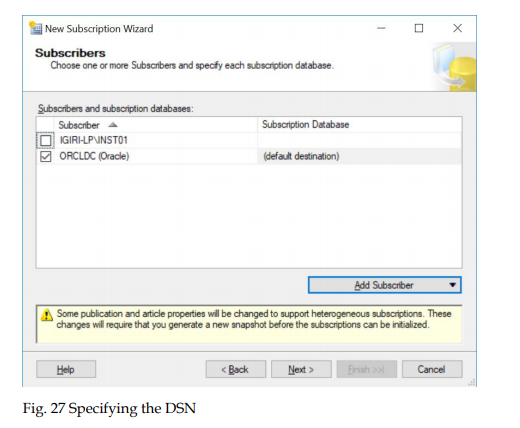
Choose one or several subscribers, as well as specify a database for each subscription.
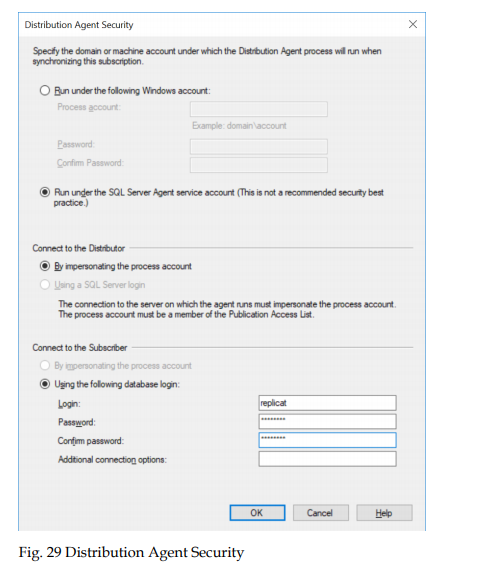
Onсe the DSN is added, we can proceed with configuring the distribution agent security. We find out that this is similar to the case when we configured a Snapshot Agent Security in the New Publication Wizard.
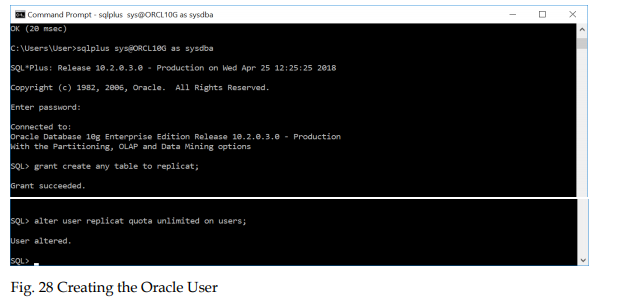
Here, however, we have a section where we establish a connection to the Subscriber rather than to the Publisher (recall that this is a push subscription). This user account must have been created on the Oracle instance and should have privileges to create tables and quota on its default tablespace (here you may need an Oracle DBA).
Add parameters to the distribution agent security and click OK.
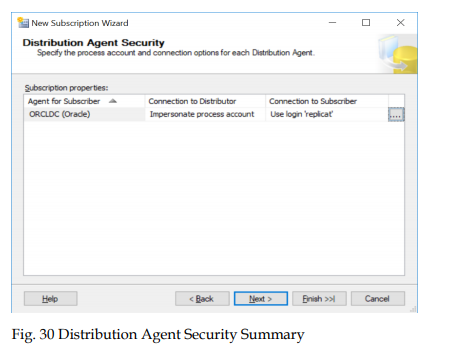
Specify the account and connection options for each distribution agent and click Next.
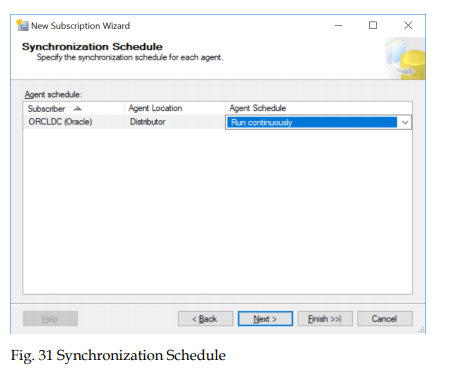
Define the synchronization schedule for each agent. In our case, we chose to synchronize continuously. Click Next.
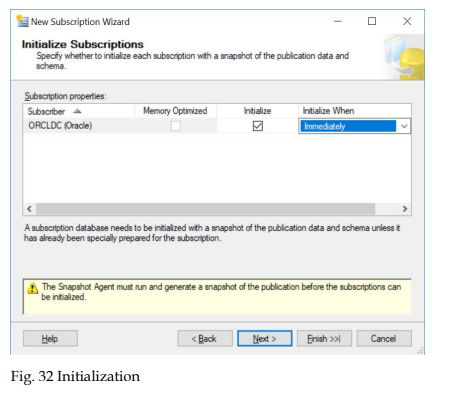
Select the option to initialize the subscription immediately that means copying ALL the data available in the Snapshot folder again. It is advised for NoSQL Server subscribers to re-initialize the subscription when any new articles are added to the Publication. Click Next.
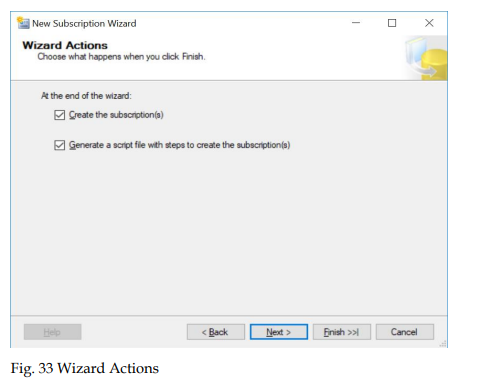
Select the options to be performed after the process is completed successfully. Click Next.
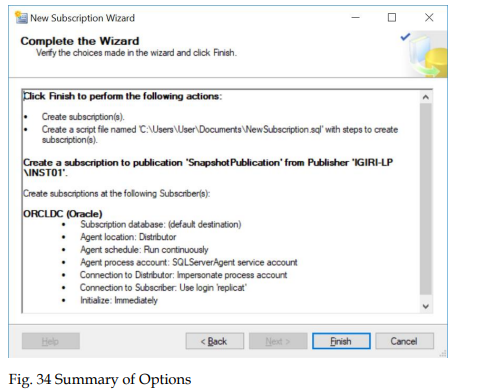
Verify the information you added and click Finish.
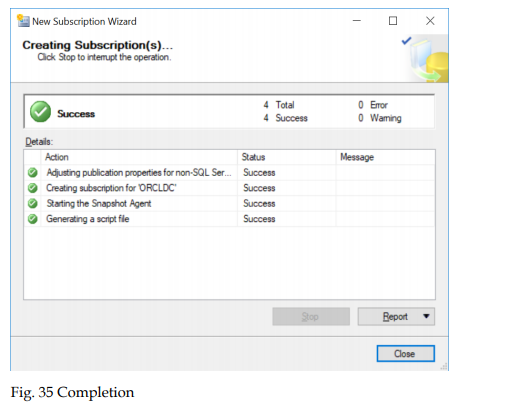
The Creating Subscription process runs.
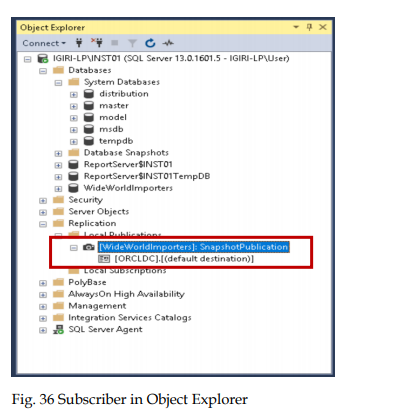
The subscription we just created shows an entry in Object Explorer (on the Publisher) mapped to its parent publication. Note that it does not show up in the Local Subscriptions node that provides you with a list of subscriptions created on the current instance that is not in this case.
Monitoring and Troubleshooting
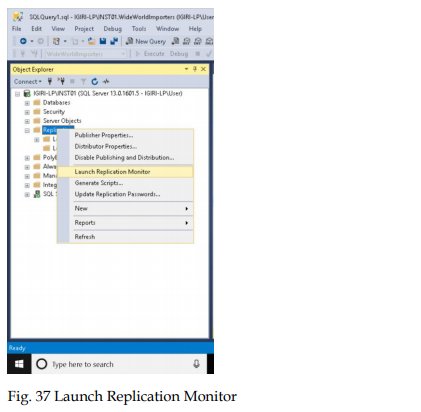
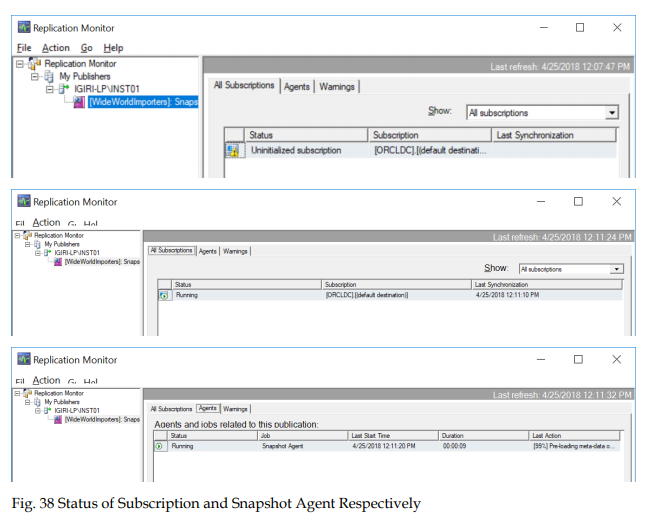
SQL Server provides the Replication Monitor to review and monitor details of all replication sessions on the instance. The Replication Monitor can inform the administrator when the Snapshot Agent runs and completes. It can also show us whether the Subscriptions are initialized and whether the Distribution Agent is running smoothly.
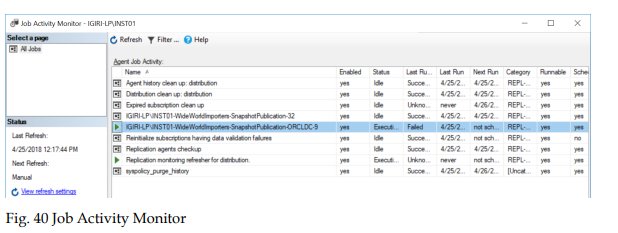
There are eight SQL Server Agent jobs associated with our current configuration. Viewing the history of these jobs also gives details on whether everything is fine.
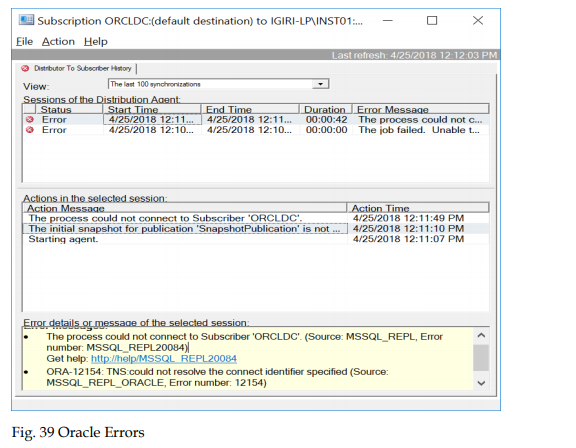
Actual Oracle errors are listed in the Replication Monitor and in the SQL Server Error log when they are encountered. This level of details makes SQL Server Replication interesting to troubleshoot. Having a knowledge of Oracle (for the SQL Server DBA) will take a long way in understanding the errors that could arise.
Take a look at the example of the error in Fig. 34. This error occurred before the Oracle Net and ODBC environments were configured correctly. The errors give a very clear indication of where the problem is.
The Job Activity Monitor view also informs us what jobs succeed and what job we need to troubleshoot in details by examining the Job History.
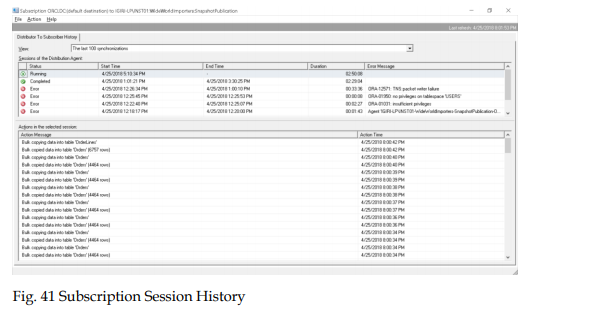
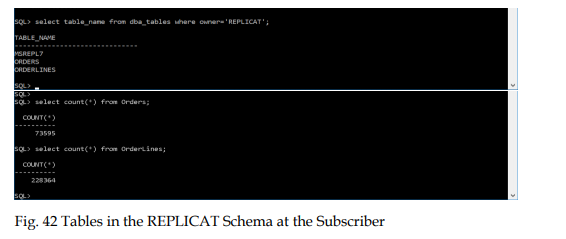
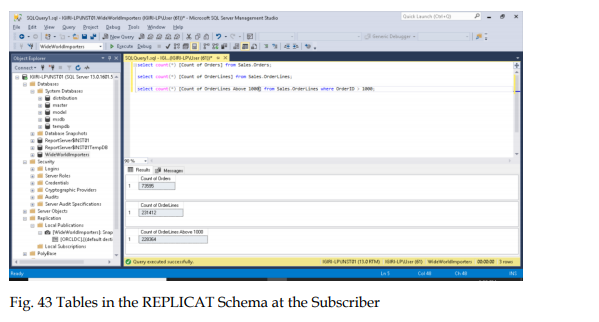
Once all the previous errors are resolved, opening up a subscription by double-clicking it gives us a detailed view of all sessions, errors, and result we expect to see when everything is fine. Observe that Agent Bulk copies data from the Publisher to the Subscriber in batches. We can also query the tables that have been created in the Oracle instance and compare the records. (Fig. 37).
As you can see, SQL Server prepares the table excluding the source schema (Sales) before creating the table in Oracle and copying the data.
The record count in the Oracle instance matches the one in the source table and takes into account the fact that we filter the OrderLines table for OrderIDs greater than 1000.
Conclusion
We have briefly run through the process of configuring heterogeneous database replication with an Oracle instance as a Subscriber. Though this option is gradually being deprecated by Microsoft there are use cases that could still benefit from the capabilities provided by this old SQL Server feature. The References section provides a wider reading on the subject which I believe will be useful for those wanting to practice more.
References
Configure Replication for Always-On Availability Groups
Non-Oracle Subscribers
Heterogeneous Database Replication
Oracle Subscribers
