
This article explains how to create an SSIS package using SQL Server Data Tools, deploy it with the Integration Service deployment wizard, and automate its execution through the SQL Server Agent job.
Practical creation, deployment, and execution of SSIS package
To demonstrate the process, we will perform all following jobs in practice:
- Create an SSIS package that rebuilds all the user database tables indexes.
- Deploy the SSIS package in the Integration Services catalog.
- Create an SQL Server Agent job to automate the execution of the SSIS package.
We can create the integration services package using SSDT for Visual Studio 2017. You can download it here.
Once it is downloaded and installed, create a New SSIS Project.
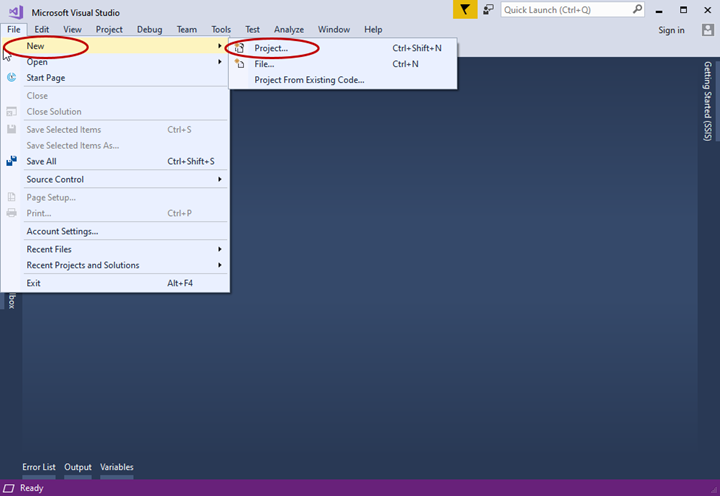
Open SQL Server Data Tools > File > New > Project:
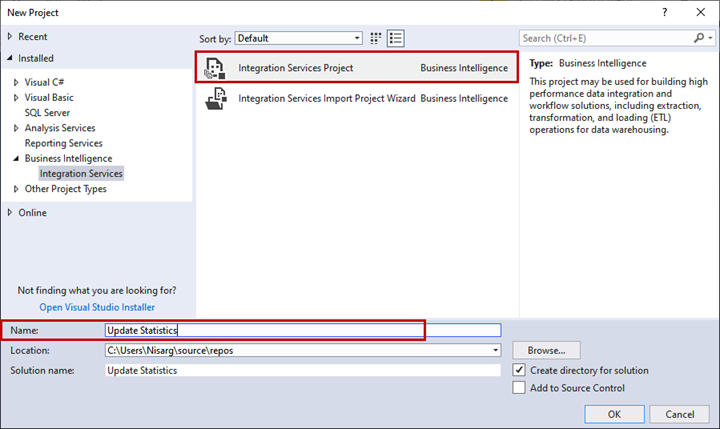
On the New Project dialog box, select Integration Services Project,and name the Project:
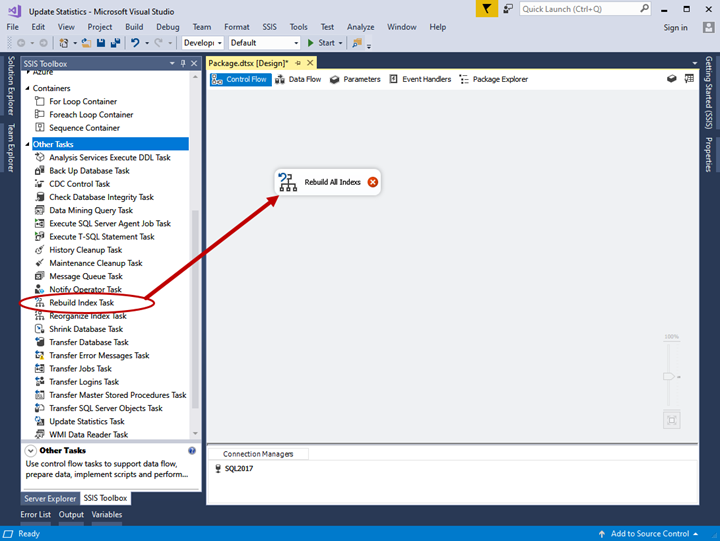
Drag the Rebuild index task from the SSIS toolbox and drop it on Control Flow designer. Rename it to Rebuild All Index.
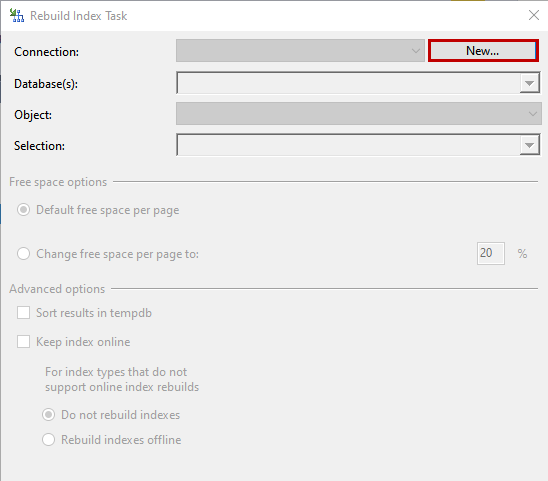
Here we need to configure the rebuild index task. Double-click it, and the Rebuild Index Task dialogue window will open.
First, click on New to create a new connection to the server.
It will open the Connection Properties Dialogue window.
Specify the connection name, the server name, and the authentication method to logon to the server.
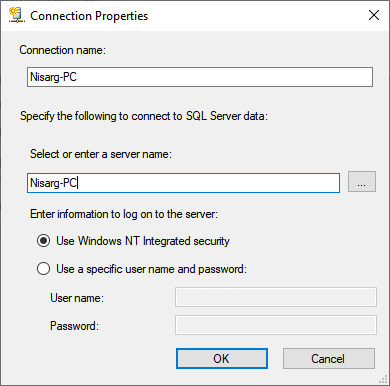
Click OK to save the settings, and close the window.
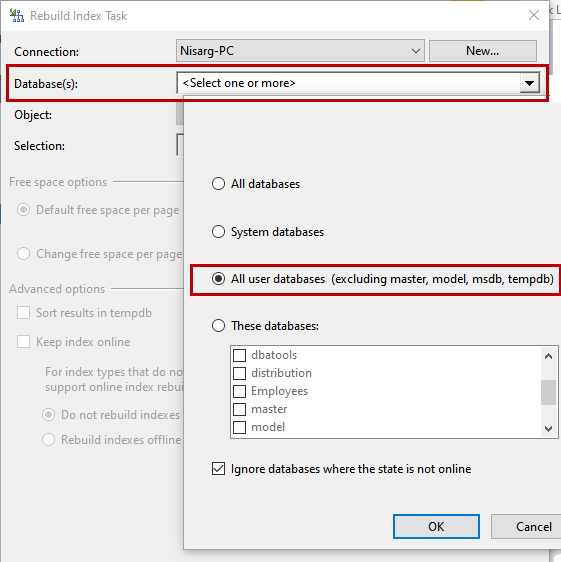
Once the connection is established, the databases’ list fills in the Database(s) drop-down box.
In this demo, the package must rebuild the index of all databases. Click on Database(s) and select All user databases from the drop-down menu.
We want to exclude the databases that are not online. Therefore, check the Ignore databases where the state is not an online checkbox in the same window.
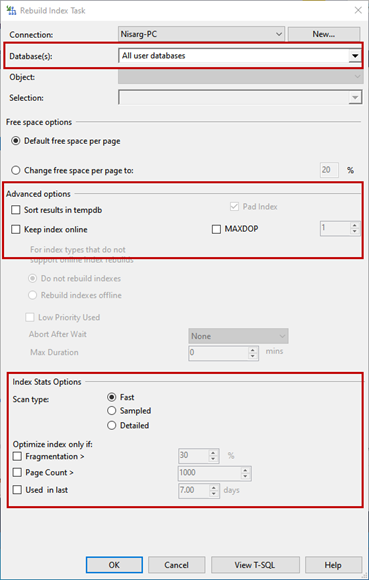
After choosing the databases, you receive access to the configuration options. The default options are reasonable and suitable for our goals, but you can configure additional settings in your particular case:
- Free space options:
- Default free space per page: it drops and recreates the table index with the default FILL factor.
- Change free space per page to. It drops and recreates the table index with the FILL factor specified by the user.
- Advanced options:
- Sort TempDB.
- Keep the index online during the index rebuild operation. (Supported in enterprise edition)
- Set the MAXDOP value to run the index rebuild in multiple threads.
- You can optimize the index rebuild operation by configuring the following options:
- Rebuild the index only if the fragmentation is higher than the value specified in fragmentation> textbox.
- Rebuild the index only if the page count is higher than the value specified in the Page Count > textbox value.
- Rebuild the index only if it is used before the number of days specified in Used in the last textbox.
Note that you can select one of those options or combine several of them.
Click OK to save the configuration.
Now, let’s deploy the SSIS package.
Hover on Project > Deploy:
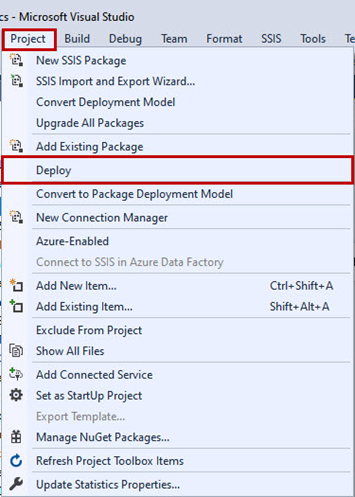
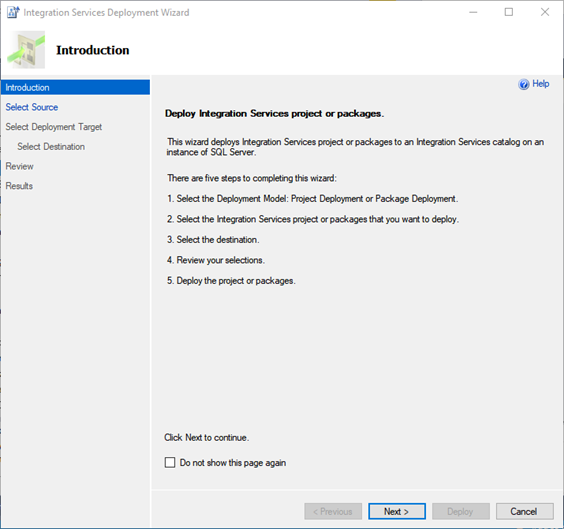
The Integration Services Deployment Wizard starts.
On the first screen, you can see the list of tasks that the wizard will perform. You can skip it – checkmark Do not show this page again at the bottom of the window, and proceed to Next.
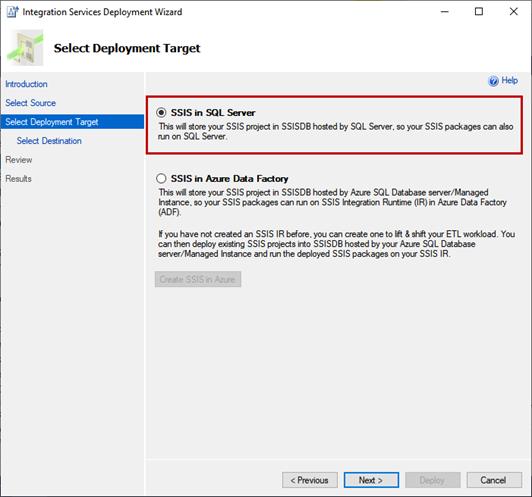
On the Select Deployment Target screen, specify the target.
You can choose either the SQL Server integration services hosted on the on-premise server or the integration services in the Azure Data Factory option.
We have installed integration services in on-premise SQL Server. Hence, select SSIS in SQL Server. Click Next.
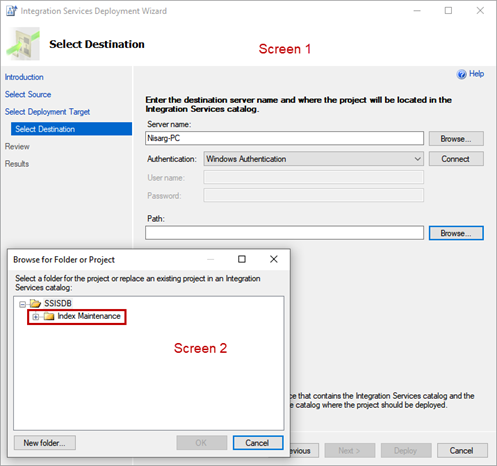
We get to the Select Destination screen.
Specify the server’s name where you have installed SQL Server integration services and provide the connection credentials (Screen 1). Note that you must specify the path to the integration services project in the SSISDB catalog at this stage.
Click on Browse (Screen 1) to locate the project in the SSISDB catalog and navigate to the SSISDB folder (Screen 2). Click OK.
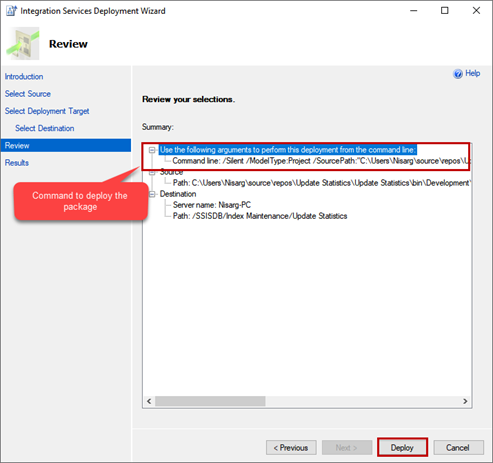
Click Next and proceed to the Review window.
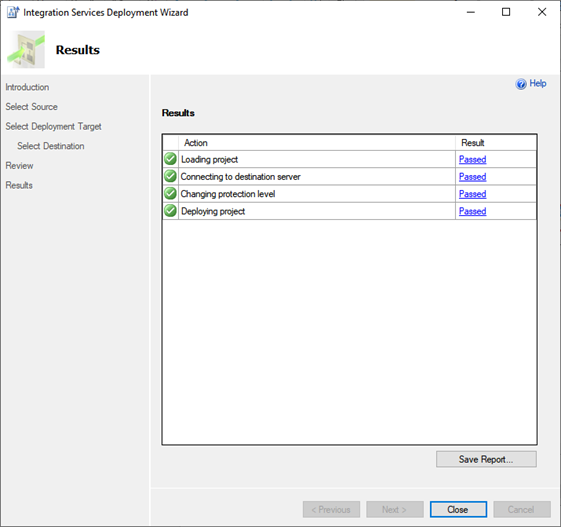
Here, you can verify the Source and destination details. After that, click on Deploy.
Once the project deploys successfully, click Close to complete the task in the Integration Services Deployment Wizard.
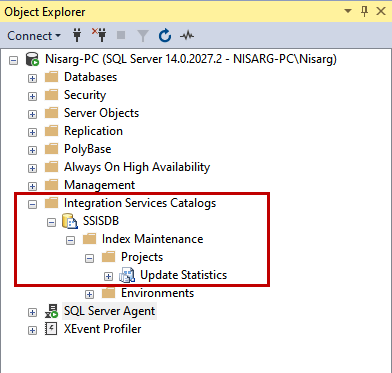
You can view the package under the integration service catalog folder of SQL Server Management Studio.
Open SQL Server Management Studio > Connect to the database engine > expand the database instance > Expand Integration Services Catalogs. Then, expand SSISDB > Index Maintenance.
Schedule the SQL Server Integration Service Package execution
The SSIS package execution scheduling requires an SQL Server Agent job.
- The SSIS package execution scheduling requires an SQL Server Agent job.
- Expand SQL Server Agent and Right-click on Jobs. Select New Job.
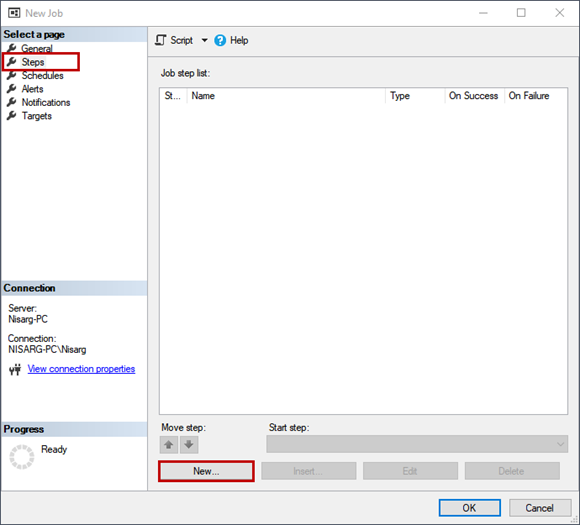
- In the New Job dialog box, enter the desired name in the Name field. Click on Steps to add the job step.
- Click on New.
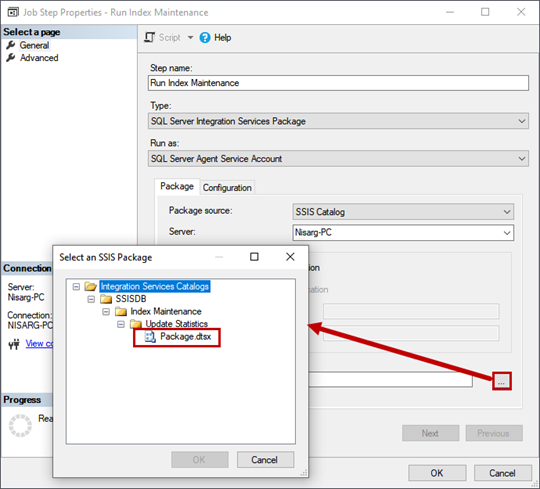
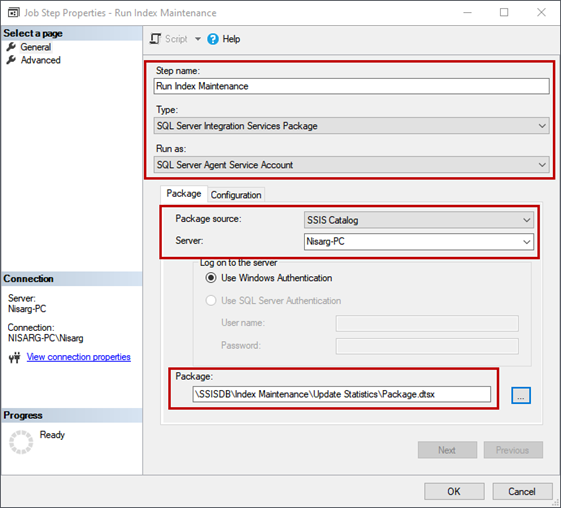
You will get to the Job Step Properties dialog window.
- Provide an appropriate job step name and select SQL Server Integration Services Package from the Type drop-down box.
- Select SQL Server Agent Service Account from the Run as drop-down menu. We do it because the SSIS package should execute through the SQL Server Agent Service account.
- Select SSIS Catalog from the Package source drop-down menu, as we’ve deployed the package in the SSIS catalog. Hence
- Enter the Hostname of the server on which we have installed the integration service.
Note that we must enter the location of the package in the SSISDB catalog. To do that, click on the (…) button (see the below screenshot). A dialog box Select an SSIS package opens. There, select an appropriate SSIS package and click on OK.
When the configuration is complete, click OK to save the job step.
The job must execute daily at 1:00 AM.
To configure the schedule, click on Schedules > New:

In the New Job Schedule dialog box that appears, enter the desired schedule name in the Name textbox.
Choose Daily from the Occurs drop-down box and enter 02:00:00 in Occurs once at the textbox:
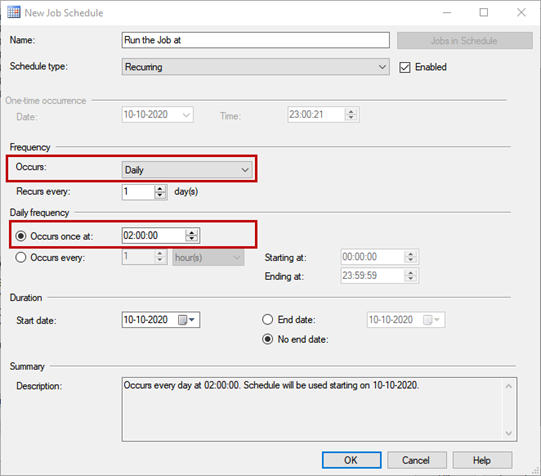
Click OK to save the schedule. Then click OK in the New Job dialog box to save the Agent job.
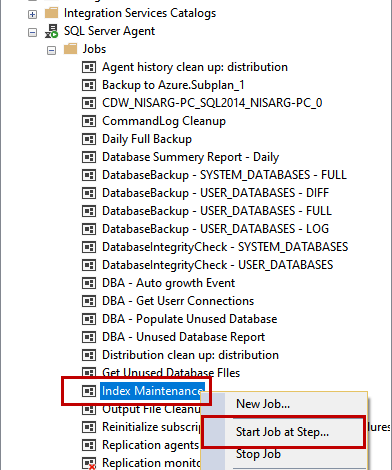
Test the SQL Job
We test the job by executing it manually. Right-click on the job and select Start Job at Step.
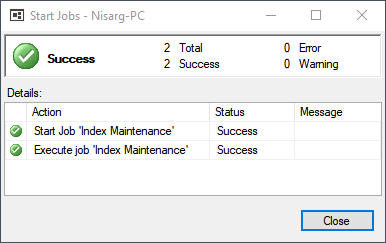
If the job completes successfully, you can see the success dialog box shown in the below screenshot.
Summary
This article demonstrates the creation of an SSIS package to rebuild all the SQL Server user database indexes. It also covers the cases of the package deploy in the SQL Server integration services catalog. Additionally, we’ve explained how to automate the SSIS package’s execution through the SQL Server Agent Job.
Tags: sql server, sql server agent, ssis Last modified: October 08, 2024