This is the final part of the three-part article which aims to help both beginners and professionals in designing a simple but fully functional data warehouse business intelligence solution in Azure from scratch. Please refer to Part 1 and Part 2 to get more information.
This part is mainly focused on the overall functionality of the simple data warehouse we are designing in Azure along with adding an important component known as the data workflow that is going to pull the data from the source and load it into the data warehouse database.
We are also discussing the idea of using business rules in our simple data warehouse followed by some thoughts about the reporting technology to be used with it.
Also please note that we are using dbForge Studio for SQL Server to manage both source and data warehouse databases in this article while you can use any compatible database management tool such as SQL Server Management Studio (SSMS) or Azure Data Studio.
Data Warehouse Database Design Review
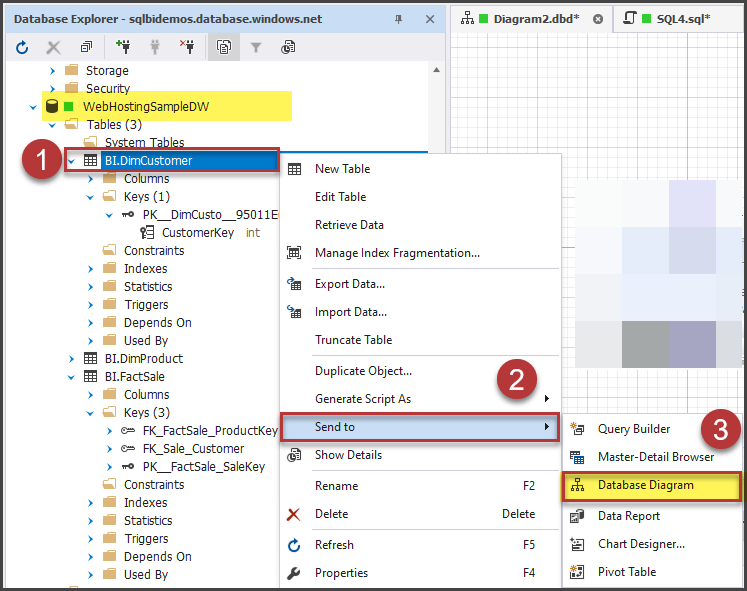
Please open dbForge Studio for SQL Server (or any other compatible database management tool such as SQL Server Management Studio (SSMS)) and under the database explorer connect to the data warehouse database.
Right-click the DimCustomer table and click Send to ? Database Diagram:
Please add all three tables to see the complete design (in SQL Server Management Studio (SSMS) this can be achieved by a database diagram):
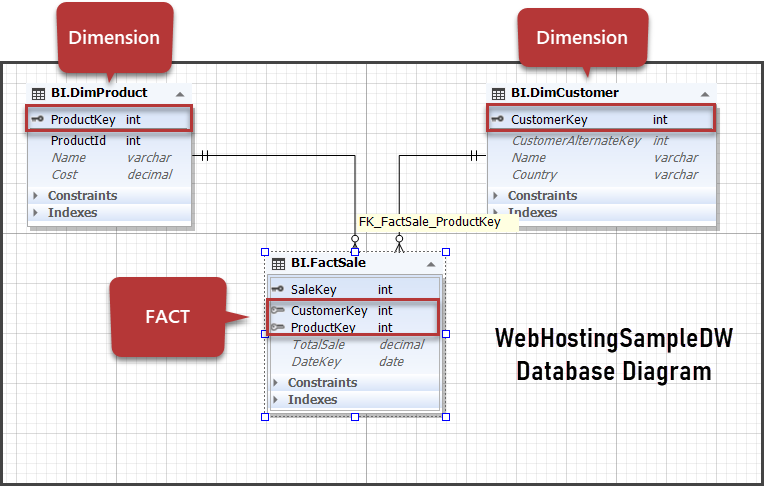
As we can see from the database diagram, the data warehouse generated keys (CustomerKey and ProductKey) are used to link the dimensions with the Fact (FactSale). This is the core of the data warehouse database and without a FACT table, your data warehouse lacks certain standards and quality and can be easily challenged by any professional/expert.
A Word about Centralised Business Logic
The centralized business logic in a professional data warehouse is the key to success but in a simple data warehouse, it can be as simple as SaleAmount column in the FactSale table which can be aggregated as per requirement.
Now by the principle of centralized business logic, you have to define it centrally. It means we can have it defined in the FACT table or later on in a data model when using Azure Analysis Services or finally in a Power BI report model view.
Data Workflow Design and Implementation
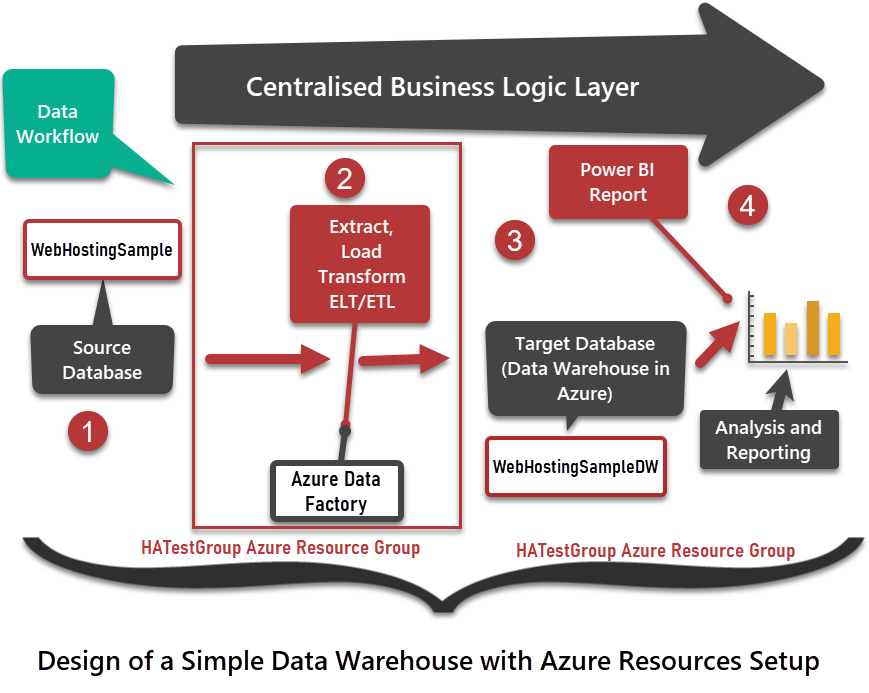
Before we design a data workflow strategy let us review the whole architecture this time focusing on the data flow from source to the target database:
Main Objective of the Data Workflow
The main objective of the data workflow is to extract the data from the source and load it into the target database (data warehouse) with some transformation if required.
We are looking forward to using Azure resources to only perform a simple operation of pulling and loading the data successfully.
Now to achieve such objective of loading the data warehouse database, one of the best suitable resources is the Azure Data Factory where we are going to build a data pipeline.
Data warehouse Data Check
Let us check the dimensions and fact table data before designing any data workflow strategy by running the following script against WebHostingSampleDW:
-- View Dimensions customer and product
SELECT * FROM BI.DimCustomer dc
SELECT * FROM BI.DimProduct dp

-- View FACT FactSale
SELECT * FROM BI.FactSale fs
The output is as follows:
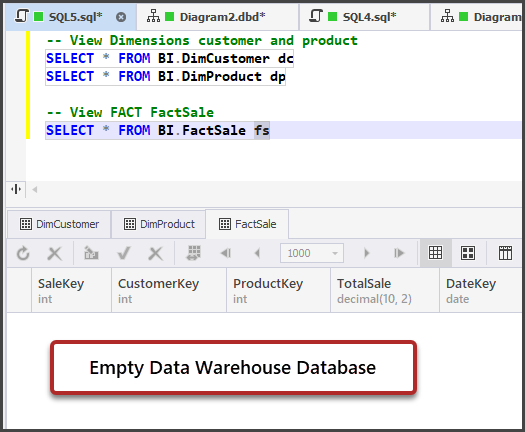
We can see there is no data yet so we need to come up with the data warehouse populating strategy and this is going to be designed with the help of Azure Data Factory.
Setup Azure Data Factory
Please sign in to your Azure Portal and under the HATestGroup resource group create a new resource type Data Factory with the following properties:
Resource Group: HATestGroup (you can choose the resource group you created)
Region: UK South (you can choose any region that suits your requirement)
Name: SQLBIDataFactory (you can choose the name of your choice)
Version: V2
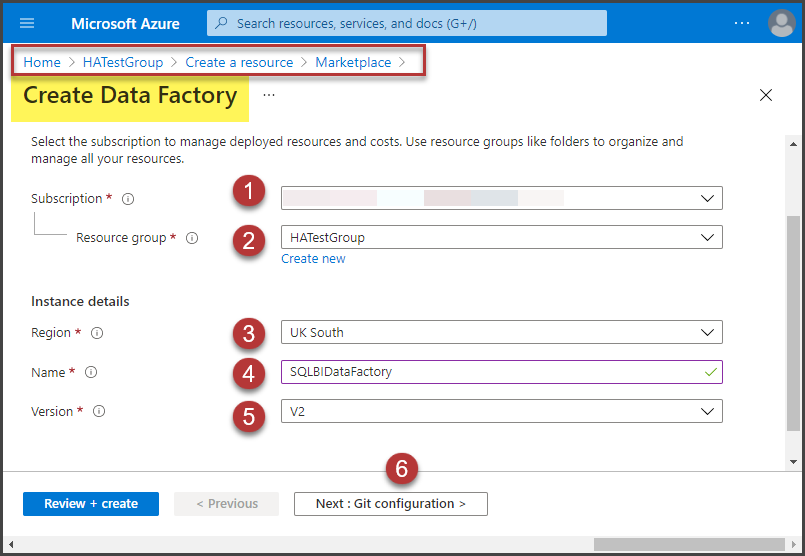
Next, select the Configure Git later checkbox and click the Review+create button as shown below:
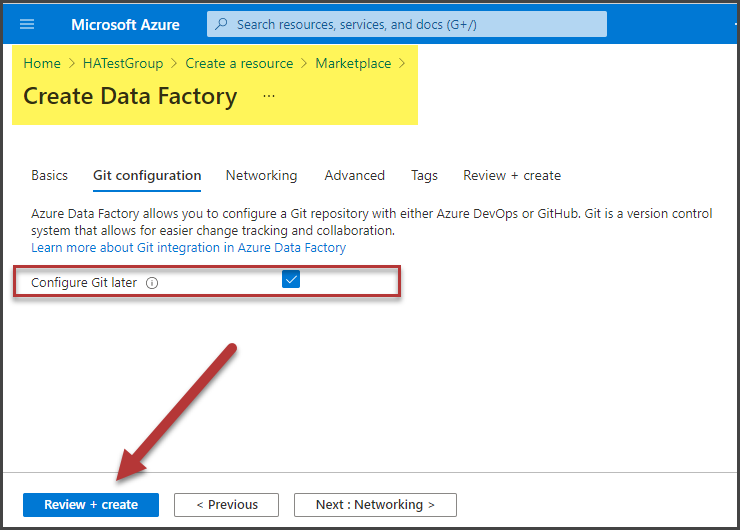
Validation will take place and in a couple of minutes, the Azure Data Factory will be ready to be used.
Please go to the recently created Azure Data Factory resource and click Open Azure Data Factory Studio:

Designing and Running Data Ingestion (Copy) Task in Azure Data Factory
Data Ingestion in the modern data warehouse is a process of copying data from the source to a place where it can be further processed (transformed) if required before loading that data into the data warehouse database.
In our case, we are simply required to ingest data with no transformation.
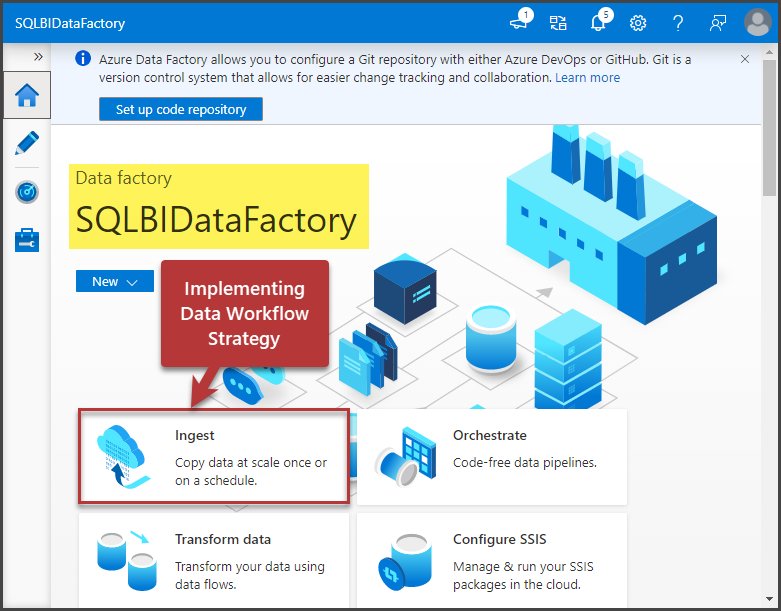
Click the Ingest button to use a wizard that will help you to copy data from source to destination (data warehouse database):
A Copy Data tool (wizard) will be launched.
Please select the Built-in copy task and Run once now option from the task schedule at the bottom of the page and click Next:

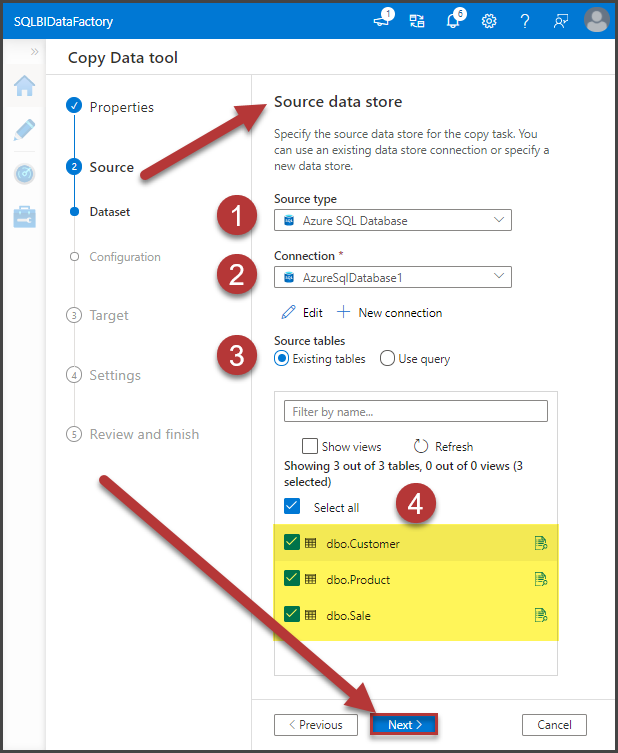
Next, select Azure SQL Database as a source and click New Connection and add a new connection as follows:

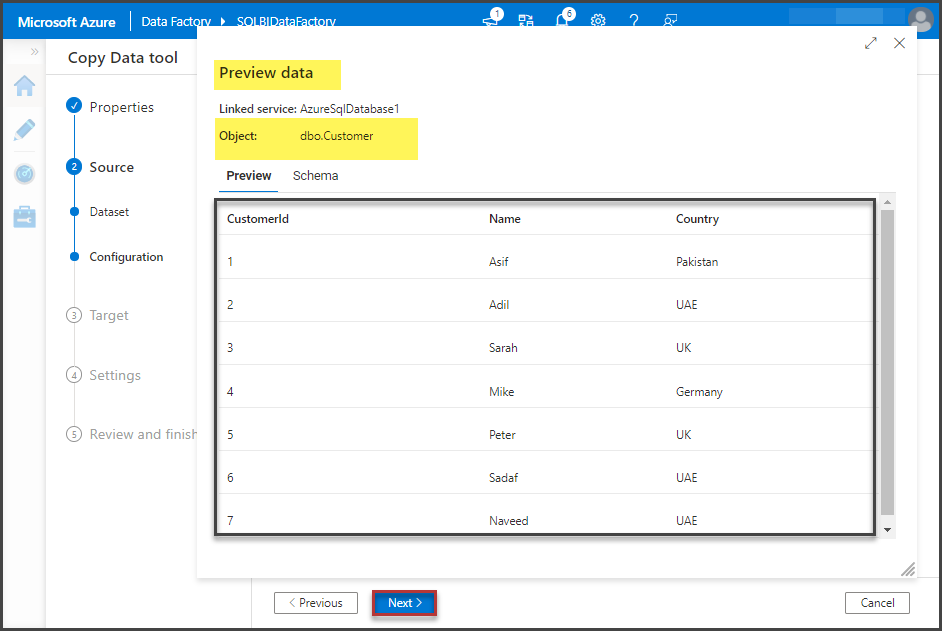
Once the source connection is set up, please select all the existing tables from the source database (WebHostingSample) and click Next as shown below:
Preview the data and click Next:
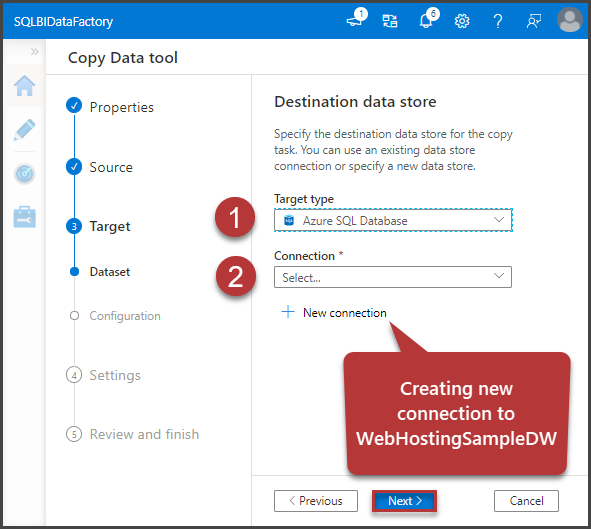
Select Target Type as Azure SQL Database and click New Connection to connect to the data warehouse database:
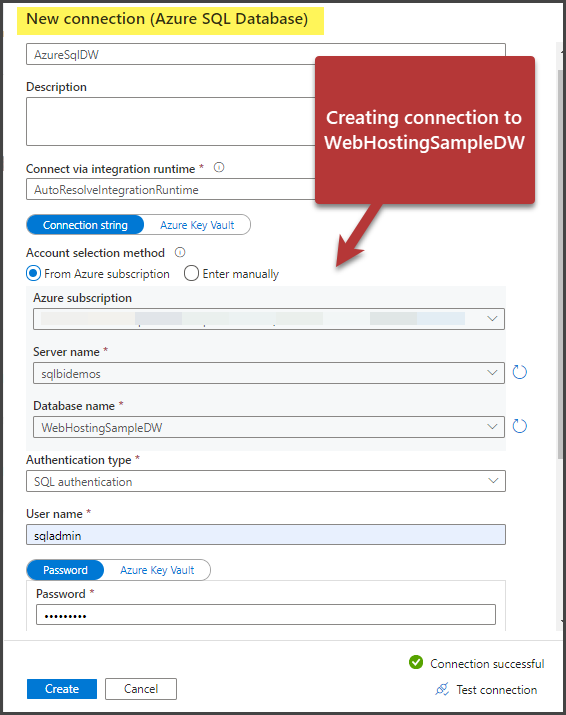
Please add connection details of the data warehouse database and click Create after testing the connection:
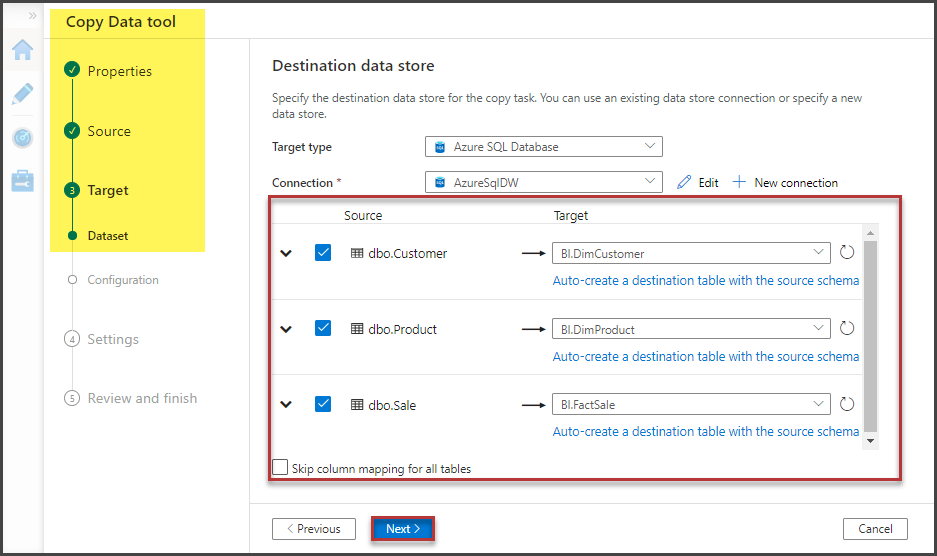
Specify the source and target tables by choosing the existing tables options for the target database:
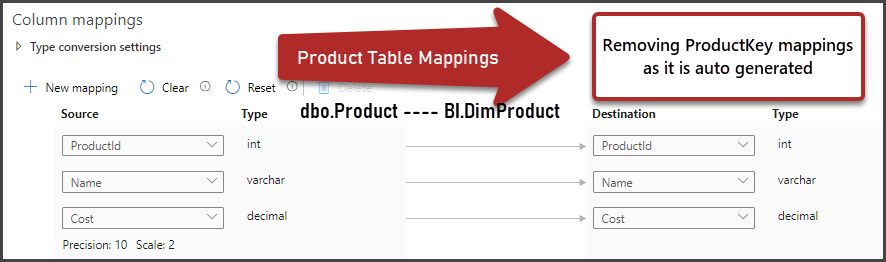
Next, map the source columns to target database columns for all the tables in such a way that you select and delete the mapping for data warehouse key columns such as CustomerKey, ProductKey, and SaleKey because this will be auto-generated as shown below:

The mappings for the Product table from dbo.Product to BI.DimProduct is as follows:
Finally, FactSale mappings are as follows:

Name the task as CopyPipeline_WebHostingSampleDW and click Next:

Click Next and wait for the validation to be successful and then click Monitor:
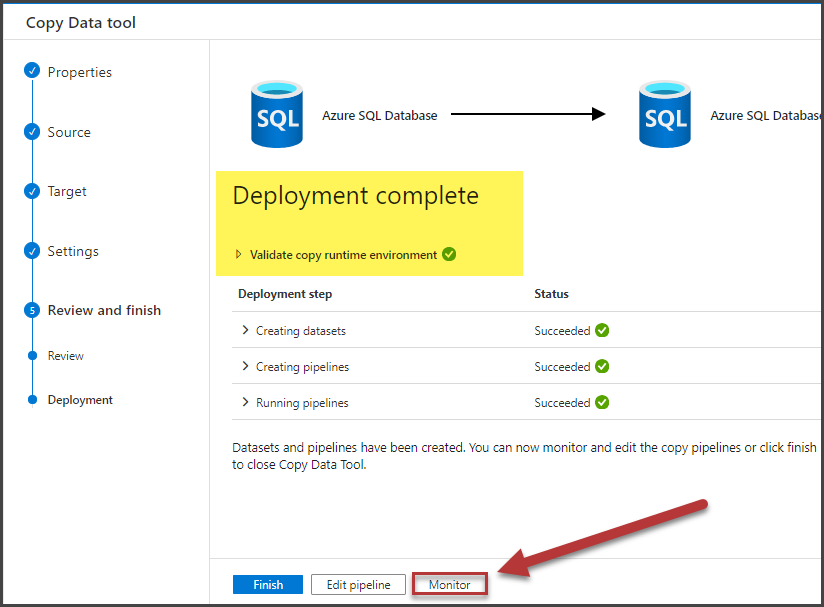
Monitoring will take you to the Pipeline runs, next click CopyPipeline_WebHostingSampleDW to see the progress as soon it is going to be finished successfully:
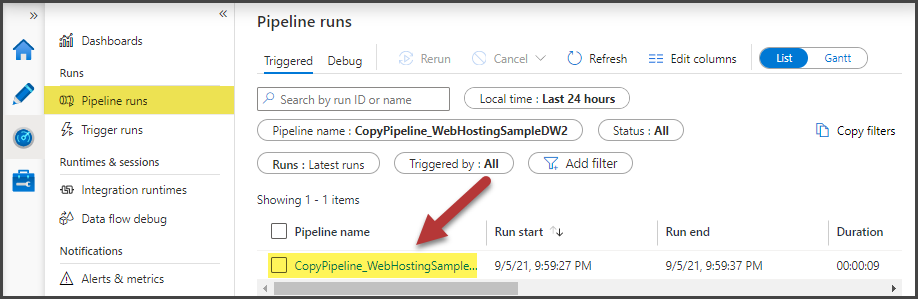
The whole pipeline activity is in front of you:

Data Check after Successful Data Pipeline Run
Let us check the data after we ran the data pipeline successfully.
View the FACTSale table by running the following script:
-- View FACTSale after data pipeline run that sent data from source to the data warehouse database
SELECT * FROM WebHostingSampleDW.BI.FactSale
The output is as follows:
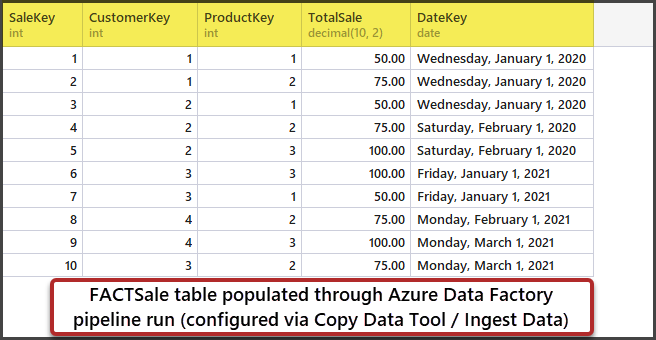
Congratulations! You have successfully set up a simple data warehouse business intelligence solution with source and target databases along with the data workflow in the form of an Azure Data Factory pipeline to copy the data from the source into the destination database.
A slight taste of centralized business logic is the column SalesAmount that becomes TotalSale in the FACT as it can be further aggregated such as a sum of sales or average sales and I leave it open for further work and exploration.
Now, adding the Power BI reporting technology is as simple as clicking Power BI (preview) under Power Platform of the Azure SQL Database in Azure Portal that represents the data warehouse:

If you have prior knowledge of Power BI then from here creating a report is a piece of cake.
We have reached the end of the final part of this article after setting up a fully functional simple data warehouse. Please, stay in touch as there are other interesting things such as improving the existing data warehouse further or analysis and reporting against the data warehouse using the Power BI reporting service.
Things to Do
Now that you know how to set up a fully functional simple data warehouse in Azure, please try the following things to improve your skills further:
- Please try adding Date dimension DimDate and linking it with DateKey in the FACTSale
- Keeping in mind this article please create another table for Suppliers dbo.Supplier and BI.DimSupplier and passing SupplierKey in FactSale
- Try creating a FACT table called FACTCustomer to capture calculations related to Customers only
- Please create and add time intelligence to your data warehouse Power BI report by going through the following article.