SQL Server 2019 was introduced in November 2019. The RTM version of SQL Server 2019 is 15.0.2000.5. To learn about the new features presented in this version, you may refer to SQL Server 2019 New Features.
The current article briefly explains the process of SQL Server 2019 installation on Windows Server 2016.
Installation process: step by step
Download the SQL Server installer from the official page. Once downloaded, execute the setup file.
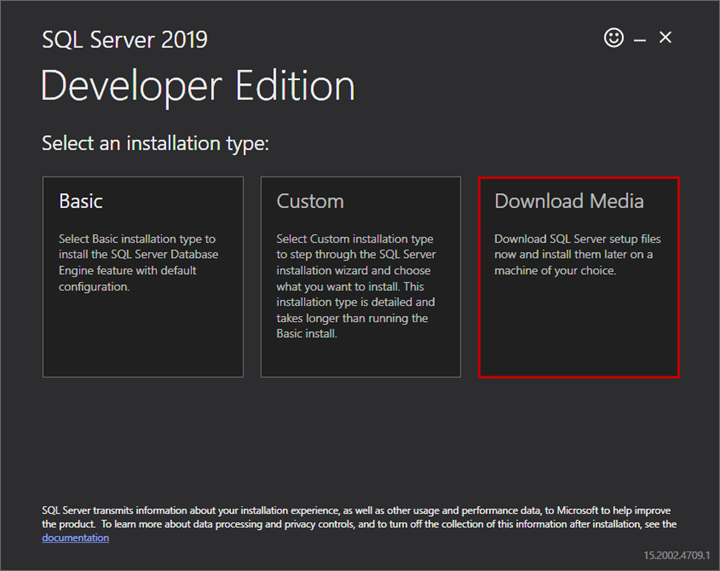
On the Select installation type screen, refer to Download Media.
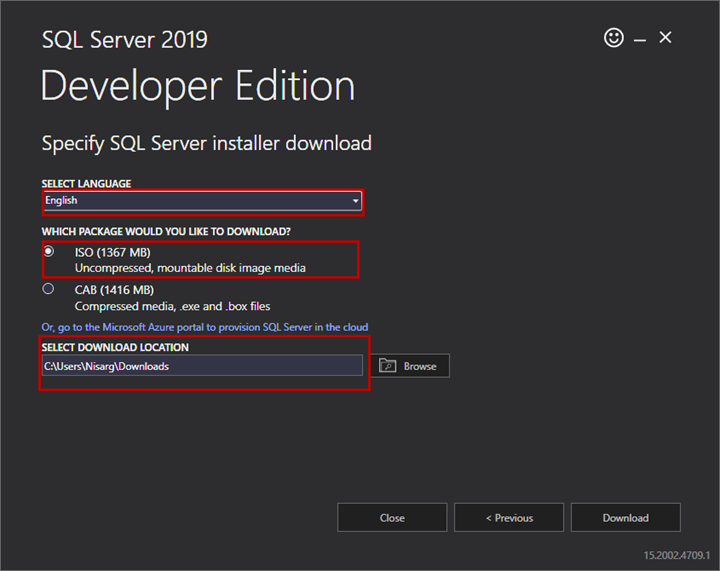
On the next screen, specify the language, choose the installation package, and define the download location. Click on Download.
Once the download is completed, we can start the installation process.
Double click on ISO file -> double-click on Setup.exe. The SQL Server installation wizard starts.
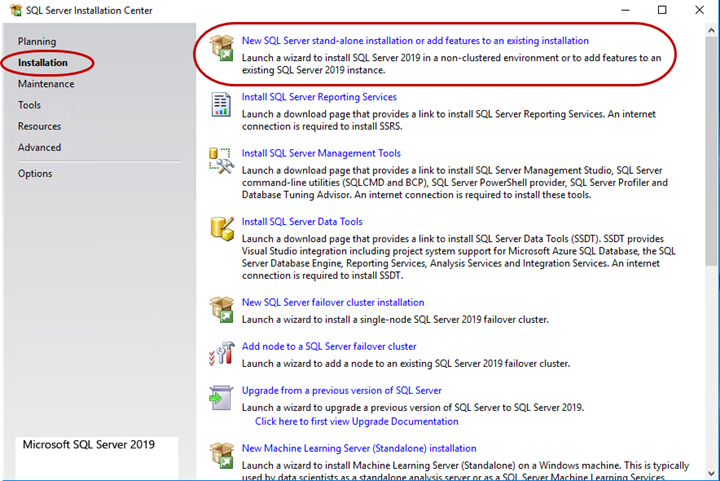
In the SQL Server Installation Center dialog box, click on the Installation button -> New SQL Server stand-alone installation or add features to an existing installation.
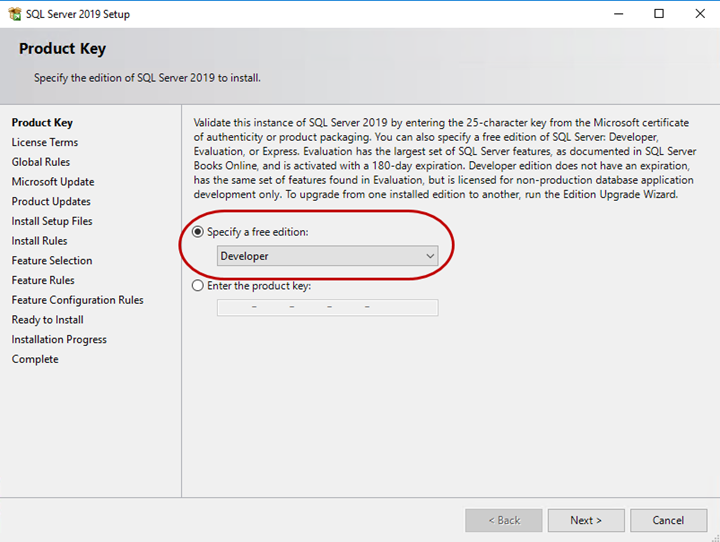
If you have purchased a standard or enterprise edition, you must provide the product key. We are using the developer edition; therefore, choose Developer and click Next.
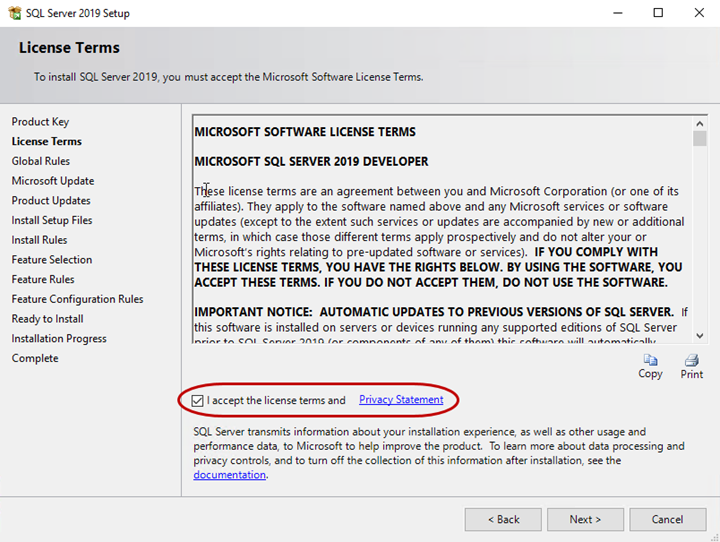
You can view the Microsoft License Terms and the Privacy Statement of the SQL Server 2019 developer edition on the License Terms screen. Accept the terms and click Next.
On the Global Rules screen, the wizard will run tests to identify the problems that might fail the installation process. Before the setup continues, ensure to fix all the problems.
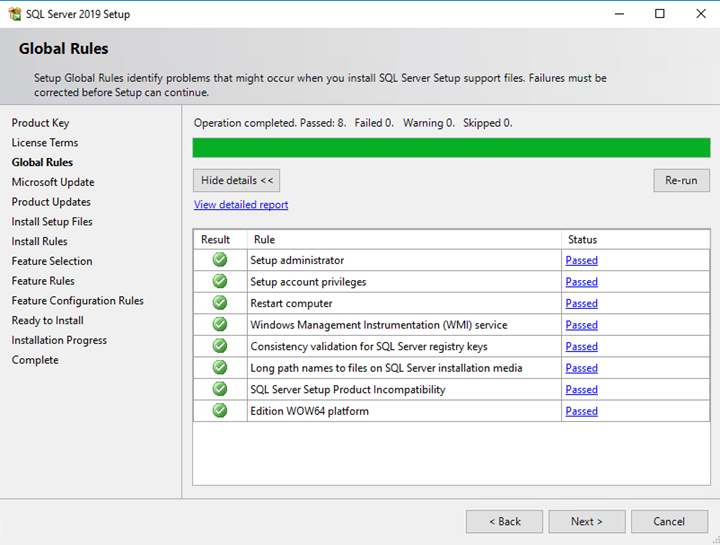
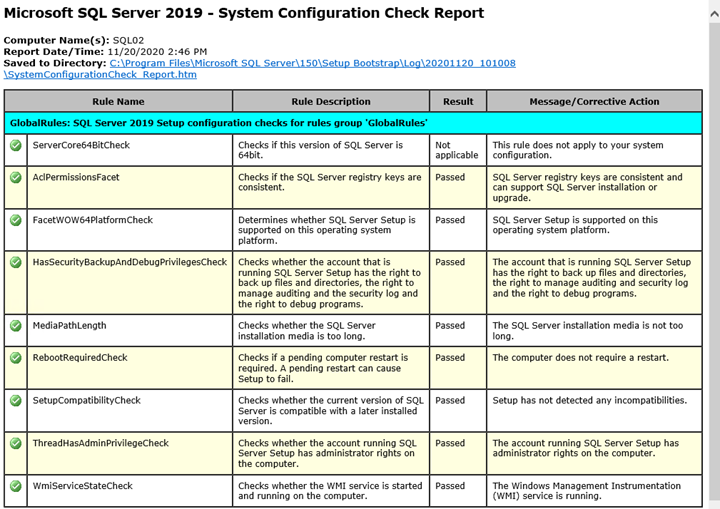
To view the test details, click on View detailed report. Below you can see which tests the SQL Server installation wizard will run:
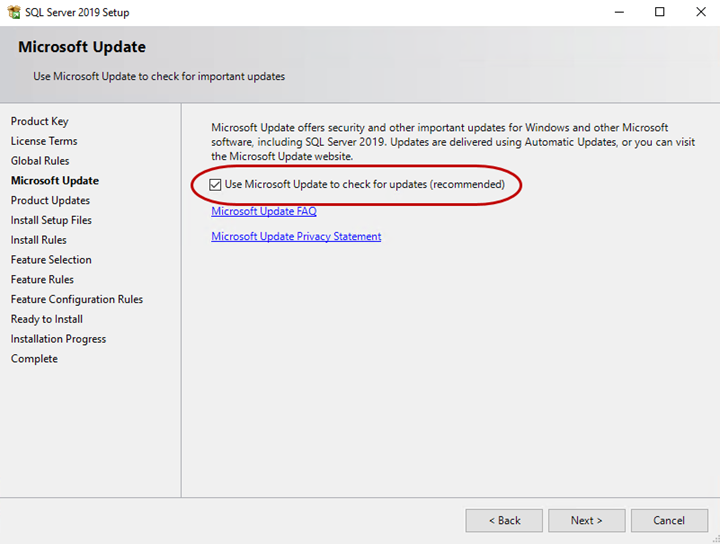
On the Microsoft Update screen, you can choose to install the latest updates of SQL Server.
Check the Use Microsoft Update to check for updates option. Then, the Microsoft Windows update tool will check for the latest updates of SQL Server. Click Next.
On the Feature Selection screen, we can choose which features to install with SQL Server.
Here, we want to install a Database engine service, Replication services, Integration services, Machine learning services, and Client connectivity tools. To do it, we need to check all features we need in the Instance Features list and click Next.

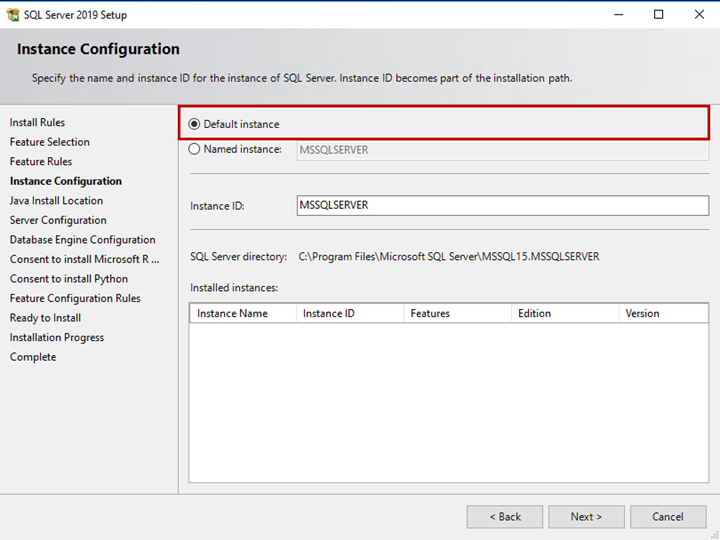
We are going to install the Default instance. Therefore, on the Instance Configuration screen, select the Default Instance, and click Next.
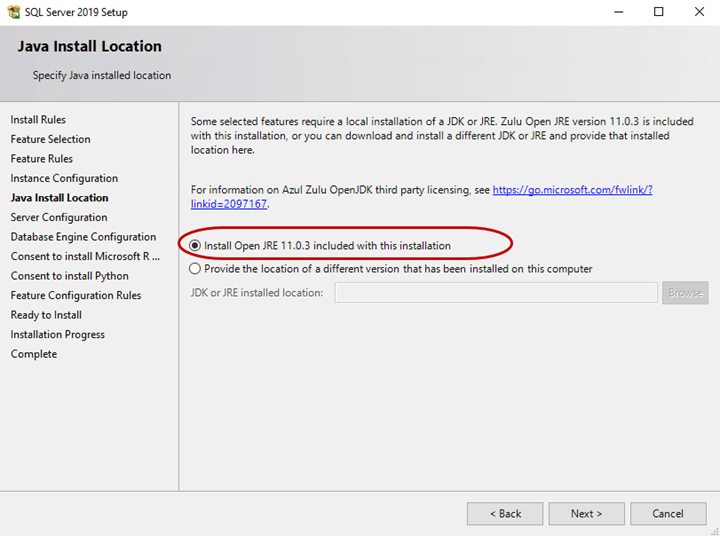
Then, we install the Machine learning language (R, Java, Python). Thus, we must install Java. JDK and JRE are included in the SQL Server 2019 installation package.
As JDK or JRE are not installed, we select Install Open JRE 11.0.3 included with this installation. If you have already installed it, provide the JRE’s path in JDK or JRE installed location textbox.
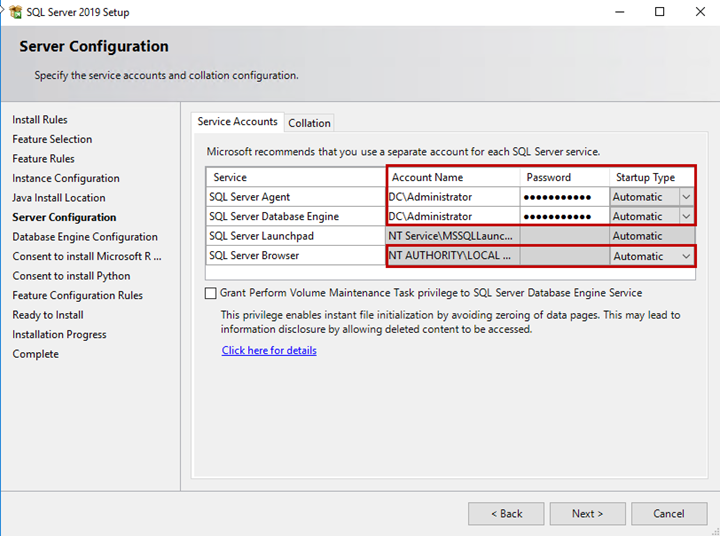
On the Server Configuration screen, we can specify the service account and collation. The SQL Server services should be running using an AD account.
Specify the domain account and password for the SQL Server Agent and SQL Server Database Engine. Moreover, сhange the startup type of SQL Server Agent and SQL Server browser service to Automatic.
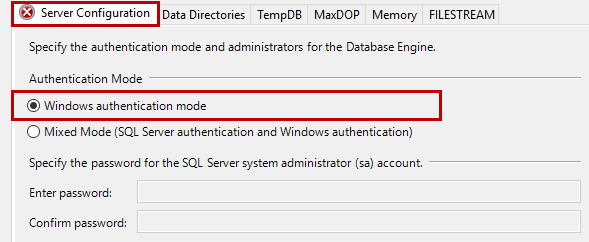
On the Database Engine Configuration screen, we can specify the following settings:
- Authentication mode. The Authentication mode section is in the Server Configuration tab. We are using the Active Directory to manage the users, and the SA user must be disabled; therefore, the Authentication Mode must be Windows Authentication.
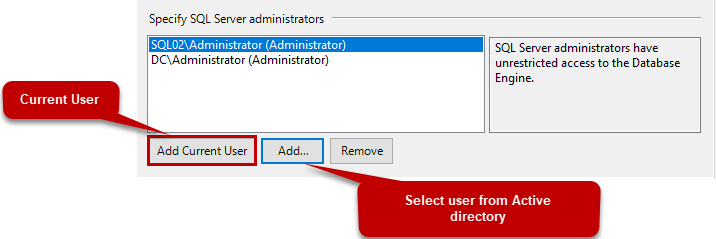
- SQL Server administrators. You can specify the SQL Server Administrator in the Server Configuration tab. To add a user, click on Add. If you want to add the current user as an SQL Server Administrator, click Add Current User.
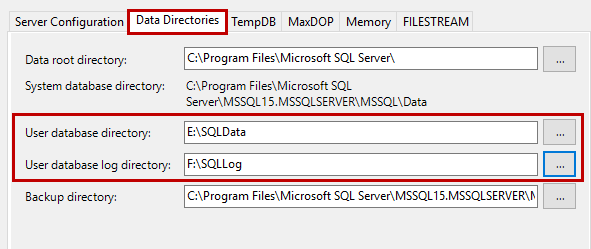
- Location of the data files and log files. You can specify the data files’ location and log files of the user database on the Data Directories tab. It is practical to keep data files and log files on separate disks for optimal performance. The datafiles’ location is E:\SQLData, and the log files are F:\SQLLog Do not change the location of the backup directory and the data root directory!
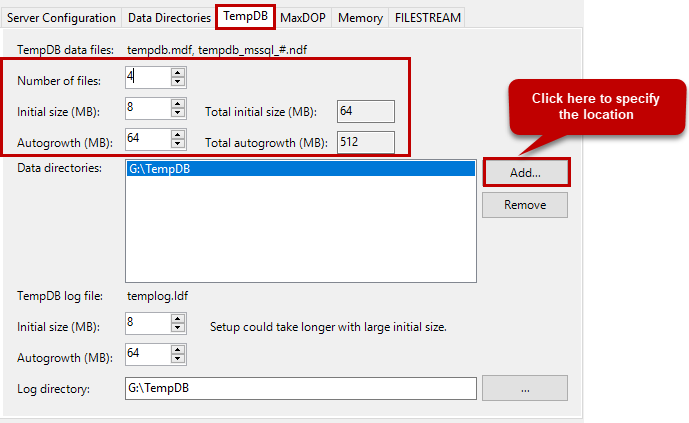
- TempDB files. You can specify the number of TempDB files, initial size, auto-growth value, and location in the TempDB tab. To get the optimum performance of TempDB, you should keep them on separate drives. The number of TempDB data files should be equal to the number of logical CPUs of the server. My workstation has 4 logical CPUs. Hence, I have created 4 TempDB files, and the location is G:\TempDB
- MaxDOP. In SQL Server 2019 installer, you can specify the maximum degree of parallelism (MAXDOP). I am not changing the default value set by the installer.

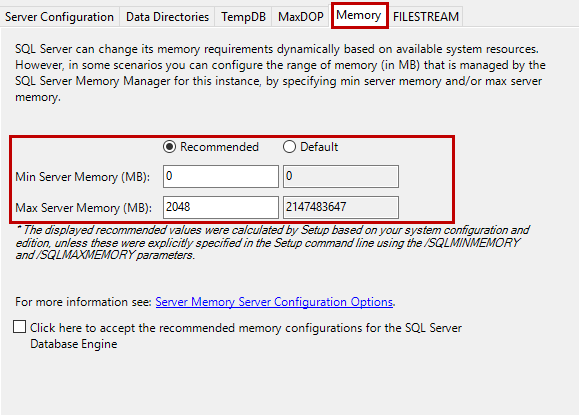
- Memory. In SQL Server 2019 installer, we can specify the amount of memory allocated to the SQL Server on the Memory tab. The installer calculates the memory on the workstation and recommends the minimum and maximum values. I am setting values based on those recommendations. Click on Recommended.
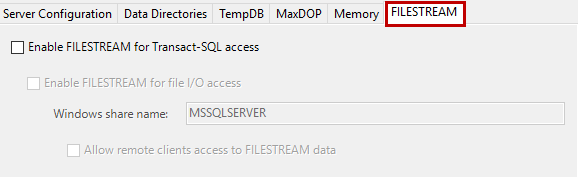
- FILESTREAM configuration. We can configure it on the FILESTREAM tab. I am not configuring it, so I am not changing anything. Click Next.
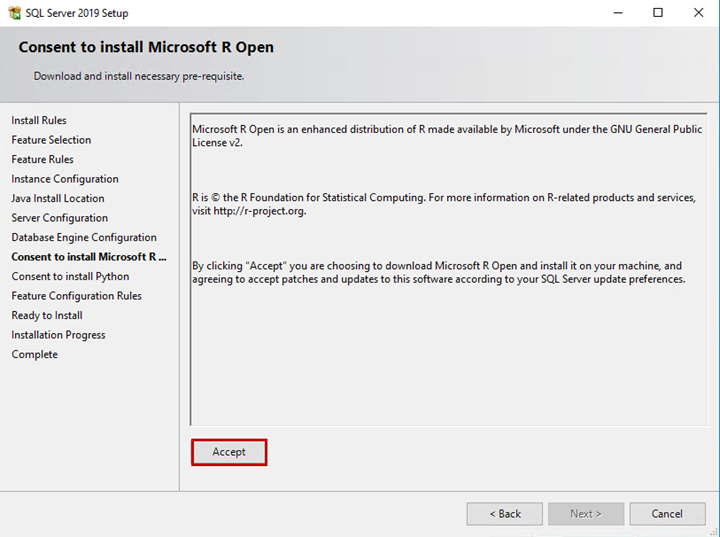
On the Consent to install R Open screen, click Accept. It allows the SQL Server Installer to download the Microsoft R open and install it.
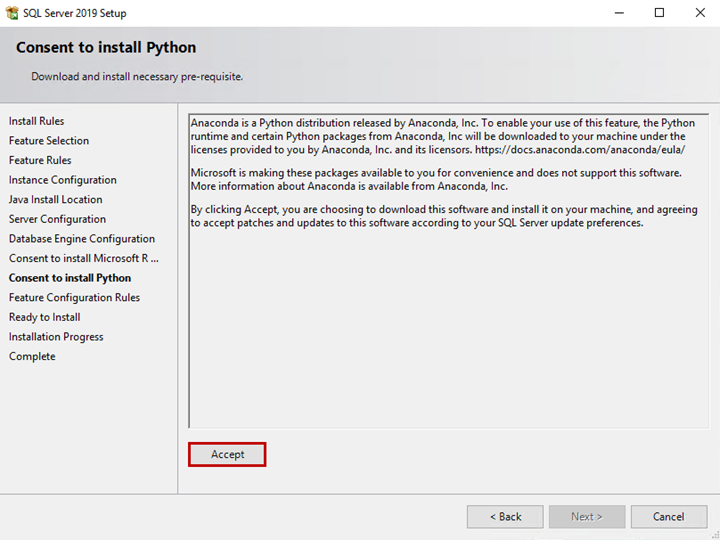
Similarly, on the Consent to install Python screen, click Accept, then Next.
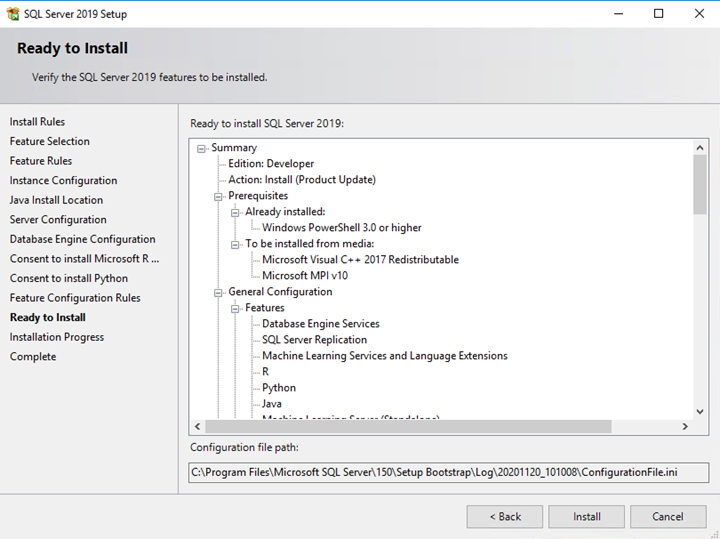
On the Ready to install screen, you see the configuration summary and the features list. Review and click Install.
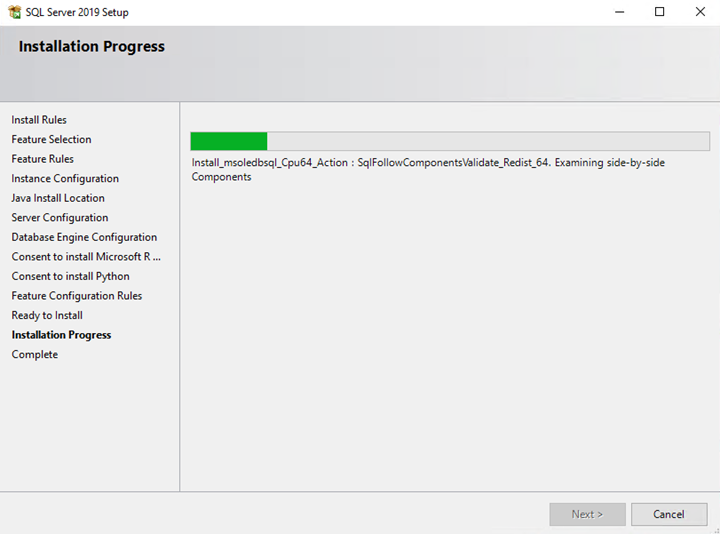
The installation process begins.
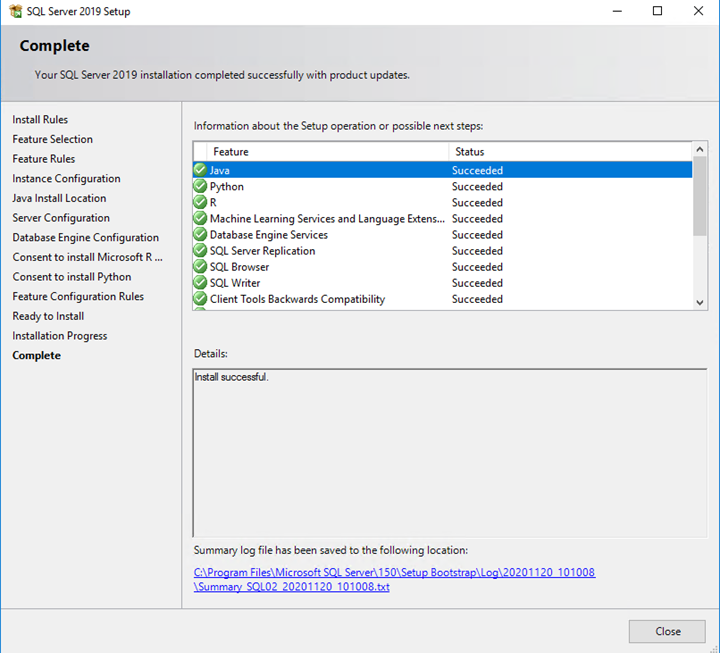
The installation completes successfully.
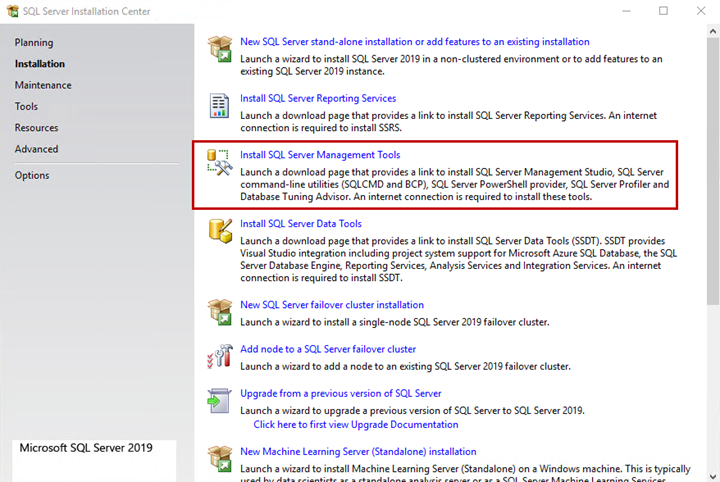
The SQL Server Management Studio is not included in the SQL Server installer package. To download it separately, click on the Install SQL Server Management Tools link of the SQL Server installer.
You will be redirected to the SQL Server Management studio page. There, you can download SSMS and install it.

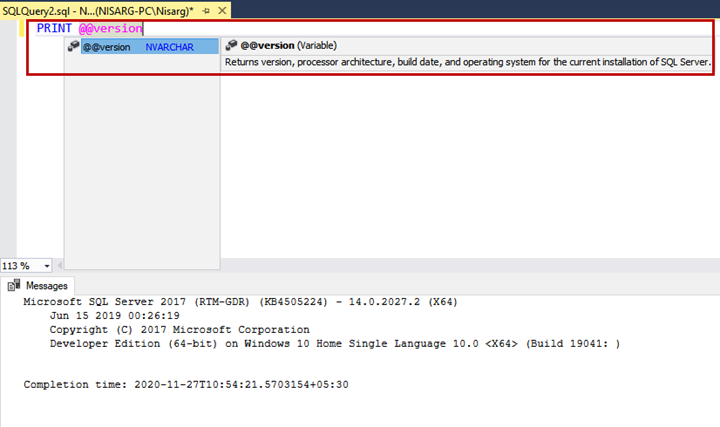
Once SSMS is installed, run a query on it.
Open SQL Server Management Studio -> Connect to the database engine. Run the following query to check the SQL Server version:
Print @@VERSIONOutput:
Note: I am using the dbForge SQL Complete express Add-on, as it provides more information than the SQL Server Management Studio Intellisense.
If you are going to install SQL Server, you will also need the SQL Server developer tools. Here, the Devart company can provide you with an absolutely free dbForge Studio for SQL Server Express Edition.
And if you’d prefer anyway to stick with the familiar SQL Server Management Studio (SSMS) environment, Devart will be of help too. It brings you the dbForge SQL Complete SSMS Add-in that offers extended hints during the queries writing.
Summary
This article explained the step by step installation process of SQL Server 2019 on Windows Server 2016.
Tags: sql server 2016, sql server 2019, SQL tools Last modified: September 18, 2021