
In the previous articles, we covered sequential steps necessary to build a virtual machine, install Ubuntu 18.04 operating system, and configure SQL Server 2019 on that Ubuntu machine. This is 3rd part of this series. Our goal is to demonstrate the step-by-step process of installing SQL Server Tools and its components on the Ubuntu 18.04 Linux system.
Install SQL Server Tools on Ubuntu Linux System
Before we proceed to explore the current topic, I would suggest you refer to the previous parts of the to refresh your knowledge:
- How to create a virtual machine and install Ubuntu 18.04 Linux server
- How to install SQL Server 2019 on Ubuntu 18.04 Server
Thus, I have already installed SQL Server 2019 on Ubuntu 18.04 and shown its connectivity through SQL Server Management Studio from a remote server.
If you want to connect to SQL Server instances locally on the Ubuntu Linux server, we first need to install the SQL Server command-line tools. These tools include sqlcmd and bcp utilities:
- SQLCMD is a popular command-line utility that we use to establish SQL Server connections to execute queries.
- BCP is one of the SQL Server utilities that serve to process the import and export of data.
The role of these SQL Server tools is crucial when if it comes to Linux-based SQL Server instances. They are very helpful for establishing the SQL Server connection or executing any query locally on the Linux server.
Steps to Install the SQL Server Command-line Tools
We have to perform the following steps to install these SQL Server command-line tools:
- Register the Microsoft Ubuntu Repository
- Install the SQL Server command-line tools
- Configure the path environment variables in a bash shell
I would recommend you checking and validating the SQL Server service on this Linux machine whether our installed version of SQL Server is running fine or not.
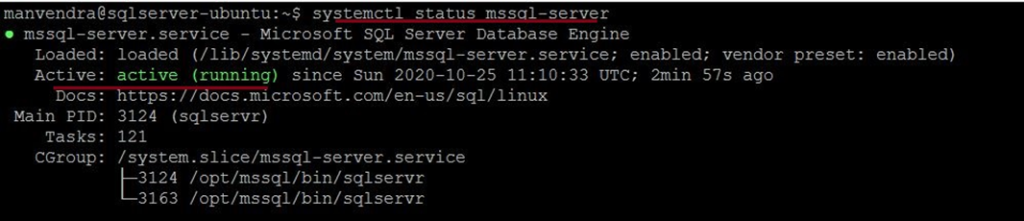
Open the Ubuntu terminal screen and connect to the server. Run the below command to get the status of the running SQL Server instance:
--Check SQL Server Service Status
systemctl status mssql-server
See the output – our SQL Server is running fine on our target system:
Import the Public Repository GPG Key
To import the public repository GPG key, run the below commands:
--Import public repository GPG key
curl https://packages.microsoft.com/keys/microsoft.asc | sudo apt-key add -
As you can see, the import is successful. The status is OK:

Register the Microsoft Ubuntu Repository
We need to register the Microsoft Ubuntu repository for Ubuntu 18.04 version. The command is below:
--Register Microsoft Ubuntu repository for Ubuntu 18.04
curl https://packages.microsoft.com/config/ubuntu/18.04/prod.list | sudo tee /etc/apt/sources.list.d/msprod.list
Note: If you are using a different version of Ubuntu, make sure to change the repository path. For instance, if you are using Ubuntu 20.04, change the repository path from /ubuntu/18.04 to /ubuntu/20.04.
See the output of the above command.

Now, we are updating the source list of packages by executing the below command:
--Update source list
sudo apt-get update
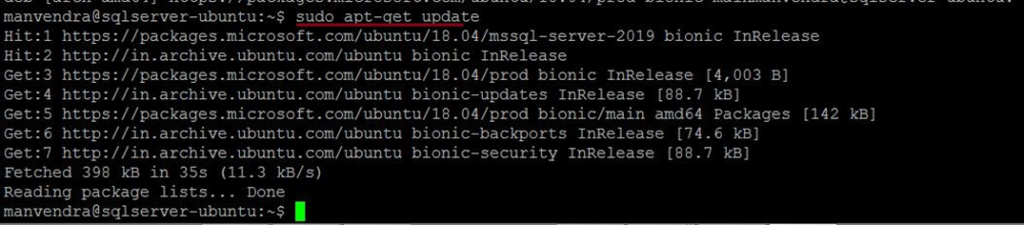
Once the updates are done, we proceed to the next step.
Install the SQL Server Command-line Tools
We will install the command-line tools along with the UnixODBC package – it is the SQL Server driver for Linux-based systems.
Execute the following command:
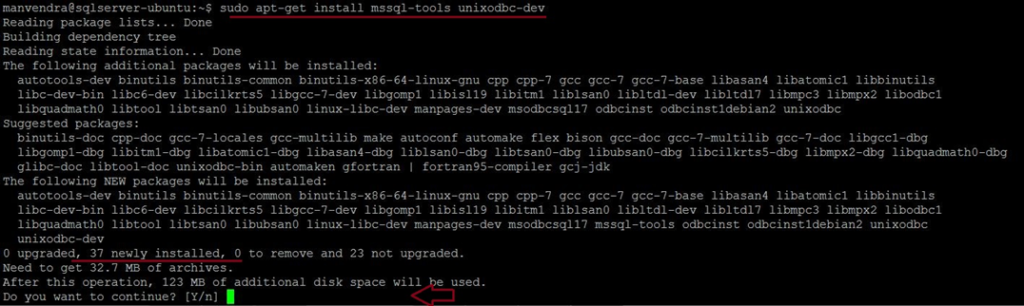
--Install SQL Server command line tools
sudo apt-get install mssql-tools unixodbc-dev
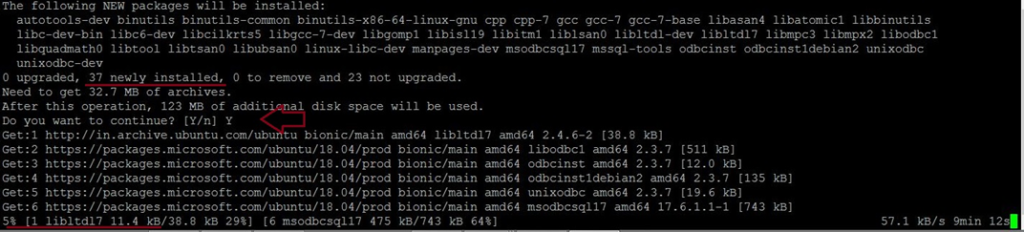
The screen will show all 37 packages to be installed. The system will check the required disk space for this installation and ask for your consent to proceed: enter Y for installation or enter n to abort the process.
I have selected Y to proceed and pressed Enter.
Once you have chosen to go ahead with this installation, the terminal screen will show the next series of execution.
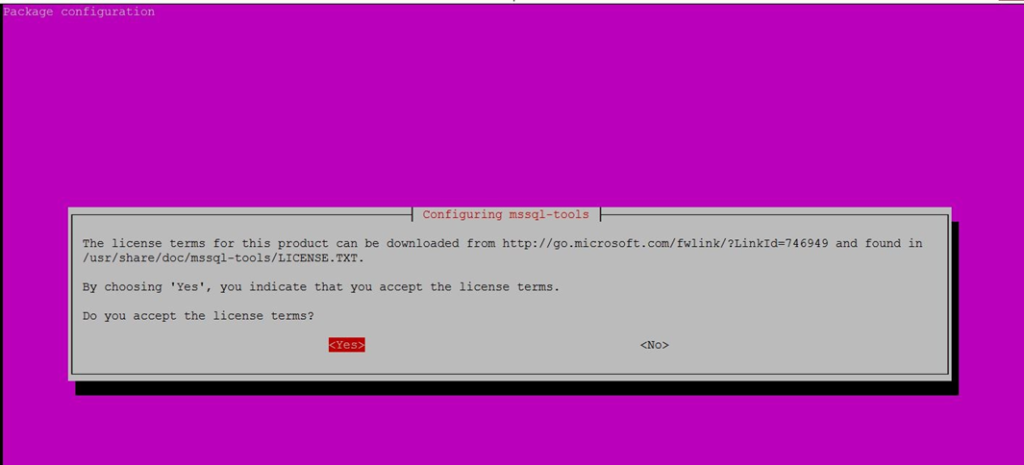
The next screen is named Package configuration. It will allow you to configure and accept the license terms for the Microsoft ODBC driver for Linux-based SQL Server.
Note: If you are facing any issues while installing this ODBC package, check and verify the existing version of your msodbcsql package. If you installed its version v17 that was briefly available, remove it before installing the msodbcsql17 package. This way, you will avoid conflicts.
As we can see, the package name is msodbcsql17. Now, we will accept the license terms of this package and proceed with this installation by choosing Yes and pressing Enter.

Now, accept the license terms for mssql-tools package on the following screen. Again, select Yes and click Enter:
The new screen will appear to execute other packages once you accept the license terms from the above screen.
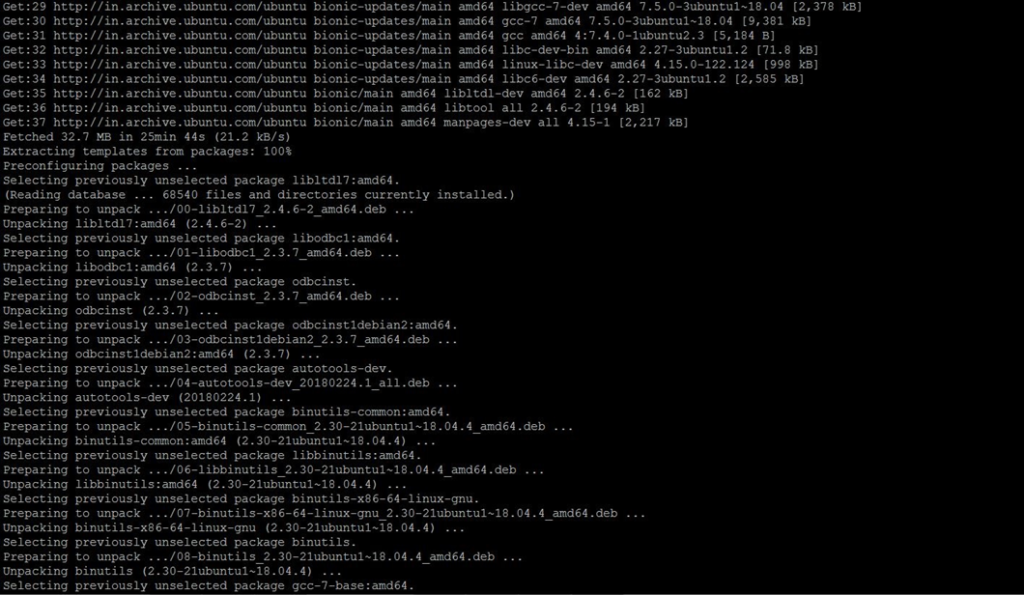
Wait until the execution is completed.
You can see all packages in the process of setting up and configured in the below screen. The last few lines show that the mssql-tools package has been set up successfully:
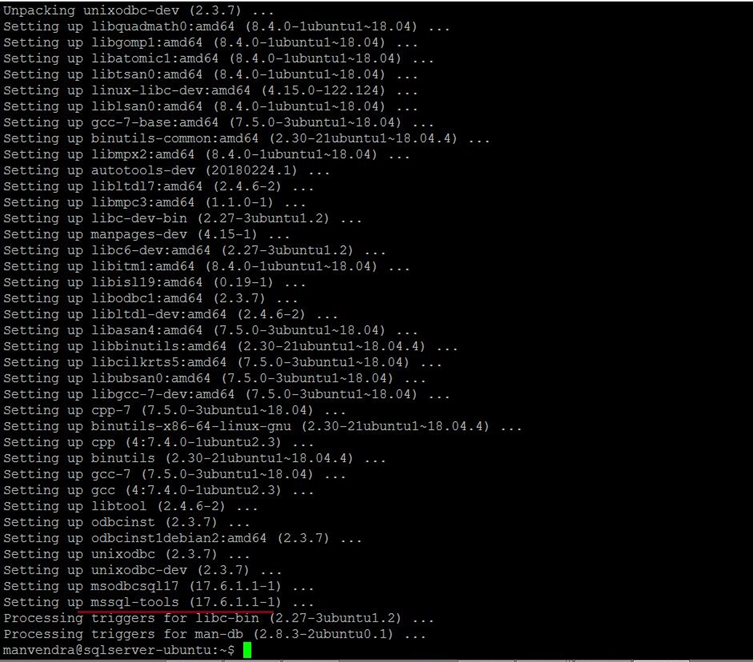
The mssql-tools package is configured. Now you can go ahead.
Configure the Path Environment Variables in a Bash Shell
Type SQLCMD to validate if Ubuntu can recognize this new utility. The thing is, we have already installed it as a part of mssql-tool package – SQL Server tools.
In our case, the Ubuntu system did not recognize SQLCMD.
To fix this issue, we’ll add /opt/mssql-tools/bin/ to our PATH environment variable in a bash shell by running the below commands:
--Run below command to use SQL Server Tools from the bash shell for login sessions
--Modify the PATH in the ~/.bash_profile file
echo 'export PATH="$PATH:/opt/mssql-tools/bin"' >> ~/.bash_profile

--Run below command to use SQL Server Tools from the bash shell for interactive/non-login sessions
--Modify the PATH in the ~/.bashrc file
echo 'export PATH="$PATH:/opt/mssql-tools/bin"' >> ~/.bashrc
source ~/.bashrc
Now, after executing the above two commands, Ubuntu has recognized SQLCMD.
Although, SQLCMD is still throwing an error. That is because we have not passed the full command line.

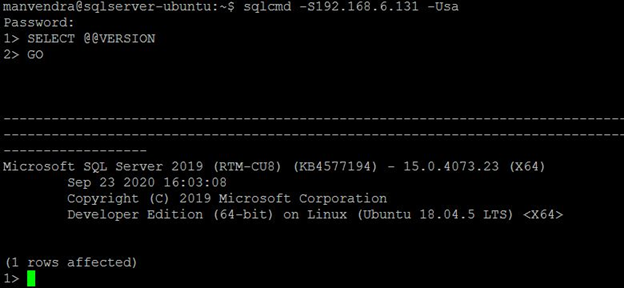
I have used the full command line using SQLCMD. As you can see, the database connection is established successfully. I have passed the Ubuntu server IP address along with the login name “sa”. You can use your login name and password:
--Establish a database connection using SQLCMD
--Replace your server IP after -S parameter
--Replace your login name after -U parameter
--Enter your login password once prompt will ask you to enter
Sqlcmd -S192.168.6.131 -Usa
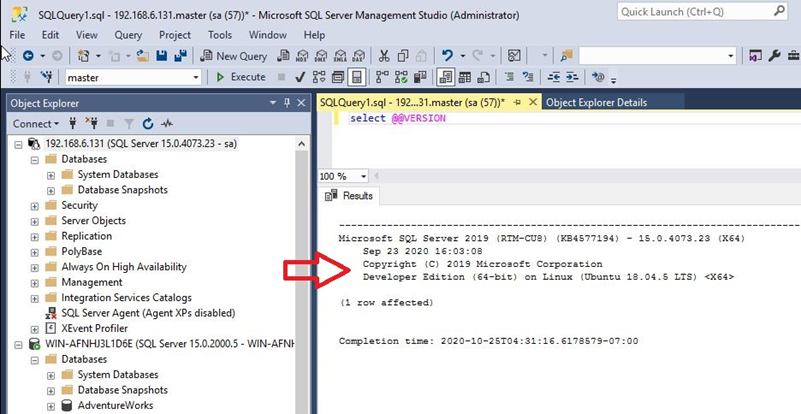
I have also executed a basic SQL query to check the installed version of SQL Server. It shows Microsoft SQL Server 2019.
Now, we have successfully installed SQL Server Tools. We can run queries and database activities.
Additional Information
The approach we explored in this article is the online installation where your Ubuntu system is connected to the Internet. If your Linux system is not connected to the Internet or does not have access to online repositories, you need to include more steps.
First, download the package from the Microsoft repository and copy that package to the target server. Then you can install it there.
Make sure to download and copy the dependency packages – the msodbcsql package, which is a dependency. This package also has a dependency on the unixodbc-dev package for Ubuntu.
Copy all these downloaded packages to the target Ubuntu server and then run the below commands to install these packages:
--Run below commands to install SQL Server Tools in offline mode
sudo dpkg -i msodbcsql_<version>.deb
sudo dpkg -i mssql-tools_<version>.deb
We hope that this article will help you in your work. If you’d like to share some practical tips from experience, feel free to add them in the Comments section below.
Tags: sql server linux, SQL tools, ubuntu Last modified: September 16, 2021