
After exploring the processes of building a virtual machine to install Ubuntu Linux 18.04 (refer to the step-by-step guideline about installing Ubuntu 18.04 on a virtual machine if necessary), we come to the primary goal. It is to install MS SQL Server on Ubuntu.
A side note before we proceed: This article focuses on using SQL Server on Ubuntu. However, Ubuntu, being one of the most favored Linux variations, is also compatible with MySQL. If you are interested in this topic too, please refer to the dedicated guideline on installing MySQL on Ubuntu for more information.
Install SQL Server 2019
Before going ahead, I would recommend you validate the basic system requirement of your virtual:
- CPU: 1.4GHz or more
- RAM: 2 GB or more
- Disk: 10 GB or more
The above configuration is sufficient. However, you might need to ensure having proper capacity planning for your workload.
To install SQL Server on Ubuntu Linux 18.04, we need to perform the following steps:
- Import the repository Ubuntu GPG key
- Register SQL Server Ubuntu repository based on your Ubuntu version
- Install SQL Server 2019
- Configure SQL Server setup
Let’s start.
Log in to the target system where you have installed Ubuntu 18.04. I logged in to the newly installed Ubuntu OS that I had configured in the previous article:

If you are using some older or existing machine with the Ubuntu OS installed, then you should first check and ensure that SQL Server is not installed or configured on this system.
Execute the below command:
--Check the present working directory to ensure you are in the right directory
pwd

--Check SQL Server service on Ubuntu system
systemctl status mssql-server

As you can see, Ubuntu can’t find SQL Server service. Thus, SQL Server is not installed on this machine yet. We can do it now. Let’s go ahead.
1. Add GPG key of repository
The first thing to do is to import the public repository GPG keys for communicating securely. Use the below command to get the necessary Ubuntu GPG encrypt file:
--Import public repository GPG key
wget -qO- https://packages.microsoft.com/keys/microsoft.asc | sudo apt-key add –
You can see that it asks us to enter the sudo password:

After entering this sudo password, keys will be imported:

2. Add the SQL Server Ubuntu Repository for Our Ubuntu Version
To register our Microsoft SQL Server Ubuntu repository for SQL Server 2019, we have to execute the dedicated command you see below. Note: If you are installing SQL Server 2019 on a different version of Ubuntu, replace 18.04 with your Ubuntu version.
--Register SQL Server Ubuntu 18.04 Repository
sudo add-apt-repository "$(wget -qO- https://packages.microsoft.com/config/ubuntu/18.04/mssql-server-2019.list)"
The command has been executed successfully. I have highlighted the points necessary to understand this installation.

Once the repository is registered, we update it to the latest version. The command is below:
--Update package lists
sudo apt-get update
Have a look at the command execution sequence:

Now, we are ready to initiate the installation of SQL Server 2019.
3. Install Microsoft SQL Server on Ubuntu
To start the installation process, execute the below command:
--Install SQL Server 2019
sudo apt-get install -y mssql-server
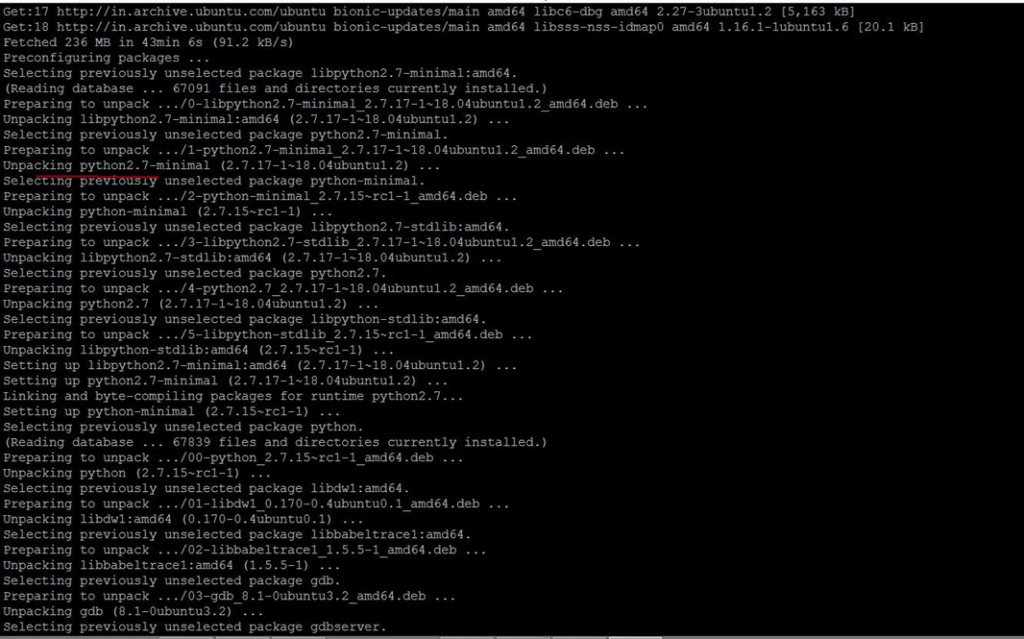
The sequence of the installation starts by building a dependency tree. The screenshot below shows all packages that will be installed as a part of the SQL Server 2019 installation.

A single screenshot won’t capture all details. I have prepared several screens to illustrate the process.
The below screen shows all dependencies and their packages meant for installing.
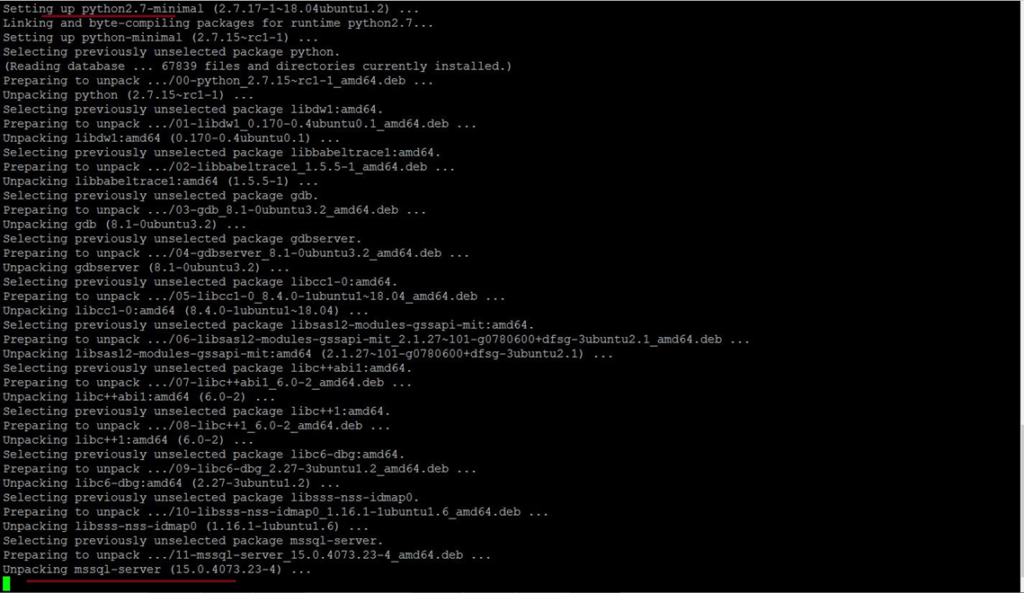
As you see, Python is a part of this installation. It is installed before we install SQL Server on Ubuntu, as that will be the last package to install (see the bottom of the following image). Therefore, all packages installed before SQL Server are related or prerequisites packages for SQL Server. This installation will fail if any of those packages fail.
SQL Server will suggest some mandatory steps:
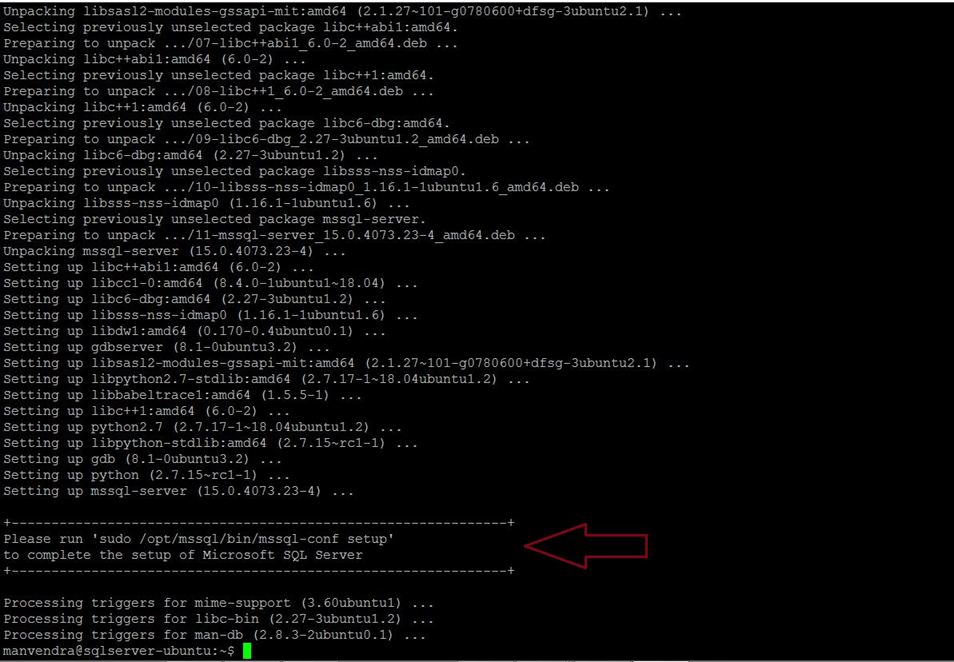
Now, SQL Server is successfully installed. According to the suggestion in the above illustration:
Run sudo /opt/mssql/bin/mssql-conf setup to complete the setup of Microsoft SQL Server
We’ll complete the installation process. The command asks to set up configurations:
- SQL Server Edition
- License Agreement Acceptance
- SQL Server system administrator password
--Accept License terms, Configure SA password, and SQL Server Edition
sudo /opt/mssql/bin/mssql-conf setup
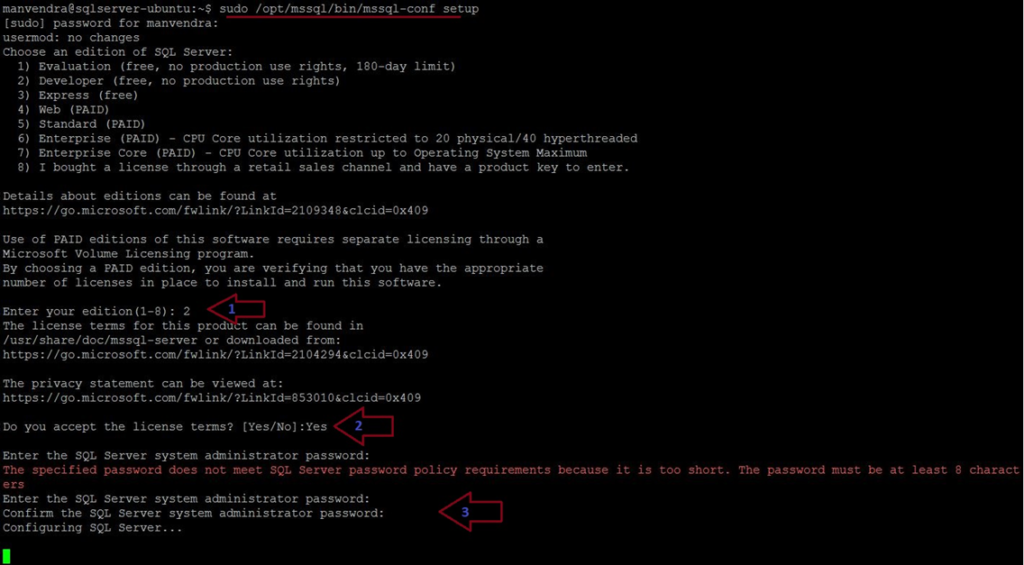
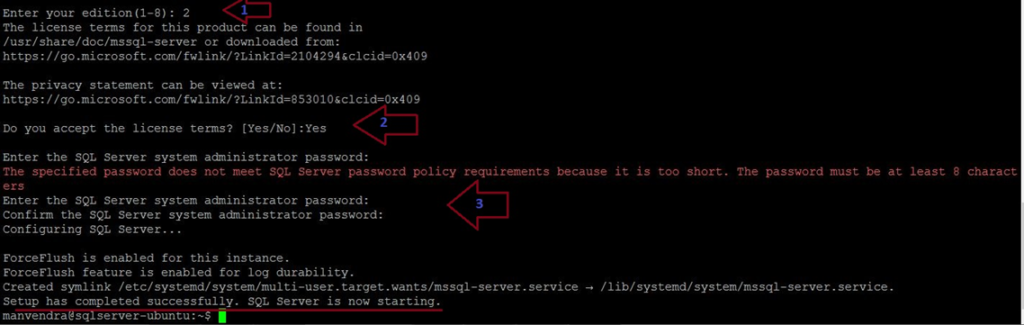
When I executed that command, it asked me to enter the sudo password. Once I did that, the command asked me to choose the SQL Server edition. You will get all SQL Server editions on your screen and only need to enter the serial number of that edition showing in the installation window.
I must install the SQL Server Developer edition, so I had chosen serial number 2 in the below screen.
When you press Enter after selecting the SQL Server and providing its serial no, the system will ask you to accept the License Terms and conditions. Type Yes to accept them or No to deny.
The final configuration of this command is to set up the SQL Server system administrator password. It comes after accepting the License Terms. Enter the complex password as per SQL Server password policy and press Enter to complete and apply these configurations.
Now, the setup is successful, and your SQL Server has restarted as part of this configuration.
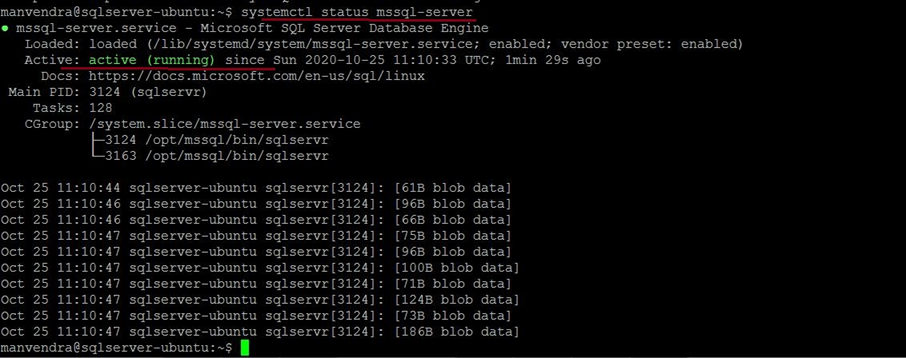
Let us verify whether SQL Server is running on this machine. Execute the below command:
--Check SQL Server service on Ubuntu system
systemctl status mssql-server
Our SQL Server has been configurated. It is shown as active:
Next, we go ahead and connect to this SQL Server instance.
We cannot connect to it locally as we don’t have sqlcmd installed yet. We’ll focus on installing the SQL Server tools in the next article and also demonstrate how to connect to SQL Server locally using sqlcmd.
However, you can successfully establish the SQL Server connection remotely using SQL Server Management Studio. You just need to ensure that TCP port 1433 is open on your firewall.
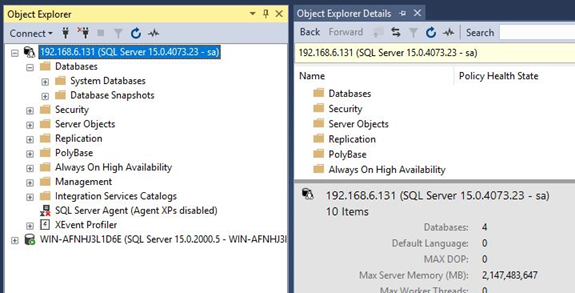
To connect to this newly installed SQL Server, launch SQL Server Management Studio on any remote system. Make sure that there is a connectivity open between the newly created system where we had installed our SQL Server and the remote system. Check if port 1433 is open between both machines.
As you can see, I have successfully established SQL Server connection remotely using SSMS. You can also observe the difference between the connected instances running on Windows and Ubuntu Linux in the below screen. Also, a Linux-based SQL Server and Windows-based SQL Server look similar in SQL SSMS if we compare their folder structures.
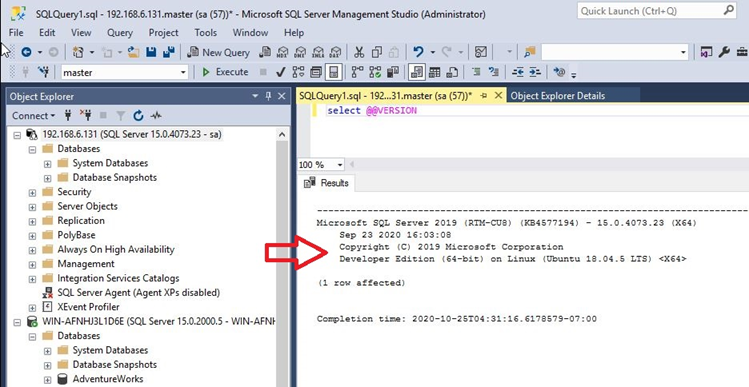
Just to ensure we have connected to the right instance, let’s run the below command to get the SQL Server version along with its running operating system:
--Check SQL Server version
SELECT @@VERSION
The output shows the SQL Server 2019 Developer edition running on Linux (Ubuntu 18.04.5) server:
If you prefer working with the Azure platform, you can also use it on Ubuntu. Please refer to the instruction on how to install Azure Data Studio Ubuntu to get all the necessary details related to getting the Azure Data Studio and SQL Server vNext on Linux.
Conclusion
We have mastered the process of installing SQL Server 2019 on the Ubuntu 18.04 Linux server and examined it step by step. Now you can go ahead and use this instance as you need.
Stay tuned for the next article where we’ll explore the SQL Server tools installation. You can also build your systems to learn the Linux-based SQL Server instances.
Please share this article and your feedback in the comments!
Tags: linux, sql server 2019, ubuntu Last modified: October 07, 2022