It is the second part of the series focused on the SQL Server Management Studio usage. You will learn the database design core concepts and issues and get a walkthrough to design a simple SQL database with SSMS (SQL Server Management Studio).
Prerequisites
- SQL Server 2016/2017/2019 Express/Developer edition is installed.
- The latest version of SSMS (SQL Server Management Studio) is installed.
- The readers have a basic knowledge of the SQL databases and the above tools.
- The basic database design concepts are clear.
- The readers are familiar with the Student-Instructor design scenario discussed in part 1.
Please refer to Learn Database Design with SQL Server Management Studio SSMS Part 1 for more information about the above requirements.
Designing Student-Instructor Database with SSMS
We start creating our simple SQL database with the help of SSMS. However, it’s better to have a recap of the planned database before we start designing it.
Student-Instructor Database Recap
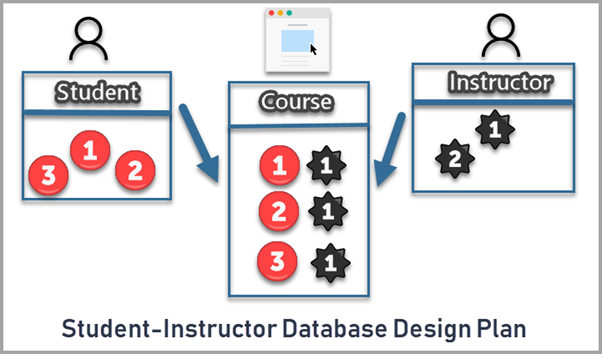
We talked about a simple database consisting of the following three tables:
- Student. This table contains records belonging to students.
- Instructor. This table stores information about all instructors.
- Student-Instructor. This one tells us which Instructor is assigned to which student.
Important: more than one student can be allocated to an instructor, and more than one Instructor can be assigned to a student (for different subjects).
In other words, many students can have many instructors.
Replacing the Student-Instructor Table with the Course Table
Let us slightly refine the student-instructor database – we rename the Student-Instructor table with Course table.
This way, it is easier to understand that each Course can have multiple students, and each Instructor can have multiple students for the same Course.
We are planning the following columns for these tables:
- Student: StudentId, Name.
- Instructor: InstructorId, Name.
- Course: CouseId, Name, StudentId, InstructorId.
Start SSMS (SQL Server Management Studio)
Type SSMS in the Windows search box and click it in the list of results to launch the software:
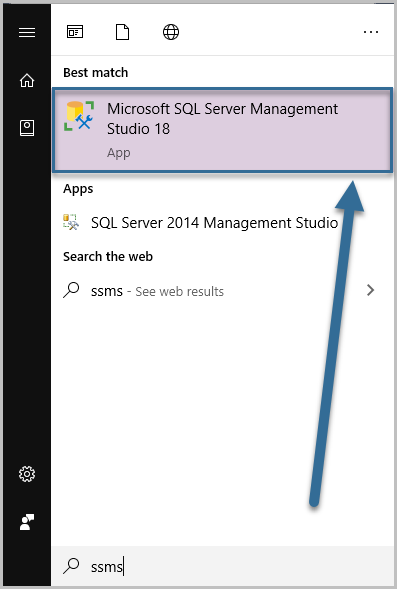
Note that you will see the version that you have installed. In our case, it is SSMS (SQL Server Management Studio) version 18.0.
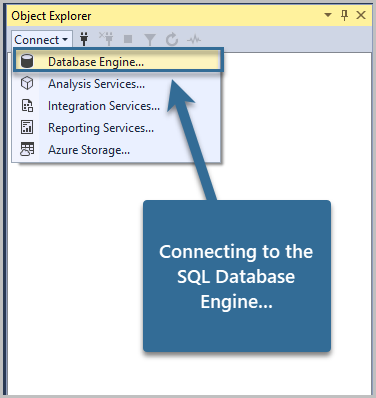
Connect to the SQL Server Database Engine
In the Object Explorer window, click Connect, and then select Database Engine:
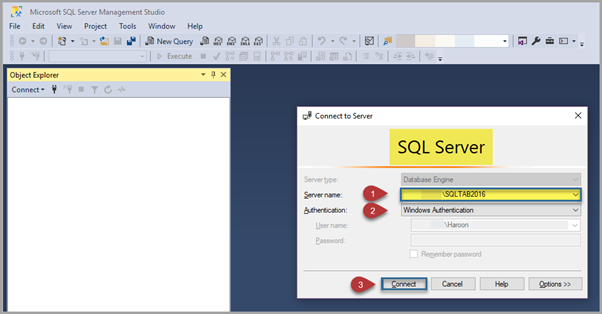
Select the Server name (the name of the SQL Server you have installed on your machine). Connect to the Database Engine based on your default settings. In our case, we use the Windows Authentication mode:
Create a New StudentInstructor SQL Database
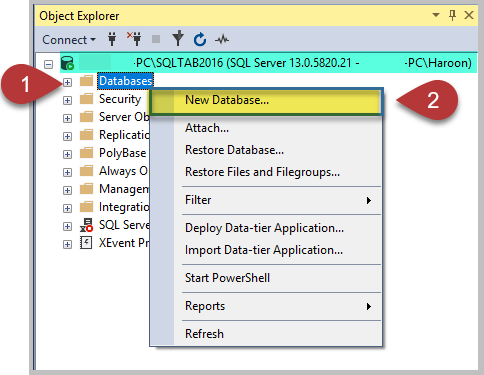
Once connected, right-click on the Databases node in the Object Explorer, and click New Database… as shown below:
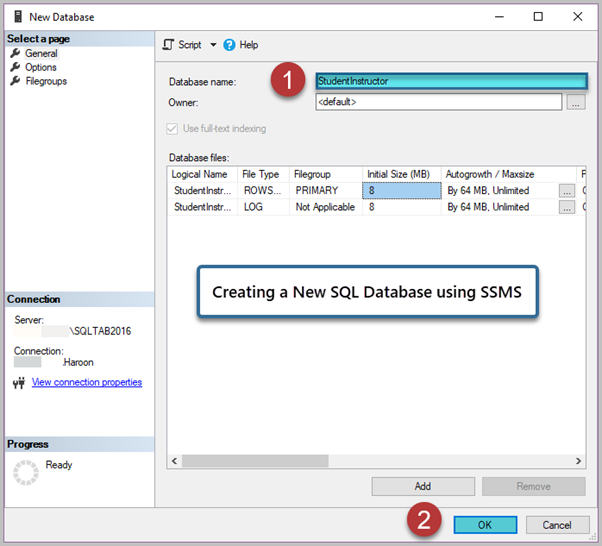
Type the name of the database StudentInstructor. Click on OK, leaving the default settings, unless you have to change them:
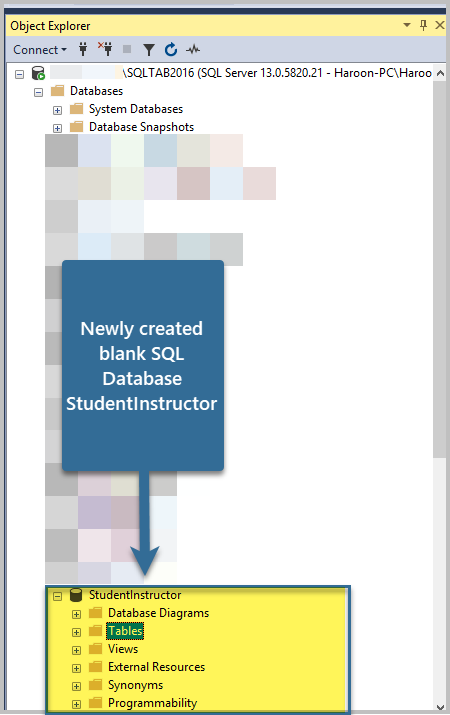
The database should be created now.
Expand the same Databases node to locate it:
Create a Student Table
Now we need to create the tables in the StudentInstructor database.
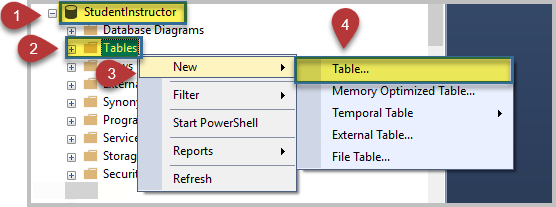
Expand StudentInstructor database node: click on it, and then right-click on Tables.
Go to New -> Table… as follows:
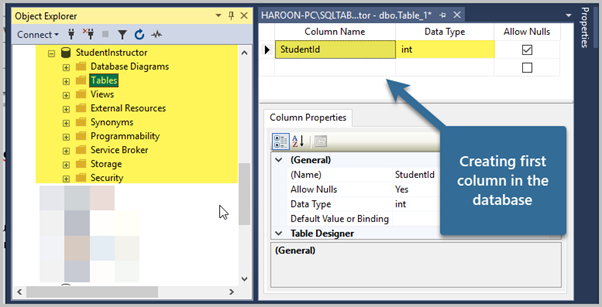
We are going to add columns to the table one by one. We start with StudentId.
Type in the StudentId column name and select int Data Type, as it is going to be numeric (with numbers only):
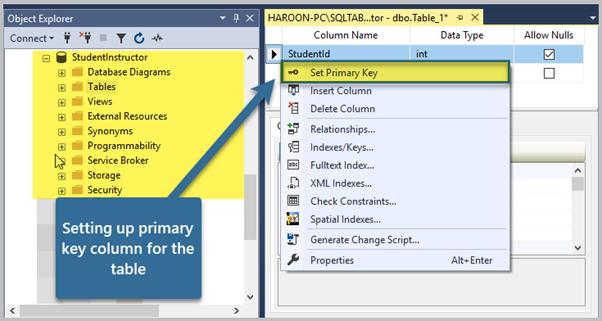
Set Primary Key
The StudentId column is also going to be the primary key of the table. It will help us identify a student (row/record) uniquely.
Right-click on the arrow pointing to the StudentId column and click Set Primary Key:
Add Identity to the Primary Key (StudentId)
An identity set to a column automatically increments its value when new records are inserted. It is like a serial number, which increases with each new record.
If we do not set up the primary key column as an identity column, we manually add the ID for each new record. This, it is a good idea to set it up.
For example, the first record inserted into the Student table will have an automatic id 1, and the next one will be StudentId 2, etc. It is if we set up the Identity.
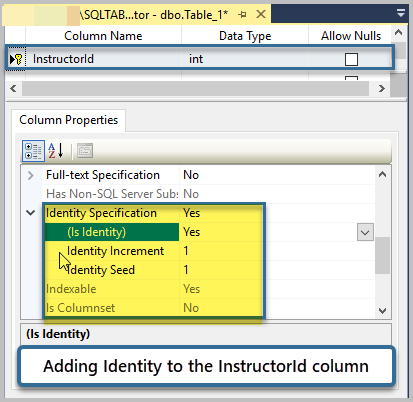
Scroll down the Column Properties window once the StudentId primary key column is selected until you find the Identity Specification property.
Set the Identity Specification as follows (starting with is Identity):
Identity Specification: Yes
(is Identity): Yes
Identity Increment: 1
Identity Seed: 1

Add a Name column to the Student Table
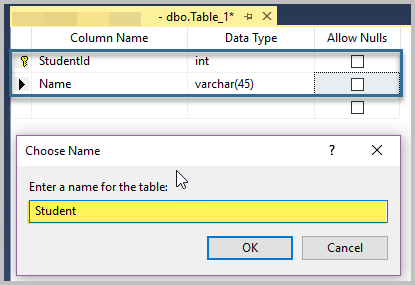
Next, add another column – Name to the table. Use varchar(45) Data Type and uncheck Allow Nulls as follows:

Remember that VARCHAR(45) represents the character data (type) up to 45 characters to be stored in the column (Name). When we uncheck Allow Nulls,we must supply this value to the column to save a Student record.
Save the Table (Student)
The most important step is to save your changes. In our case, we save the newly created table by simply clicking the Save disk icon on the toolbar or by the keyboard shortcut CTRL+S.
Type in the table’s name – Student – when saving it:
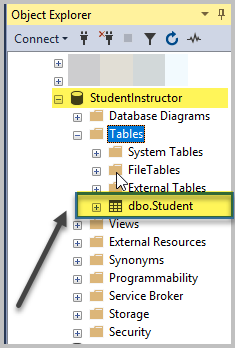
View the Student Table (Object Explorer)
Once the table is saved successfully, expand the Tables node of the StudentInstructor database to locate the newly created table:
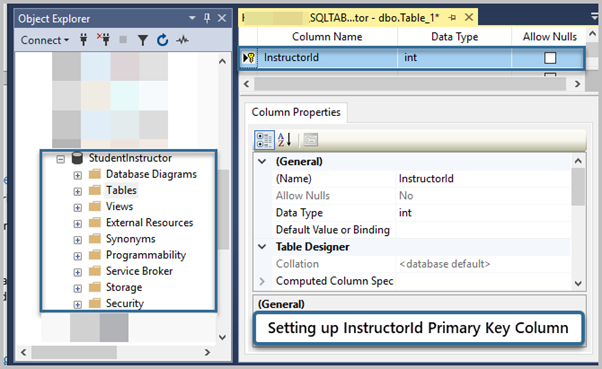
Create an Instructor Table with InstrutorId and Name Columns
Similarly, right-click on the Tables node again. This time, create a new table called Instructor.
Then, add a new column called InstructorId of int data type and set it as the primary key as shown below:
The next step is adding Identity to the column InstructorId:
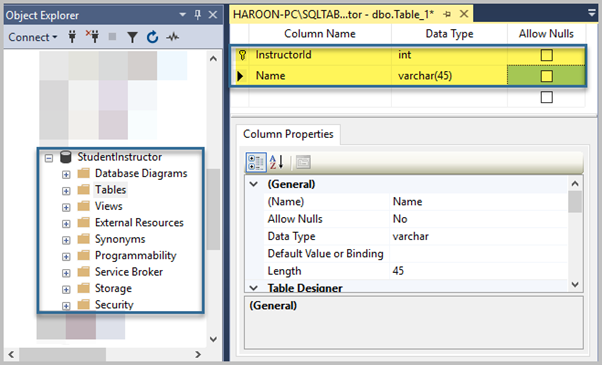
After this, add the Name column of VARCHAR(45) data type to the Instructor Table, and do not allow Nulls for this column, just like for the Name column of the Student table:
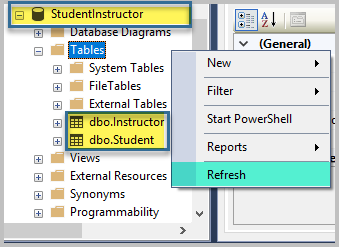
Save and View an Instructor Table (Object Explorer)
Save the table by pressing CTRL+S shortcut or clicking the Save icon. Name the table as Instructor.
Right-click on the Tables node under StudentInstructor database and click Refresh to see both tables now:
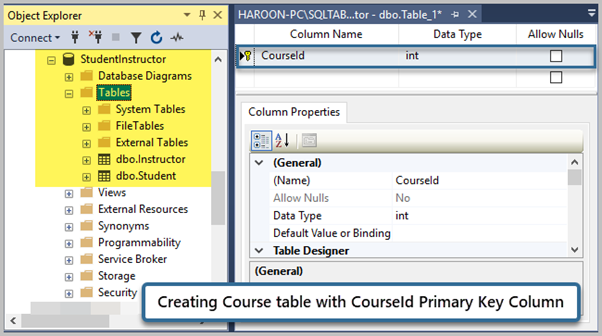
Create the Course Table with CourseId Primary Key Column with Identity
We have to add one more table to the database – the Course table, which will contain ids from both the Student and Instructor tables. There will be a many-to-many relationship (many students can be allocated to many instructors, as per our requirements).
Create a new table Course with the CourseId primary key:
Add Identity to the column in the same way we did for StudentId and InstructorId columns.
Add Name, StudentId, and CourseId Columns
Next, add a Name column of type VARCHAR(45) to the Course table followed by adding StudentId and CourseId columns of int data type:
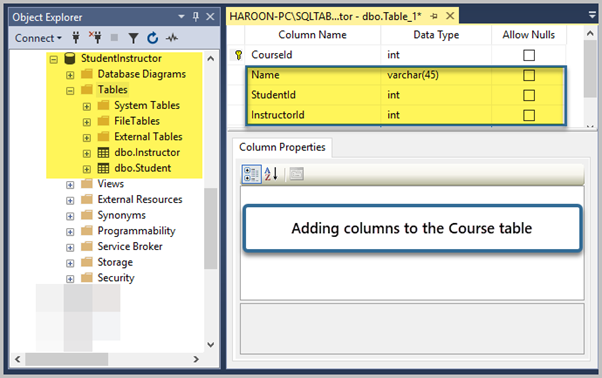
Don’t forget to uncheck Allow Nulls to ensure that a record won’t be saved without inputting these column values.
This way, we ensure that a Course must have a Student and an Instructor before it can be saved in the database. On top of that, the Student and Instructor must exist in their original tables.
Save and Quick Check
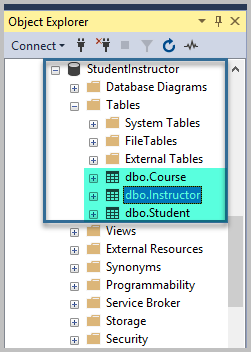
Save the table and name is as Course:

Finally, Refresh all the tables and view the newly created table alongside others in the Object Explorer:
Add All Tables to the Database Diagram
Now, we need to create a relationship among the tables so that both Student and Instructor tables got connected to the Course table through their primary keys.
For example, StudentId in the Student table is connected with StudentId in the Course table. Similarly, InstructorId in the Instructor table is connected with InstructorId in the Course table.
We can achieve it with the database diagram.
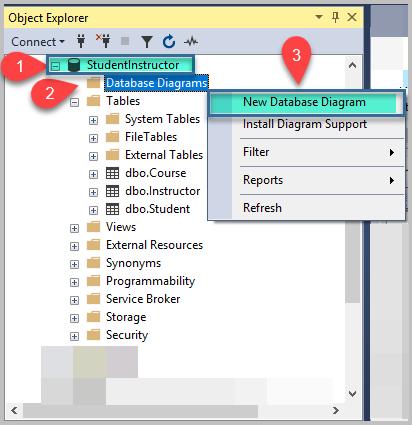
Go to the StudentInstructor database in the Object Explorer and right-click on Database Diagrams -> New Database Diagram:
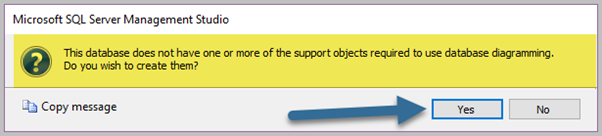
Click Yes:
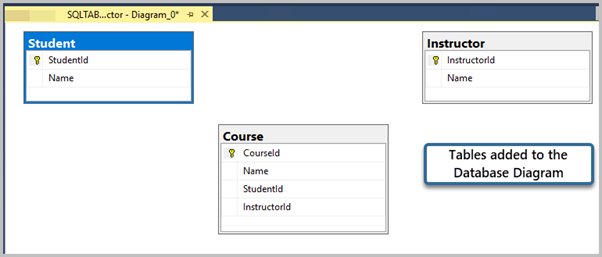
Use the CTRL key to select all existing tables and add them to the Database Diagram:

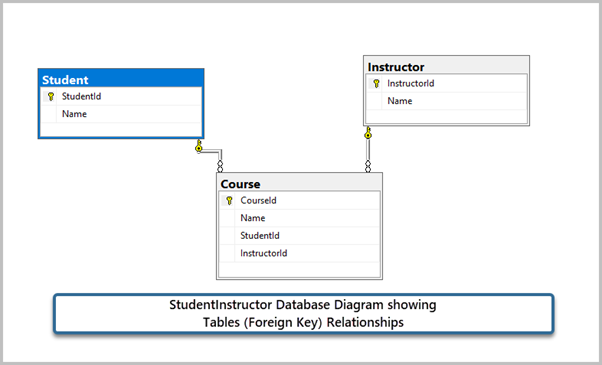
View the database diagram and rearrange the tables (click on the table and move it) to make the Course table stand in the middle, between the Student and Instructor tables:
Link the Student Table with the Course Table
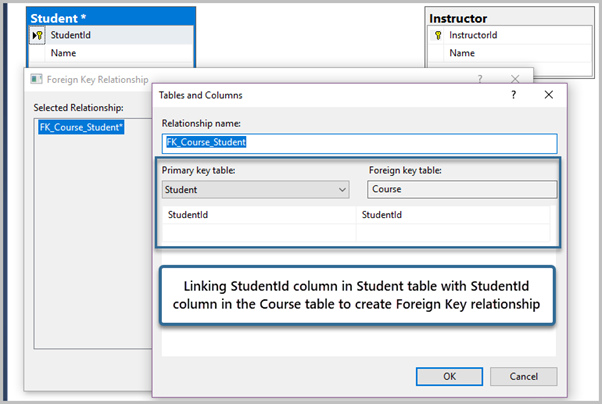
We need to create a relationship between Student and Course by connecting StudentId in the Student table with the StudentId column in the Course table.
Drag the StudentId key and drop it into the StudentId column in the Course table. Click OK:
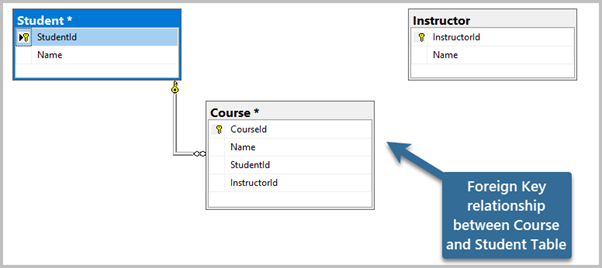
It will create a foreign key relationship between the Course and Student tables – it ensures that only those students saved in the Student table will be saved in the Course table:
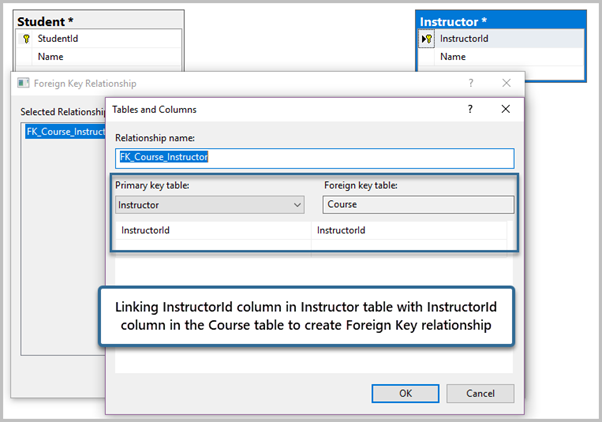
Link the Instructor Table with the Course Table
Similarly, you have to link the Instructor table with the Course table so that the InstructorId primary key column of the Instructor table would get passed to InstructorId in the Course table.
This way, we ensure that the InstructorId primary key exists as a Foreign Key in the Course table. It means that we can store any instructor’s row from the Course table only if that Instructor exists in the original Instructor table. This way, we maintain the database consistency and integrity as per standard practice.
Save the Database Diagram
Finally, save the database diagram by clicking the Save icon on the toolbar:
Add data to the Student Table
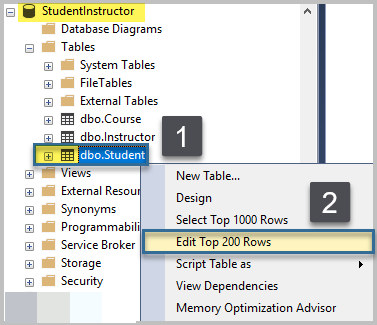
It’s time to add some data to the created tables, starting from the Student table. We will add three students’ records to the table.
Right-click on the Student table and click on Edit Top 200 Rows (do not worry, you are not going to edit 200 rows):
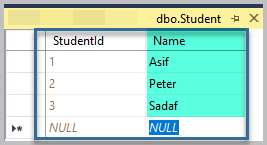
Type the following names and click Enter to save these records:
Then, close the window – click on the cross on the top right or press CTRL+F4.
Please note that StudentIds 1,2 and 3 are automatically allocated to the records. We’ll use them later in the Course table.
Add data to the Instructor Table
Now, we need to add two instructors named Martin and Asad. Thus, add the following data to the Instructor table:
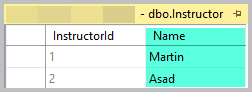
Similarly, keep these ids 1 and 2 in mind. You can close this window for now.
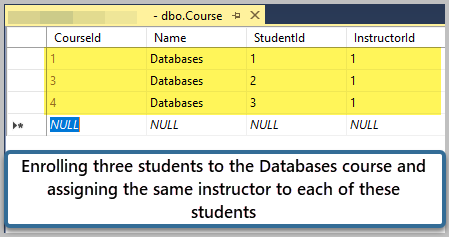
Add data to the Course Table
We have students on one side and instructors on the other side. But we can only add those students who are already on the Student table, and the same applies to instructors.
Let us enroll all three students to the Databases course and assign an instructor to this Course as well:
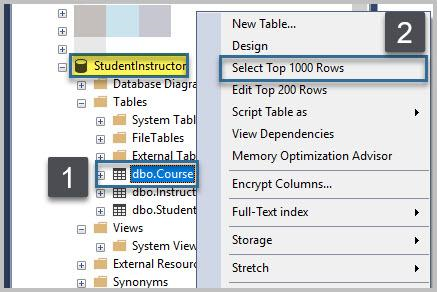
View the Course Table Contents
To view the data, right-click on the Course table -> Select Top 1000 Rows:
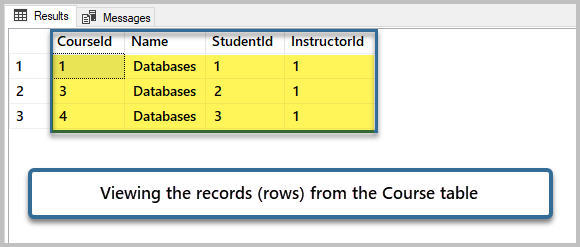
Congratulations! You have successfully learned to design a simple database with SSMS (SQL Server Management Studio). Alongside we’ve trained to insert new records and viewing the inserted data.
Things to do
Now that you can design a database with SSMS, try the following things to improve your skills further:
- Try viewing the Student and Instructor tables’ contents.
- Try adding another course called Business Intelligence and enroll all the three students in that Course, along with assigning the instructor Asad (InstructorId: 2)
- Remember that you can improve the actual database design from the article by the following things:
- Renaming the Course table as the Class table;
- Removing the Name column from the Class table;
- Replacing the CourseId with the ClassId column;
- Creating a separate Course table with the CourseId and Name columns, just like for the Student and Instructor tables;
- Adding a new CourseId column to the Class table and linking CourseId of the Course Table with the CourseId column in the Class table, just like Student and Instructor.


