This material was originally posted on Habr.com in Russian. The author permitted it to be translated and published on Codingsight.
Perhaps, everyone has somewhere a file to keep certain exciting and useful things, like, links to articles, books, repositories, manuals, etc. You might use bookmarks in a browser or tabs, still open and waiting for you. Over time, it all grows excessively, links become broken, and materials get obsolete.
But what if we could share these insightful gems with the community? Upload a file to GitHub? Then, your findings would be useful for someone else. Besides, it would be easier to keep the file up-to-date together, getting the list updated via the good old pull requests.
This is what we have the Awesome Lists project for.
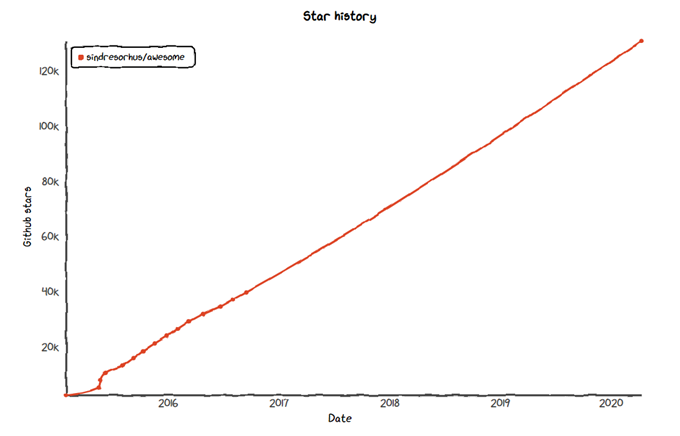
Awesome Lists is among the top-10 GitHub repositories, boasting 138k “stars” already, and a link to your works can make it up to its root README, thus attracting huge audiences. However, you’ll have to make some effort first. Here, I want to share my experience.
I am Maksim Gramin, a Java developer and database researcher at CROC, an international IT company with HQ in Moscow. This article will tell you about Awesome Lists and how to make your official awesome-repo.
What Are Awesome Lists About?
Whenever I have to deal with some new technology or a programming language, I go there first, looking for the necessary section and appropriate lists. Given the big and ever-increasing number of “stars,” I am not the only person with such an approach.
In fact, “Awesome Lists” is a standard plain readme.md living in a separate repository. However, it occupies the 8th position among all the GitHub repositories and includes other lists dedicated to certain topics. For example, the Programming Languages section has Awesome Python and Awesome Go lists, while the Front-End Development section stores numerous Web development materials. Last but not least, there is the Database section (we’ll talk about it a bit later).
Of course, the content is not limited to technical subjects only and also includes other sections, such as Entertainment and Gaming. You can find many exciting things there too (I was really happy with the awesome-fantasy list).
The project’s main distinction is that all these lists are managed by not the author only, but the community. Besides, they all are made according to a strict Awesome Manifesto. Each list represents a separate community of specialists, living its own life and being open for your pull requests, which will make it even better. Moreover, anyone can create their own list in case some topic lacks exploring.
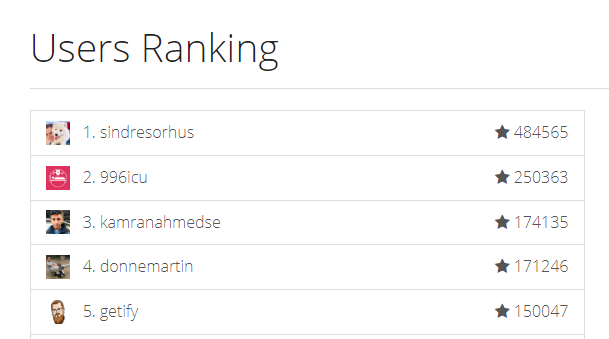
For original idea and all-this-stuff coordination, we should be thankful to legendary Sindre Sorhus, the first man on GitHub and the author of 1,000+ npm-modules. He is the one who will accept your pull requests.
How to Make an Awesome-List
If you haven’t found the right list for the necessary topic, it is the first sign that you should do it yourself! I’ll tell you how to do it by the example of my own creation – Awesome Database Tools.
Project by project, I had to deal with all kinds of databases. Thus, I started to manage some files where I gathered different helpful tools for work. There were various DB-migrators, IDE, admin panels, monitoring tools, etc., including those I already used or only planned to.
I shared this file with my colleagues at CROC and beyond, encouraged by seeing how it benefited many of them. Then, I wanted more. When I noticed that the Databases section lacked a list dedicated to the tools, I decided to add mine.
What do you need for that?
- Register a standard GitHub-repo and name it like awesome-smth – in my case, it was awesome-database-tools.
- Adjust the list to the awesome format using generator-awesome-list that will generate all the necessary files in the right format.
- Configure continuous integration (CI) – awesome-lint and Travis CI will help us control the validity of the list.
- Wait for 30 days.
- Review at least 2 other pull requests.
- Make a pull request to the main repo, and add a link to our own repo. Important: Carefully read all the numerous requirements to the new list and pull requests, and follow them precisely.
My first attempt did not succeed.
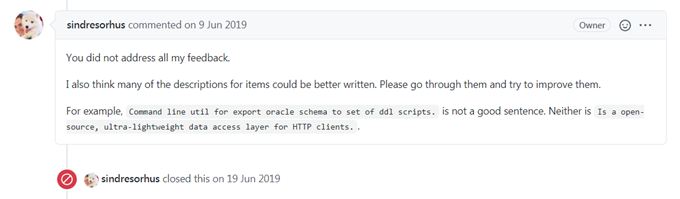
However, after some time, I collected more materials, did my homework, fixed the errors, and attempted a second time.
But I forgot one crucial thing, and they reminded me about it politely:
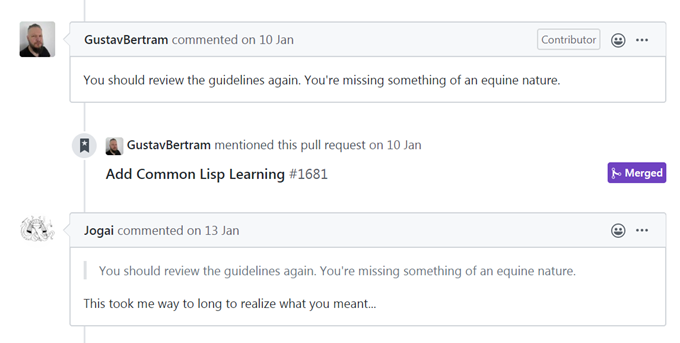
I was not attentive enough and did not add a unicorn as a confirmation of all conditions being fulfilled.

Some more time passed, I got some more remarks and added amendments, and, finally, I saw a long-awaited twit that my PR had been accepted.
This is how I made my first list and started to receive the community’s pull requests for adding new tools. Many of them are already included in Awesome Database Tools.
If you have good ideas for databases – feel free to share them. Also, I’ll be happy to get feedback from you, like pull requests and stars. If you have any questions about making your own lists, please let me know.
You can reach the author at [email protected].
Tags: awesome list, github, tips and tricks Last modified: September 18, 2021