In the previous article, I explained how we could install Ubuntu 18.04 and SQL Server 2019 on the virtual machines. Now, before we proceed further, let’s go through the configuration.
We created three virtual machines, and the details are the following:
| Host Name | IP Address | Role |
| LinuxSQL01 | 192.168.0.140 | Primary Replica |
| LinuxSQL02 | 192.168.0.141 | Synchronous Secondary Replica |
| LinuxSQL03 | 192.168.0.142 | Asynchronous Secondary Replica |
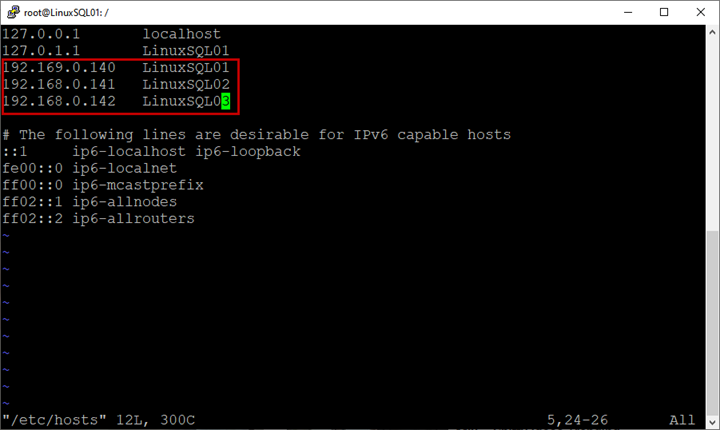
Update the host file.
In the configuration, we are not using a domain server. Therefore, to resolve the hostname, we must add an entry in the host file.
The host file is located on /etc directory. Run the below command to edit the file:
root@LinuxSQL01:/# vim /etc/hostsIn the host file, enter the hostnames and IP addresses of all virtual machines:
Save the host file.
Perform the same steps on all virtual machines.
Enable SQL Server AlwaysOn availability groups
Before deploying AlwaysOn, we must enable the high availability feature in SQL Server.
In Windows Server 2016, this option can be enabled from the SQL Server configuration manager, but in the Linux platform, we must do it with a bash command.
Connect to LinuxSQL01 using Putty, and run the following command:
root@LinuxSQL01:~# sudo /opt/mssql/bin/mssql-conf set hadr.hadrenabled 1Restart the SQL Server services:
root@LinuxSQL01:~# service mssql-server restartPerform the above steps on all virtual machines.
Create the certificates for authentication
Unlike AlwaysOn on the Windows server, the Linux deployment does not require a domain controller. For authentication and communication between primary and secondary replicas, it uses the certificate.
The following script creates a certificate and a master key. Then it backups the certificate and secures it with a password.
Connect to LinuxSQL01 and run the following script:
CREATE MASTER KEY ENCRYPTION BY PASSWORD = 'abcd!1234';
CREATE CERTIFICATE AG_Auth_Cert WITH SUBJECT = 'dbm';
BACKUP CERTIFICATE AG_Auth_Cert
   TO FILE = '/var/opt/mssql/data/ AG_Auth_Cert_backup.cer'
   WITH PRIVATE KEY (
           FILE = '/var/opt/mssql/data/ AG_Auth_Cert_backup.pvk',
           ENCRYPTION BY PASSWORD = 'abcd!1234'
       );
Once we get the certificate and master key created, we copy them to secondary replicas (LinuxSQL02 and LinuxSQL03) by running the below command.
Ensure that the master key and certificate’s location are the same on all replicas and have read-write permission.
/*Copy certificate and the key to LinuxSQL02*/

scp /var/opt/mssql/data/AG_Auth_Cert_backup.cer root@LinuxSQL02:/var/opt/mssql/data/
scp /var/opt/mssql/data/AG_Auth_Cert_backup.pvk   root@LinuxSQL02:/var/opt/mssql/data/

/*Copy certificate and the key to LinuxSQL03*/

scp /var/opt/mssql/data/AG_Auth_Cert_backup.cer   root@LinuxSQL03:/var/opt/mssql/data/
scp /var/opt/mssql/data/AG_Auth_Cert_backup.pvk   root@LinuxSQL03:/var/opt/mssql/data/
Execute the following command on secondary nodes to grant read-write permission on the certificate and private key:
/*Grant read-write permission on certificate and key to root@LinuxSQL02*/

root@LinuxSQL02:~# chmod 777 /var/opt/mssql/data/AG_Auth_Cert_backup.pvk
root@LinuxSQL02:~# chmod 777 /var/opt/mssql/data/AG_Auth_Cert_backup.cer

/*Grant read-write permission on certificate and key to root@LinuxSQL03*/

root@LinuxSQL03:~# chmod 777 /var/opt/mssql/data/AG_Auth_Cert_backup.pvk
root@LinuxSQL03:~# chmod 777 /var/opt/mssql/data/AG_Auth_Cert_backup.cer
Once permission is assigned, we create the certificate and master key using the backup of certificate and master key created on LinuxSQL01.
To do that, run following command on both secondary replicas:
CREATE MASTER KEY ENCRYPTION BY PASSWORD = 'abcd!1234';
CREATE CERTIFICATE AG_Auth_Cert
    FROM FILE = '/var/opt/mssql/data/AG_Auth_Cert_backup.cer'
    WITH PRIVATE KEY (
    FILE = '/var/opt/mssql/data/AG_Auth_Cert_backup.pvk',
    DECRYPTION BY PASSWORD = 'abcd!1234'
            );
Once we have created the certificate and master key, we will configure the database mirroring points.
Create the mirroring endpoints
To communicate between the primary and secondary replicas, SQL Server uses mirroring endpoints.
A mirroring endpoint uses the TCP/IP protocol to send and receive messages from primary and secondary replicas and listens on a unique TCP/IP port.
Run the following script to create an endpoint on Primary and Secondary nodes:
/*Run this script on LinuxSQL01*/

CREATE ENDPOINT [AG_LinuxSQL01]
    AS TCP (LISTENER_PORT = 5022)
    FOR DATABASE_MIRRORING (
	    ROLE = ALL,
	    AUTHENTICATION = CERTIFICATE AG_Auth_Cert,
		ENCRYPTION = REQUIRED ALGORITHM AES
		);
ALTER ENDPOINT [AG_LinuxSQL01] STATE = STARTED;

/*Run this script on LinuxSQL02*/

CREATE ENDPOINT [AG_LinuxSQL02]
    AS TCP (LISTENER_PORT = 5022)
    FOR DATABASE_MIRRORING (
	    ROLE = ALL,
	    AUTHENTICATION = CERTIFICATE AG_Auth_Cert,
		ENCRYPTION = REQUIRED ALGORITHM AES
		);

ALTER ENDPOINT [AG_LinuxSQL02] STATE = STARTED;

/*Run this script on LinuxSQL03*/

CREATE ENDPOINT [AG_LinuxSQL03]
    AS TCP (LISTENER_PORT = 5022)
    FOR DATABASE_MIRRORING (
	    ROLE = ALL,
	    AUTHENTICATION = CERTIFICATE AG_Auth_Cert,
		ENCRYPTION = REQUIRED ALGORITHM AES
		);
ALTER ENDPOINT [AG_LinuxSQL03] STATE = STARTED;
Once the mirroring points have been created, let us create an availability group.
Create availability group
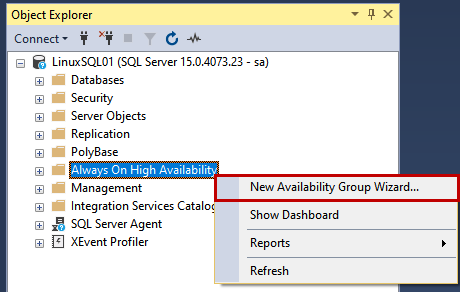
We are going to configure AlwaysON using SQL Server Management Studio.
First, launch it and connect to the LinuxSQL01 instance using sa credentials. Once connected to the SQL Server instance, Right-click Always On High Availability and select the New Availability Group Wizard.
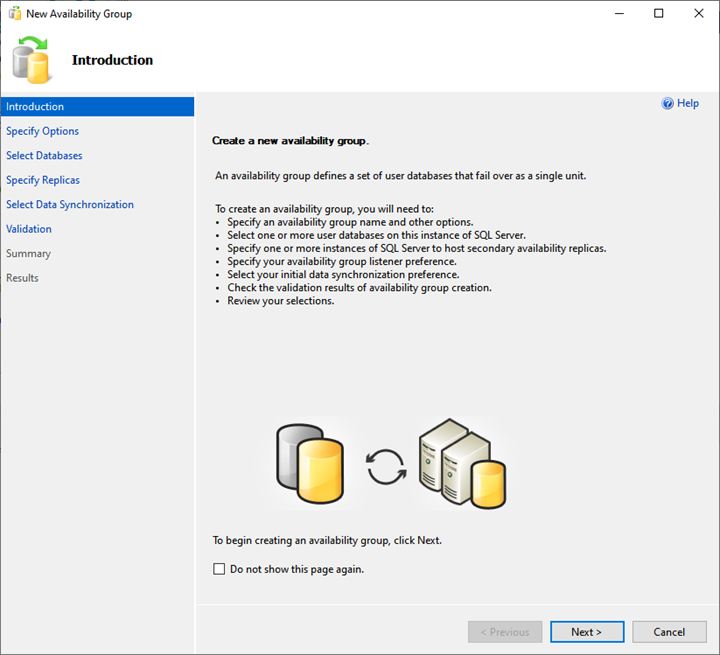
The Availability group wizard starts.
1. Introduction
In an Introduction screen, see the tasks list that will be performed by the availability group wizard. Click Next.
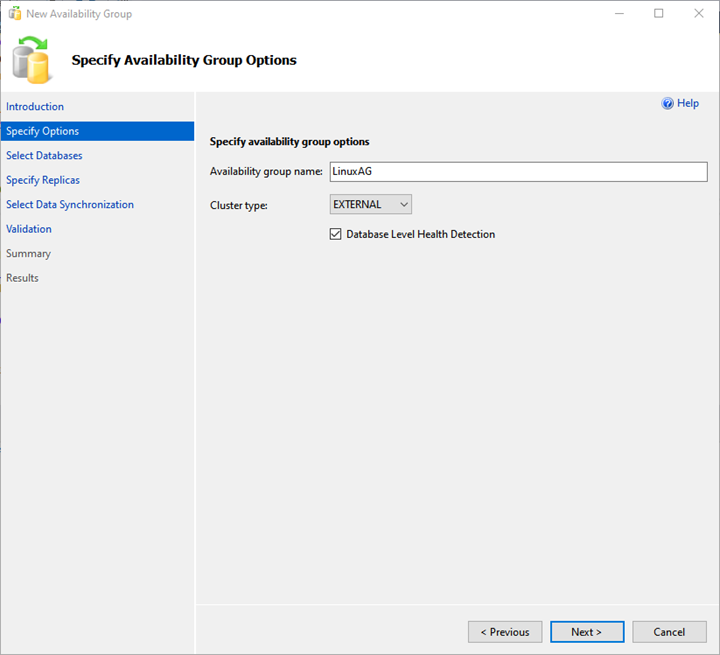
2. Specify Availability Group Option
On the Specify Availability Group Option screen, provide the desired availability group name and choose EXTERNAL from the Cluster type drop-down menu.
Also, put a checkmark for the Database Level Health Detection checkbox. It enables the extended event session for the availability of group health.
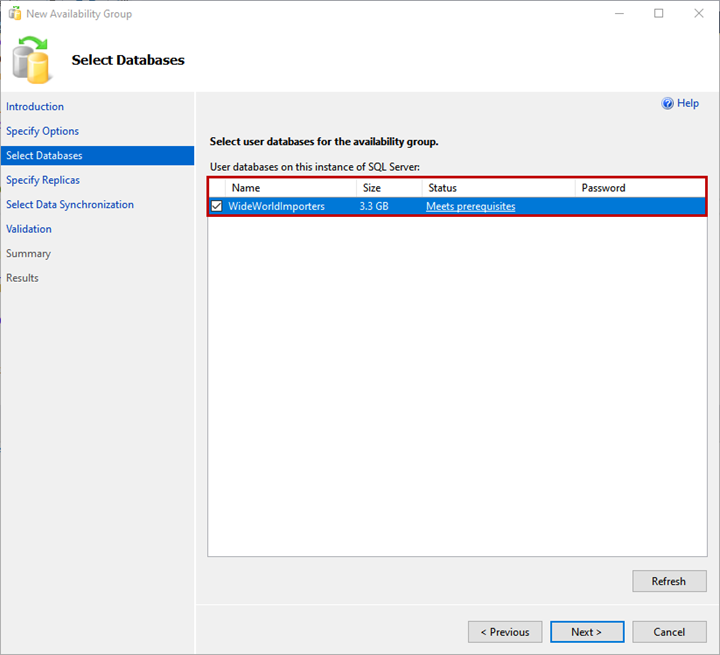
3. Select Databases
You can choose the database to add to the availability group on the Select Databases screen. Note: The database must meet the following pre-requisites:
- The database must be in the FULL recovery model.
- A FULL backup of the database must be created.
I have restored a backup of the WideWorldImportors database on the primary replica. The database is in FULL recovery model, and a full backup has been generated.
Select the WideWorldImportors database from the list and click Next.
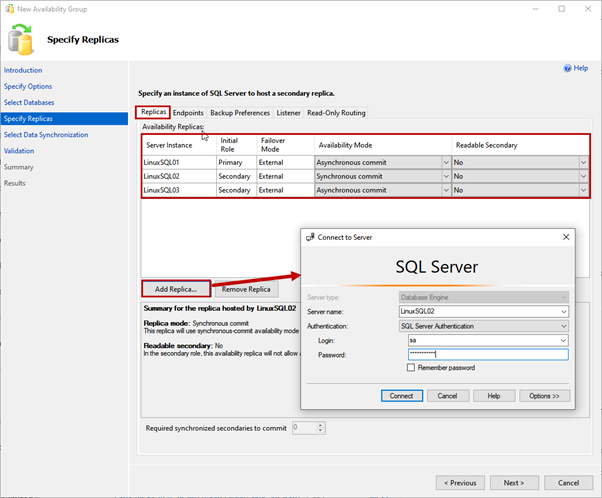
4. Specify Replicas
On the Specify Replicas screen, we have several tabs to configure different options. Let’s review them all.
Replicas tab
Here, we specify the primary and secondary replicas, availability mode, and failover modes.
We use LinuxSQL01 as a Primary replica. LinuxSQL02 and LinuxSQL03 are a Secondary replica.
The availability mode for LinuxSQL02 will be Synchronous commit, and for LinuxSQL03 will be Asynchronous commit.
To add the replica, click on Add replica. Then, on Connect to the Server dialog box, specify the server name and SQL Login details to connect to the instance:
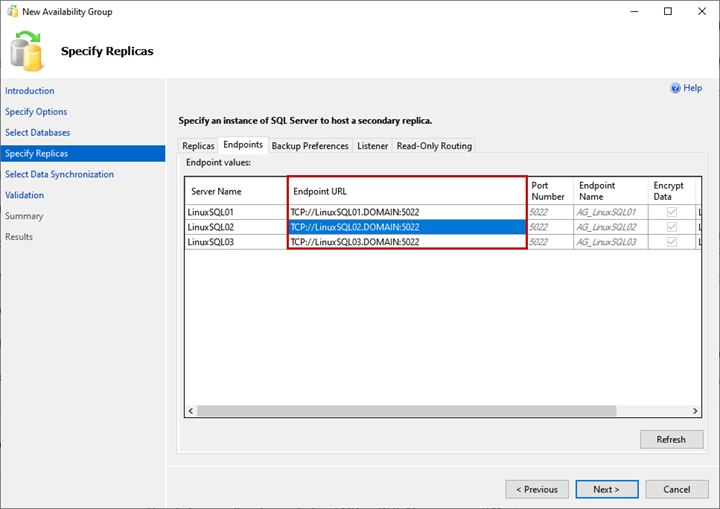
Endpoints tab
Here, we can view the list of replicas and their mirroring endpoints with corresponding port numbers and names:
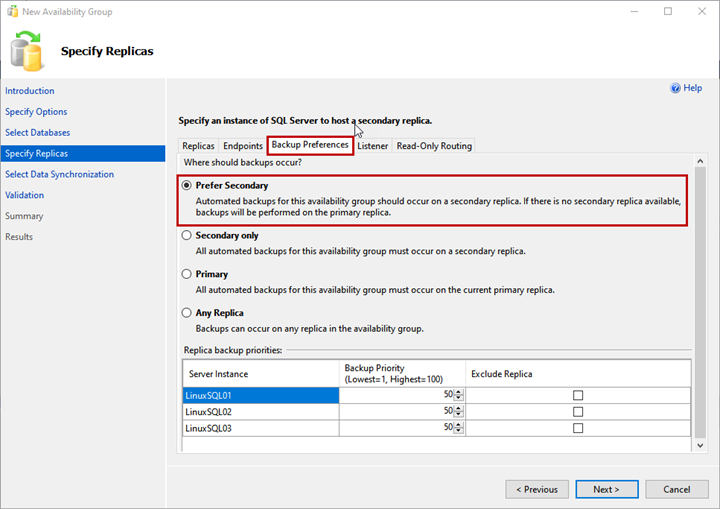
Backup Preferences
Here, you specify the replica you want to use to generate the backup. This option is useful when you want to offload the SQL database backup process within the availability group.
You can choose any of the following options:
- Prefer Secondary: Backup will be generated on the secondary replica. If the secondary replica is not available, the backup will be generated on the primary replica.
- Secondary only: All backups will be generated on the secondary replica.
- Primary: Backups will be generated on the Primary replica.
- Any replica: Backup will be generated from any of the replicas.
We will use the Prefer Secondary option:
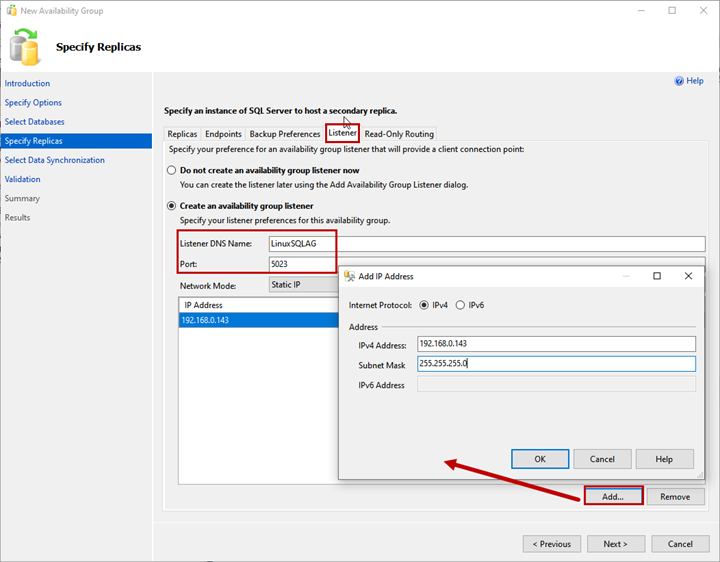
Listener
The availability group listener is a virtual name used by an application to connect the availability group databases. Specify the Listener DNS Name and its port in Listener DNS Name and Port text boxes.
Select Static IP from the Network Mode drop-down menu.
To add the IP Address for the availability group listener, click Add >Enter IP Address and Subnet Mask.
Read-Only Routing
Here, you can provide the Read-Only Routing URL and Read-Only Routing list for Primary and Secondary replicas.
We won’t configure Read-Only routing in our demonstration. Therefore, click Next. To learn more about Read-Only routing, you can refer to Read-only Routing for an Always On.
Now, let’s get back to the main process we work on.
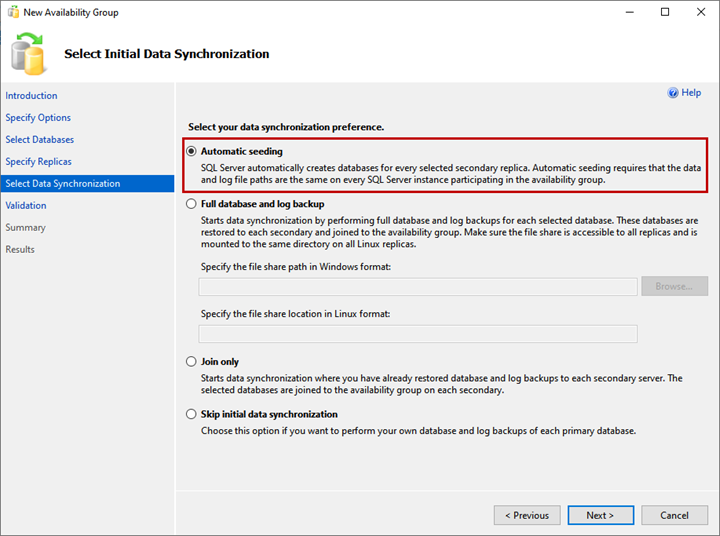
5. Select Initial Data Synchronization
On the Select Initial Data Synchronization screen, set your preferences for the initial data synchronization. Details of each option are provided on the wizard screen, and you can choose any of them:
- Automatic Seeding.
- Full Database and log backup.
- Join only.
- Skip initial data synchronization.
I have not created the WideWorldImportors database on LinuxSQL02 and LinuxSQL03 replica, selecting the Automatic seeding option. It will create the database on both replicas and kick off the data synchronization. Click Next.
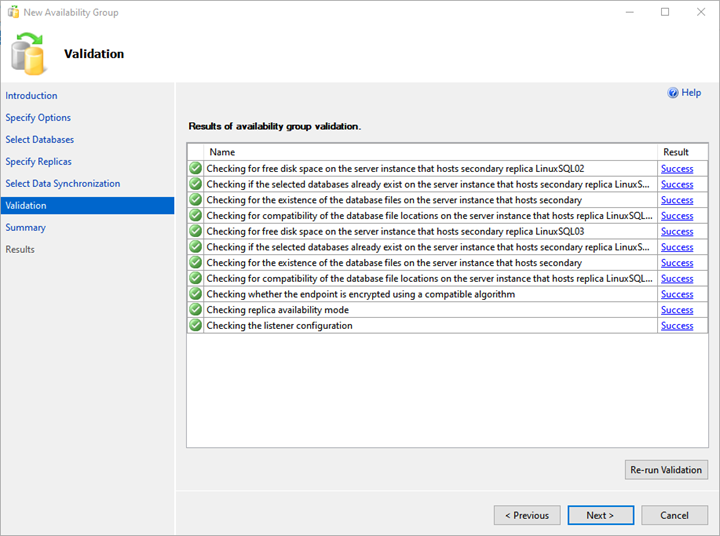
6. Validation and Summary
On the Validation screen, the wizard validates all the configurations.
To deploy the Always On availability group successfully, you need all validation succeeded. If there is any error, you must resolve it.
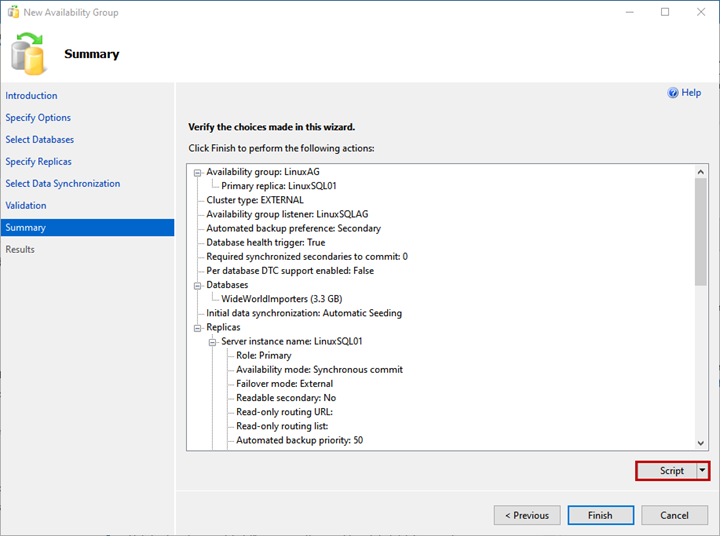
On the Summary screen, you can see the list of configurations chosen to deploy the availability group.
Review the details once more, and click Finish – it launches the deployment process.
If you want to generate the script of the deployment process, click Script.
As we see, the AlwaysOn deployment process starts. Once it is complete successfully, click Close to exit the wizard.
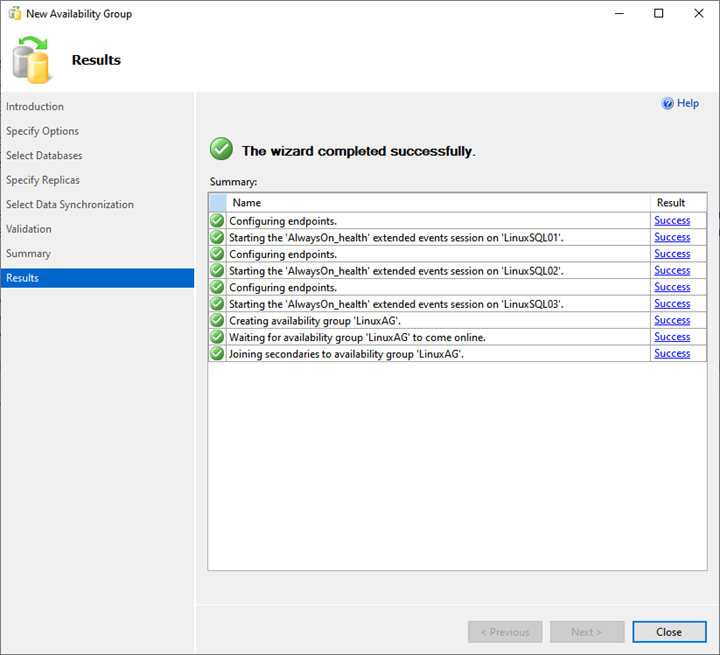
Thus, the deployment of the AlwaysOn availability group on SQL Server 2019 is completed.
Summary
This article helps us to understand the step-by-step deployment process of the SQL Server AlwaysOn availability group on Linux.
The next article will explain how we can configure the availability group listener and perform manual failover using SQL Server Management Studio. Stay tuned!
Tags: failover cluster instance, linux, sql always on, sql server availability groups Last modified: September 18, 2021