The SQL Server Express edition is a free version of SQL Server 2019. You can use it to deploy small applications and websites and monitor the database mirroring instances. It also serves as a back-end of the third-party software. For example, if you plan to set up an SQL Server monitoring tool, and the data retention period does not exceed a week or two, you can use the Express edition to save the license cost.
The Express edition benefits are as follows:
- It is free to use. If you want to learn the basics of SQL Server or test any applications, it can be very useful.
- It is lightweight, yet impressively functional. It supports Full-Text search, SQL Common language runtime (CLR), native XML, In-Memory OLTP, Column store index, table and index partitions, and Data compression.
- There are security features like Row-Level security, database auditing, dynamic data masking, and Always encrypted.
- It is compatible with all paid versions of SQL Server. You can create an application with the Express edition and deploy it on Standard or Enterprise edition.
- No limit on the number of concurrent connections.
The limitations of the Express edition are as follows:
- The maximum database size is 10GB, and only one physical CPU or four cores can be used. Maximum memory supported is 1410 MB.
- SQL Server Agent service is absent.
- Integration service and analysis service are absent.
- Import-export feature for data movement between different data sources is absent.
Refer to the dedicated Microsoft documentation for more details on the features and limitations of the SQL Server 2019 Express edition.
In this article, we are going to explore the SQL Server Express edition installation process. Additionally, we will configure the Express edition LocalDB.
But first, let’s install SQL Server.
Install SQL Server Express edition
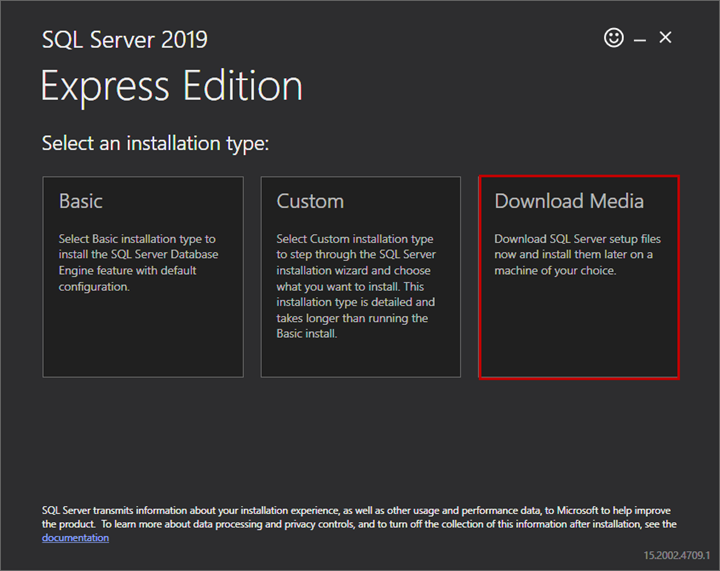
Download the SQL Server and execute the setup file. On the Select an installation type screen, click Download Media:
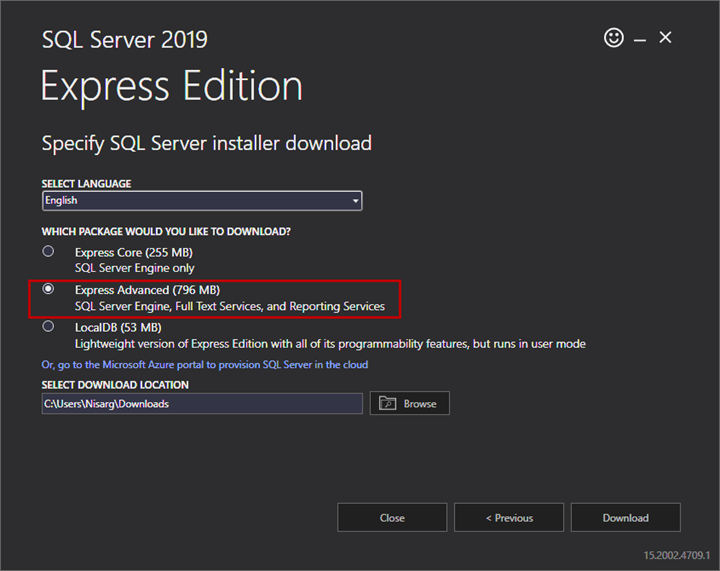
On the next screen, specify the SQL Server installer language, select the installation package, and specify the download location. Click Download.
Once the download is complete, we’ll start the installation process.
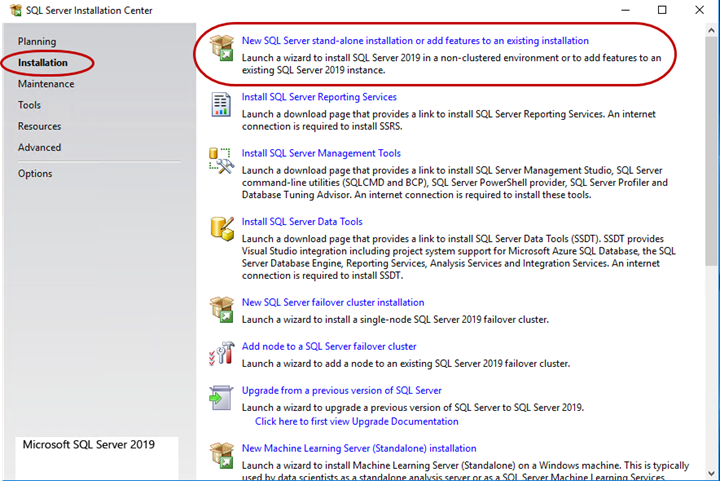
Double click on the ISO file -> double-click on Setup.exe. The SQL Server installation wizard starts.
In the SQL Server Installation Center dialog window, click Installation -> New SQL Server stand-alone installation or add features to an existing installation.
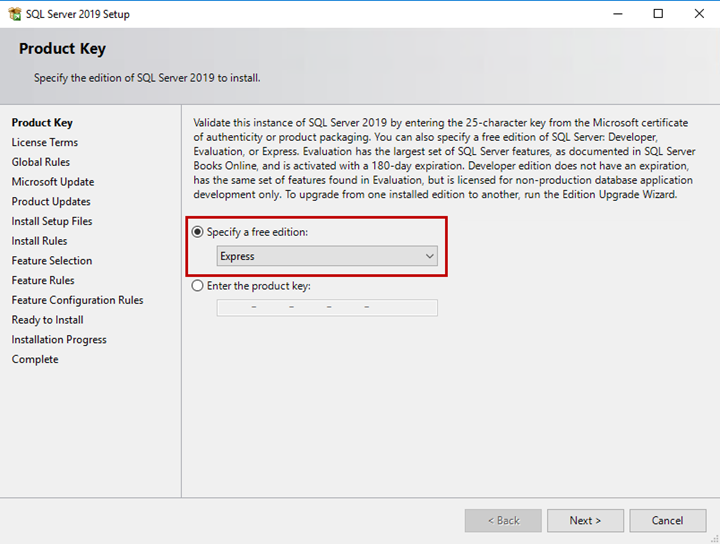
We are installing the Express edition, therefore, choose it and click Next.
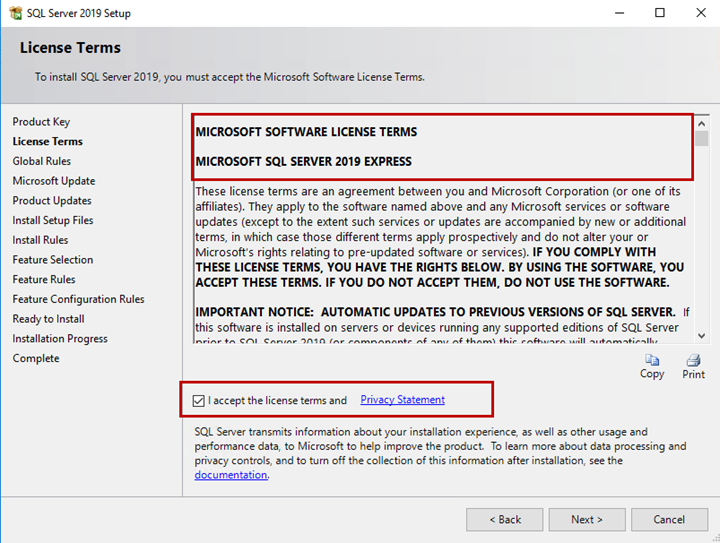
Review the Microsoft License Terms and the Privacy Statement of the SQL Server 2019 express edition on the License Term screen. Accept them and click Next.
On the Microsoft Update screen, Click Use Microsoft Update to check for updates. Click Next.
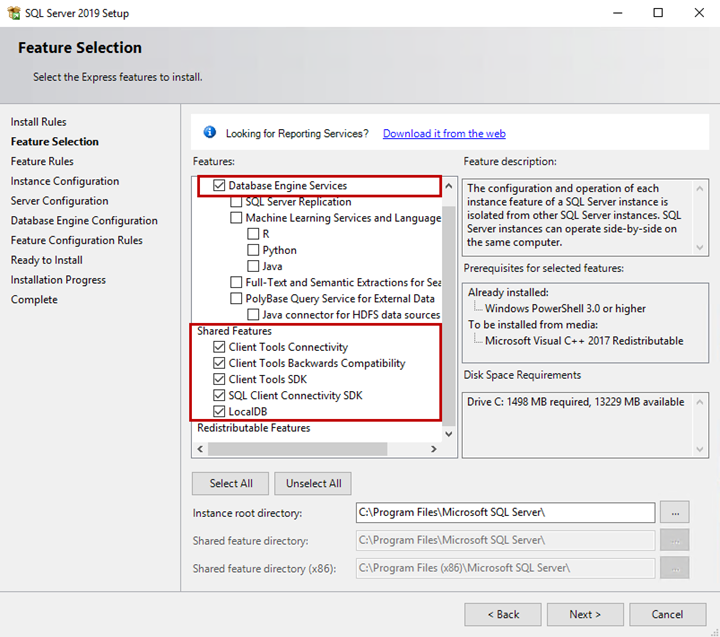
On the Feature Selection screen, we can choose a feature to install with the SQL Server Express edition.
Here, we’ve decided to install the database engine service, LocalDB, and client connectivity tools. Select those features from the list and click Next.
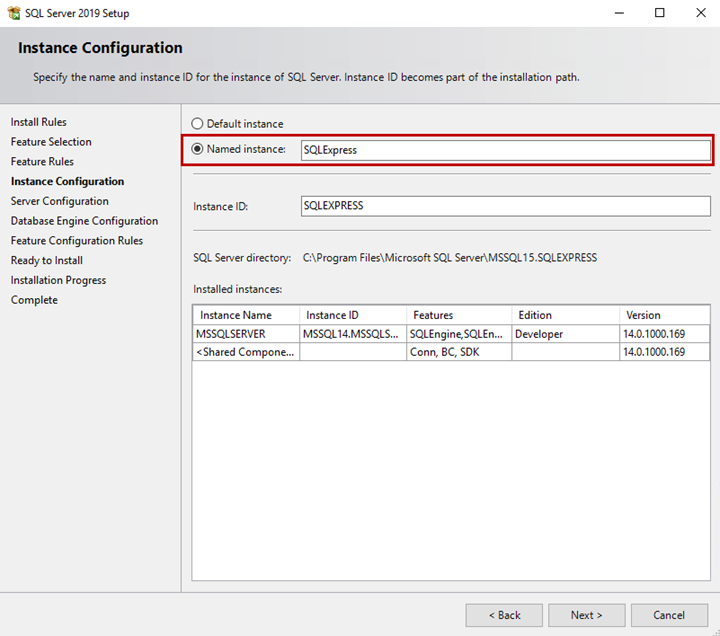
We want to use the Named instance. On the Instance Configuration screen, specify the desired instance name in the respective field and click Next.
On the Server Configuration screen, we can specify the service account and collation.
The SQL Server services should run using an AD account. Thus, specify the SQL Server Database Engine’s domain account and password. Also, change the startup type of SQL Server browser service to Automatic.

On the Database Engine Configuration screen, we can specify the following:
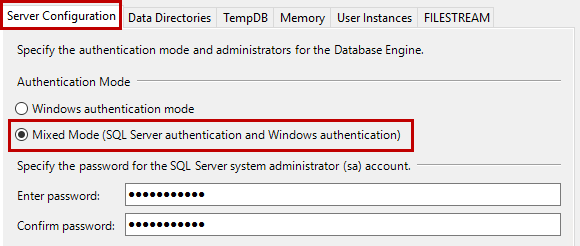
- Authentication mode is the section on the Server Configuration tab. To make the SQL Server instance more secure, we apply the SA user. It means you need to set Authentication Mode as Mixed Mode (Windows Authentication and SQL Server Authentication).
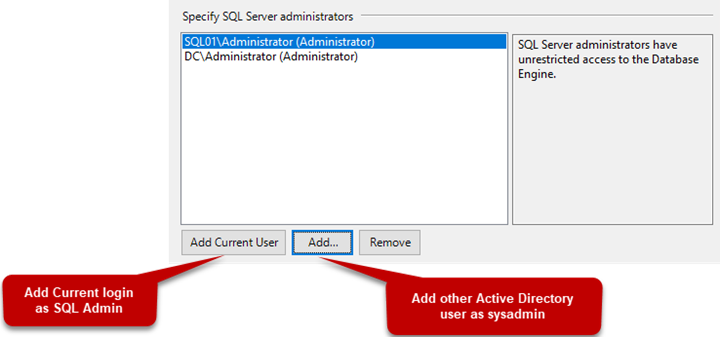
- SQL Server administrators are specified on the Server Configuration tab. To add a user, click Add. If you want to add a current user as an SQL Server Administrator, click Add Current User.
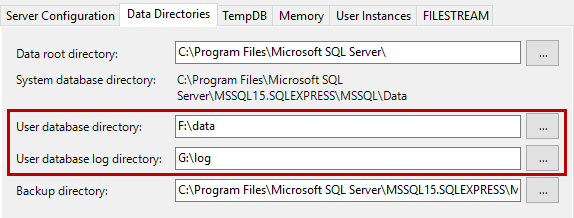
- Location of the data files and log files. Onthe Data Directories tab, specify the data files’ and log files’ location for the user database. The datafiles’ location is F:\Data, and the log files are at G:\Log. Do not change the location of the backup directory and data root directory.
- TempDB files. You can specify the number, initial size, auto-growth value, and location of TempDB files in the TempDB tab. Here, the location is G:\TempDB.

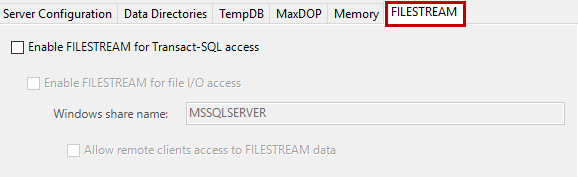
- FILESTREAM configuration is optional. We don’t configure it here and won’t change anything. Click Next.
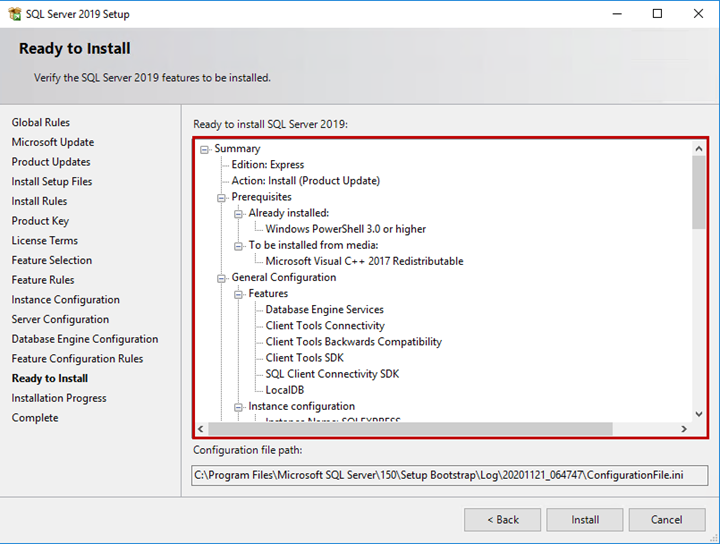
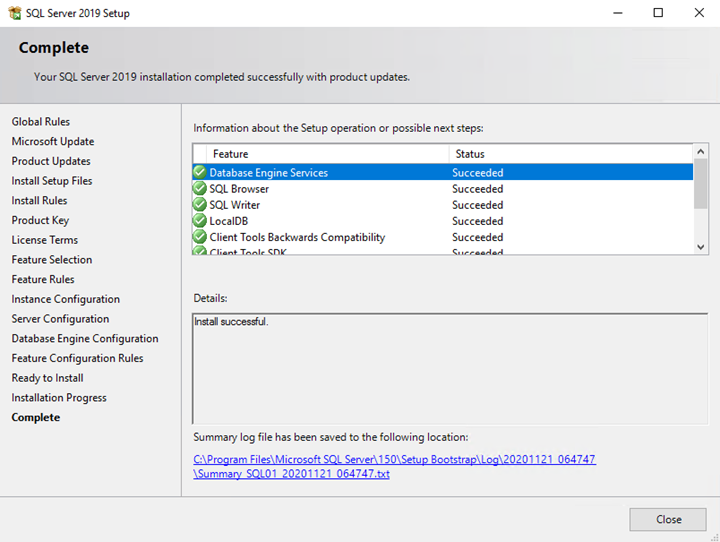
On the Ready to Install screen, you can see the configuration summary and the features list. Review them and click Install.
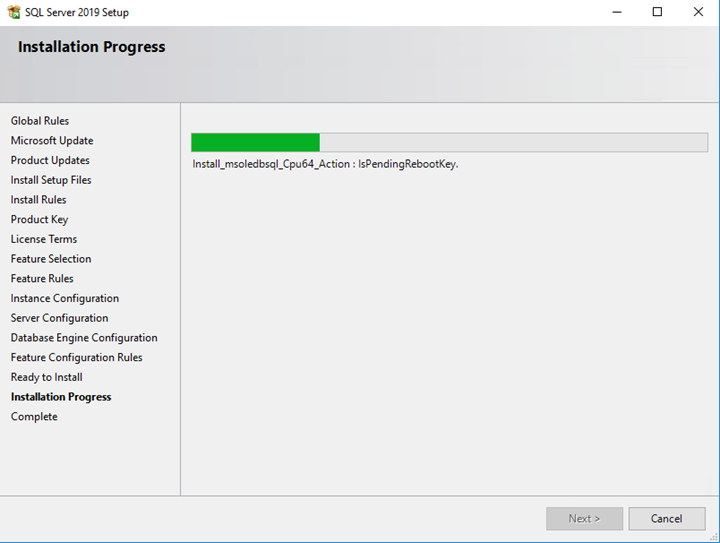
The installation process begins.
The SQL Server Express edition has been installed successfully.
Once it is installed, let’s connect it using SQL Server Management studio.
We have created a named instance of SQL Server Express edition. The server name must match the following format:
[HOST NAME]\[INSTANCE Name]
See the following illustration:

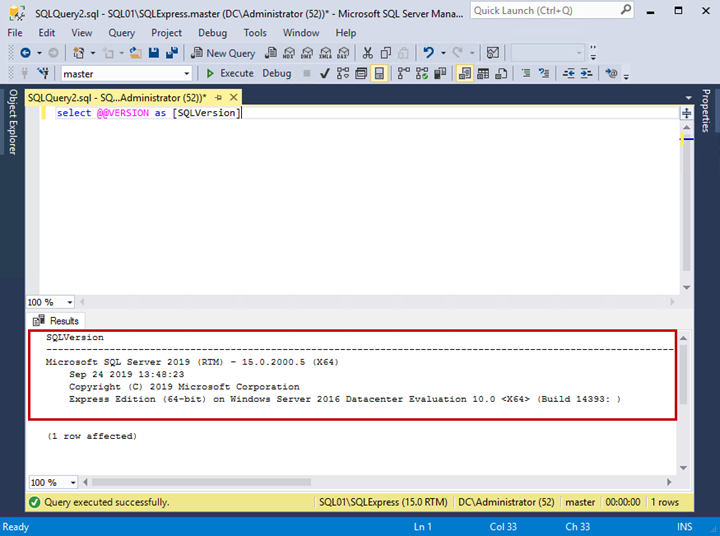
Run the following query to check the SQL Server version.
Select @@version as [SQLVersion]Output:
Configure the SQL Server 2019 Express edition LocalDB
When the SQL Server is installed, we configure the LocalDB instance, as it is not created during the installation. We must create it ourselves, by running the SqlLocalDB utility.
During the installation of SQL Server, the file is copied to C:\Program Files\Microsoft SQL Server\150\Tools\Binn location.
Open a command prompt and run the following command:
C:\Program Files\Microsoft SQL Server\150\Tools\Binn>SqlLocalDB.exe create LocalDBOutput:

When an instance is created, you can view the LocalDB instances details by executing the following command:
C:\Program Files\Microsoft SQL Server\150\Tools\Binn>SqlLocalDB.exe infoOutput:

If you have installed a different version of the LocalDB, and want to check the SQL Server version of the individual localDB instance, execute the following command:
C:\Program Files\Microsoft SQL Server\150\Tools\Binn>SqlLocalDB.exe versionsOutput:

Now, let us connect to the LocalDB instance using SQL Server Management Studio.
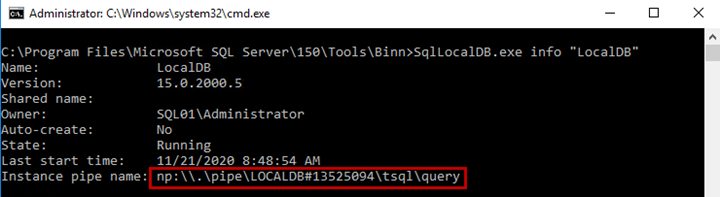
The connection method differs from the traditional method. To connect to the LocalDB instance, we must use the Instance pipe name. To obtain that value, execute the following command:
C:\Program Files\Microsoft SQL Server\150\Tools\Binn>SqlLocalDB.exe info "LocalDB"Output:
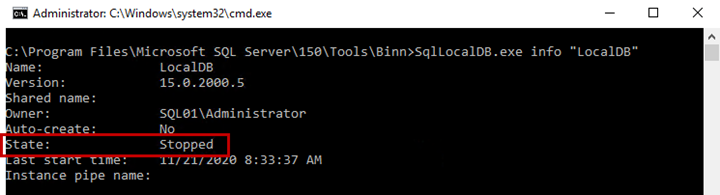
As you can see in the above image, the status of the LocalDB instance is stopped. To start the instance, run the following command:
C:\Program Files\Microsoft SQL Server\150\Tools\Binn>SqlLocalDB.exe Start "LocalDB"
The following command brings the instance pipe name:
C:\Program Files\Microsoft SQL Server\150\Tools\Binn>SqlLocalDB.exe info "LocalDB"Output:
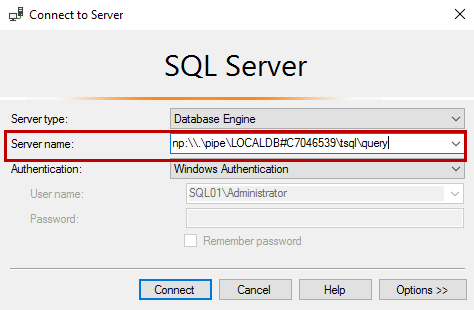
Copy the instance name pipe and use it in SQL Server Management Studio. Click Connect:
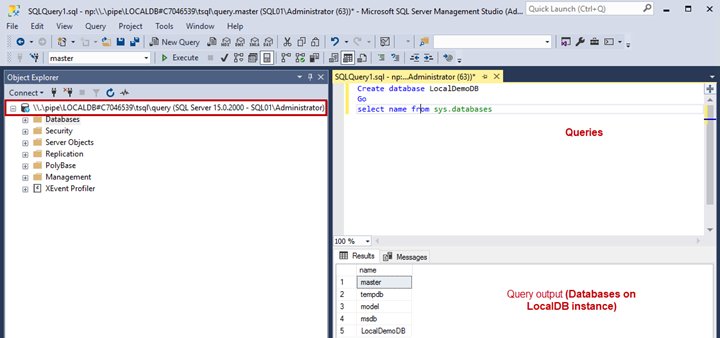
Once connected, execute the following queries to create a database named LocalDemoDB and view the databases list on the LocalDB instance:
If you chose a free SQL Server edition, you most likely need the SQL Server developer tools too. Here, the Devart company can provide you with a free dbForge Studio for SQL Server Express Edition.
In case you prefer staying within the familiar SQL Server Management Studio (SSMS) environment, Devart offers the dbForge SQL Complete SSMS Add-in – a convenient helper allowing you to extend hints during the queries writing.
Summary
This article covered the benefits and limitations of the SQL Server 2019 Express edition and exposed the installation process. Moreover, it explained the LocalDB instance and its management with the sqllocaldb utility.
Tags: sql server 2019, sql server express Last modified: September 18, 2021