
Microsoft Azure platform provides an Azure Database Migration Service (ADMS) – a convenient solution for the Azure Cloud-based Databases migration tasks in a straight forward way. In this article, we elaborate on the AMDS essential work and integrated processes.
We put in the focus issues related to the migration of object resources on Cloud to Cloud and on-premises database server to cloud. Also, we’ll deal with the cross-database migration compatibility between different database technologies.
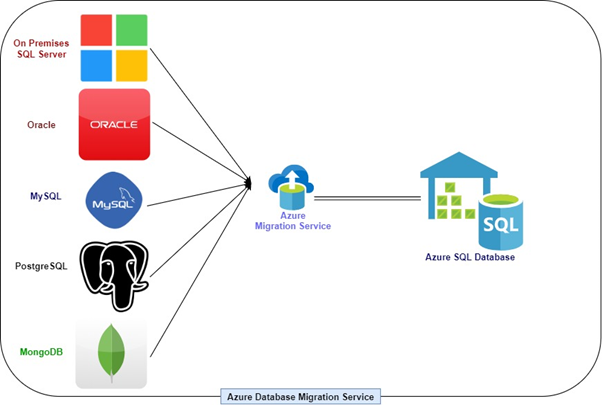
ADMS supports several Automation migration tasks for data migration on Azure platform from SQL Server, MySQL, AWS RDS for MySQL, PostgreSQL, AWS RDS for PostgreSQL, Oracle, AWS RDS for SQL Server, and NoSQL Server (MongoDB).
Why Azure Database Migration Service (ADMS)?
Many organizations upgrade their platform technologies and shift toward Cloud technology. It endorses new technologies and lowers infrastructure costs. Azure Database Migration Services works as an arbitrator between the two data sources: it helps to migrate schemas, objects, and data between two databases or database servers.
The primary concern is how to move an existing database structure and information to the Cloud?
Typically, when we migrate data from the current setup to the Azure database, DBAs have to plan and prepare schema migration scripts, data migration scripts, and other assets in the server migration process. The source and destination can have different data type support and different syntax for the programmability objects (e.g., MySQL to Azure database).
While shifting the on-premises data to the cloud database via ADMS, we can rely on the Azure migration solutions. It won’t matter if the source database uses the same technology or a different one.
Users can also choose to automatically design the data migration, which is a significant plus of this service. Moreover, according to the users’ requirements, ADMS allows us to synchronize the information in the runtime or periodically. Cross-database technologies at the migration origin and destination, which are among the most tedious tasks for the DBA, become simpler with ADMS.
It is a pretty convenient service for migration on the Cloud. Microsoft has designed it in a way that it can execute a quick migration from a massive source to the Azure database. There are several key steps to configure the first migration service before constructing a new Migration Project. Further, we’ll build our first Azure Database Migration Service.
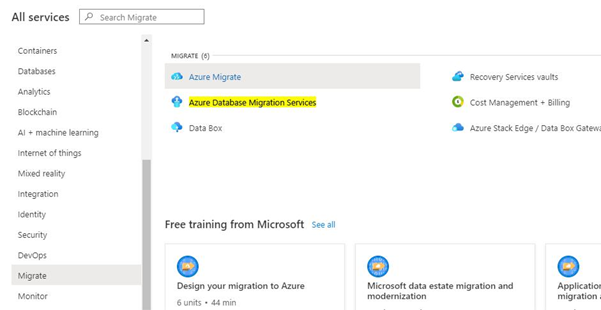
Azure Database Migration Services (ADMS) is included in the Migrate category of the “All services” list on the Azure portal dashboard.
All Services > Migrate > Azure Database Migration Services
Setting up a new Migration Service
Firstly, we need to choose the Subscription Plan, as the migration services’ charges depend on this subscription plan. However, the user gets a total bill for all subscriptions.
Second, we must select the Resource group to distinguish and host our necessary service. It is possible to create a new resource group by a user, or you can bridge this service with it as well.
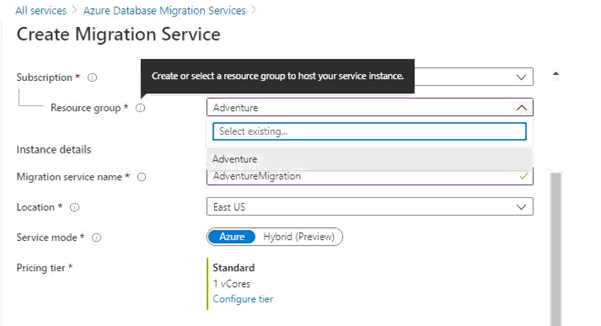
In this example, we have selected the “Adventure” resource group. The next step is to specify the instance name for this service.
We have defined the Migration Service Name as AdventureMigration. The location we set is East US, where we want to execute the instance of this service. Users can choose the site location as per their destination site. It is very convenient for managing the ADMS service on the site/location where the destination project runs.
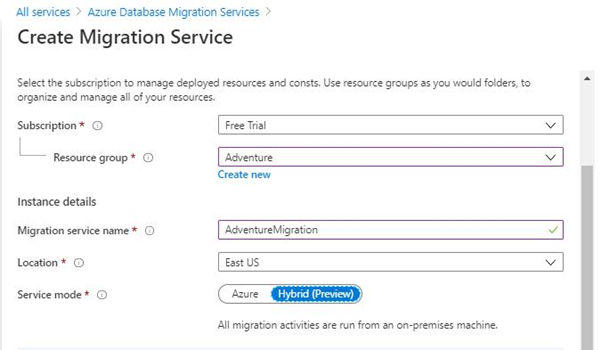
Service mode specifies the worker or resource configuration for the service. Two service modes are available for ADMS: Azure and Hybrid.
- Azure Service mode hosts ADMS in the Azure platform as service.
- Hybrid Service mode hosts ADMS on the on-premises setup.
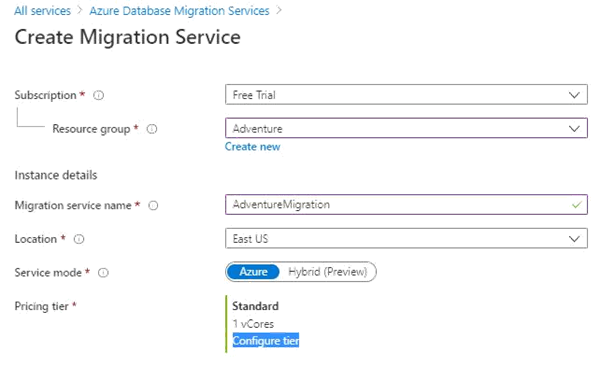
Users can set up the Azure service mode based on the migration process requirements and nature. Offline and online migration tasks are available in Premium, while Standard provides offline migrations only.
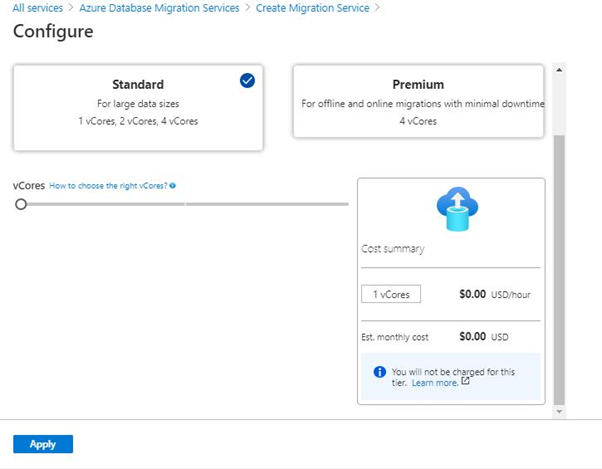
The user gets an option to set up vCores with the migration service, charged accordingly. However, you must select the Premium service whenever you need to set up an online data migration task. As per the attribute of data and data pipeline size, CPU assets can shape the vCores with the service.
In the “Networking” tab, proceed to the virtual network name field. Select your virtual network from the predefined list or create a new virtual network and specify its name.

You can append this migration service to the network where the destination site is under execution. If any project exists with your account, it will appear in the existing virtual network. Users have to choose the right one to deploy the service.
The following step creates a new virtual network. We entered the Migration Network nameintothe {Virtual network name} field to configure it.
Now, point a tag with the migration service while organizing the Azure resources logically with the tag name. This way, its value becomes handy.
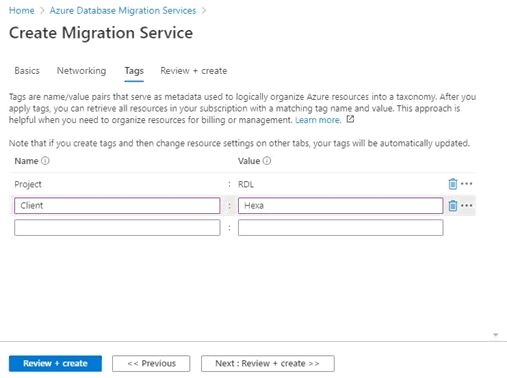
Tags help distinguish the resource usage for the billing process. In the screenshot above, we’ve created “Project” and “Client” tags.
Tagging becomes crucial, as it helps to recognize the appropriate service from the multiple services of multiple projects.
The following screenshot demonstrates how to review and create the first migration service.
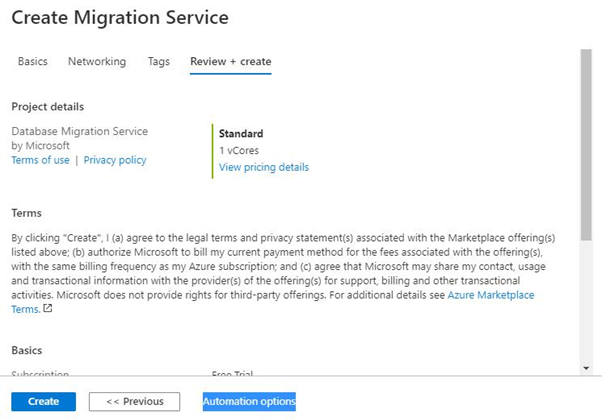
If you forget to push any values to any mandatory parameters, the alert will appear to warn you about that. Thus, you’ll know which field is missing and where. In our case, there are no visible warnings or errors.
Install the service.

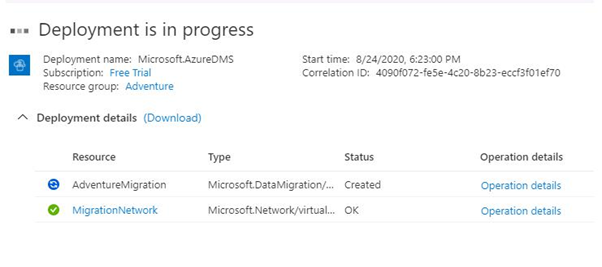
An error will occur when any validation fails for the parameter group configuration when dealing with migration service. When validated successfully, the service deployment status will be “in progress” (see below):
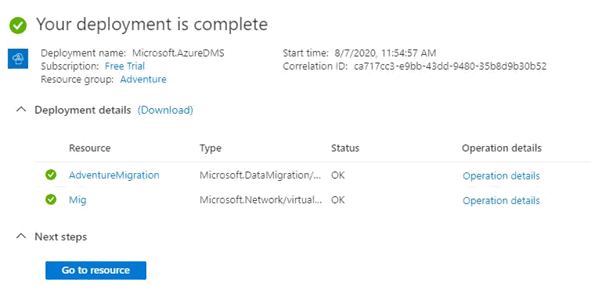
This process can take a while to complete all steps for the deployment. When you get the “Your deployment is complete” message, it means successful completion. See the screenshot:
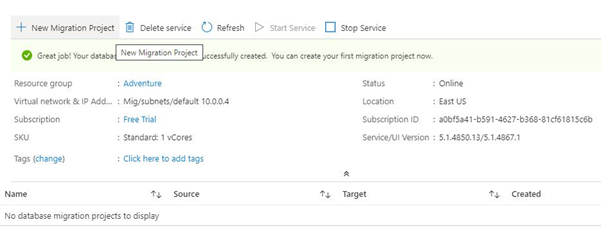
Now the AdventureMigration service is visible in the list:

You can add a new migration project within the AdventureMigration recently constructed:
Conclusion
We’ve demonstrated the new ADMS launch from the migration service tab in the dashboard in the current article. Note that you can launch it from the existing resource group as well. You need to go to the Resource Group and make a new Azure Database Migration Service inside.
Azure supports maximum schema and data conversion for the cross-platform migration. Execution of migration projects can fail in the ADMS when any schema or data transfer error occurs, except the conversation limit.
Review the next article about installing the first project with ADMS. You will get more ideas about database migration and its tricks and limits.
Tags: azure sql, database administration, Microsoft Azure Last modified: September 20, 2021