
Sometimes, we need a sample database that has all the required objects along with a large set of data inside the database for our various testing needs or our learning purpose. Microsoft has developed several sample databases for each type of workloads like the AdventureWorks database for OLTP workload and the AdventureWorksDW database for data warehouse workloads.
Here, I will show you various approaches to create or install SQL Server data warehouse sample database AdventureWorksDW. I will use the latest version of this database AdventureWorksDW2019 in this article.
Table of contents
- What is AdventureWorks database?
- Choose Suitable Way for Using Sample SQL Database
- How to Download AdventureWorks Database for SQL Server
- How to Restore AdventureWorks Database Using GUI
- Restoring AdventureWorks Database Using T-SQL
- How to Create AdventureWorks Database Using T-SQL Scripts
- Video Step-by-Step Tutorial
- Conclusion
What is AdventureWorks database?
AdventureWorks is a sample database provided by Microsoft that contains information on products, customers, and employees. It is a great way to get started with SQL Server.
Choose Suitable Way for Using Sample SQL Database
You can use any of the two methods to install a sample database AdventureWorks.
- Restore AdventureWorks using a backup file
- Create AdventureWorks database using T-SQL scripts
I will explain both approaches (GUI and T-SQL) to restore this database using a backup file in this article. Let’s start with the first method in which we will restore this database with the help of backup files.
How to Download AdventureWorks Database for SQL Server
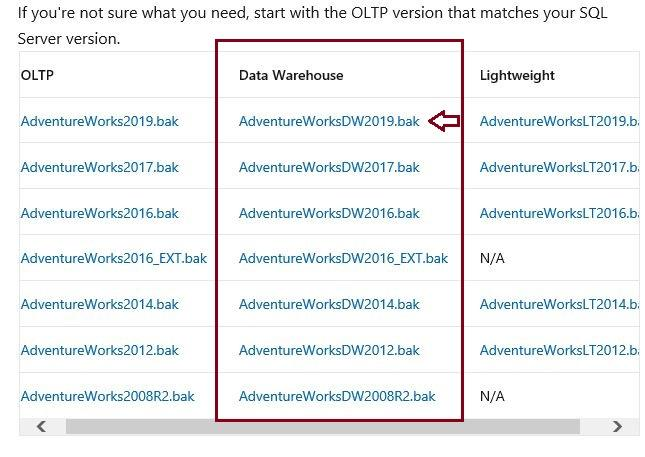
This section will explain restoring sample database AdventureWorksDW2019 with the help of its backup file using GUI and T-SQL statements. The first step to start this installation is to download its backup file following this link.
Once you click the respective version of a backup file, you will get the below popup at bottom of your screen to choose its correct location. Click the Save button to start the download process.

Once the backup file is downloaded, the below popup will display this as per the below image.

Now, you have downloaded the backup file of your SQL Server Data Warehouse sample database AdventureWorksDW2019. The next step is to restore this backup file on your target SQL Server instance.
How to Restore AdventureWorks Database Using GUI
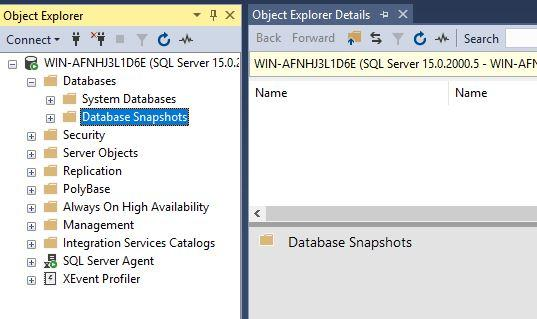
This section will explain the GUI approach to restore the sample database. It will be a straightforward restoring as we do for other SQL Server databases. Launch SQL Server Management Studio. Connect to your target SQL Server instance where you want to restore the data warehouse sample database AdventureWorksDW2019. I have connected to my target instance in the below image.
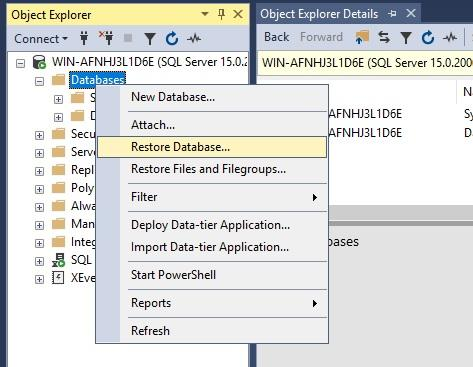
Right-click the Databases folder and click the Restore Database… option as shown in the below image.
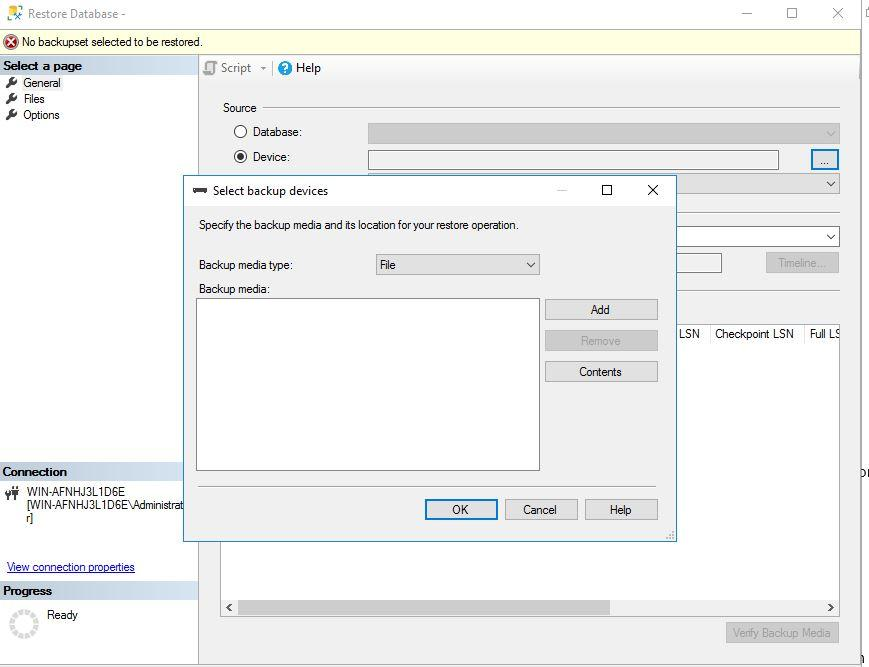
You will get the below Restore Database window after clicking Restore Databases… options from the above screenshot. We will choose the second option shown in the source section of the below image. Click the radio button given beside Device. Once you click this option, a tab with three dots showing as grayed out in the below image will be enabled to choose the backup file.

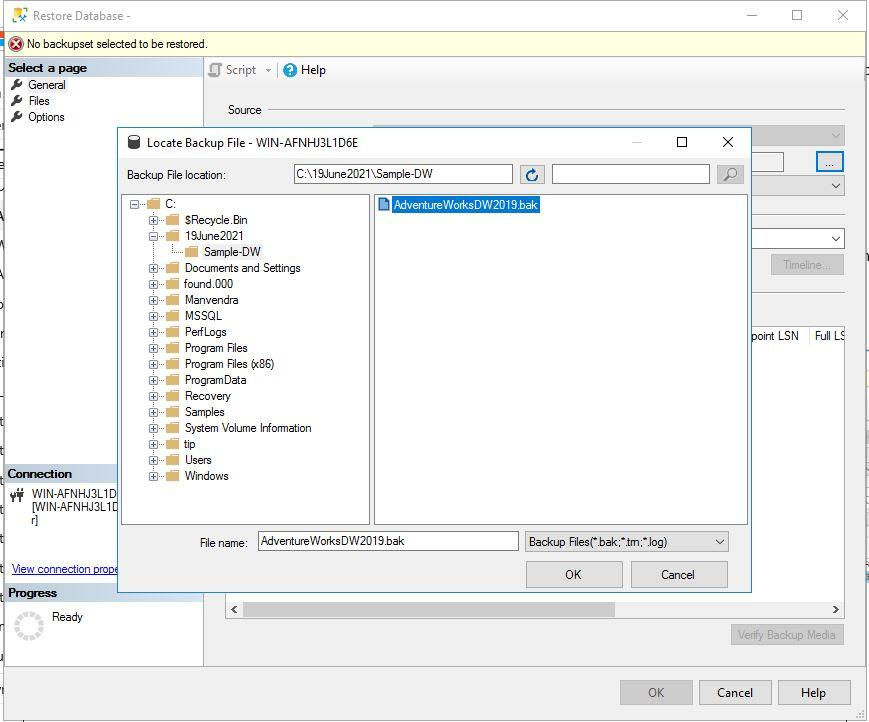
Click the three dots of the device that is shown in a blue rectangle in the below image to choose the backup media. You will get the below screen to choose the backup file which we have downloaded in the above section. Follow the instructions to select the backup file.
Here, we can see the downloaded backup file in the below image. Select this file to restore the sample database. Choose this backup file and click the OK button to proceed.
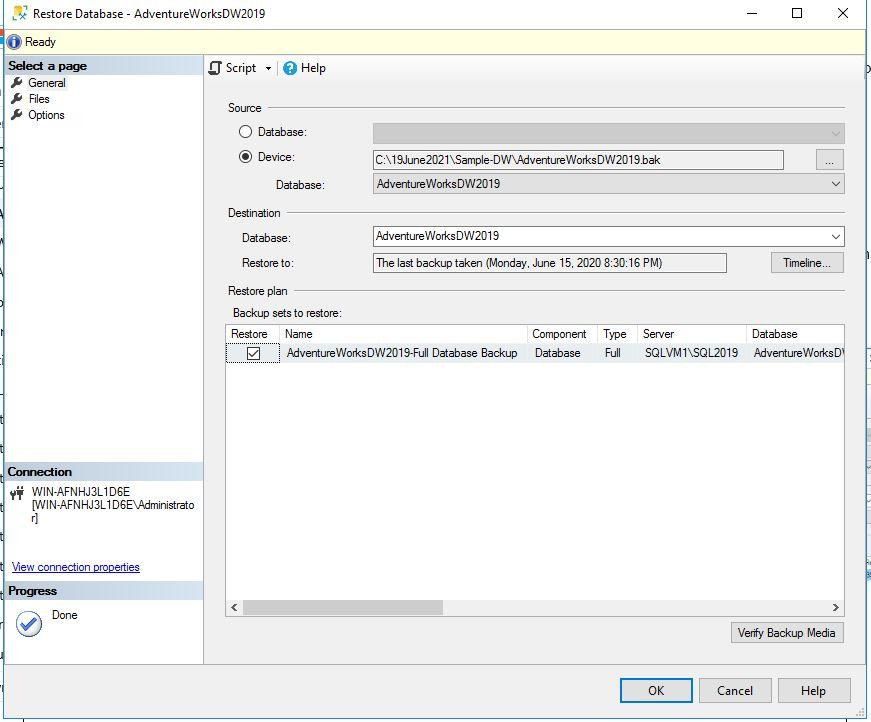
Once you select the backup file, all the details related to the database will be auto-filled with the help of the backup file. You just need to verify all the details and make changes if you need. Here, we have to restore this database with the same name, so I have left everything as it is.
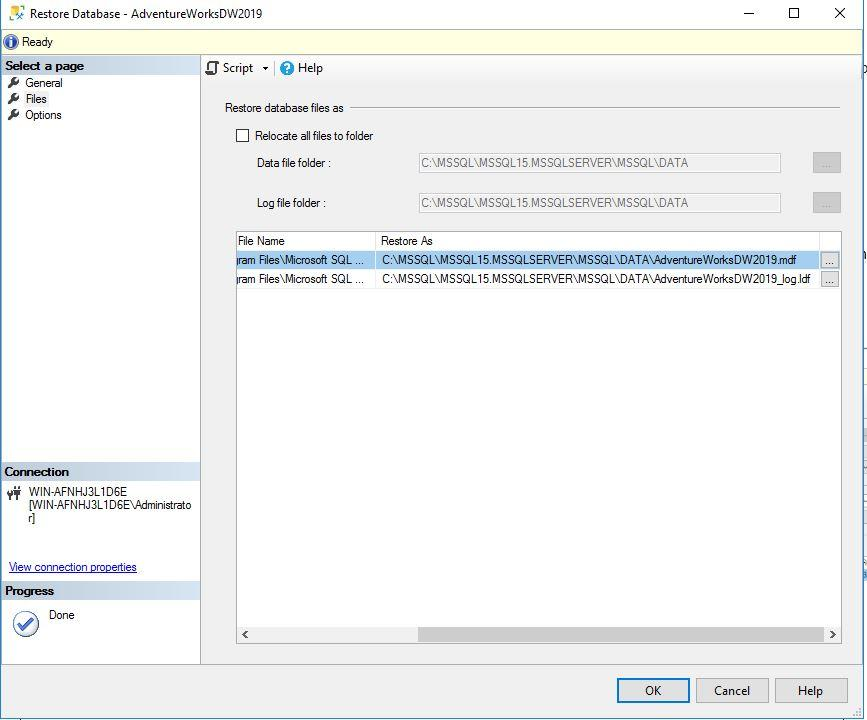
Click the Files tab to verify whether you are restoring this database to the correct location. If you want to change the location of the database files, you can do it here. Verify the details and if everything looks fine, click the OK button to continue the restoration.
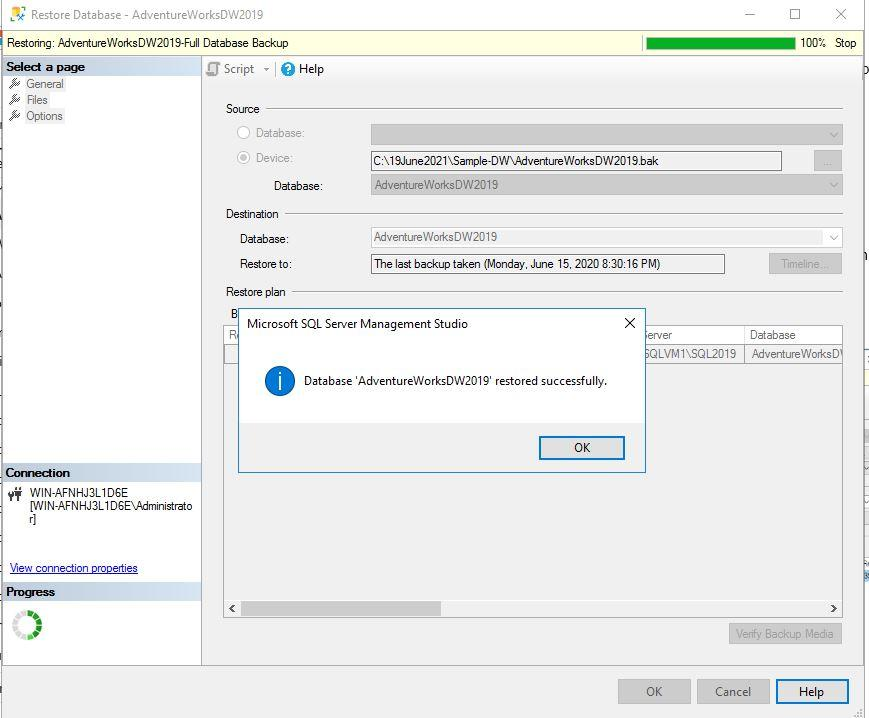
You can see database AdventureWorksDW2019 has been restored successfully in the below image. Click the OK button to close the restoration window.
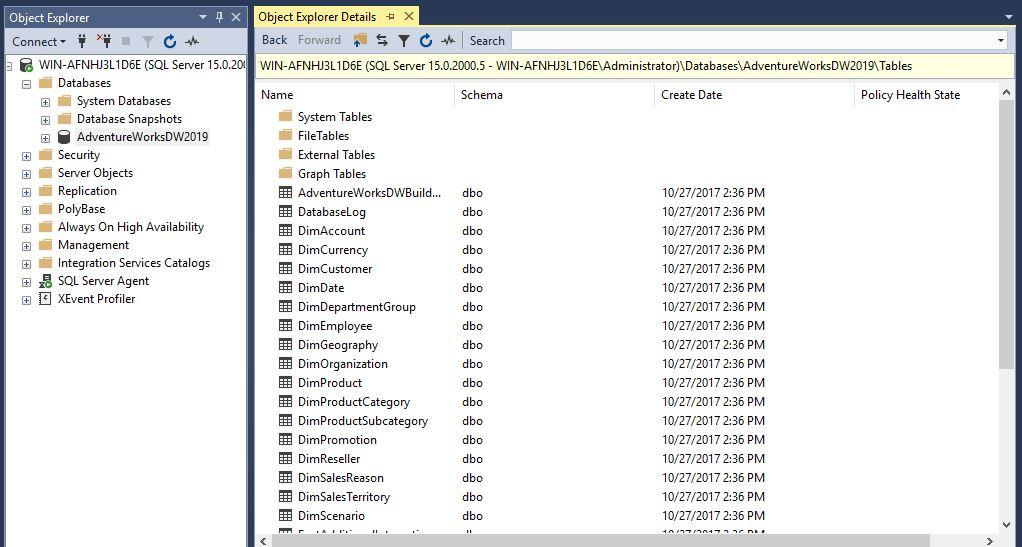
You can validate this restoration by accessing this newly created database and we can see this database is very much accessible in the below image. We can see all its objects in the object explorer.
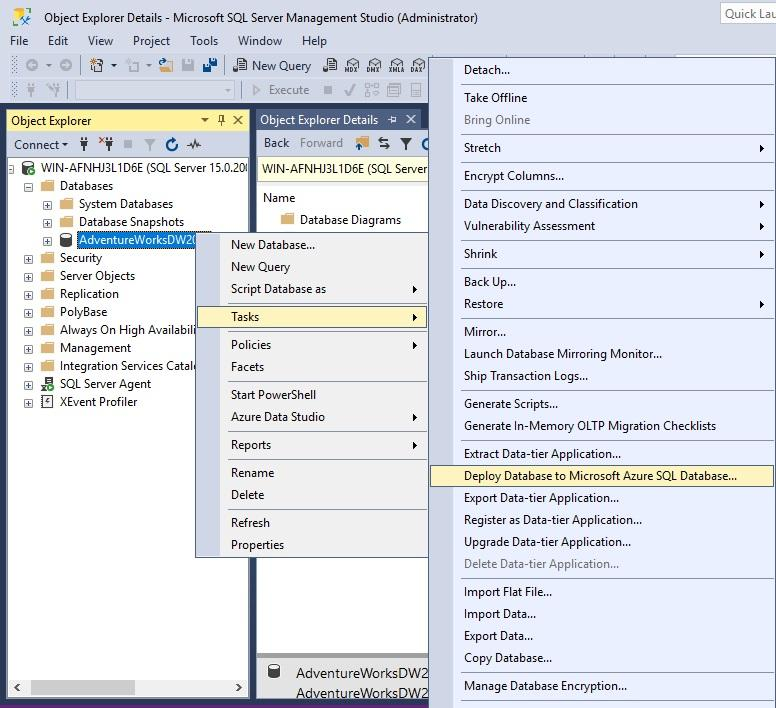
Even if you want to deploy or copy this database in Azure SQL Database in-cloud, you can do it by the following Deploy Database to Microsoft Azure SQL Database… option given under the Tasks option which you will get by right-clicking the restored database as shown in the below image. You just need to follow the remaining instructions suggested by its window. It will ask you to connect to your Azure SQL database, and then deployment will start.
Restoring AdventureWorks Database Using T-SQL
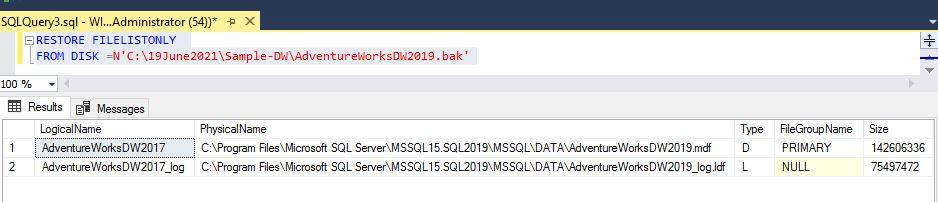
We can also restore the sample database AdventureWorksDW2019 using T-SQL statements. As we have downloaded its backup file *.bak in the above section. Now we will read the backup file header information to get database file names using the below T-SQL statement.
--Run below statements to read database logical file names and other backup header information
RESTORE FILELISTONLY
FROM DISK =N'C:\19June2021\Sample-DW\AdventureWorksDW2019.bak'
Database details are showing below while accessing the backup header information. We need its logical file names to run the RESTORE DATABASE command. Also, focus on its physical file name if this location is not suitable for your target database file location, use the MOVE clause in the RESTORE statement.
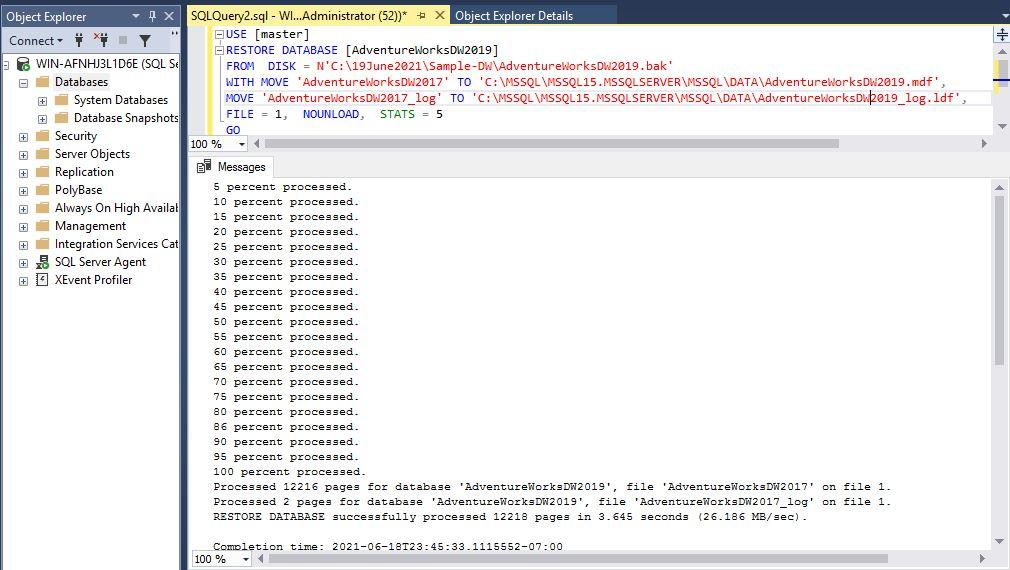
Next, we will run the below RESTORE DATABASE command to restore the sample database on your target instance. Make sure to change the database file location given in the MOVE clause.
--Restore Sample Database AdventureWorksDW2019
USE [master]
RESTORE DATABASE [AdventureWorksDW2019]
FROM DISK = N'C:\19June2021\Sample-DW\AdventureWorksDW2019.bak'
WITH MOVE 'AdventureWorksDW2017' TO 'C:\MSSQL\MSSQL15.MSSQLSERVER\MSSQL\DATA\AdventureWorksDW2019.mdf',
MOVE 'AdventureWorksDW2017_log' TO 'C:\MSSQL\MSSQL15.MSSQLSERVER\MSSQL\DATA\AdventureWorksDW2019_log.ldf',
FILE = 1, NOUNLOAD, STATS = 5
GO
The above command has restored the sample database AdventureWorksDW2019 in the below image.
If you have already restored this sample database with the same name using the GUI method, you can drop that database if you want to restore using the same name or a different name. Here, I have changed the database name as well as its files for the successful execution of this restoration.
--Restore sample database using different Name
USE [master]
RESTORE DATABASE [AdventureWorksDW2019-TSQL]
FROM  DISK = N'C:\MSSQL\AdventureWorksDW2019.bak'
WITH MOVE 'AdventureWorksDW2017' TO 'C:\MSSQL\MSSQL15.MSSQLSERVER\MSSQL\DATA\AdventureWorksDW2019-TSQL.mdf',
MOVE 'AdventureWorksDW2017_log' TO 'C:\MSSQL\MSSQL15.MSSQLSERVER\MSSQL\DATA\AdventureWorksDW2019TSQL_log.ldf',
FILE = 1,  NOUNLOAD,  STATS = 5
GO
Here, you can validate the restored database AdventureWorksDW20119. I have executed the sp_helpdb command to get its details and you can see this database is accessible in the below image.
-- Check DB details
sp_helpdb AdventureWorksDW2019
I have demonstrated two approaches to restoring the sample database AdventureWorksDW2019 in the above section.
How to Create AdventureWorks Database Using T-SQL Scripts
If you don’t want or can’t restore a sample database using a backup file *.bak, you have another option to get it using T-SQL scripts. Microsoft has given a master T-SQL script that will create a sample database AdventureWorksDW20119 with all database objects having structure and then this script will load all tables with the actual data. This section will let you create this database using T-SQL scripts.
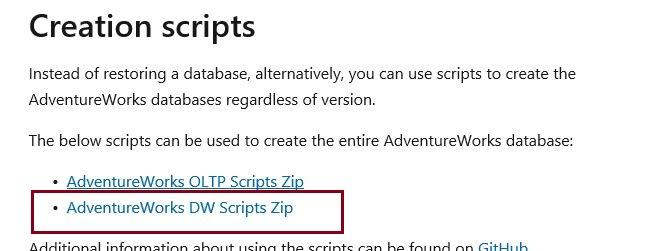
Open the attached MSDN link to download all scripts and data sheets that will be loaded to the sample database. Go to the Creation Scripts section of this MSDN page. You will see two download links as shown in the below image. One is for OLTP workload and the second is for data warehouse workload. As we have to install a sample database for data warehouse workload, we will download the files attached under the second link which I have highlighted in the below screen as well.
You will get the below popup window at the bottom of your screen to download and save this file. Choose the appropriate location and save these files.

Go to the location where you have saved the above files. You will see downloaded zipped files as shown in the below image. The next step is to extract this zipped file by right-clicking it and extracting or unzipping it here.

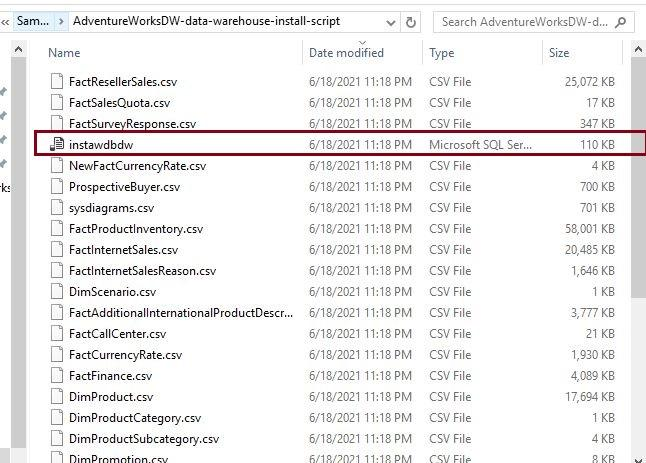
You can see all files that come under the zipped file in the below screen after extraction. There is one SQL file named “instawdbdw” and multiple CSV files where the actual data is. We will be running this SQL script which will create the database and all its objects along with loading its actual data to the database.
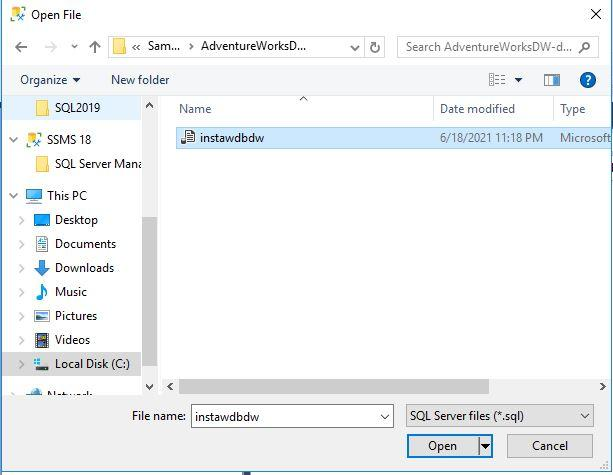
Connect to your SQL Server instance in SQL Server Management Studio. Click the File tab, then click Open, now choose the File… option to select the above SQL file to run on SQL Server.

Choose the downloaded SQL file here. Click the Open button to open it in the new query window of SQL Server Management Studio.
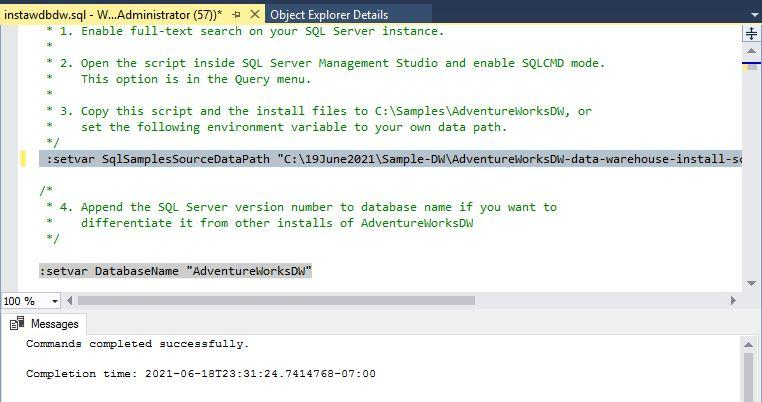
Here, you can see the SQL script in the new query window. Read all commented lines of the script to ensure the successful execution of this script. You can see several mandatory prerequisites given in the below image, make sure to follow all of them before running this script. Below is the list of these prerequisites:
- Enable Full-Text Search on SQL Server instance
- A query should run in the SQLCMD mode
- Change the path given in this script to your desired path where you have saved the script or copy the script to the location as suggested below.

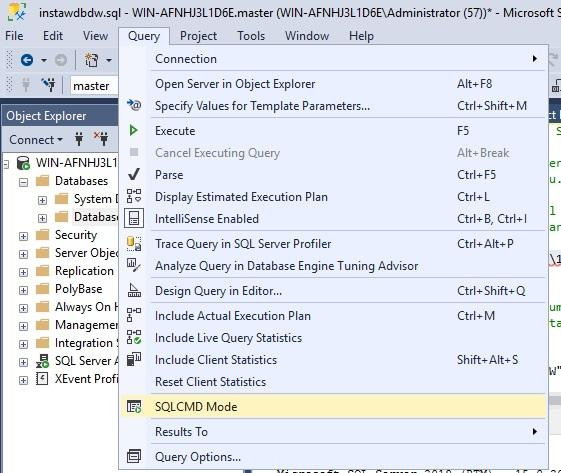
I have already enabled full-text search for my SQL Server instance, so we are good with the first option. The second option is to enable SQLCMD that we can do by clicking the SQLCMD Mode of the Query tab as shown in the below image. I have already changed the script location path where I have saved all files.
Now, run the above command.
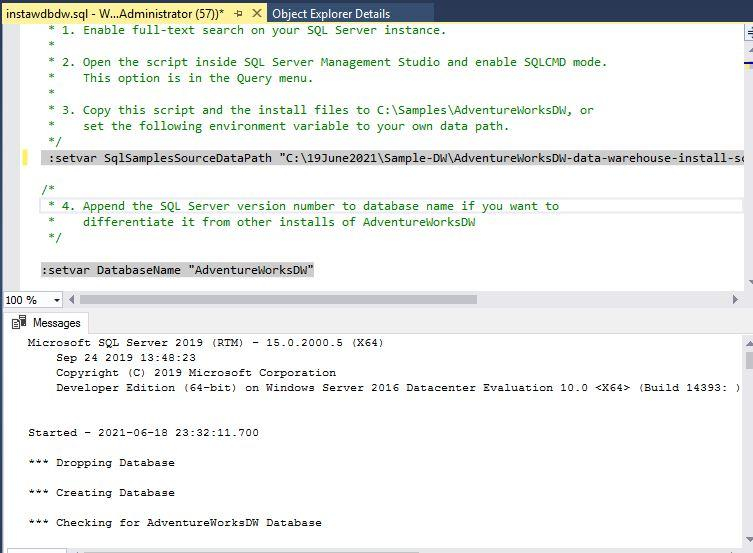
You can see the execution of this script in the below image. You can observe the script execution progress in the output section where every action is being clearly stated.
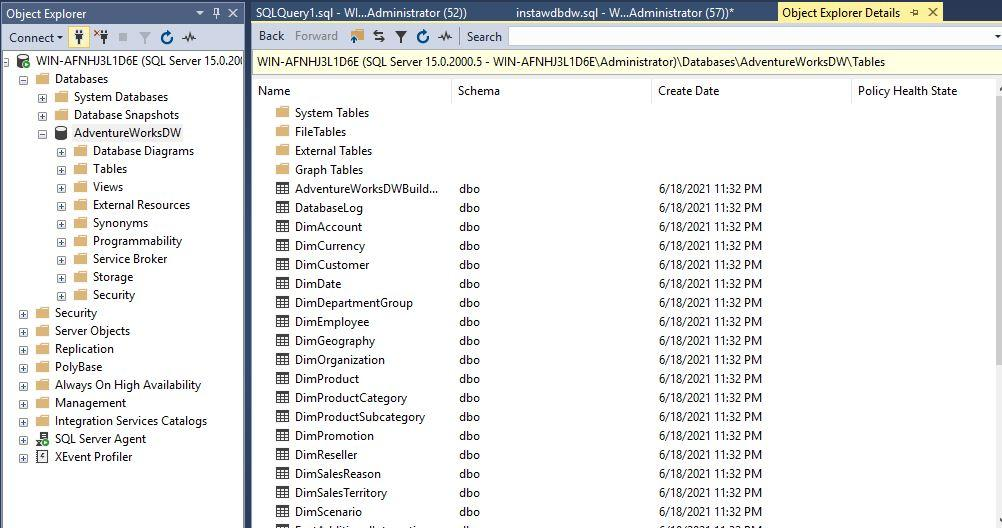
Next, you can validate the newly created data warehouse sample database AdventureWorksDW in the below image when the above script is executed successfully. We can see all objects have been created.
Video Step-by-Step Tutorial
Conclusion
In this article, I have shown you how to create and install the data warehouse sample database AdventureWorks using multiple methods. You can follow this article to restore the sample database for your business needs. You can also create backups of databases and restore the sample database from a backup using dbForge Studio for SQL Server. Please share this article and give your feedback, so that we can improve.
Tags: adventureworks, database administration Last modified: September 23, 2022