
I explained a step-by-step process to restore the data warehouse sample database AdventureWorks DW in my last article. AdventureWorks DW database was restored using GUI and T-SQL in SQL Server Management Studio. I would suggest you read that article to understand the complete process to install a sample database using SQL Server Management Studio. The objective of this article is the same and that is to restore the sample database AdventureWorks DW but using another tool Azure Data Studio.
SQL Server Management Studio was designed specifically for on-prem Windows-based SQL Server instances. But later when SQL Server evolved and Cloud became popular, there was a need for a tool that is cross-functional and easy to manage. Initially, Azure Data Studio was a separate installation. But now, when you install or upgrade to SQL Server Management Studio 18.7, Azure Data Studio will be automatically installed.
In this article, I will use the latest version of the database AdventureWorksDW2019.
We are going to use two approaches to install the sample database AdventureWorks DW2019 as we did during SQL Server Management Studio. You can use any approach as per your comfort.
- Restore AdventureWorksDW2019 using GUI in Azure Data Studio
- Restore AdventureWorksDW2019 database using the T-SQL command RESTORE DATABASE in Azure Data Studio
Both methods will be using a backup file to restore this database.
Restore AdventureWorks DW2019 Using GUI in Azure Data Studio
This section will explain restoring sample database AdventureWorksDW2019 with the help of its backup file using GUI in Azure Data Studio. The first step to start this installation is to download its backup file. Open this link and look at the data warehouse section where the backup file of all versions of the sample database AdventureWorks DW is attached.
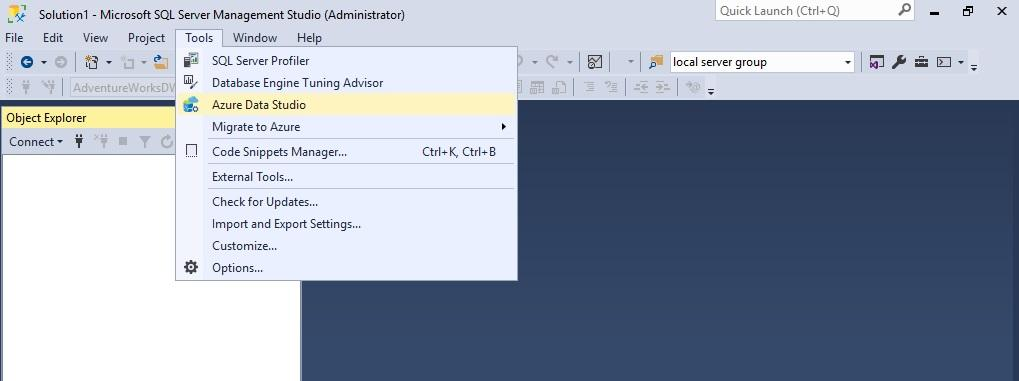
Now, go ahead and launch Azure Data Studio. If you haven’t installed Azure Data Studio separately and it is running with SQL Server Management Studio 18.7 or beyond, launch SQL Server Management Studio. Click the Tools tab and select Azure Data Studio from the dropdown menu as shown in the below image.
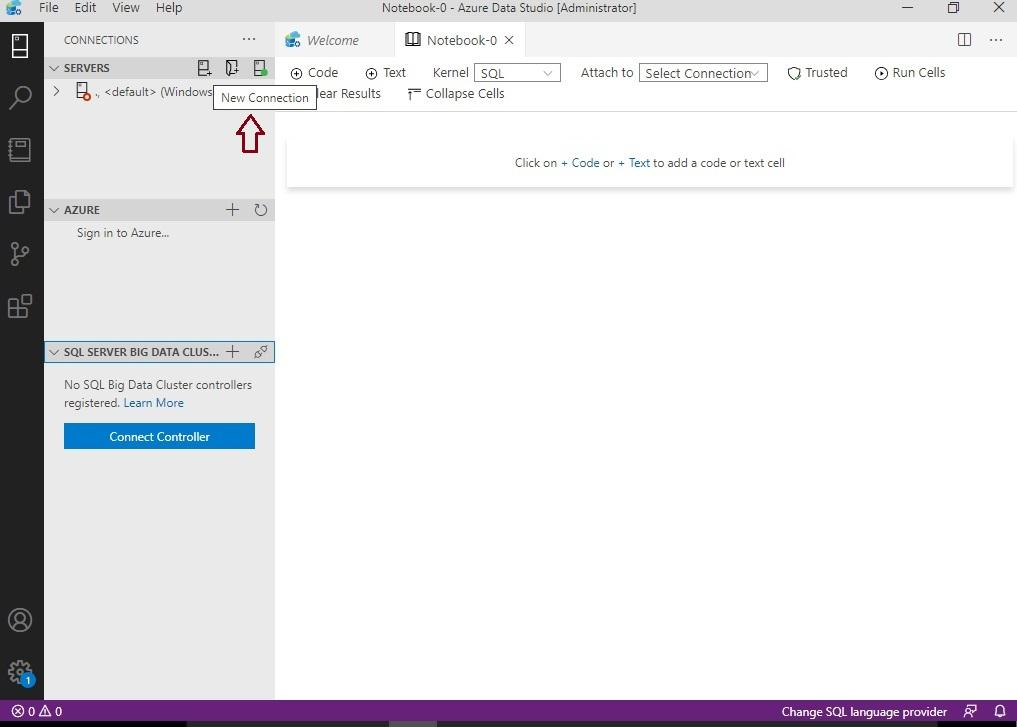
Once you click the Azure Data Studio option, the below window of Azure Data Studio will appear on your screen. You can observe that the look of this tool differs from SQL Server Management Studio. The next step would be to establish a database connection to your target SQL Server instance. Click the New Connection option under the Servers tab. Similarly, if your target instance is in the cloud, you can connect to that instance in the respective section that is given under the Azure tab.
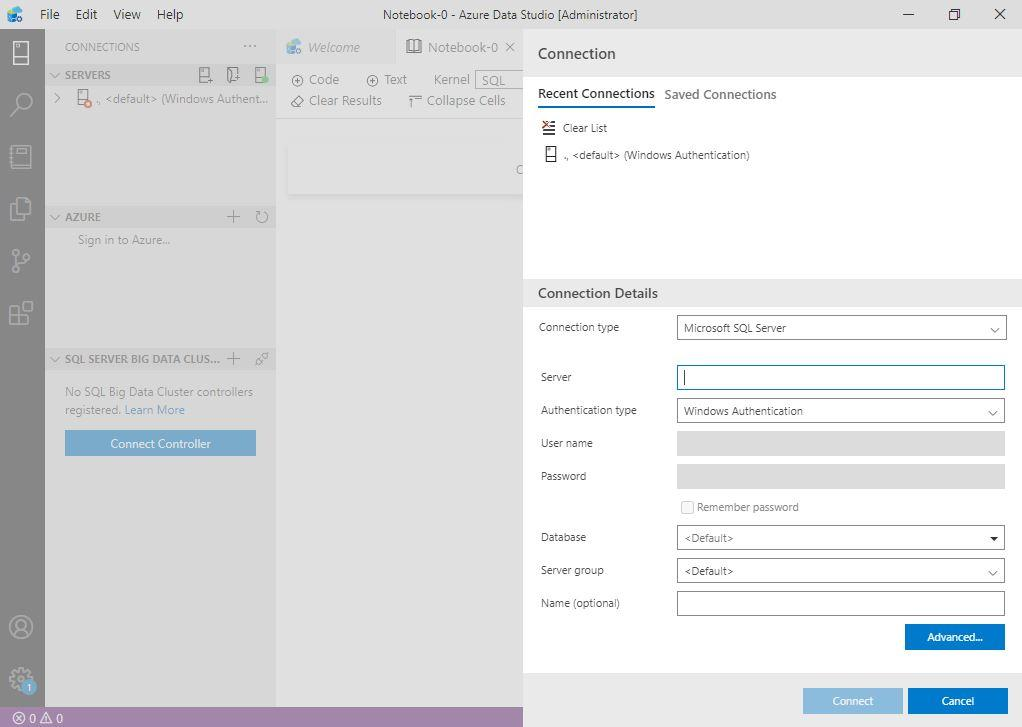
The New Connection popup window will appear on your screen where you need to enter the details like connection type, server name, database, etc. as shown in the below image.
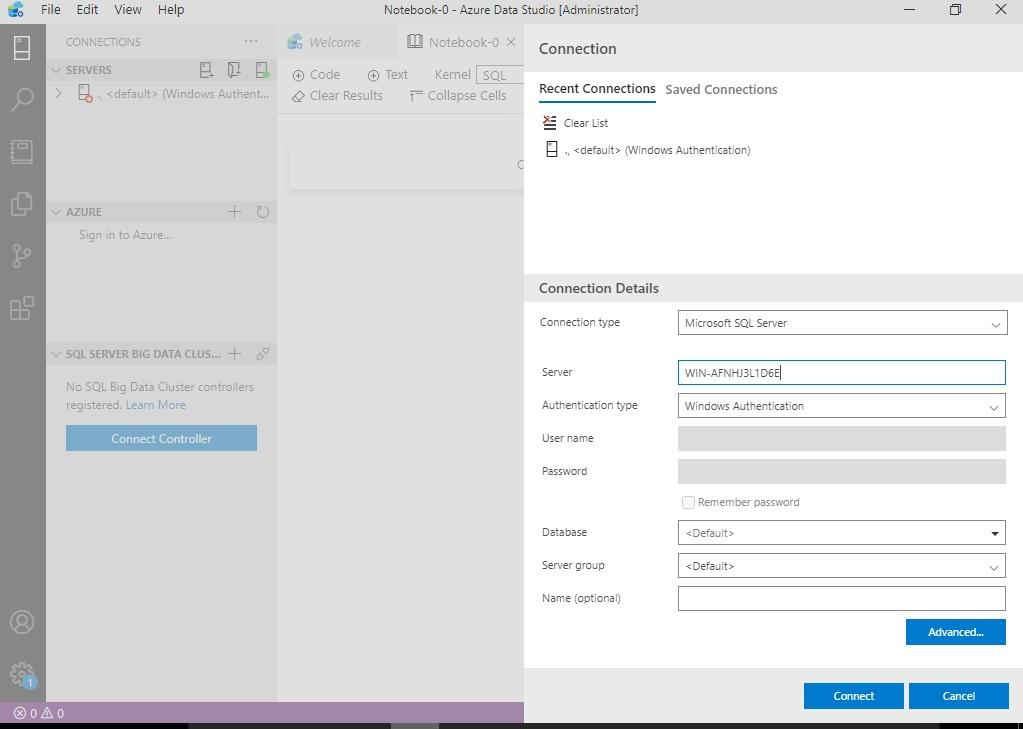
Enter all details and click the Connect button to establish a database connection to your target server in Azure Data Studio.
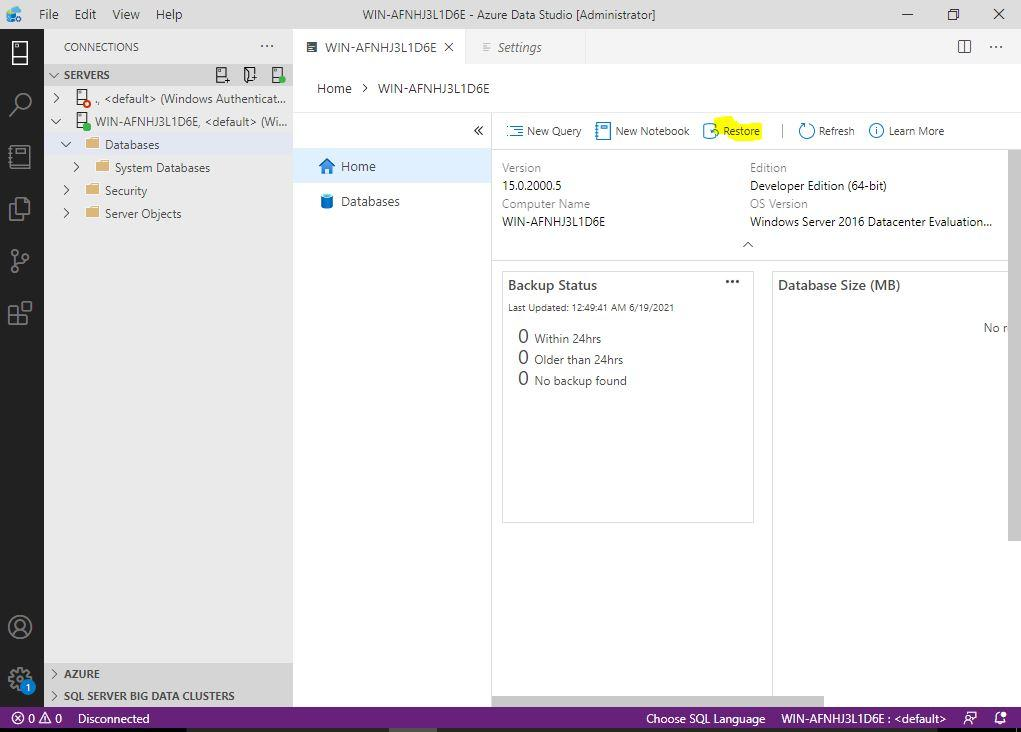
We have made a successful database connection in the below image. The folder structure looks quite similar to SQL Server Management Studio but with limited options. You can see the instance-level details in the right-side pane of Azure Data Studio. It looks like a dashboard report where backup status, database sizes, SQL Server version, and other details can be viewed.
Right-click the SQL Server instance name in the left-side pane and click the Manage option.
Now, click the Restore tab in the right-side pane of the below image. Here you can see a popup appearing at the right bottom of the screen in the below image.
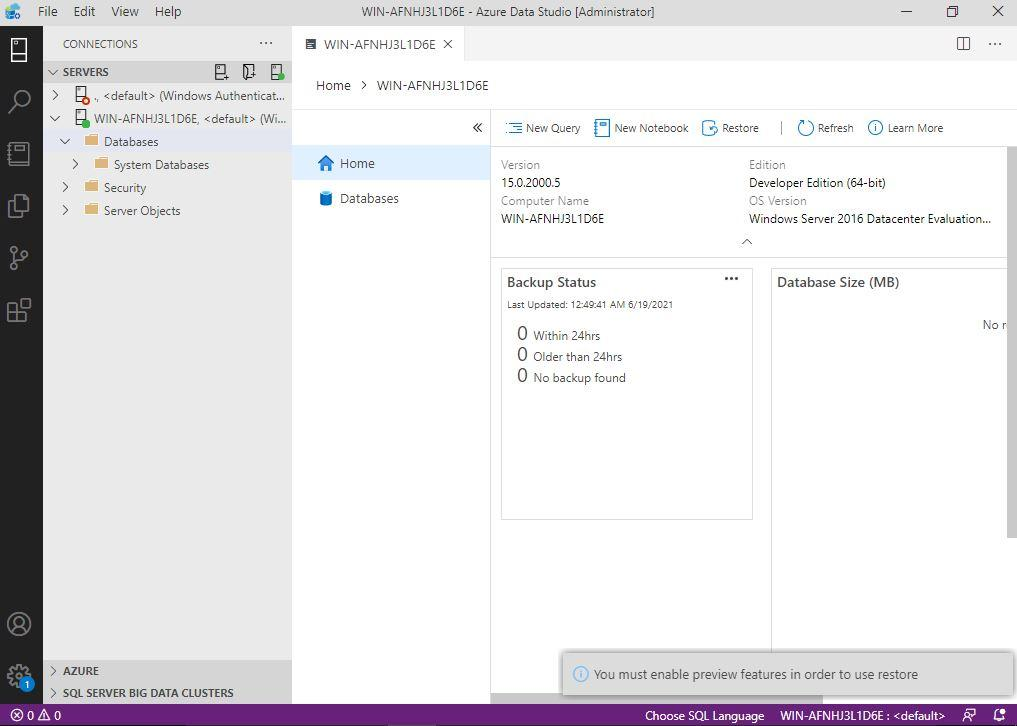
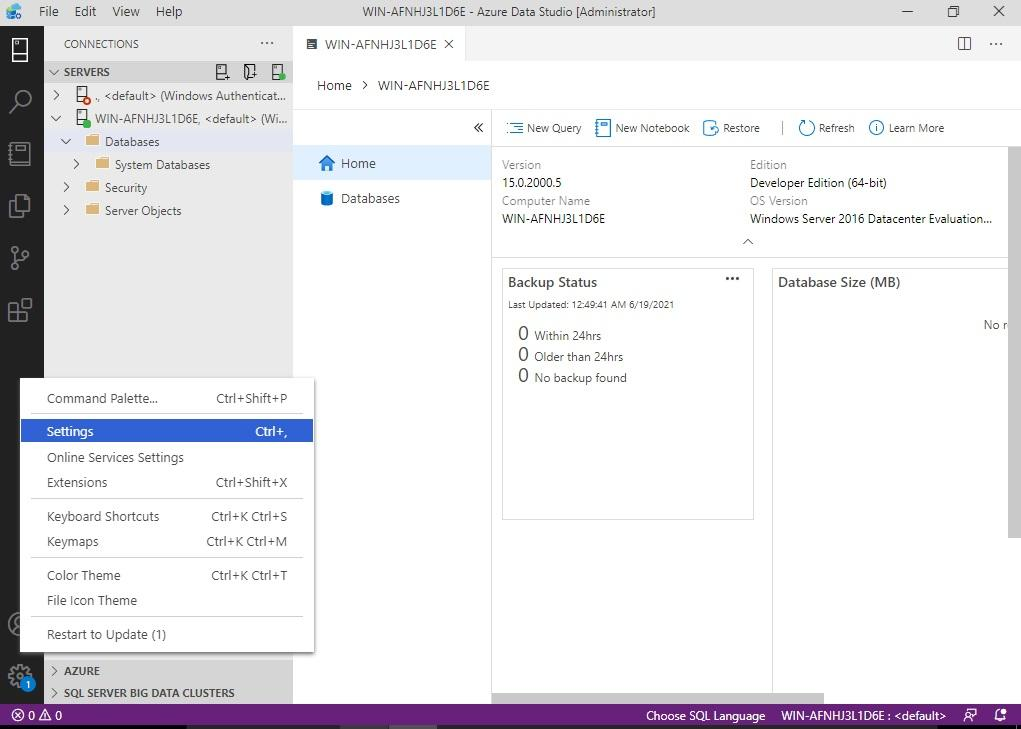
Microsoft first releases all features as preview ones before making them available for general use. The restore feature in Azure Data Studio is one of such features which are still in the preview stage. Next, we will enable preview features to use the restore option. To do that, click the Settings option given on the bottom left-side of Azure Data Studio.
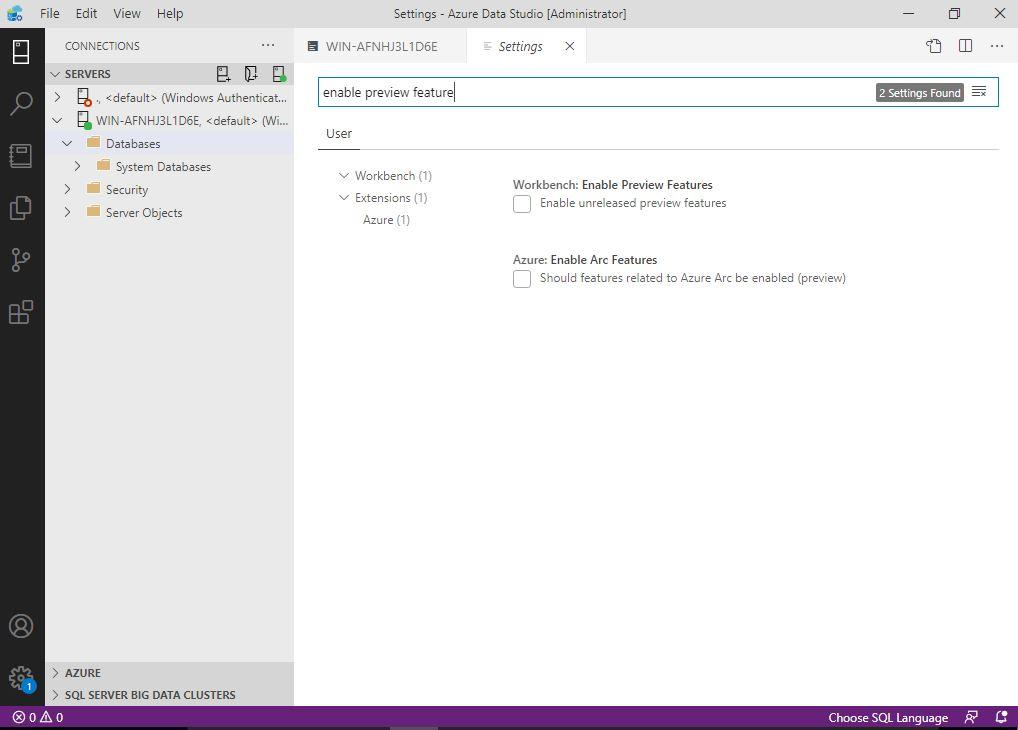
The below screen will appear on your screen. Enter Enable Preview Feature in the Search box, you will get similar options in the dropdown as we have searched for. Have a look at the below screen:
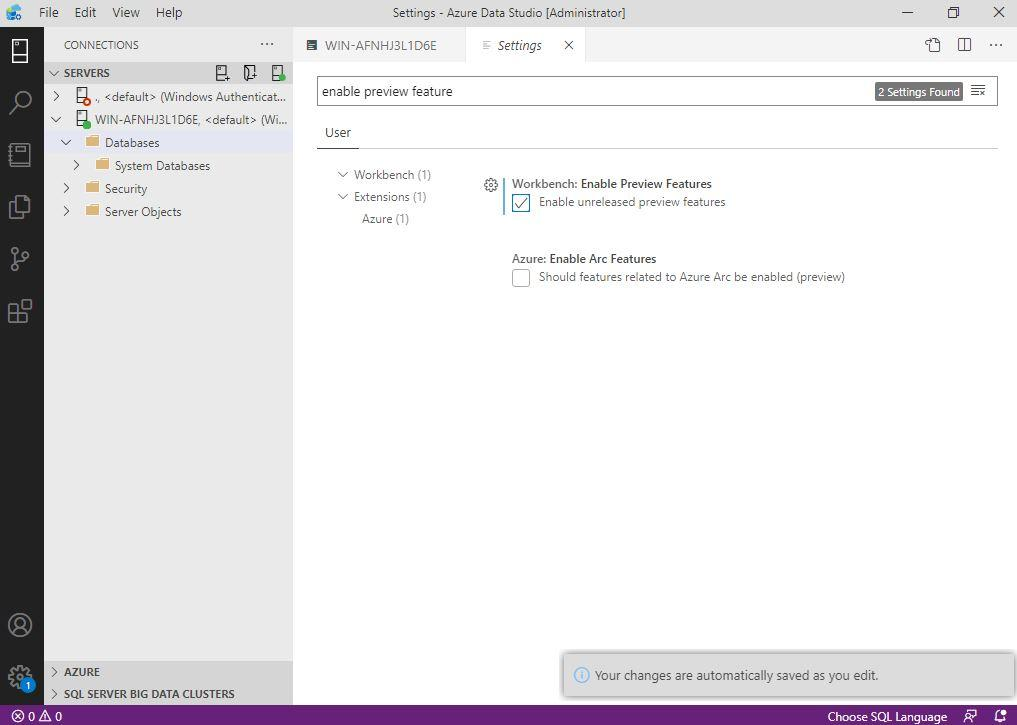
You just need to click the checkbox to Enable unreleased preview features under Workbench: Enable Preview Features as shown in the below image. You can uncheck this box to disable this feature. All these changes will be automatically saved in Azure Data Studio. Here, I have explained how to enable or disable preview features in Azure Data Studio. Now, we will go ahead and try the restore operation again.
Now click the Restore tab again after enabling the preview features.
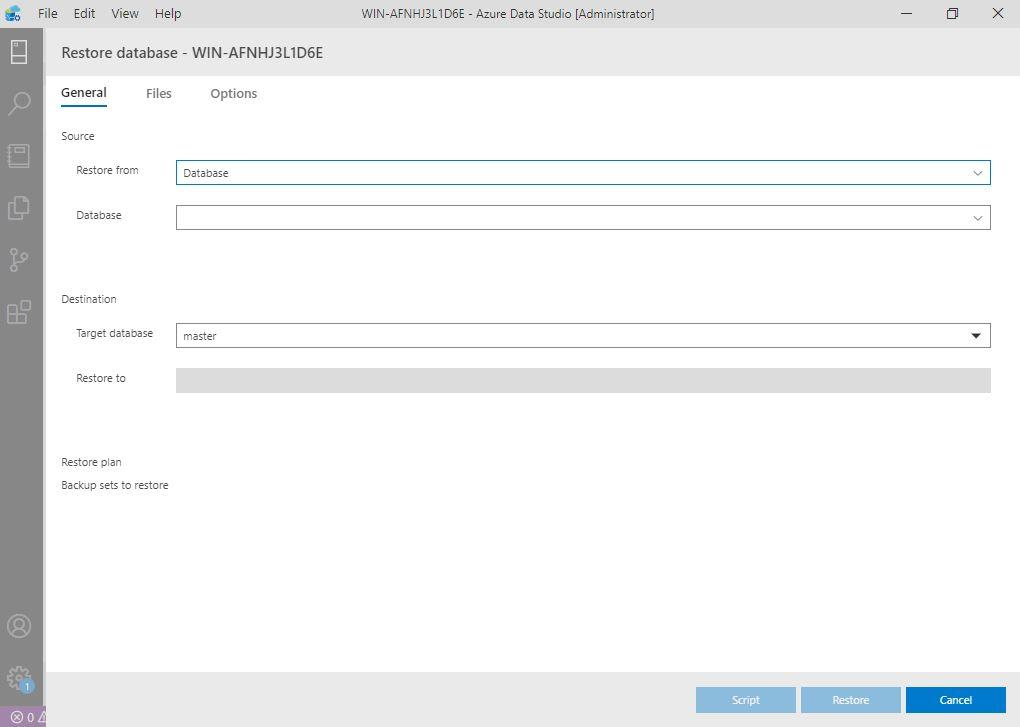
Another window Restore Database has appeared, enter the details related to the source and destination targets.
There are 3 tabs in the Restore Database window screen: General, Files, and Options. The general tab will have the source and destination database details. Select Backup File in restore from the option under the source section from the below image. If you want to restore using the database, then choose a database but we must restore this sample database using .bak file so we will choose a backup file option.
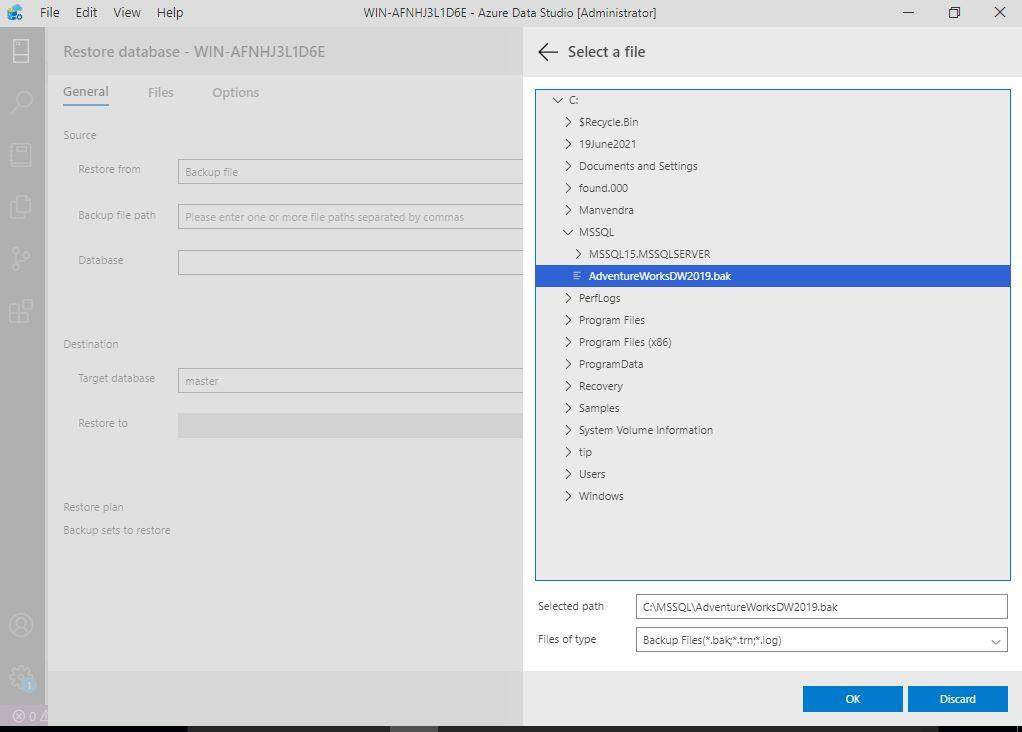
Choose a backup file path from your desired location where you have the saved backup file of the sample database AdventureWorksDW2019. If you are restoring another database in Azure Data Studio, select your desired backup file and database.
Verify the remaining details as they will be auto-filled after choosing a backup file.
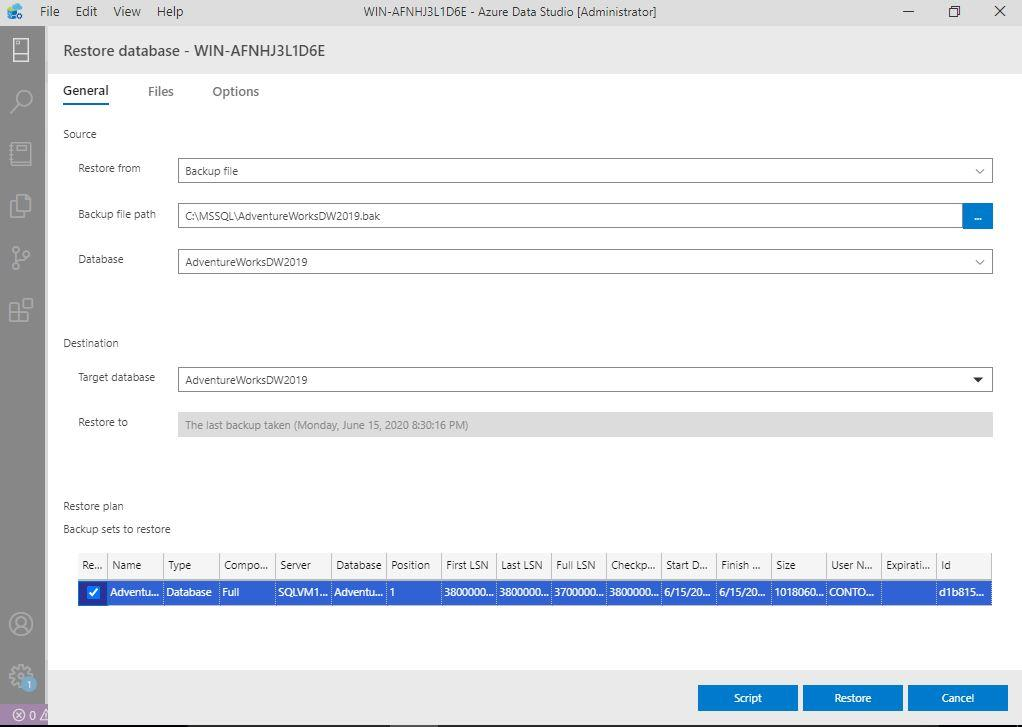
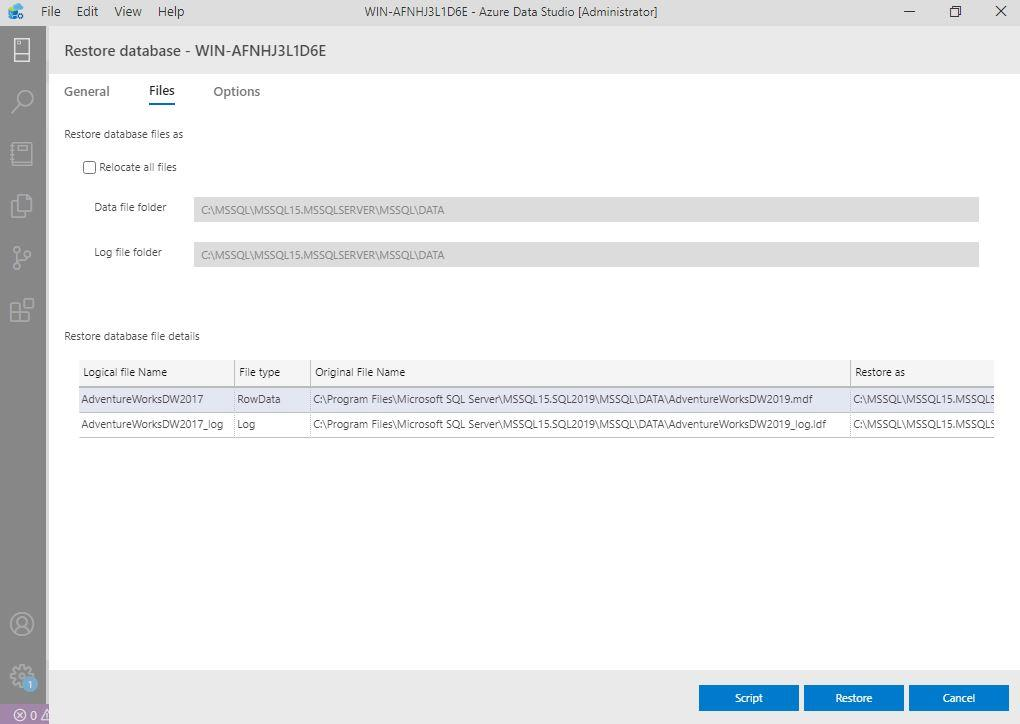
Click the Files tab to validate logical and physical file names. You can change your destination path for this restoration here. Click the Restore button after validating all the details. You can also generate the script of this restoration by hitting the Script button given below. Generate its script if you want to do it using T-SQL or want to save it for future references.
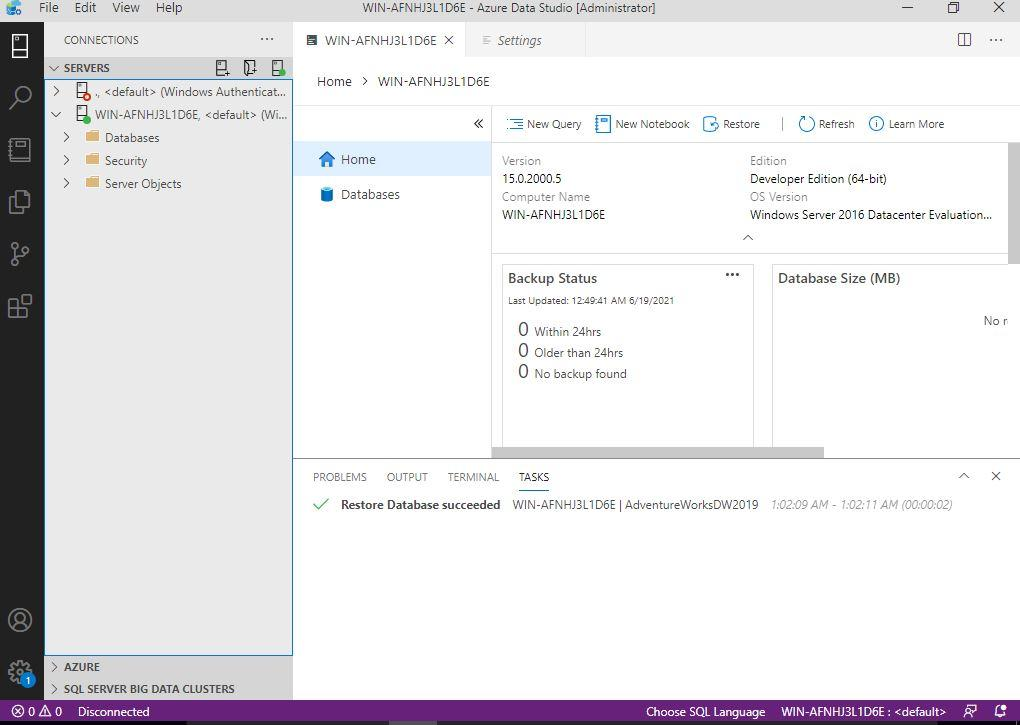
A sample database AdventireWorks DW2019 has been restored in the below image. You can see its status in the output section.
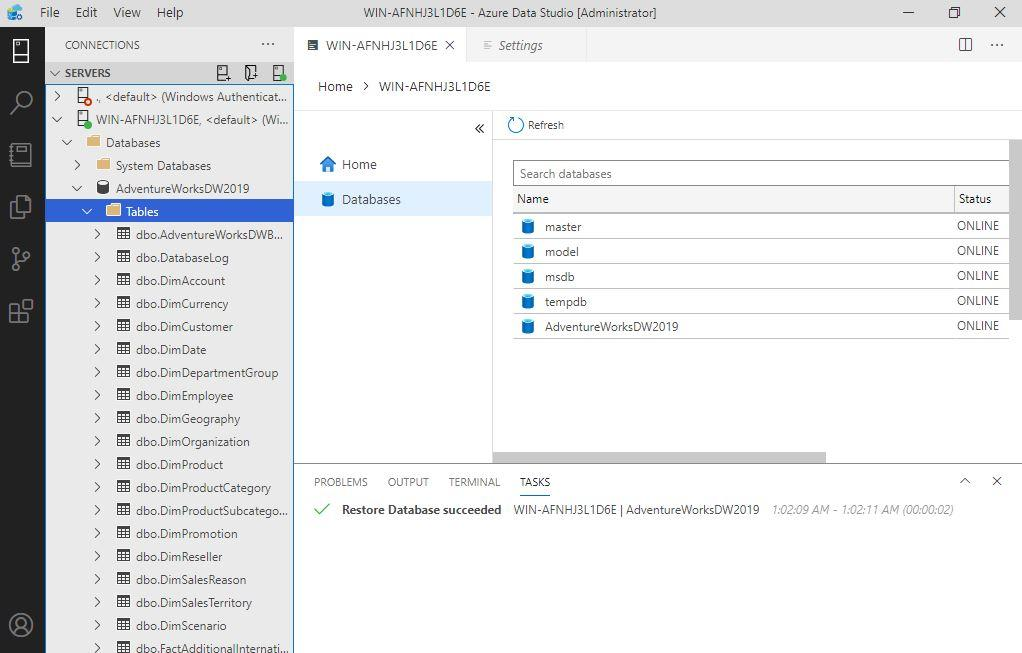
Now expand the database folder from the left-side pane under the SQL Server instance tree to verify the restored database. We can see all objects in the left-side pane as well as a newly restored database status ONLINE in the right-side pane.
I have shown a step-by-step process to restore the sample database AdventureWorksDW2019 using Azure Data Studio in the above section. You can go ahead and use this sample database for your business needs.
Restore AdventureWorksDW2019 Using T-SQL in Azure Data Studio
This section will elaborate on the steps we will take to restore a sample database using the T-SQL command RESTORE DATABASE in Azure Data Studio. T-SQL statements will be the same but a query window in Azure Data Studio will differ from the SQL Server Management Studio query window. Azure Data Studio has a very good feature known as code snippets which have various built-in and custom code snippets, you don’t need to write the same code again and again that will finally save our time and effort.
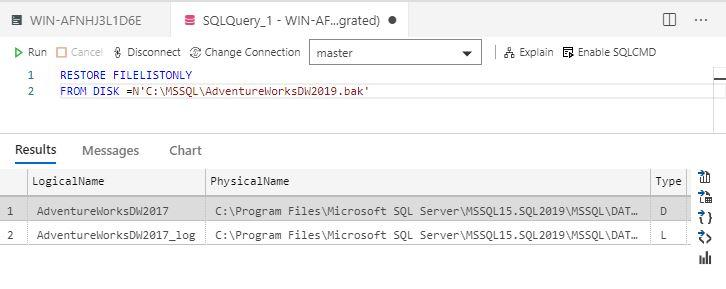
Let’s start the restoration now. Open the New Query window in Azure Data Studio and run the below T-SQL statement to get the database file names.
--Get DB files names and path
RESTORE FILELISTONLY
FROM DISK =N'C:\MSSQL\AdventureWorksDW2019.bak'
You can see the output of the above command in the below image. The details will be very useful when you use the MOVE statement to restore a database as per your desired destination path.
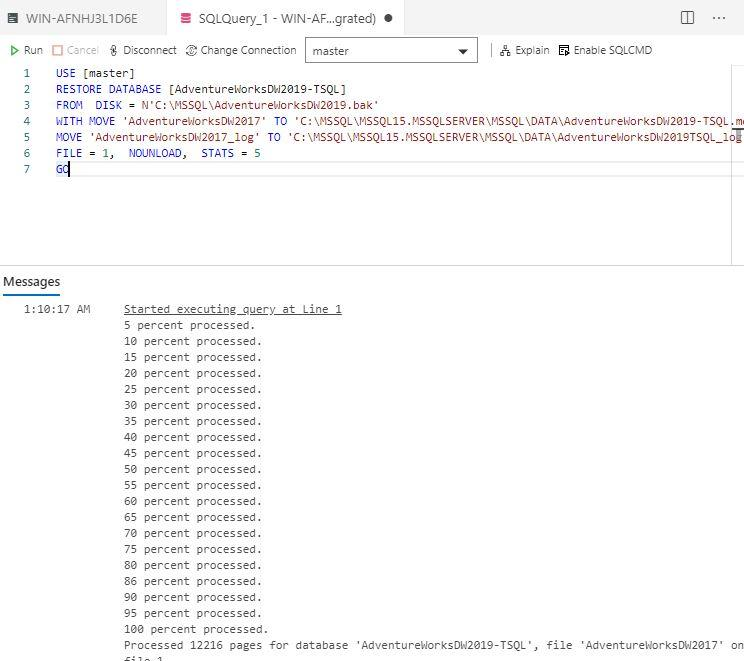
Next, we will run the below RESTORE DATABASE command to restore this sample database on our target SQL Server instance. I have changed the name of this database to “AdventureWorkdDW2019-TSQL”.
USE [master]
RESTORE DATABASE [AdventureWorksDW2019-TSQL]
FROM  DISK = N'C:\MSSQL\AdventureWorksDW2019.bak'
WITH MOVE 'AdventureWorksDW2017' TO 'C:\MSSQL\MSSQL15.MSSQLSERVER\MSSQL\DATA\AdventureWorksDW2019-TSQL.mdf',
MOVE 'AdventureWorksDW2017_log' TO 'C:\MSSQL\MSSQL15.MSSQLSERVER\MSSQL\DATA\AdventureWorksDW2019TSQL_log.ldf',
FILE = 1, NOUNLOAD, STATS = 5
GO
Have a look at its output. The sample database has been successfully restored using T-SQL in Azure Data Studio.
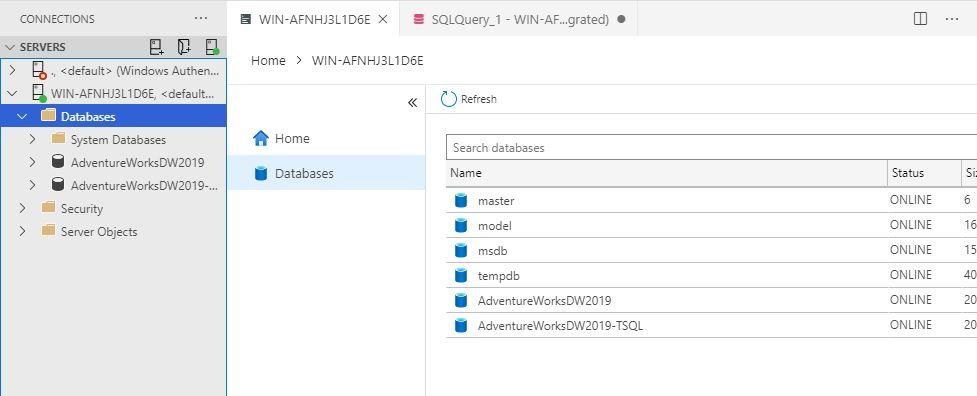
Let’s validate the restored databases. We can see both databases in the below image. The status of both databases is ONLINE. You can start your development work with the help of these databases.
Conclusion
We have explored these topics in the article.
- How to Enable or Disable Preview Features in Azure Data Studio
- How to Restore a Database using Azure Data Studio
- How to install data warehouse workload sample database AdventureWorks DW2019 using Azure Data Studio
Please share this article and leave your comments so that we can improve.
Tags: adventureworks, azure data studio, data warehoue Last modified: October 19, 2021