In my previous article, I have explained the step-by-step process of installing a node in existing SQL Server Failover Cluster Instance. Along with that, I have also demonstrated manual failover and automatic failover.
In this article, I am going to demonstrate the process of adding a disk in a failover cluster and then move the existing database to a new drive.
First, to add a disk in the cluster, we must perform the following steps:
1. Create a new iSCSI virtual disk.
2. Connect to the new iSCSI virtual disk using the iSCSI initiator from failover cluster nodes.
3. Add a new disk to an existing failover cluster storage.
4. Move the sample database file to the new disk.
First, let me give you a short introduction to the demo setup. I have created four virtual machines on my computer. Here are the details:
| Virtual Machine | Host Name | IP Address | Purpose |
| Domain Controller | DC.Local | 192.168.1.110 | This virtual machine will be used as a domain controller. |
| SAN | SAN.DC.Local | 192.168.1.111 | This virtual machine will be used as a virtual SAN. I have created two iSCSI virtual disks that I will connect from failover cluster nodes using the iSCSI initiator. |
| Primary SQL Node | SQL01.DC.Local | 192.168.1.112 | On this virtual machine, we will install the failover clustered instance. |
| Secondary SQL Node | SQL02.DC.Local | 192.168.1.113 | On this virtual machine, we will install the secondary node of the failover cluster instance. |
On SAN.DC.Local, I have created three iSCSI drives. The details are as follows:
| iSCSI drive name | Purpose |
| Sql-data | On this drive, we are storing database files of user databases and TempDB files. |
| Sql-log | On this drive, we are storing the log files of user databases. |
| quorum | This drive is used as a quorum. |
Following is the screenshot of our configuration:

Create an iSCSI disk
As I mentioned above, we should first create an iSCSI virtual drive. In this case, I am going to use PowerShell to create and configure fixed-size iSCSI virtual disks. The size of the virtual disk is 8 GB. To create a new iSCSI drive, execute the following command.
New-IscsiVirtualDisk –Path F:\new-sql-data\new-sql-data.vhdx –SizeBytes (8GB) –UseFixed
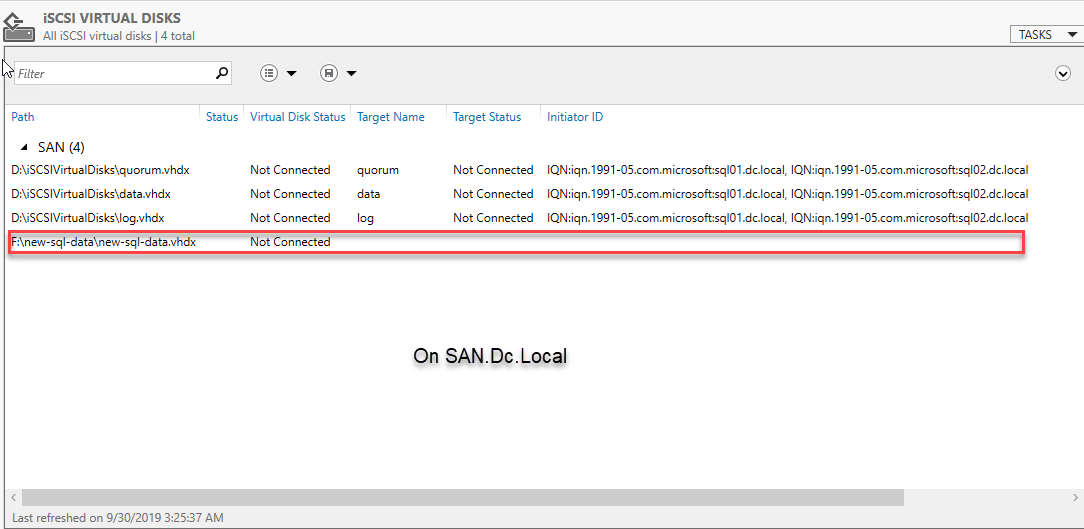
To verify that the iSCSI disk is created successfully, open the Server Manager and click iSCSI virtual disks on the left pane. See the following image:
Now we must create an iSCSI target. Remote servers can connect to a virtual disk by using the target name. Here, I will create a target named new-sql-data. To create an iSCSI target named “new-sql-data” and assign it to SQL02.dc.Local and SQL02.dc.Local, execute the following command.
New-IscsiServerTarget -TargetName "new-sql-data" -InitiatorIds @("IQN:iqn.1991-05.com.microsoft:sql01.dc.local", "IQN:iqn.1991-05.com.microsoft:sql02.dc.local")
Once the iSCSI target is created, we must assign our virtual disk to the iSCSI target. To do that, execute the following query:
Add-IscsiVirtualDiskTargetMapping -TargetName new-sql-data –Path "F:\new-sql-data\new-sql-data.vhdx"
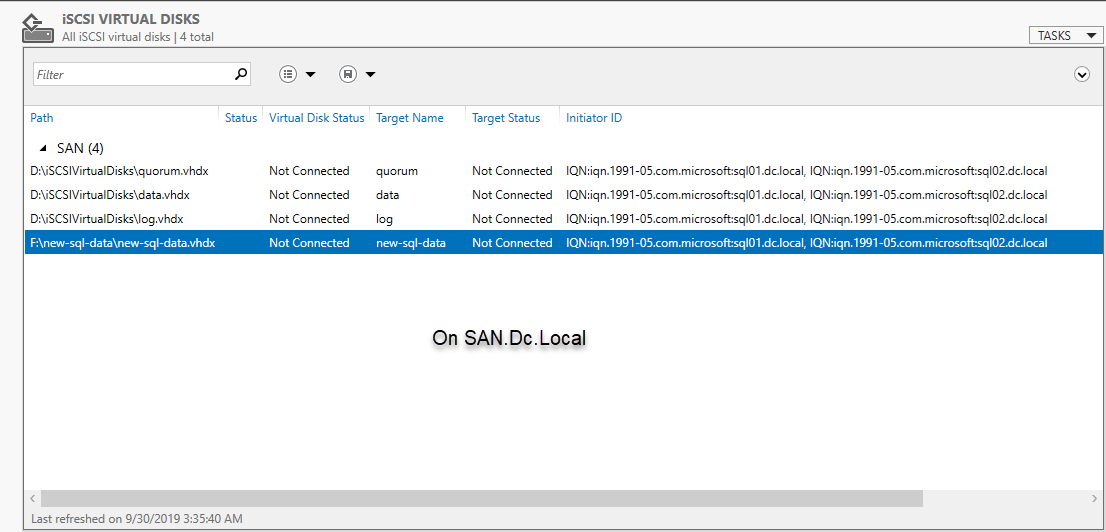
Once target mapping is successfully completed, refresh the iSCSI virtual disk pane in the Server Manager. See the following image:
Connect to the new iSCSI virtual disk using the iSCSI initiator from failover cluster nodes
Now, let’s connect to this drive from the SQL01.dc.local node by using RDP.
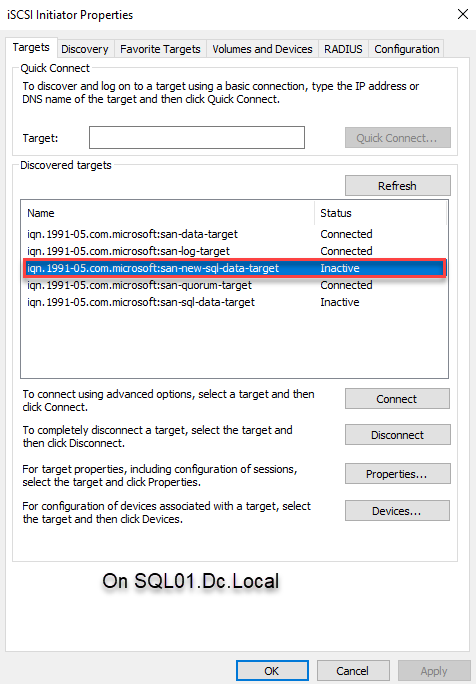
To connect to the iSCSI virtual disk using the iSCSI initiator, open the iSCSI initiator and click the Refresh button to discover the target. Now you can choose the appropriate target name from the “Discovered targets” text box. Select the appropriate target and click Connect. See the following image:
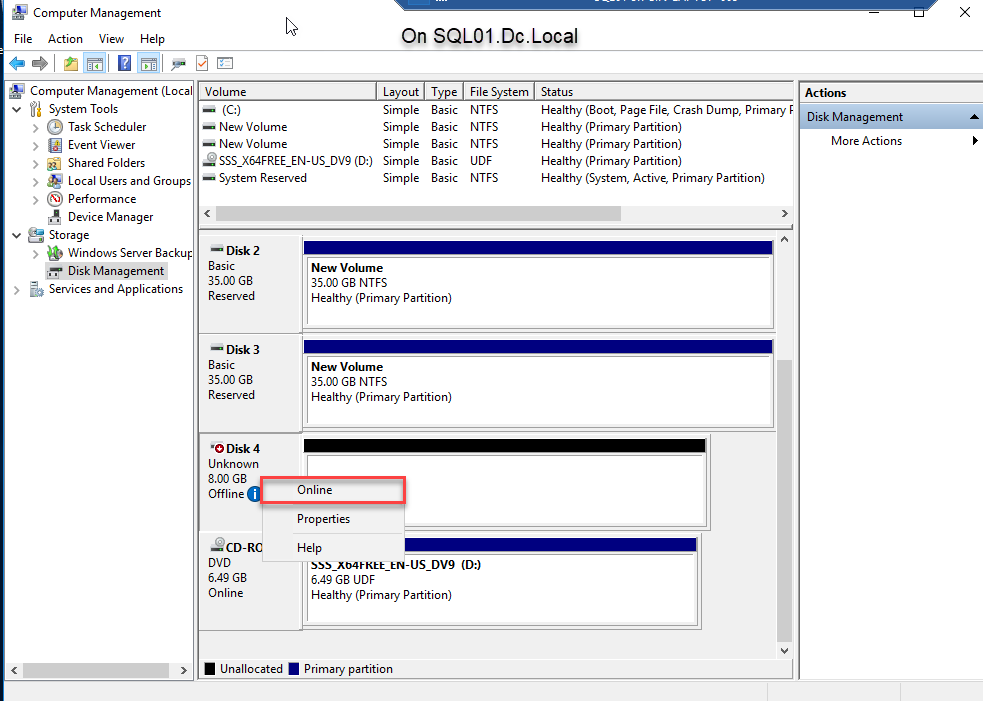
Once we are connected to the virtual disk, you can see the disk in the Disk Manager section under Computer Management. To use the disk within the cluster, we must perform the following tasks:
- Bring the disk online. To do that, right-click Disk 4 and select Online. See the following image:
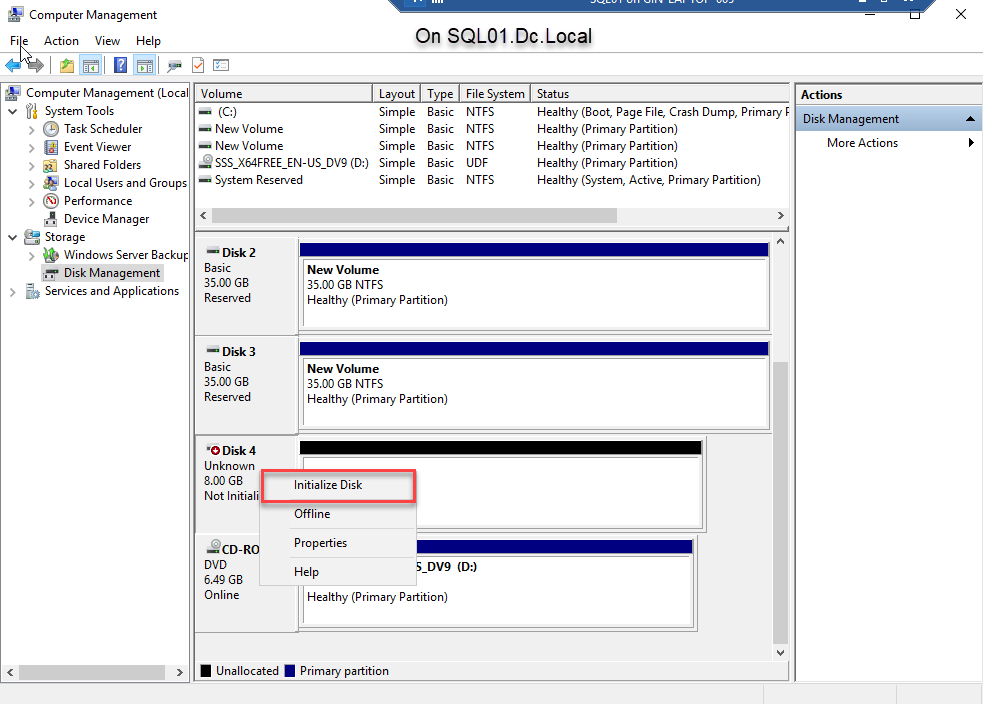
- Once the disk is online, initialize the disk. To do that, right-click Disk 4 and select Initialize disk. See the following image:
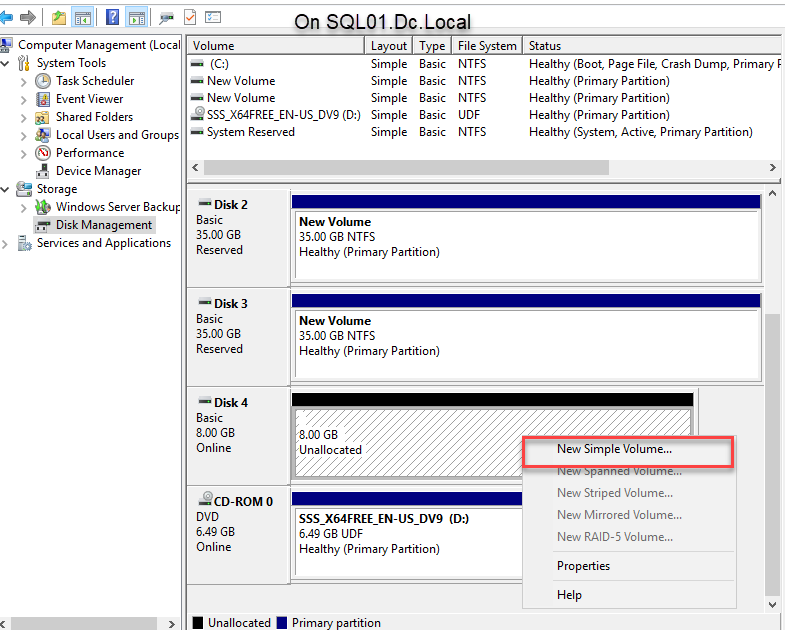
- Once the disk is initialized, right-click Disk 4 and select New Simple Volume to create a partition. See the following image:
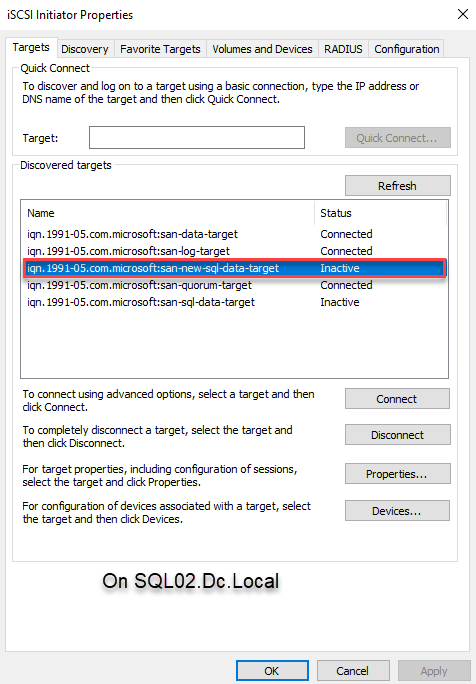
Similarly, we must connect the virtual drive from the SQL02.dc.local node. To do that, connect the SQL02.dc.local node using RDP, open the iSCSI initiator, and click the Refresh button to discover the target. Now you can choose the appropriate target name from the Discovered targets text box. Select the appropriate target and click Connect. See the following image:
Add the new disk to an existing failover cluster storage.
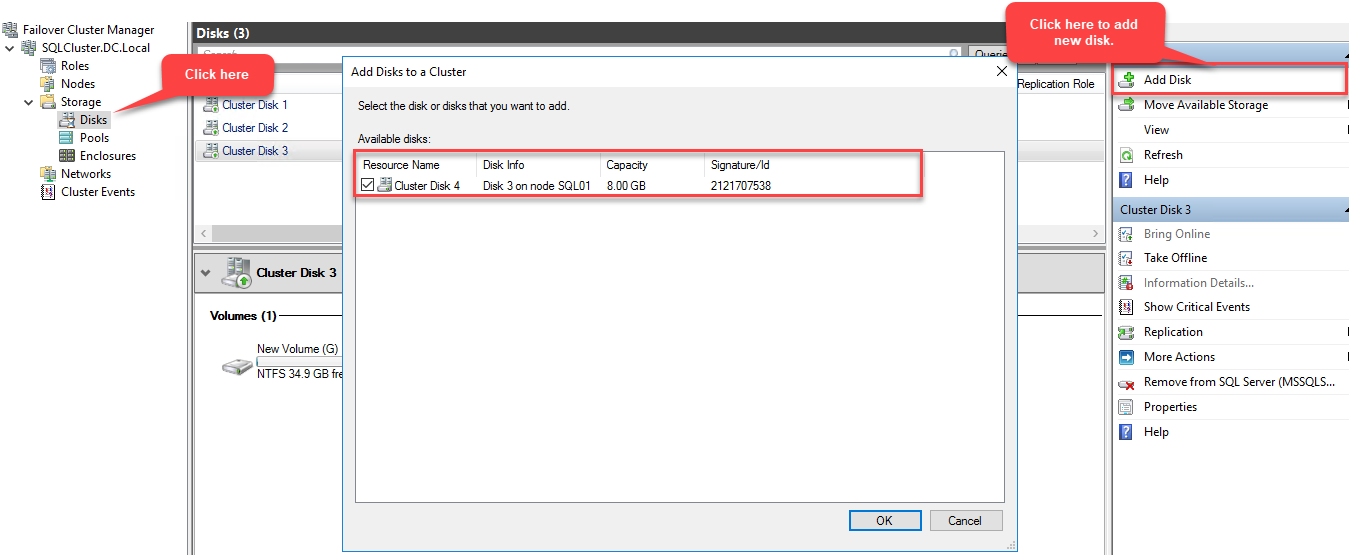
To add this disk to the cluster storage, connect to SQL01.Dc.Local using RDP, open the Failover Cluster Manager, connect to SQLCluster.DC.Local, select Disks from the left pan and click Add disk. The “Add disk to cluster” dialog box will be opened. In this dialog box, the new clustered disk will be displayed. See the following image:
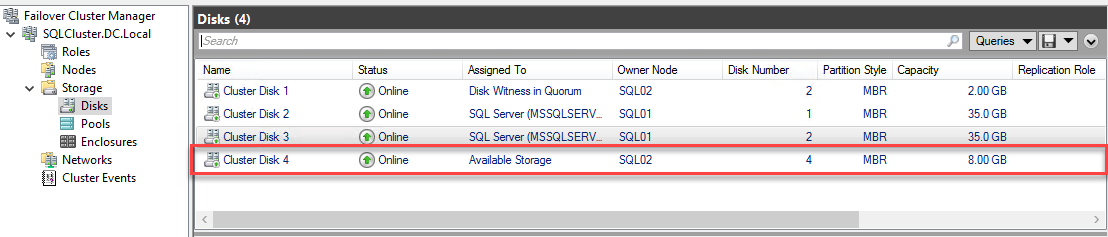
Once the new disk is added, you can see it in the disk menu of the Failover Cluster Manager. See the following image:
Move the sample database file to the new disk.
Once the disk is added, let’s move a sample database file to the new drive. I have created a database named demodatabase on SQL01.dc.local. We want to move its data file to the new disk. To do that, connect to PowerShell and then connect to the SQL Server instance using the ‘SQLCmd’ command.
Once you’re connected to the instance, execute the following command to detach the database.
exec sp_detach_db [demodatabase]
go
Once the database is detached, copy the data file from drive F (old drive) to drive E (new drive) and execute the following command to attach the database.
CREATE DATABASE demodatabase
    ON (FILENAME = 'E:\SQLData\demodatabase.mdf'),
    (FILENAME = 'F:\SQLLog\demodatabase_log.ldf')
    FOR ATTACH;
GO
When you execute the command above, you’ll receive the following error:
Msg 5184, Level 16, State 2, Server SQLCLUST, Line 1
Cannot use file 'E:\SQLData\demodatabase.mdf' for clustered server. Only formatted files on which the cluster resource of the server has a dependency can be used. Either the disk resource containing the file is not present in the cluster group or the cluster resource of the Sql Server does not have a dependency on it.
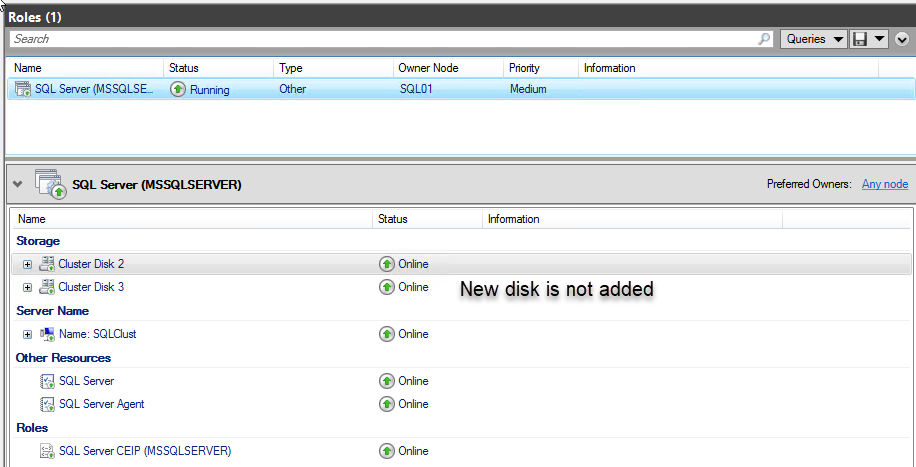
This error occurs because we did not add the new disk to the cluster resource group and to the AND Dependency of MSSQLSERVER role. See the following image:
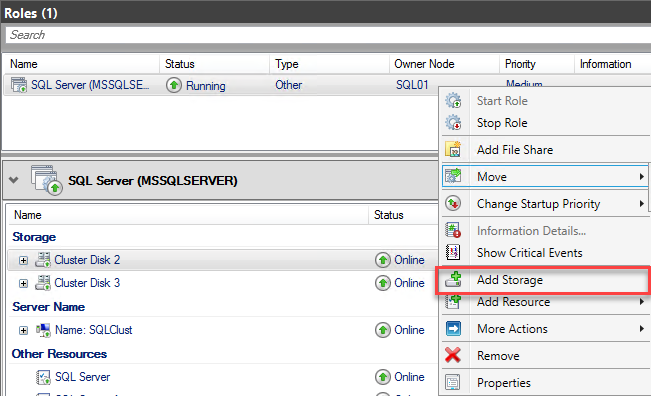
To fix this error, we must add the new disk to the MSSQLSERVER role. To do that, open the Failover Cluster Manager, click Select Roles, right-click the SQL Server (MSSQLSERVER) role, and choose Add Storage. See the following image:
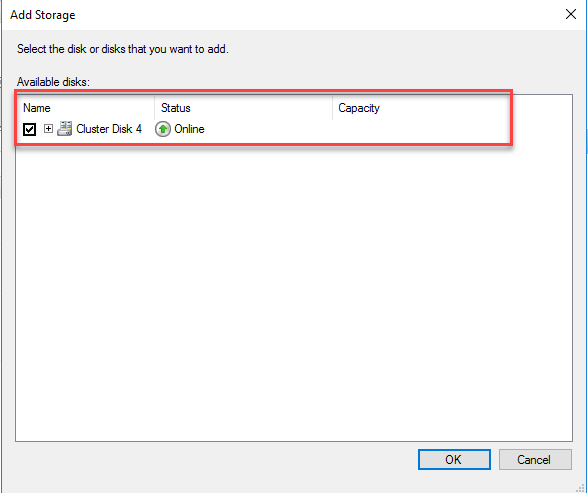
The Add Storage dialog box will be opened. From the list of available storage, choose the disk that we created. See the following image:
Once we add the storage, we can verify it from the resource tab of the MSSQLSERVER role. See the following image:

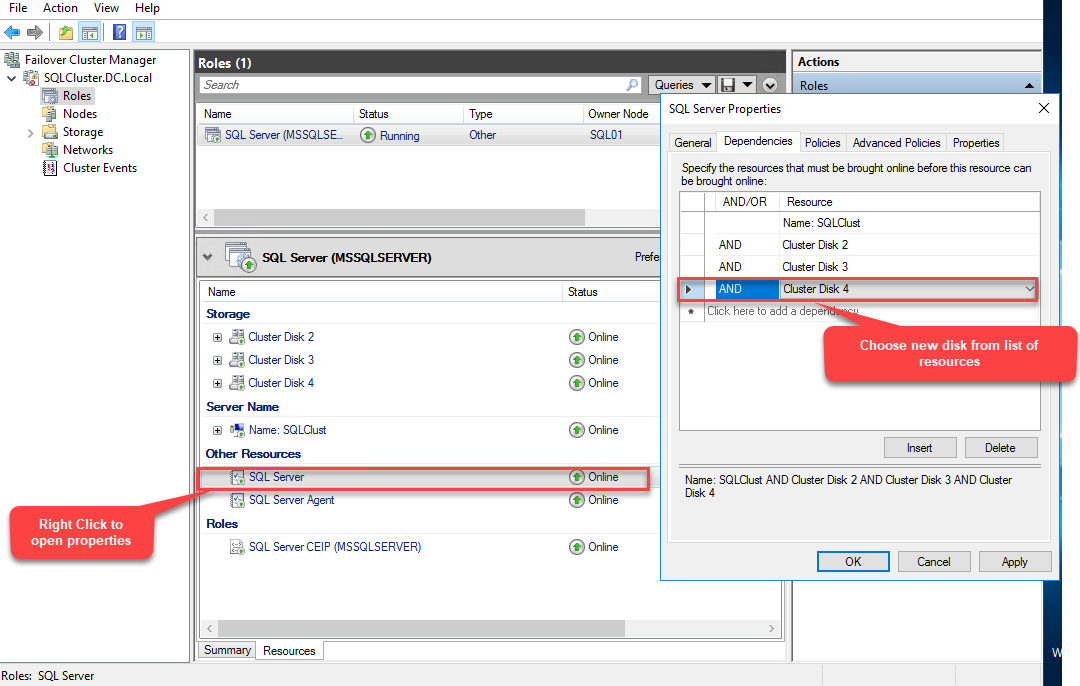
Once the disk is added, we need to also add it to the SQL Server AND dependency. To do that, right-click SQL Server in the list of resources under the MSSQLSERVER role and select Properties. In the Properties dialog box, go to the Dependencies tab and select Cluster Disk 4 from the drop-down box in the Resources column.
Once the disk resource is added, try to attach the database using the following command:
CREATE DATABASE demodatabase
    ON (FILENAME = 'E:\SQLData\demodatabase.mdf'),
    (FILENAME = 'F:\SQLLog\demodatabase_log.ldf')
    FOR ATTACH;
GO
The command will be executed successfully. To verify that the file has been copied to the appropriate location, execute the following query in PowerShell.
select db_name(database_id) as [database name], physical_name from sys.master_files where db_name(database_id) ='demodatabase'
Following is the output:
Database Name		physical_name
------------ 		---------------------------------
demodatabase		E:\SQLData\demodatabase.mdf
demodatabase		F:\SQLLog\demodatabase_log.ldf
As you can see, the database file has been moved to the new drive.
Summary
In this article, I have explained that the step-by-step process of adding a disk to an existing SQL Server failover clustered instance. In the next article, I will explain how to move system databases to a new clustered disk.
Stay tuned!
Tags: failover cluster instance, sql server Last modified: September 20, 2021


