In this article, I am going to explain the process of installing SQL Server on failover cluster instance (FCI) on the primary node. First, let’s look at the prerequisites.
Virtual Machine details:
For demonstration purposes, I have enabled the Hyper-V role on my workstation and created four virtual machines. I have then installed Windows Server 2019 on these virtual machines. Following are the details:
| Virtual Machine | Host Name | IP Address | Purpose |
| Domain Controller | DC.Local | 192.168.1.110 | This virtual machine will be used as a domain controller. |
| SAN | SAN.DC.Local | 192.168.1.111 | This virtual machine will be used as a virtual SAN. I have created two iSCSI virtual disks and using iSCSI initiator; I will connect them from Failover Cluster nodes. |
| Primary SQL Node | SQL01.DC.Local | 192.168.1.112 | On this virtual machine, we will install the failover clustered instance. |
| Secondary SQL Node | SQL02.DC.Local | 192.168.1.113 | On this virtual machine, we will install the secondary node of the failover cluster instance. |
Failover cluster details:
After creating and configuring the virtual machine, I have created a two-node cluster. Here are the details:
| Virtual Machine | Purpose |
| Number of Nodes | 2 |
| Cluster Name | SQLCluster.DC.Local |
| Storage | Two clustered disks and one quorum witness |
| Active Node | SQL01.DC.Local |
| Passive Node | SQL02.DC.Local |
After enabling the failover cluster role on the nodes, I have configured a cluster named SQLCluster.DC.Local. The cluster has one active node (SQL01.DC.Local) and one passive node (SQL02.DC.Local). See the following image:

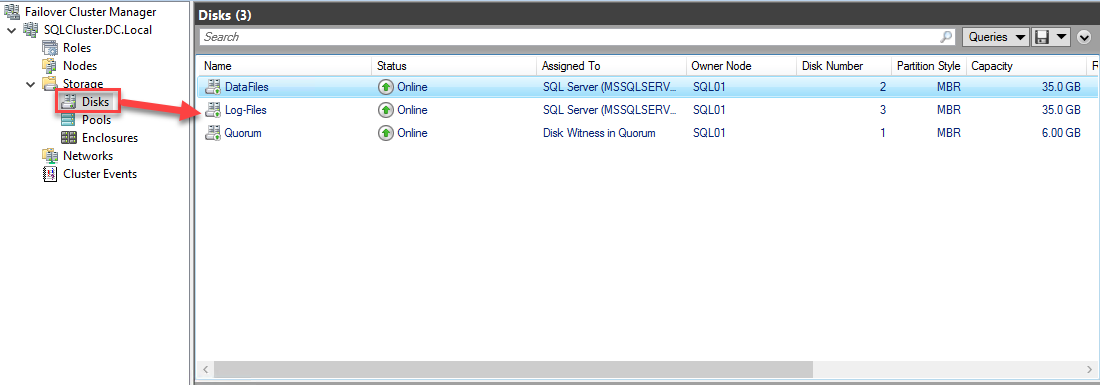
The cluster has three clustered disk volumes, and I have renamed them accordingly. The disk volume DataFiles is used to store database files while TempDB and Log-Files are used to store database files and T-log files. The volume named Quorum acts as a quorum witness – I have configured the cluster to use this disk as a quorum witness. See the following image:
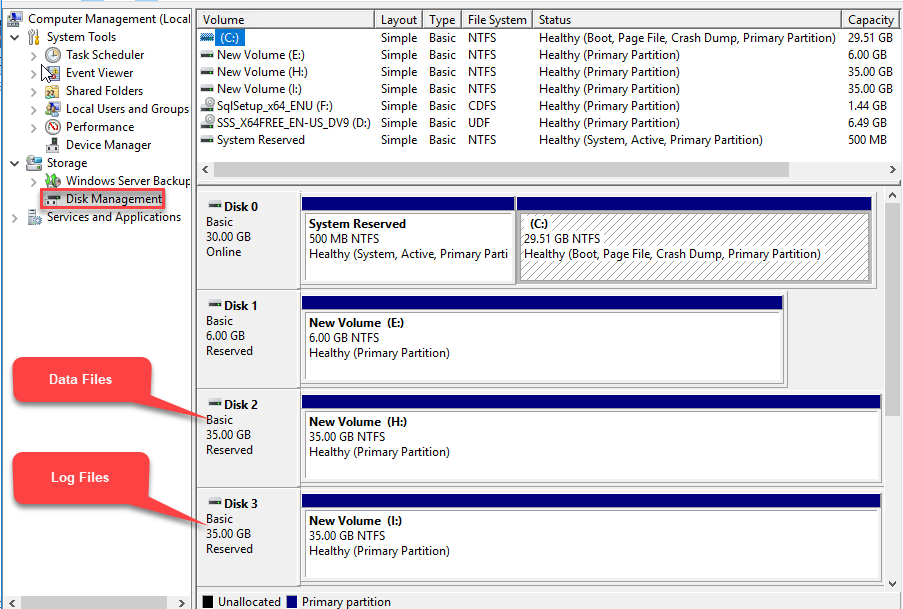
On the SQL01 Node, I have connected to both clustered volumes using an iSCSI initiator, initialized those drives, marked them as online and formatted them. I have assigned the drive letter H:\ to DataFiles and I:\ to Log-Files. See the following screenshot of the Disk Management window:
Installing a SQL Server Failover Cluster instance
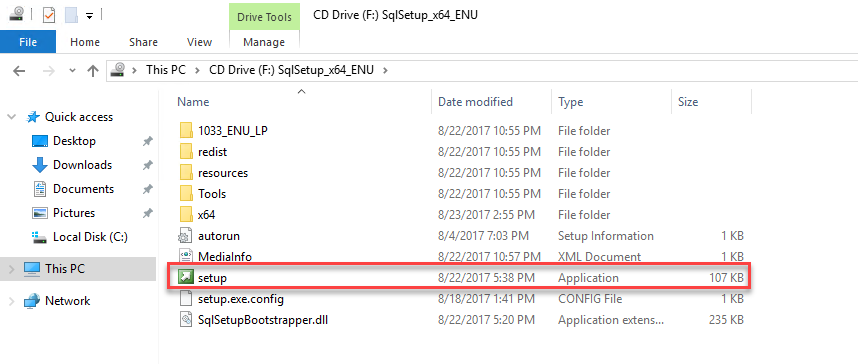
Once the cluster is configured, download SQL Server 2017 from here. When the download is completed, copy the .iso disk image to the SQL01 node. Connect to SQL01, double-click the .iso file to mount it. Once the .iso file is mounted, run setup.exe. See the following image:
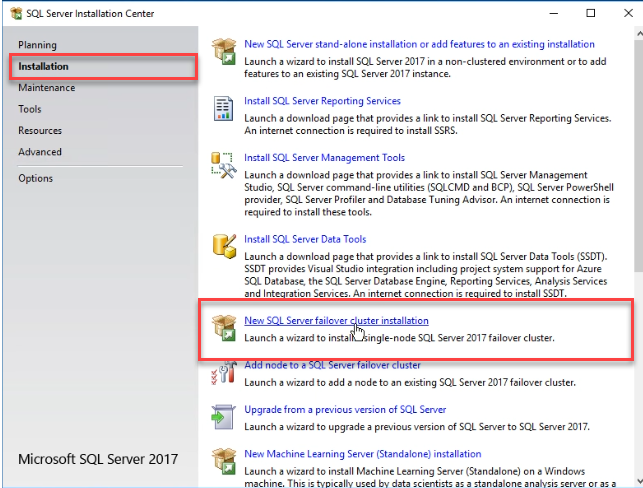
SQL Server installation wizard will be opened. In the wizard’s left pane, select “Installation” and then click “New SQL Server failover cluster installation.” See the following image:
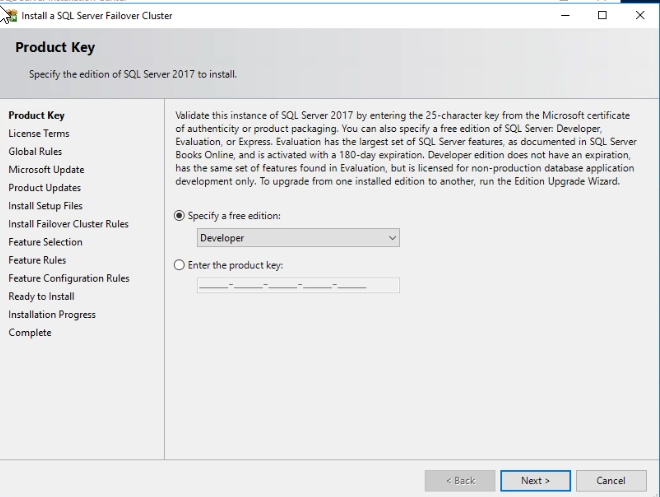
In the “Product Key” dialog box, select the edition of SQL Server you want to install. If you have a license key for SQL Server standard edition or enterprise edition, you can enter it in the “Enter the product key” text box. If you’re using the developer edition or a free evaluation edition, choose any options in the Specify Free Edition drop-down box.
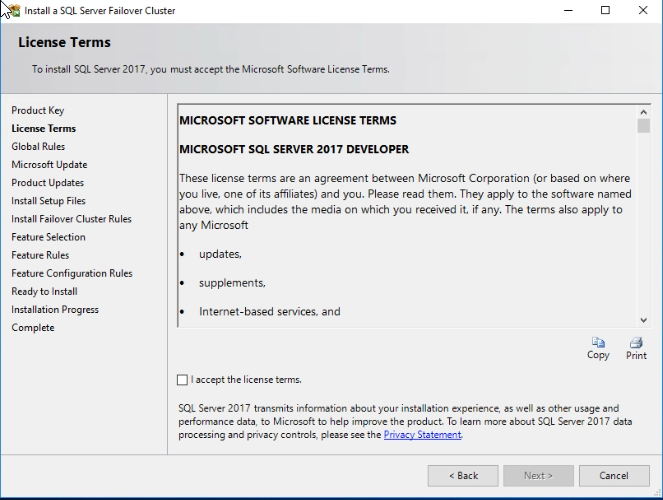
In the License Terms dialog box, accept Microsoft terms and conditions. See the following image:
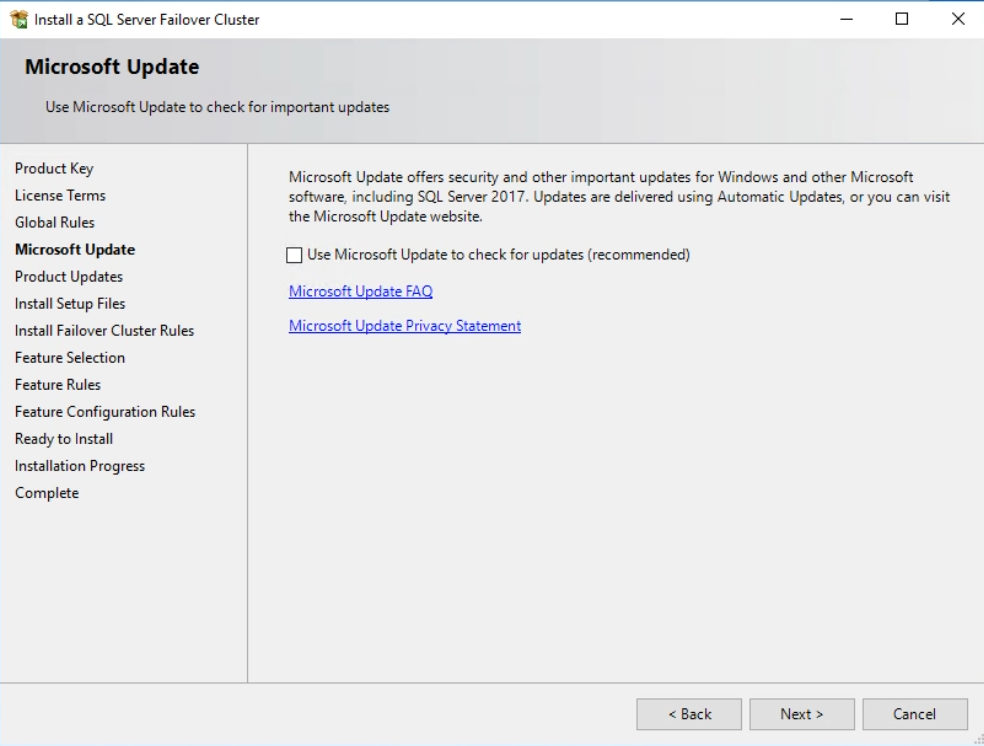
In the “Microsoft Update” dialog box, you can choose to install Microsoft updates. If you want to download the updates manually, then you can skip this step. Click Next.
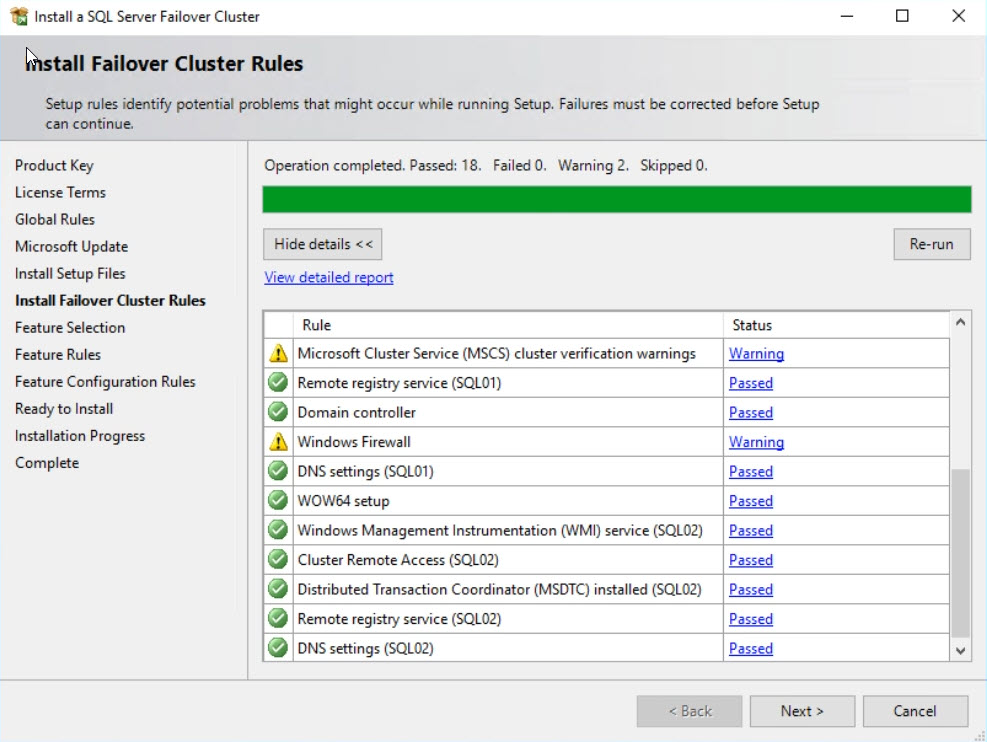
In the Install Failover Cluster Rules screen, make sure that all rules are validated successfully. If any rule fails or gives a warning, you should fix it and continue the setup. In this demo, I have skipped the warning. See the following image:
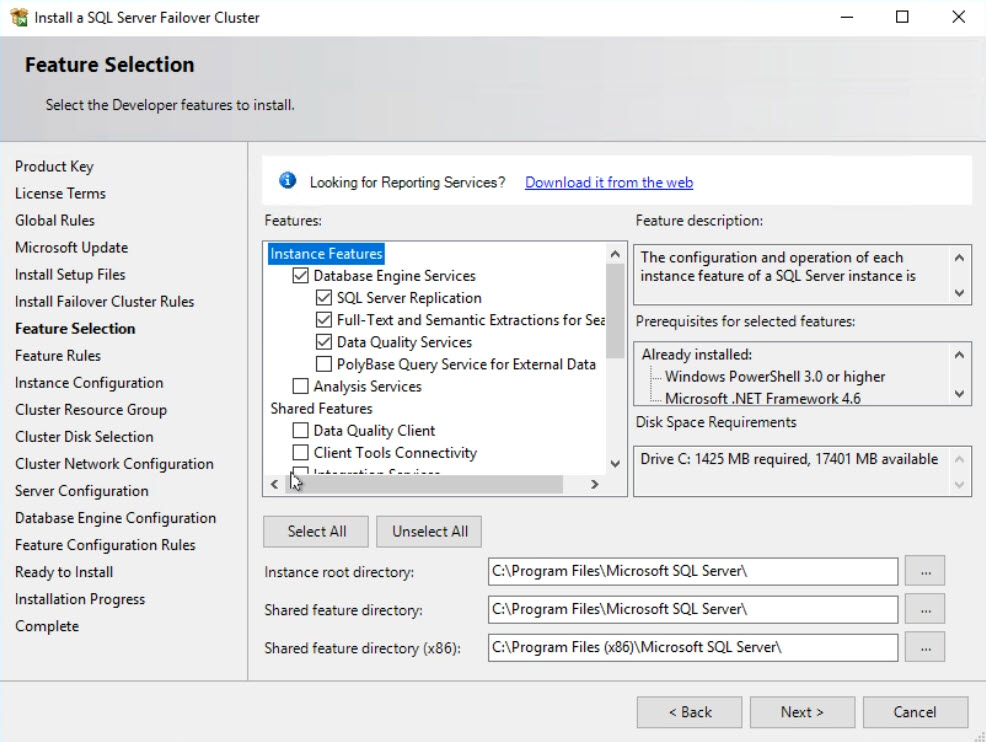
In the Feature selection dialog box, select the features you want to install. From SQL Server 2016, we can download the SQL Server Management studio separately. See the following image:
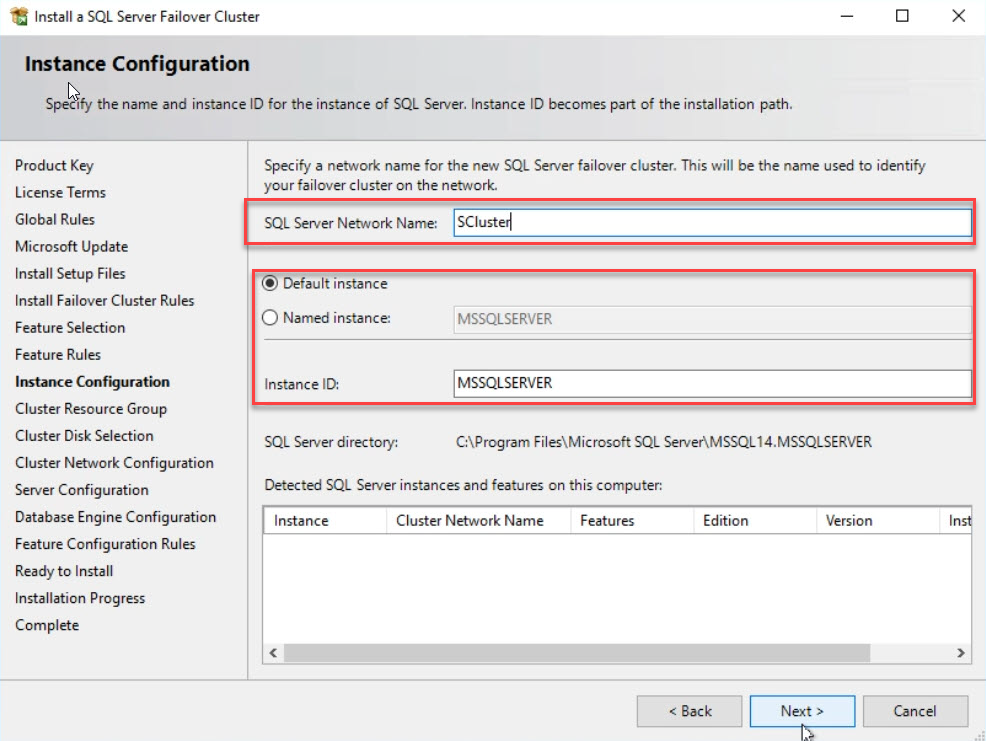
In the Instance Configuration dialog box, enter the SQL Server Network Name – it’s used by the application and SQL Server Management Studio to connect to the failover cluster instance. You can choose between default instance or named instance as Instance ID. If you want to install multiple instances in the failover cluster, you can use a named instance. In this demo, I used the Default Instance. See the following image:
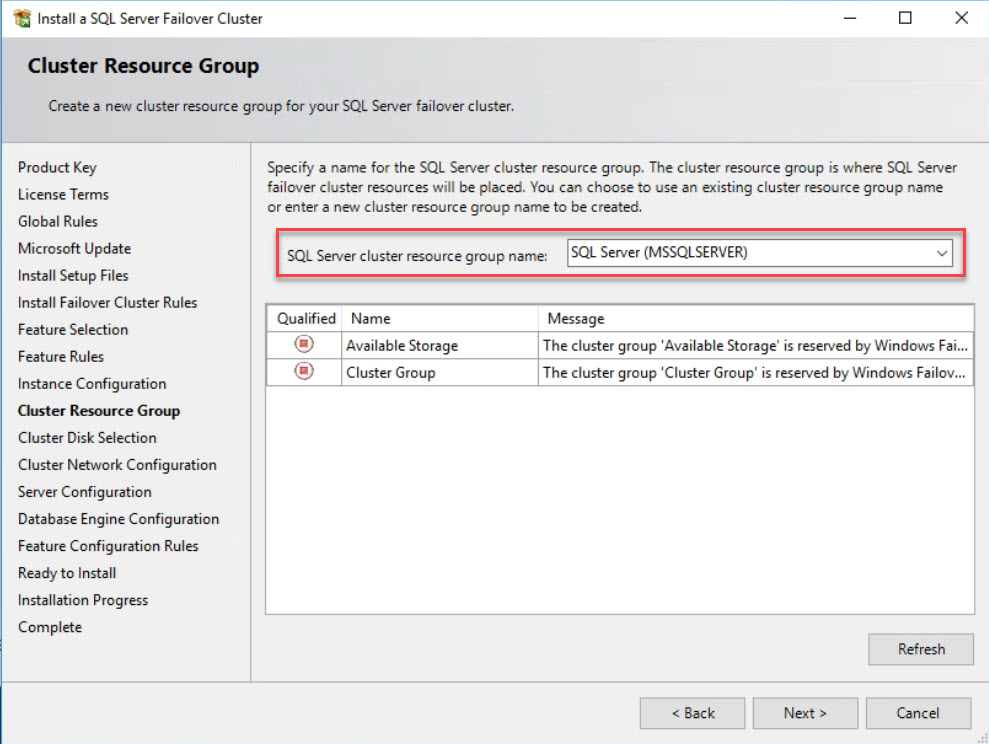
In the Cluster resource group dialog box, specify the name of the Windows failover cluster resource group. There are two options: either creating a new resource group for MSSQLSERVER, or choosing an existing one in the SQL Server cluster resource group name drop-down box. See the following image:
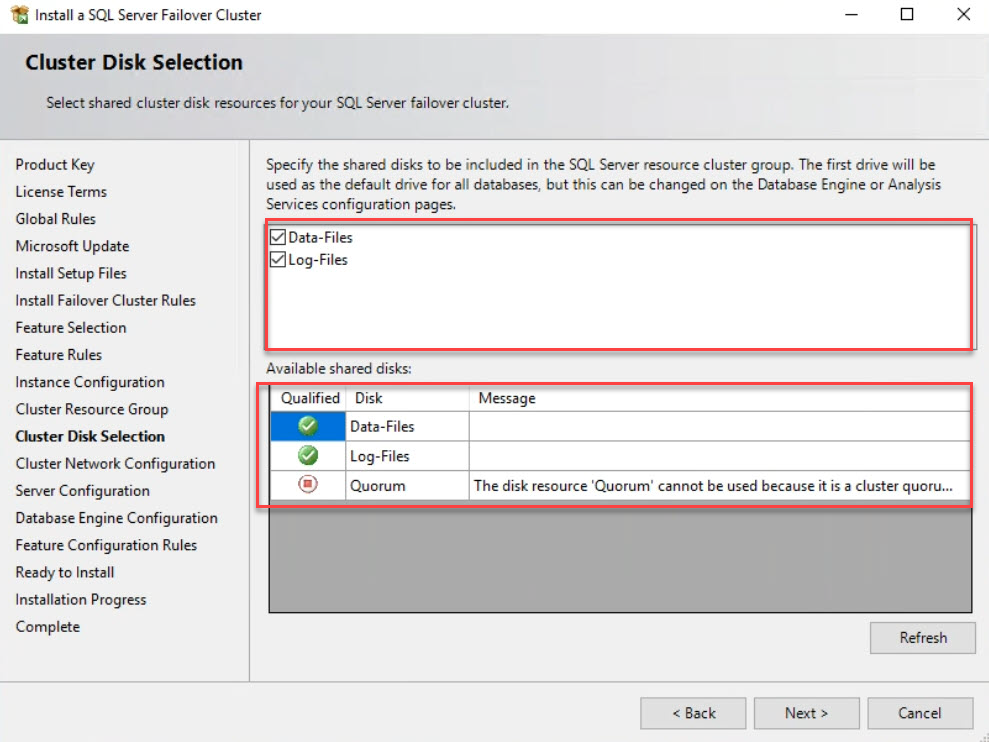
In the Cluster Disk Selection dialog box, select the shared disk of the failover cluster group. This disk will be used by SQL Server failover cluster instance. I have already created two clustered disks named DataFiles and Log-Files. I have selected those drives and clicked Next. See the following image:
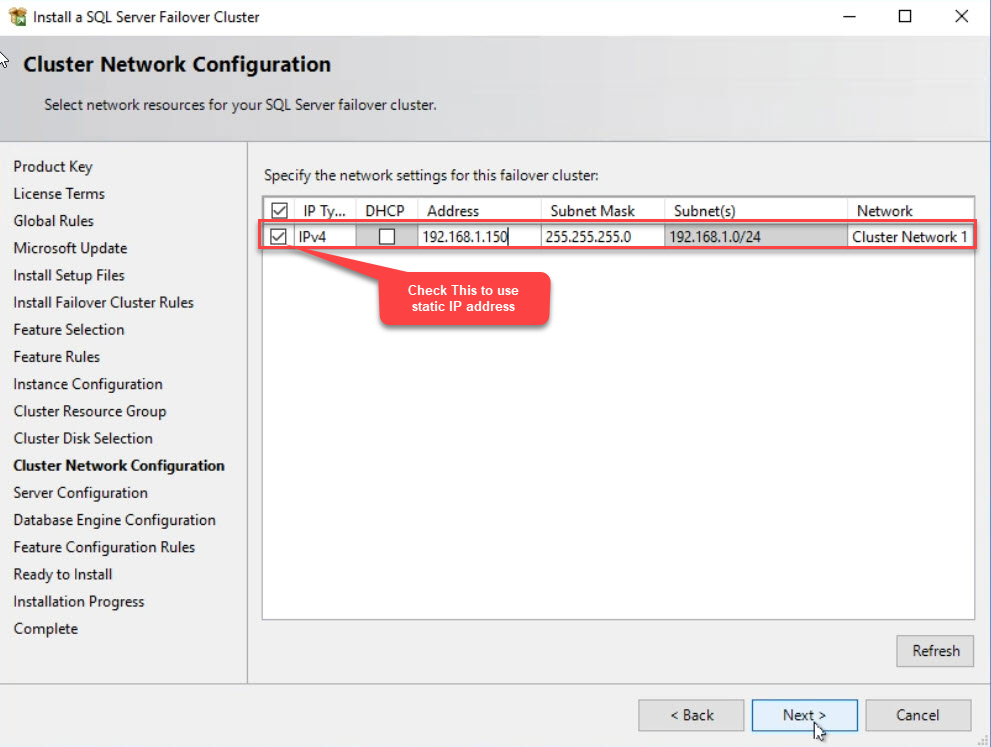
In the Cluster Network Configuration dialog box, provide the IP address and subnet mask. This IP address will be used by SQL Server FCI. In this example, I’m using 192.168.1.150. If you’re using a static IP address, enable the checkbox near the Ipaddress column and click Next. See the following image:
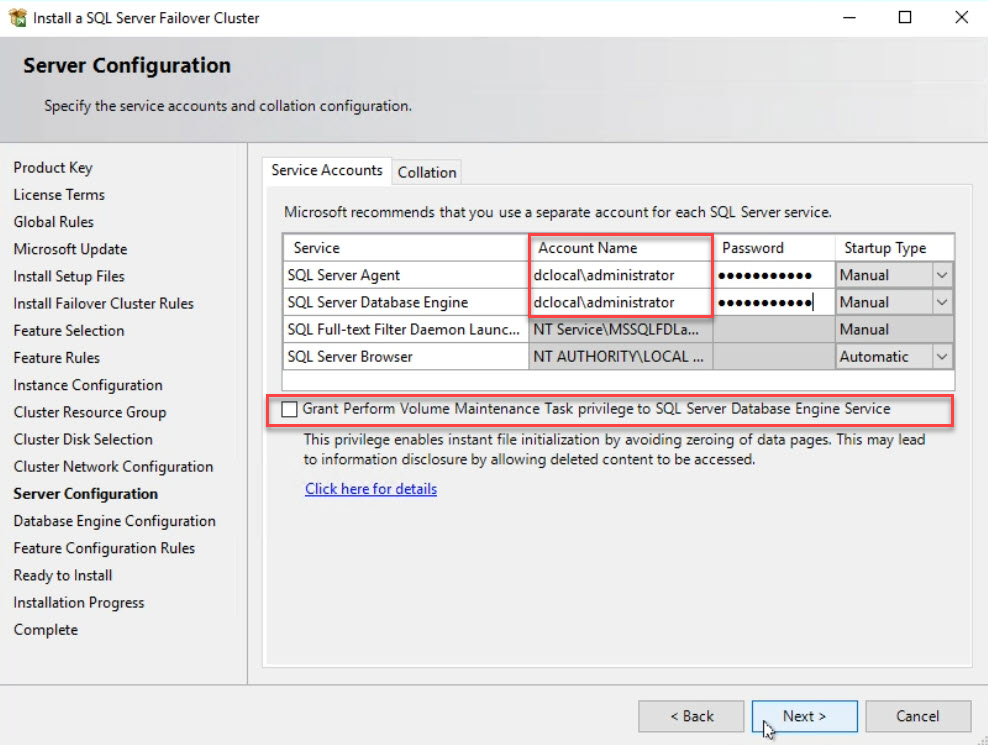
In the Server Configuration dialog box, provide the user name and password of a SQL Service account in the Account Name column. You can enable instant file initialization in this dialog box. IFI eliminates the zeroing process during the auto-growth option. To do that, enable the Grant Perform Volume Maintenance Task Privilege option. Click Next. See the following image:
In the Database Engine Configuration dialog box, under the Server Configuration tab, specify the authentication mode. You can configure the instance to use only Windows Authentication mode or Mixed mode (both Windows and SQL Server authentication). You can add the current user (the user installing SQL Server) by clicking the Add Current User button. You can also add other domain accounts. I have selected mixed mode as an authentication type and added the current user as a SQL Server administrator. See the following image:

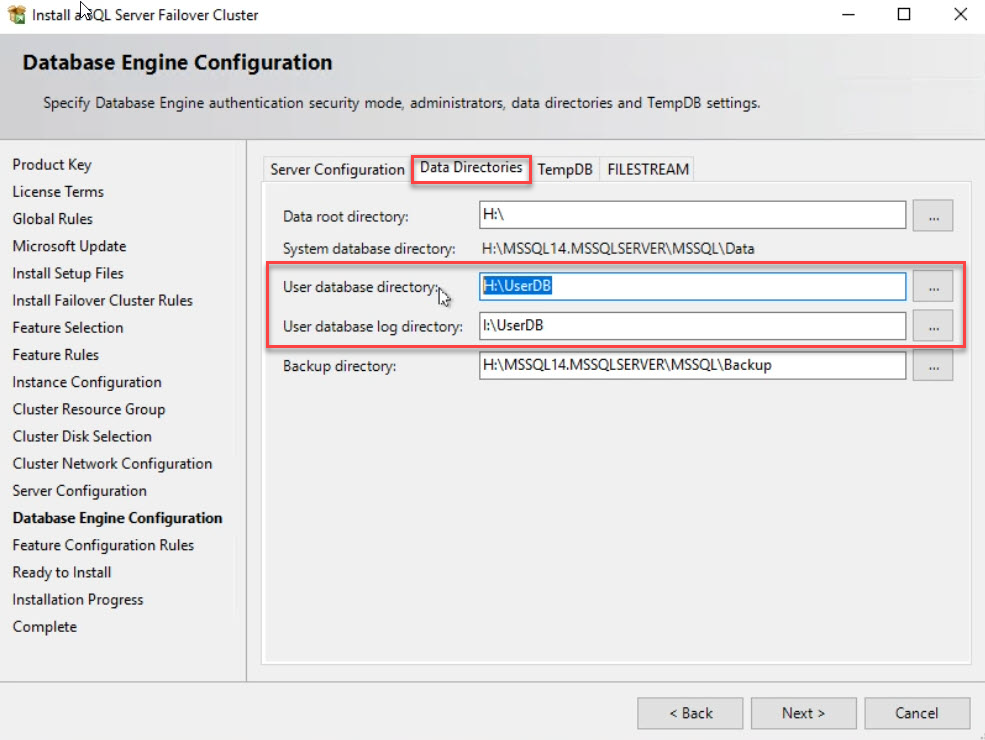
Now, you’ll need to go to the Data Directories tab and specify paths for storing the user database file, user database log file, and the backup file. In this example, I specified “H:\UserDB” in the User database directory box and “I:\UserDB” in the User database log directory box. See the following image:
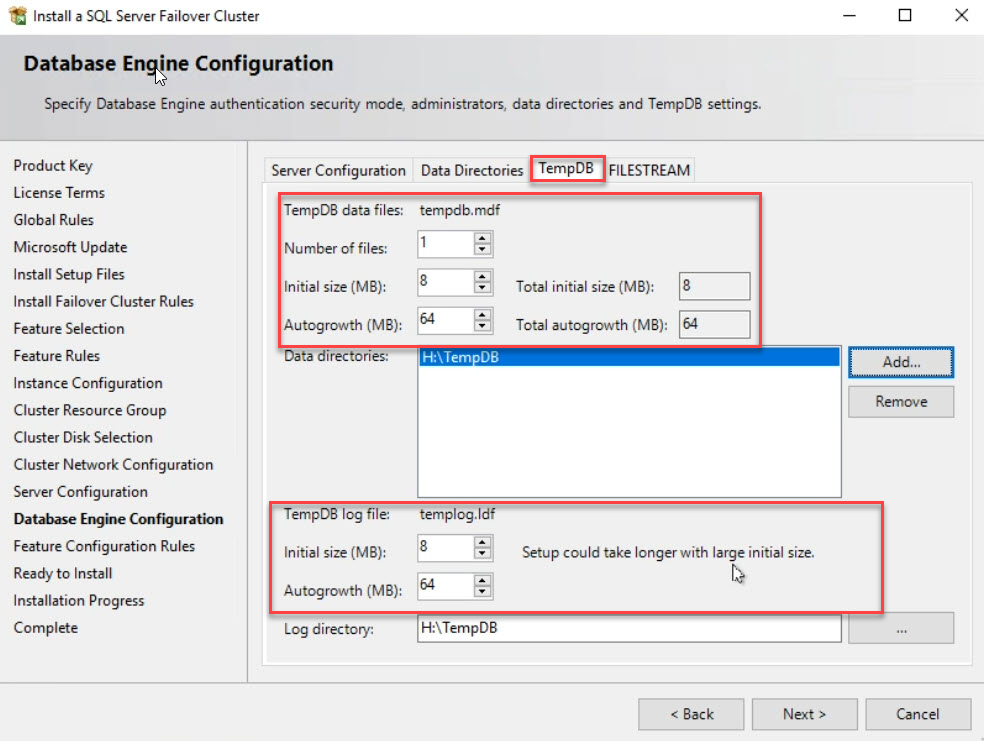
Next, go to the TempDB tab to specify the location of TempDB. Moreover, you can specify the number of TempDB databases and log files, their initial size, and the auto-growth value. On the H:\ drive, I have created a folder named TempDB to store the TempDB files. So, in the Data directory text box, specify “H:\TempDB.” In this example, I didn’t change the values for the number of files, initial size, and auto-growth. Once all values are specified, click Next. See the following image:
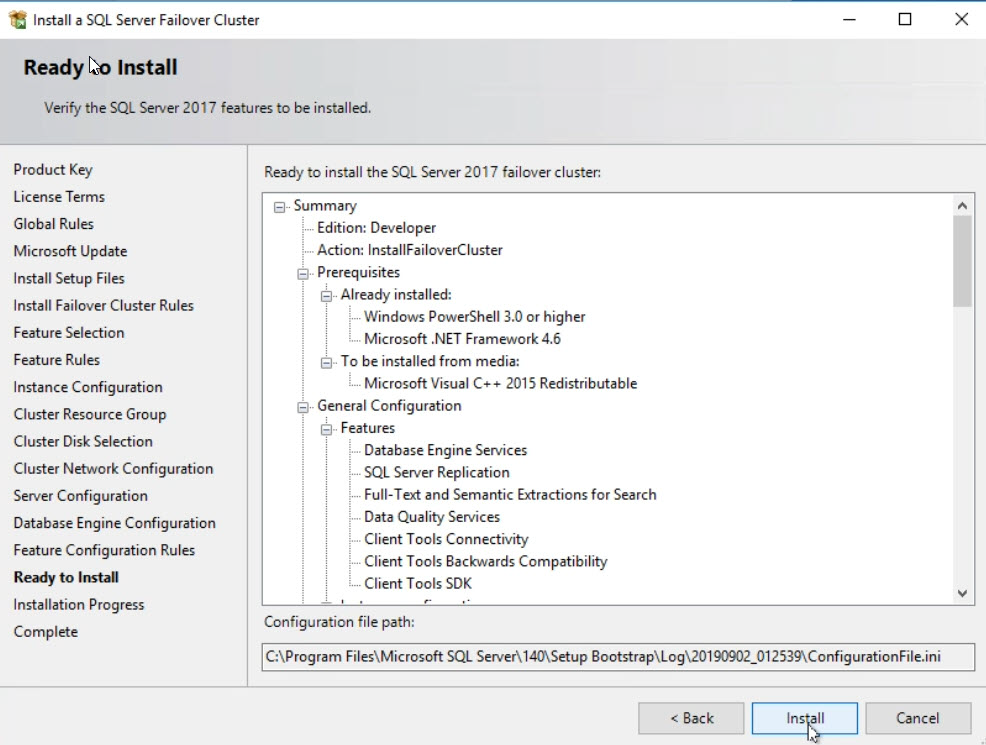
On the Ready to Install screen, review all settings and click Install to start the installation process. See the following image:
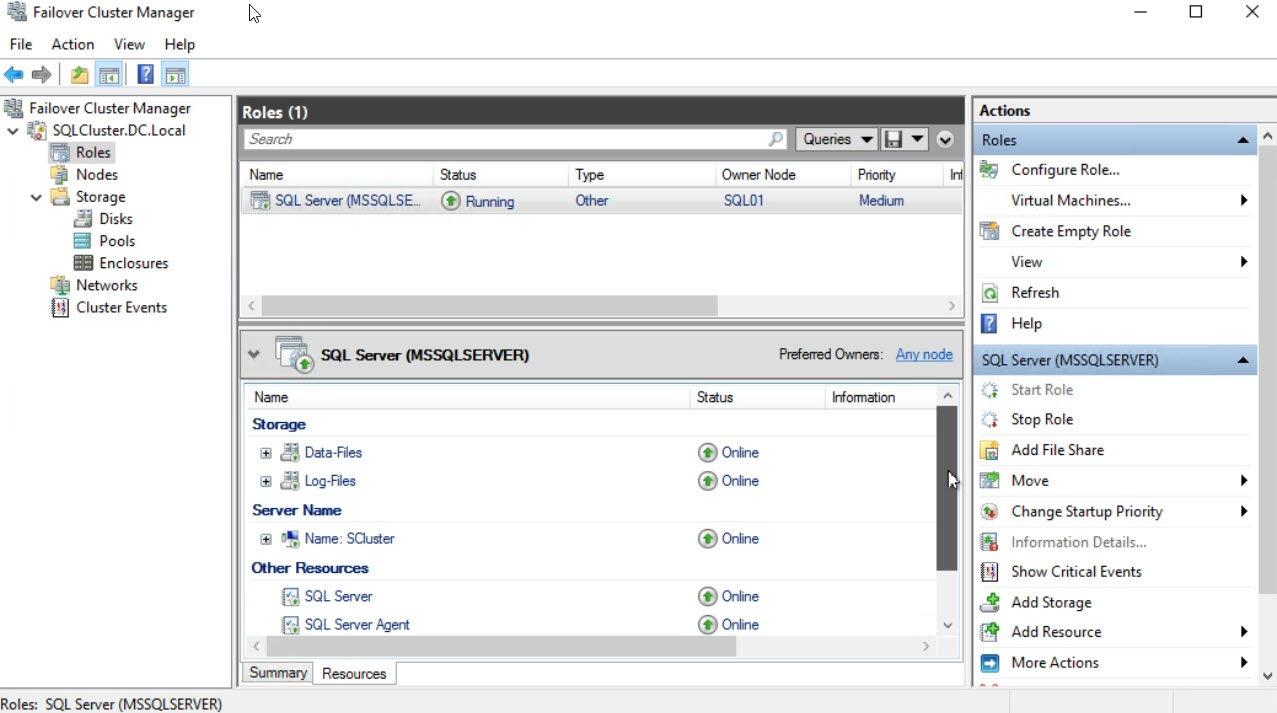
Once the installation is completed, open the Failover Cluster Manager. In Roles, you can see that the SQL Server (MSSQLSERVER) role is installed successfully. Make sure that all its dependencies are online. See the following image:
Summary
In this article, I have explained the process of installing SQL Server Failover cluster instance step by step. In the next article, I will explain how to install a secondary node in the SQL Server failover cluster instance and demonstrate the manual failover process. Stay tuned!
Tags: failover cluster instance, sql server Last modified: September 20, 2021


[…] my previous article, I have explained the step-by-step process of installing SQL Server Failover Clustered Instance. In […]