In my previous article, I have explained the step-by-step process of installing SQL Server Failover Clustered Instance. In this article, I will explain how to add a secondary node to the existing failover clustered instance.
Install SQL Server Failover Cluster instance
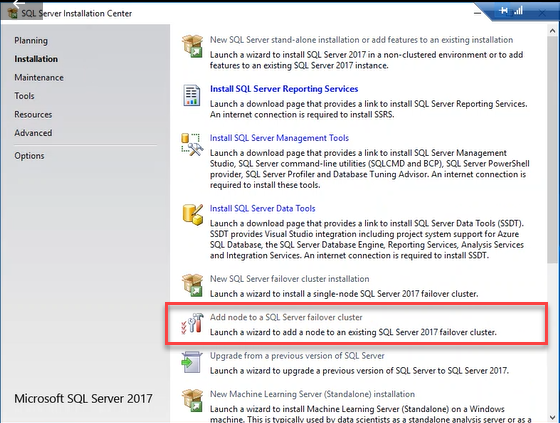
Once SQL Server is installed on an SQL01.dc.Local node, connect to SQL02.dc.Local and run setup.exe – SQL Server installation wizard opens. In the wizard, select “Installation” from the panel on the left and click on “Add node to a SQL Server failover cluster”. See the following image:
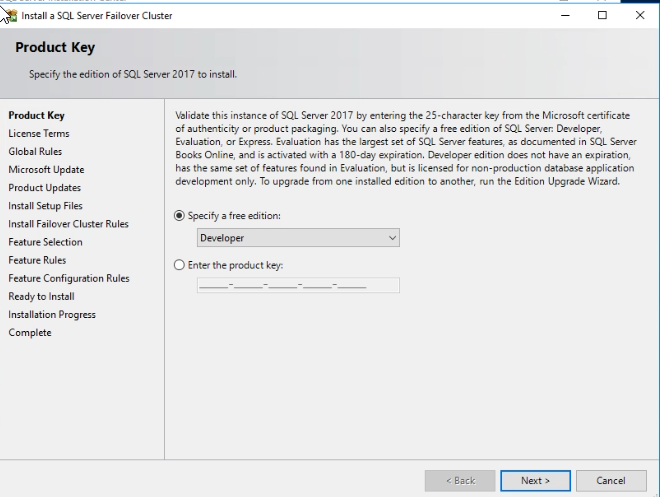
In the “Product Key” dialog box, select the SQL Server edition you want to install. If you have a license key for the SQL Server standard or enterprise edition, you can enter it in the “Enter the product key” text box. If you’re using a developer edition or a free evaluation, choose any of the options from the “specify a free edition” drop-down box.
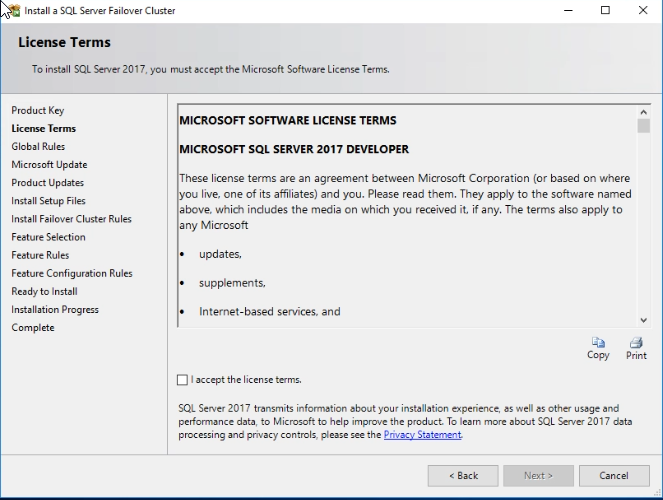
In the “License Terms” dialog box, accept Microsoft terms and conditions. See the following image:
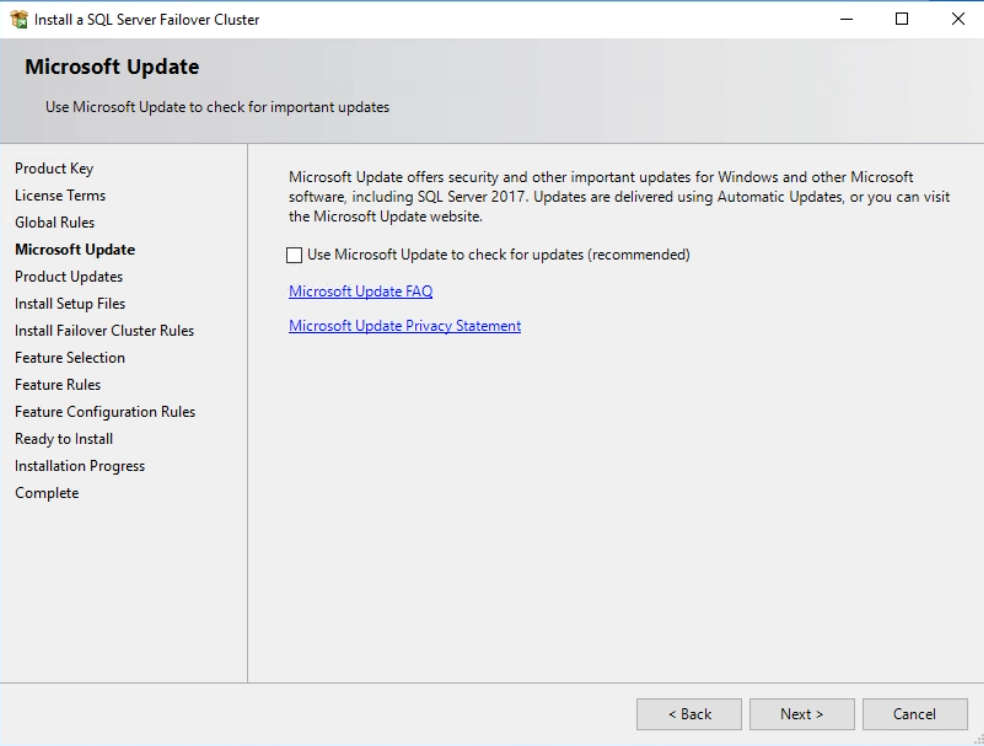
In the “Microsoft Update” dialog box, you can choose to install Microsoft updates. If you want to download the updates manually, you can skip this step. Click on Next.
In the “Add Node Rules” menu, make sure all the rules are validated successfully. If any rule fails or gives a warning, you should fix it and continue the setup. In the demo, I have skipped the warning, so we get the following image:

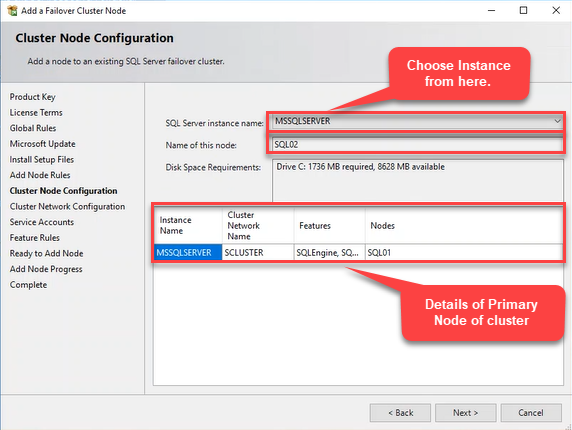
In the “Cluster Node Configuration” dialog box, verify the SQL Server instance name, cluster network name, features, and the selected node. If you create multiple failover instances, you can choose the appropriate instance from the “SQL Server Instance Name” drop-down box. Verify all the configurations, click on Next, and see the following image:
In the “Cluster Network Configuration” dialog box, verify the network configuration of the failover cluster and click on Next. See the following image:

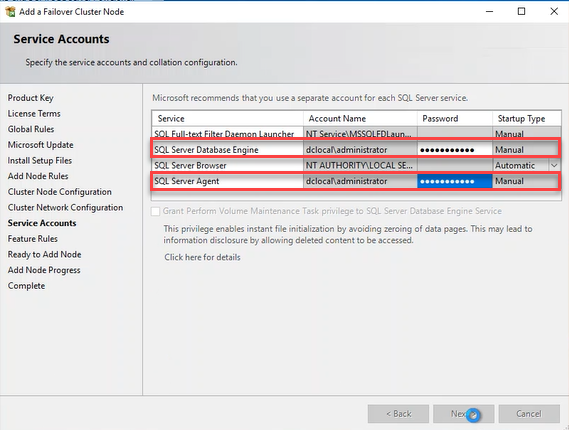
In the “Service Accounts” dialog box, enter a password of the corresponding SQL Server service accounts and click on Next. See the following image:
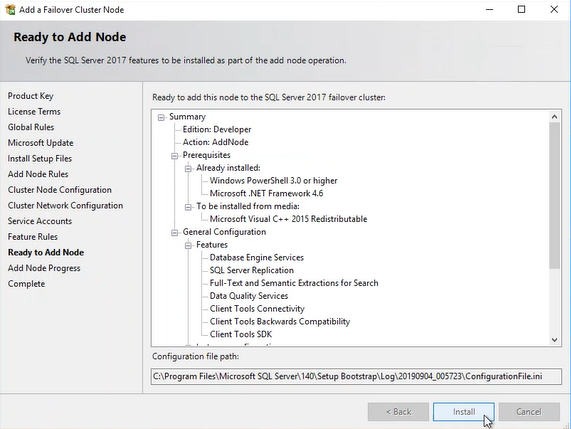
In the “Ready to add node” dialog box, review all settings and click on Install. It will begin a process of adding a node to an existing failover cluster instance. See the following image:
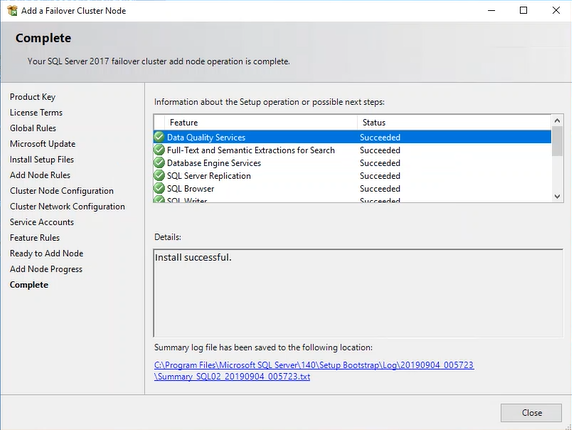
Once the process completes, it shows whether the process was completed successfully or failed. As you can see, the installation was completed successfully. See the following image:
To review information in SQL Server failover cluster instance, open failover cluster manager by running the following command in “Run”:
Cluadmin.exe
You can also open it in control panel > “Administrative Tools” > “Failover Cluster Manager”. See the following image:
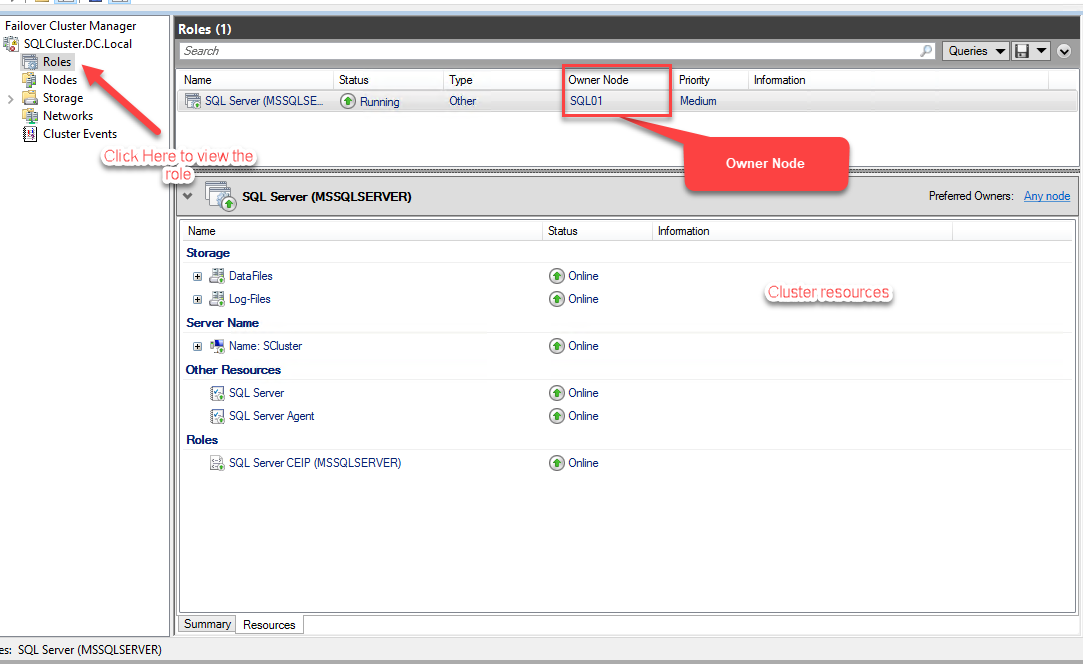
As you see from the image above, the SQL Server (MSSQLSERVER) role has been created, and the Owner Node is SQL01. You can see the information about the resources that have been created.
You can obtain the owner information and secondary cluster nodes by executing the following query:
SELECT CONVERT(VARCHAR(5), nodename)AS [Name of Node],
       CASE
         WHEN CONVERT(INT, is_current_owner) = 0 THEN 'No.'
         ELSE 'YES'
       END                          AS [Is Current Owner]
FROM   sys.dm_os_cluster_nodes
Following is the output:
Name of Node Is Current Owner
------------ ----------------
SQL01        YES
SQL02        No.
Let’s now test a cluster setup by performing manual and automatic failovers.
Performing Manual Failover
Manual failover will allow us to verify if the cluster has been set up appropriately. As I mentioned, we have created a two-node cluster. To demonstrate the process, I will move the SQL Server role from the primary node (SQL01) to the secondary node (SQL02). To do that, open failover cluster manager.
See the following image:
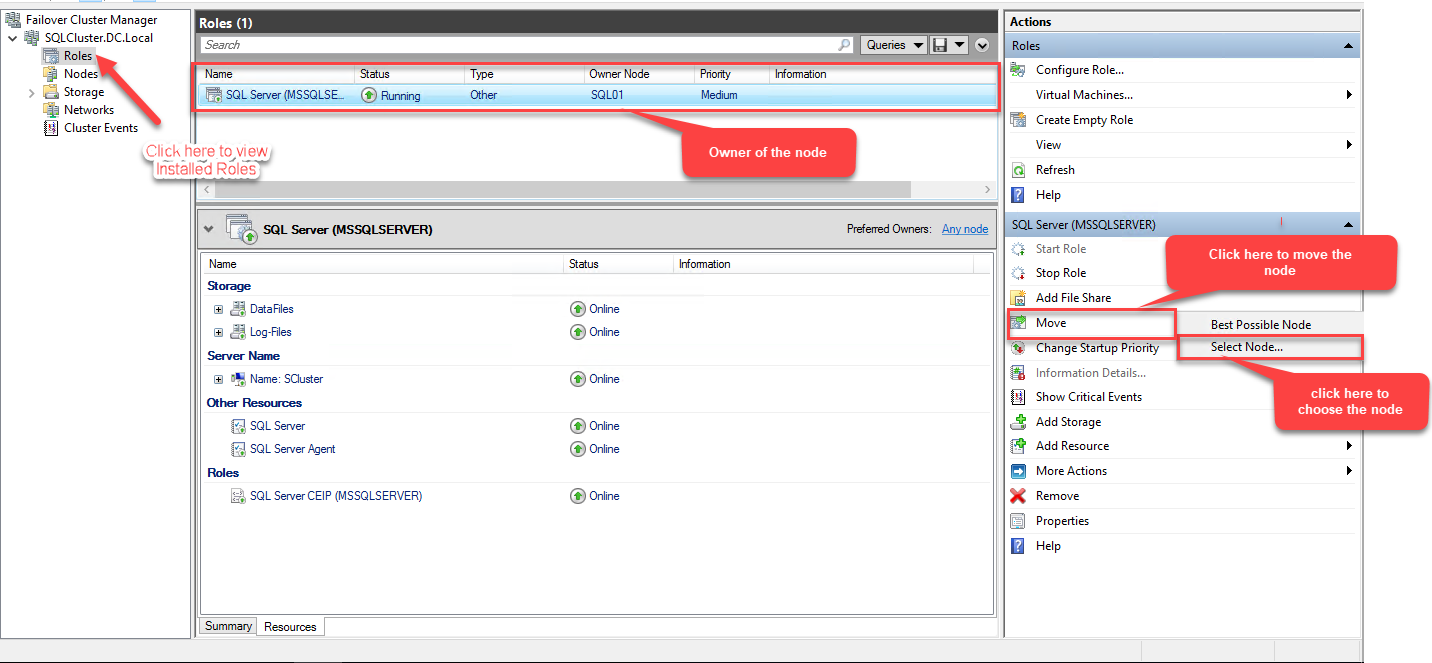
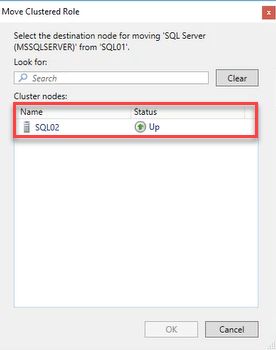
Now, expand “Roles“, select “Move”, and choose “Select Node”. The “Move Clustered Role” dialog box opens. Select SQL02 from the “Clustered Nodes” list and click OK. See the following image:
Once the failover process completes, open failover cluster manager. See the following image:

As you can see, after the failover, the Owner Node has been changed. Now the Owner Node is SQL02. You can verify this by executing the following query:
SELECT CONVERT(VARCHAR(5), nodename)AS [Name of Node],
       CASE
         WHEN CONVERT(INT, is_current_owner) = 0 THEN 'No.'
         ELSE 'YES'
       END                          AS [Is Current Owner]
FROM   sys.dm_os_cluster_nodes
Following is the output:
Name of Node Is Current Owner
------------ ----------------
SQL01        No
SQL02        YES
Alternatively, you can perform failover using the following PowerShell command:
Move-ClusterGroup "SQL Server (MSSQLSERVER)" -Node "SQL02"
Test Automatic Failover
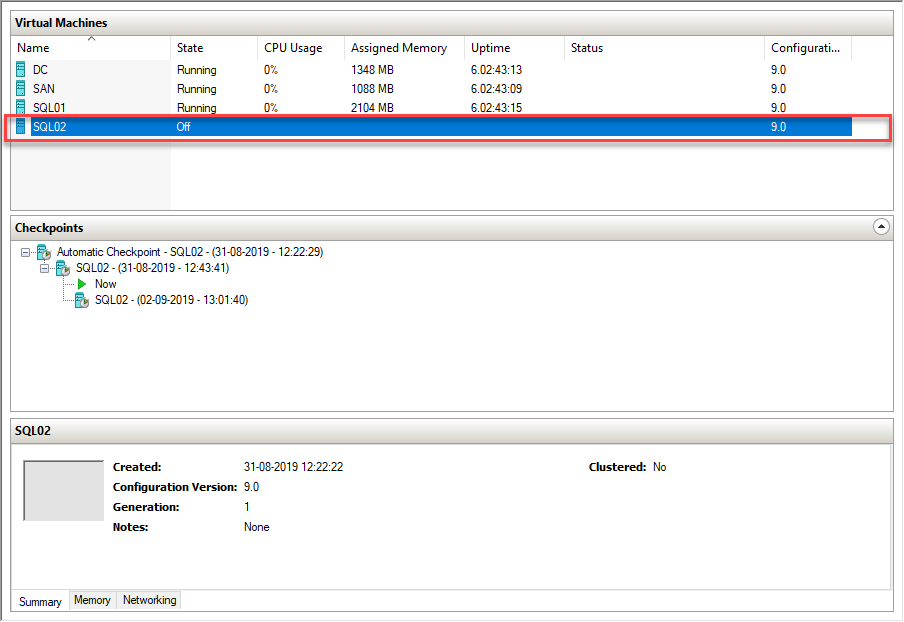
Let’s now validate the failover cluster by invoking an automatic failover. Previously, we have manually moved failover to the SQL02 Node. To invoke an automatic failover, lets shut SQL02 down. Once the shutdown completes, SQL Server cluster resources will be moved to the SQL01 Node. See the following image of the Hyper-V manager:
The following image is failover cluster manager in SQL01 node:

You can perform automatic failover by doing the following things:
- Disable network adaptor on any node
- Shut failover cluster services down
- Shut SQL Server service down
Summary
In this article, I have explained the step-by-step process of adding a node to an existing SQL Server failover clustered instance. In the next article, I will explain the step-by-step process of adding a new clustered disk and moving user databases to it. Stay tuned!
Tags: failover cluster instance, sql server Last modified: September 20, 2021


