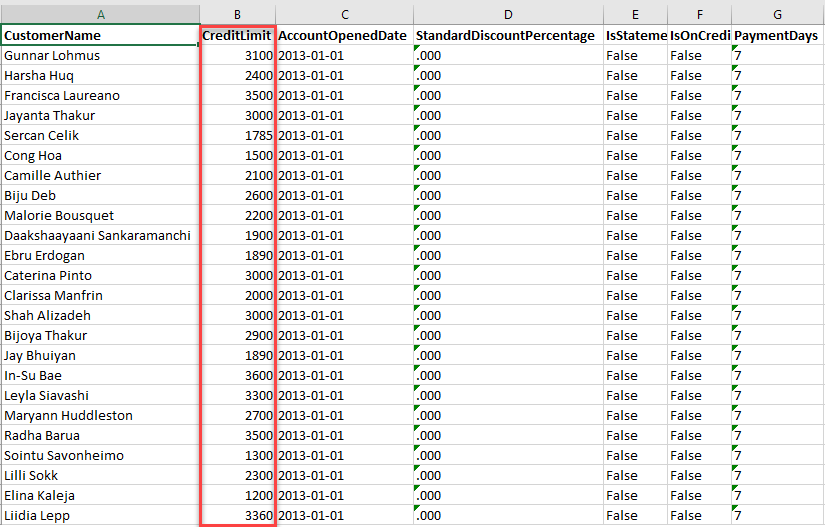
When we export data from SQL server table to Excel file by using SQL Server integration service package, data in Excel file column exports into text format. Even though the column values are Integer or Decimal, it is stored in text format. For example, I am retrieving the values of “CreditLimit” column from the product table. Data format changes automatically and stores in text format in Excel file.
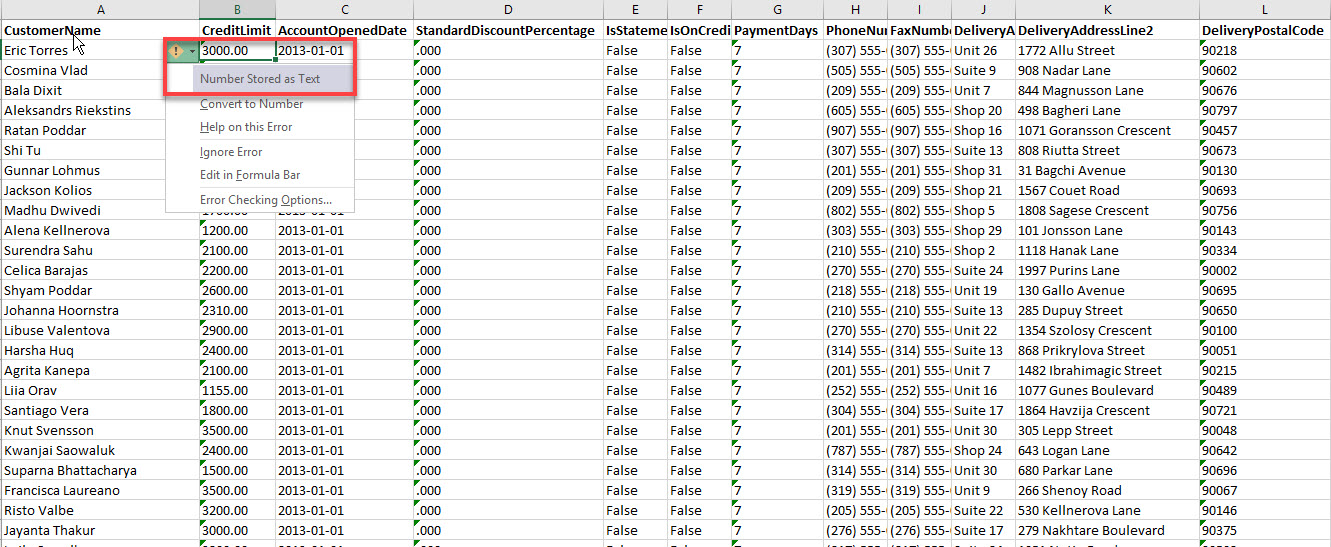
See below image:
As you can see in the above image, the data type of “CreditLimit” column in the SQL table is decimal. But after, when the data exports to Excel file, the format of column values changes to the text.
We can create macro code (VBA code) within the Excel file to convert column format from text to number. The problem appears when integration service package inserts data from SQL table to Excel file and the macro does not run automatically. We have run it manually.
We can execute the macro by using the C# Code hence for running the macro by using SSIS package we have to use “Execute Script Task”. It can be implemented by C#.Net code.
Execute Script Task
SSIS Script task is the powerful and useful component of SQL server integration services. While using the Script task, we can execute C#.Net OR VB.Net code to perform the tasks that are not in-built in SSIS. To run the script task, we have to install “Visual studio tools for application” on the computer because script task uses the VSTA engine to run the code within the script task.
While using the Script task, we can perform many tasks that are not in-built in SSIS. For example, if we want to retrieve the list of active directory user, then we can write a code that accesses the active directory and retrieves the list of users.
In this article, I am going to demonstrate how to run the macro for changing the column format of Excel file by using the SSIS script task component. Dive deeper into SSIS components and tools.
In this demo, I will
1. Create an Excel file and macro code to convert column format from text to number.
2. Create SSIS package and configure data flow task to populate data from SQL server and save it in Excel file.
3. Configure Script task to execute the macro code.
4. Test the SSIS package.
Demo:
For this demo, I am using:
1. Database Server: SQL Server 2016.
2. Database: WideWorldImportors
3. Software: Microsoft Office 2016 and SQL Server Data tools.
4. Programming Language: C#.Net.
Create Excel file and macro
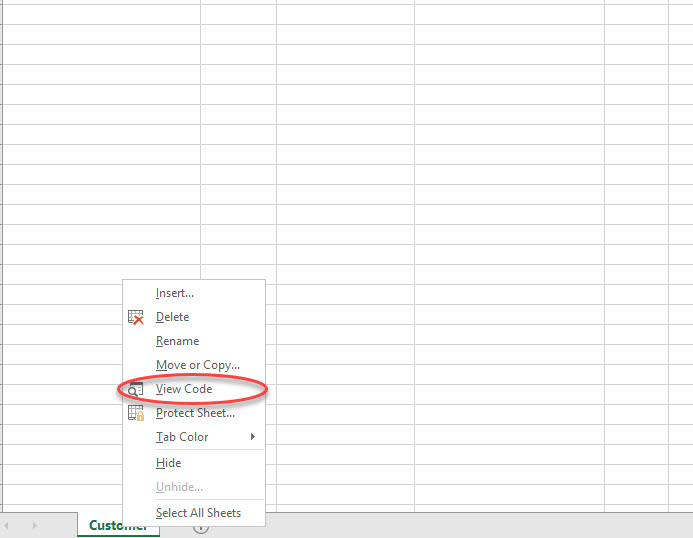
Firstly, open Microsoft Excel 2016. Rename the first tab as “Customer.” Right click on “Customer” tab and select view-code (Shortcut key is Alt+F11).
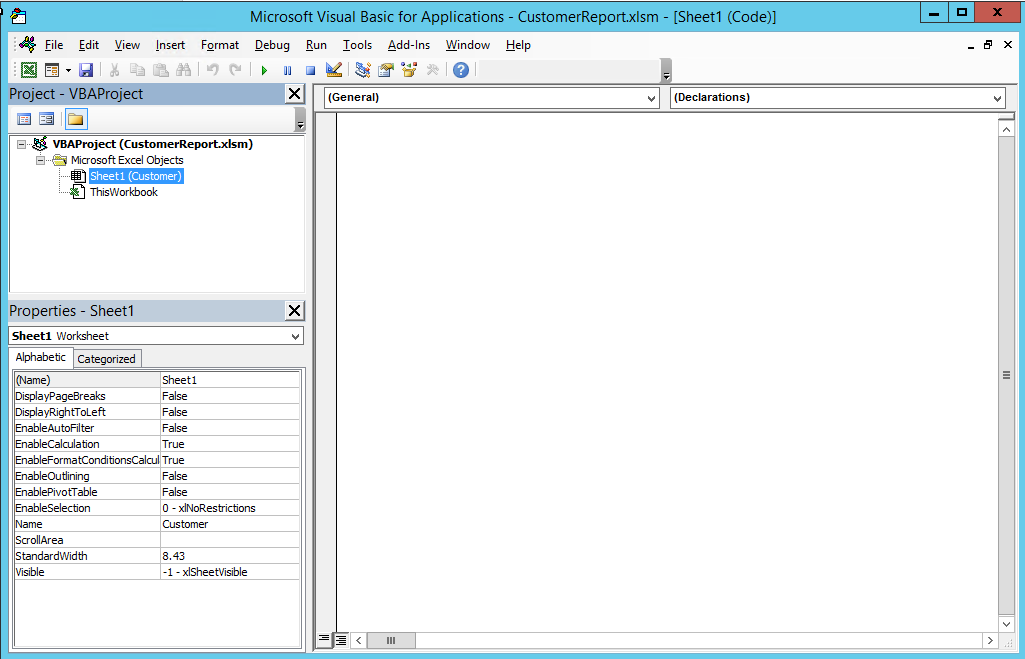
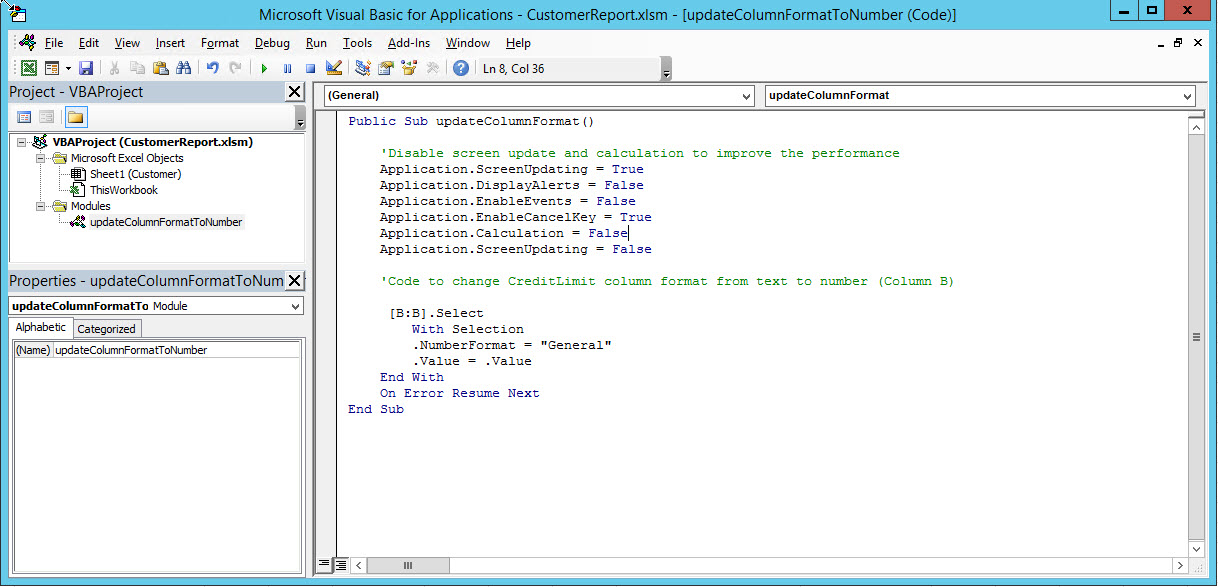
Visual basic editor for application opens as shown in below image:
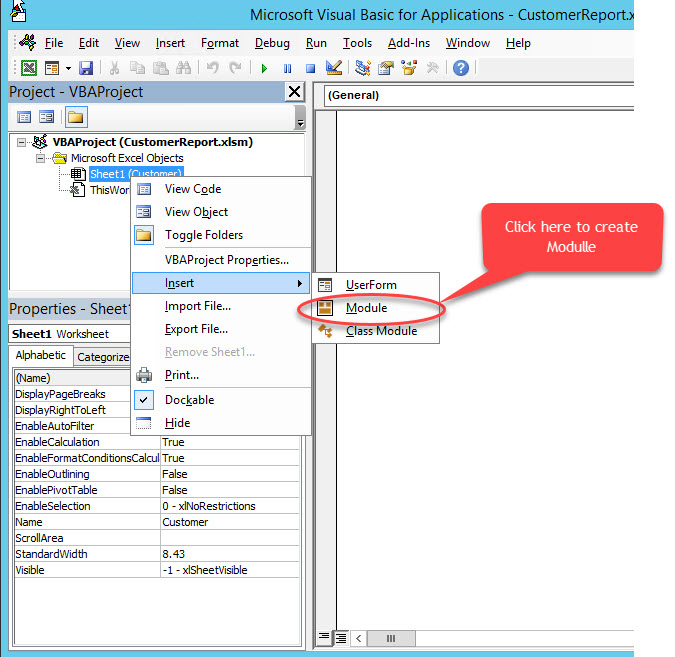
Secondly, create a module (Function). To do that, right-click solution (My Project1) and select “Module” as shown in below image:
Now we have to write code to change the format of “CreditLimit” column from text to number. Write below code in that module:
Public Sub updateColumnFormat()

'Disable screen update and calculation to improve the performance of import
Application.ScreenUpdating = False
Application.ScreenUpdating = True
Application.DisplayAlerts = False
Application.EnableEvents = False
Application.EnableCancelKey = True
Application.Calculation = False
Application.ScreenUpdating = False


[B:B].Select 'Update data type from text to number of CreditLimit (Column B)
With Selection
.NumberFormat = "General"
.Value = .Value
End With
On Error Resume Next
End Sub
The above code will:
1. Disable screen update when macro code updates the column format that improves performance significantly.
2. Select Column B and change the column format from text to Number.
See below a screenshot of Module:
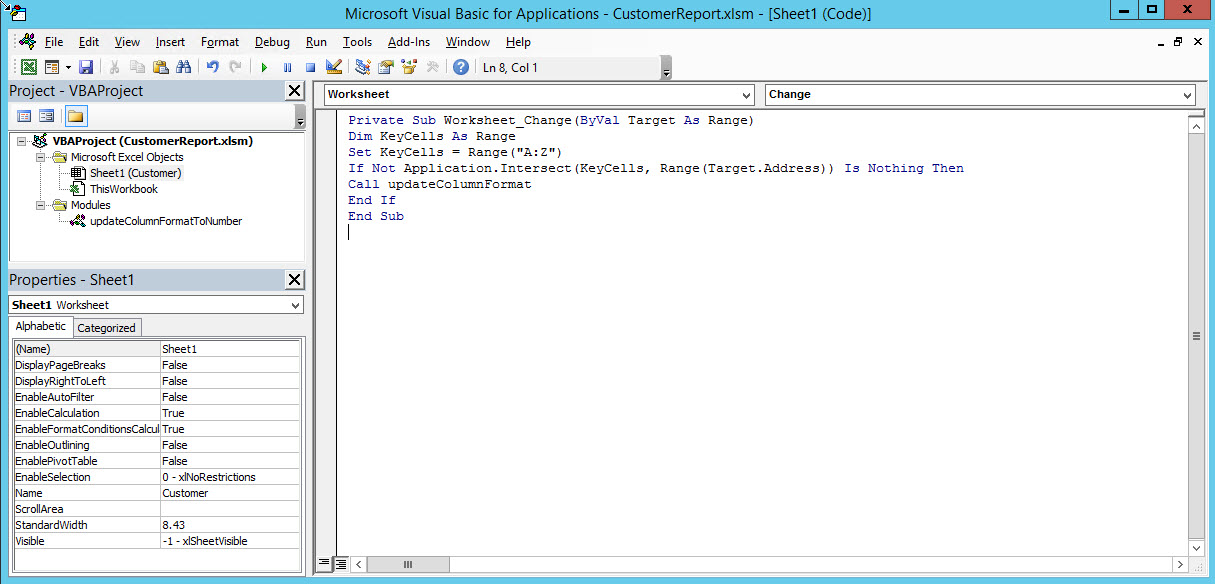
Write below code for calling the Module from “main”. When the cell value of “CreditLimit” column changes, it executes the code written in the module and change the format of the column from text to number.
Dim KeyCells As Range 'Declare variable

Set KeyCells = Range("A:Z") 'Declare range

Call updateDataType 'Call Module (Function) to convert a data type from text to number in excel column
The code of Excel object will look like as below image:
Save the file as “CustomerReport.xlsm” (Excel Macro-enabled file) and close it.
Configure the Data Flow task to export data
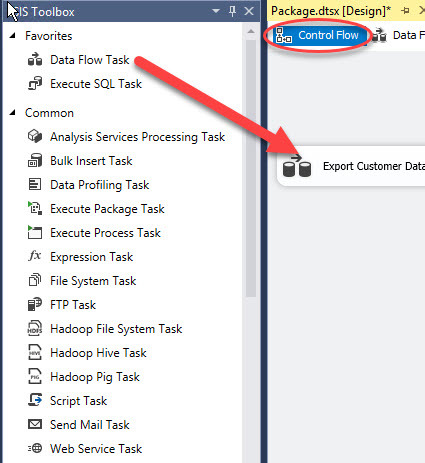
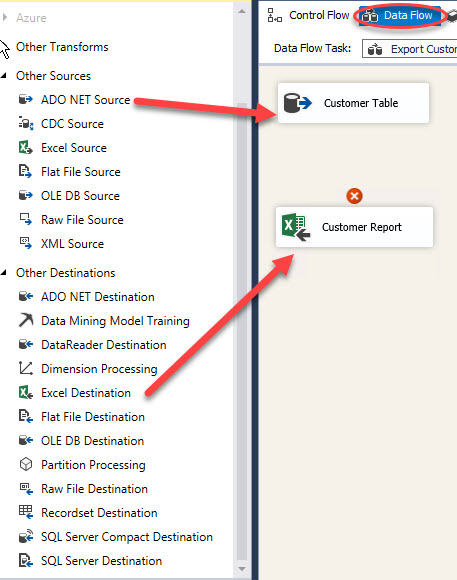
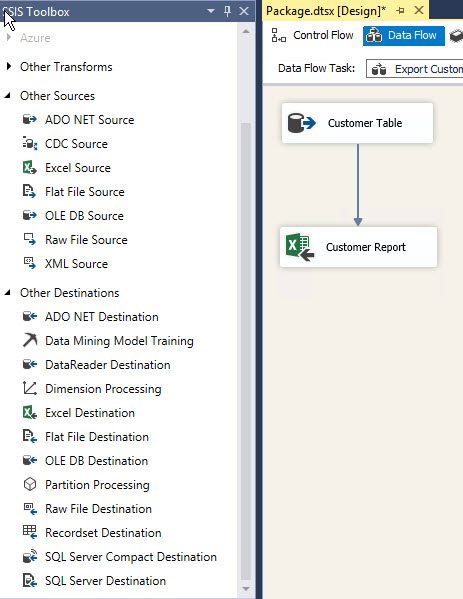
Now create an Integration services project and SSIS package. To do that, drag and drop Data Flow task from SSIS toolbox to control flow window and rename it to “Export Customer Data” (Fig.1). Double click on Data Flow task to open data flow window. Drag and Drop ADO.Net Source, rename it as “Customer Table” and Excel destination, rename from SSIS toolbox as shown in the following image (Fig 2.):
Fig. 1: Data flow task
Fig. 2: ADO.net Source and Excel destination
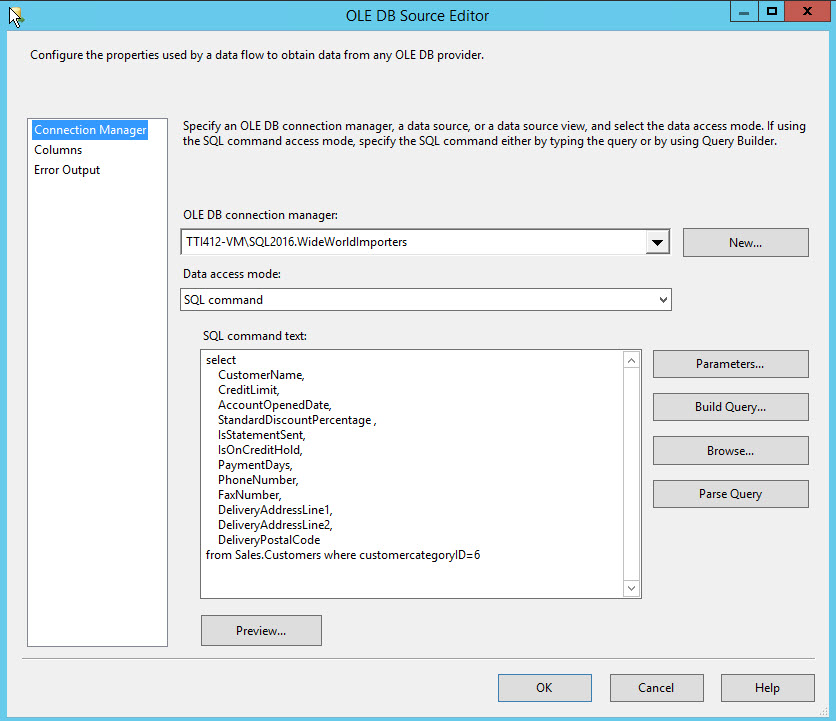
As mentioned above, Data should be retrieved using SQL Query. To retrieve data from the database, configure the ADO.Net connection. This article explains how to configure the ADO.Net connection. Once the ADO.Net connection is configured, select “SQL Command” option from Data access mode drop-down box in ADO.Net source editor. A multi-line text box opens. Write the below query in it.
select
CustomerName,
CreditLimit,
AccountOpenedDate,
StandardDiscountPercentage,
IsStatementSent,
IsOnCreditHold,
PaymentDays,
PhoneNumber,
FaxNumber,
DeliveryAddressLine1,
DeliveryAddressLine2,
DeliveryPostalCode
from Sales.Customers where customercategoryID=6
Once the configuration completes, the ADO.Net connection should be like below image:
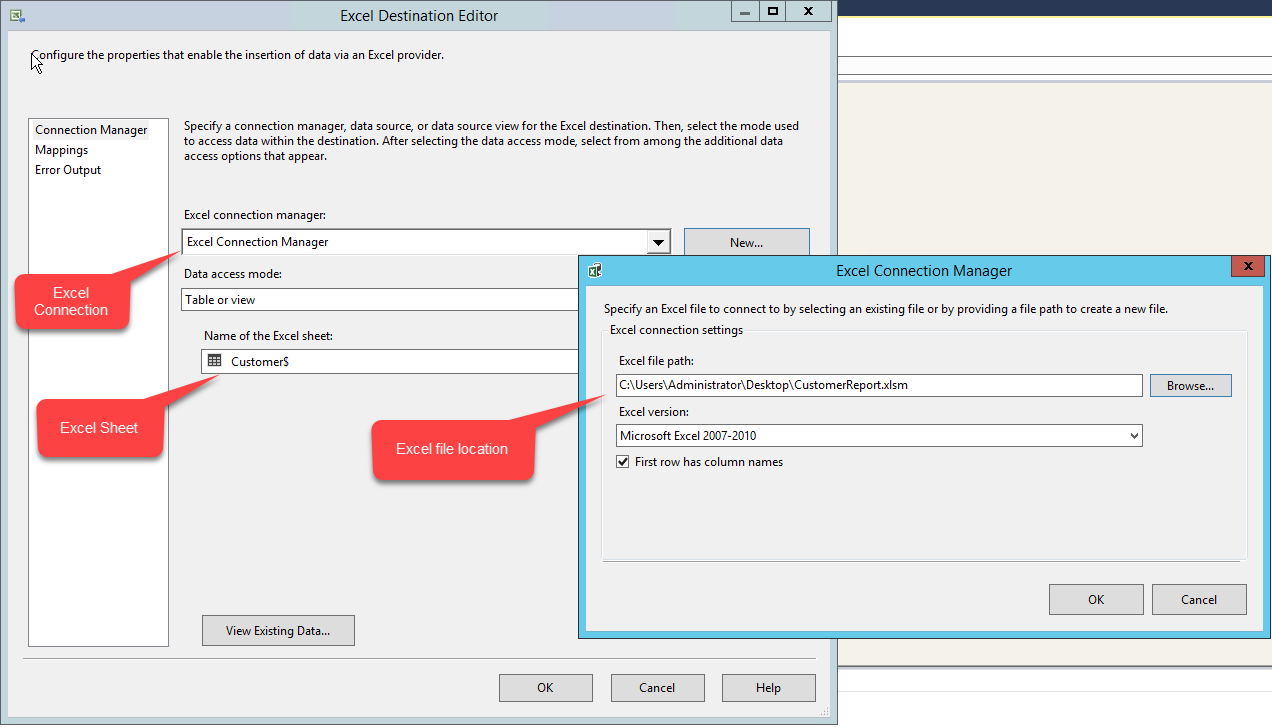
Now configure the Excel destination. This article explains how to configure the Excel connection manager. Select “Table or View” in data access method. Select “Customer$” in “Name of the Excel sheet” drop-down box. See the following image:
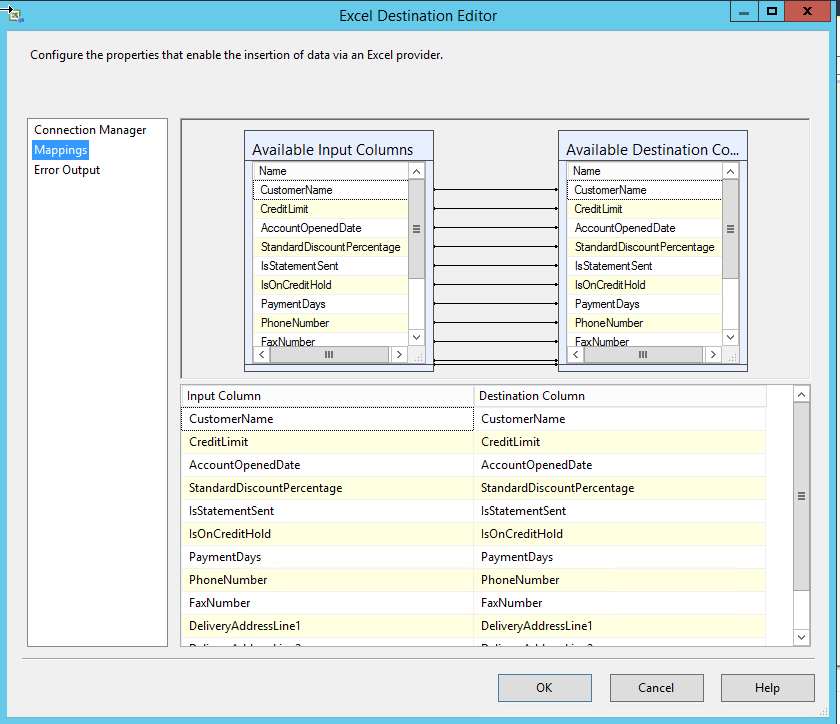
Column name of Excel file and result set that is generated by SQL Query is the same hence columns map automatically as shown in the following image:
Once the configuration completes, the data flow task will look like the following image:
Configure Script Task
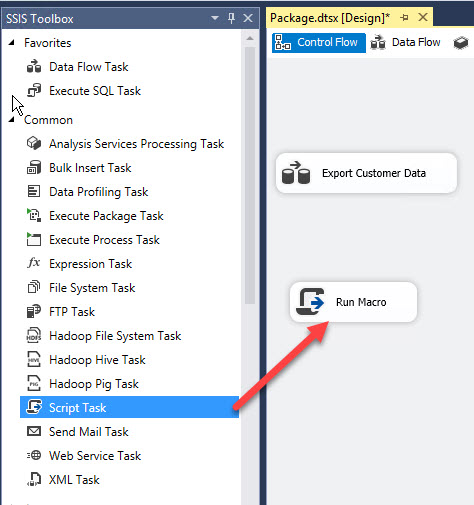
Click on control flow task and drag and drop “Script task” from SSIS toolbox. Rename it as “Run Macro” as shown in below image:
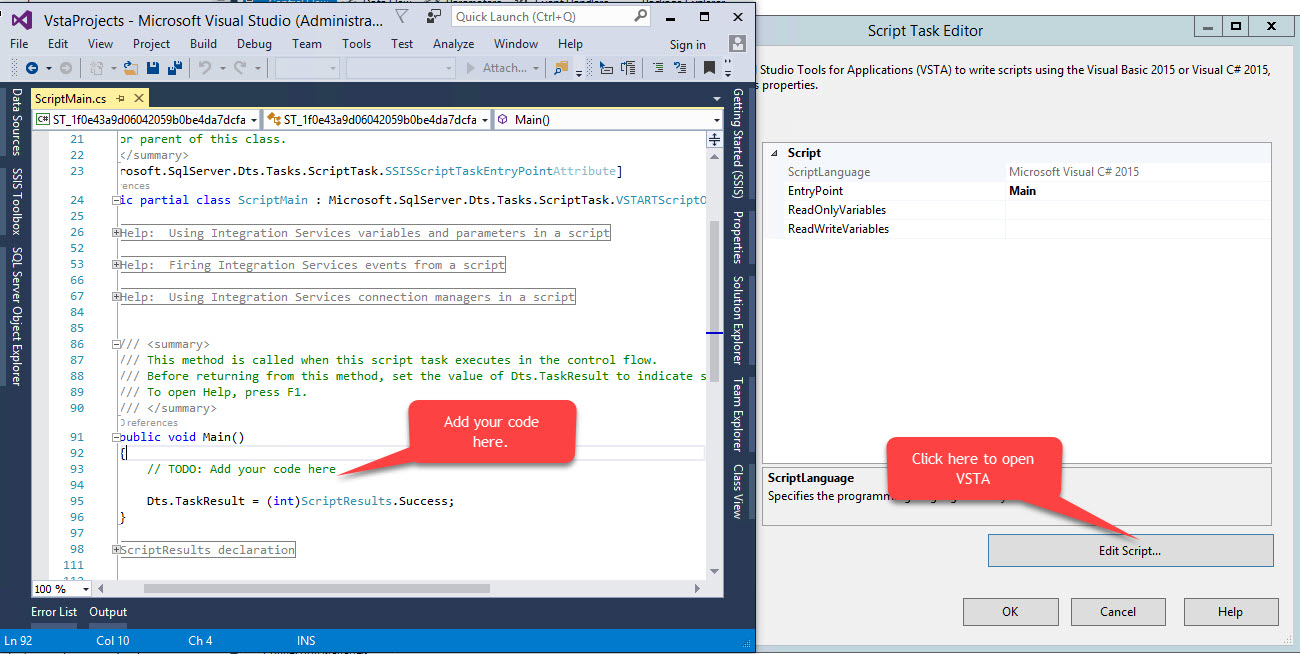
As I mentioned above, “Execute Script task” uses Visual Studio tools for Application (VSTA) engine. Double click on “Script Task” to “VSTA project”. A dialog box “Script Task editor” will open. On the dialog box, click on “Edit Script” button. It will open “Microsoft visual studio tools for application code editor” window as shown in below image:
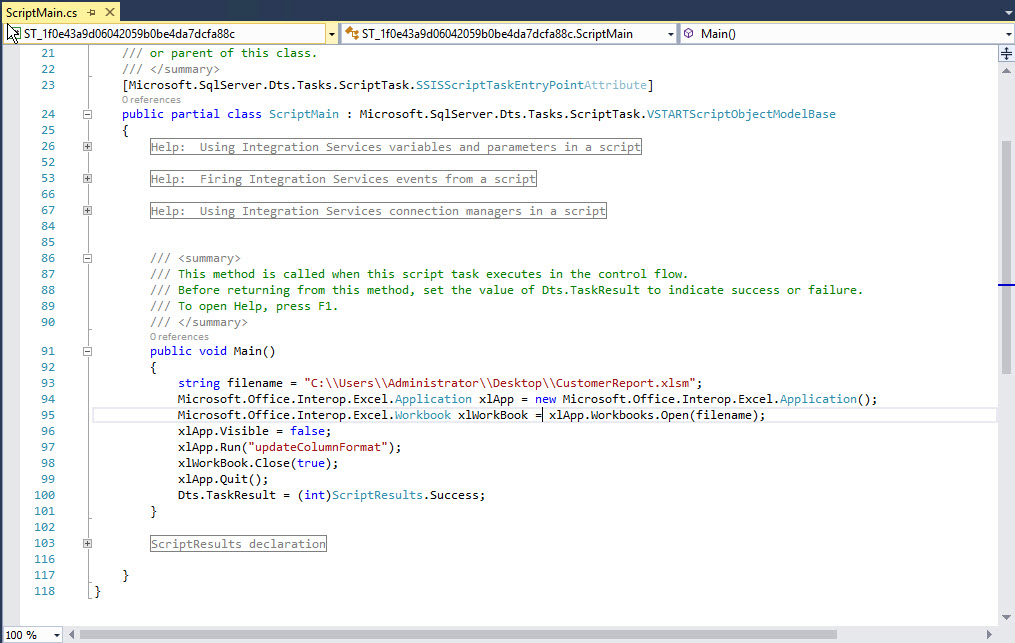
Now add the below code in “Main” function:
string filename = "C:\\Users\\Administrator\\Desktop\\CustomerReport.xlsm";
Microsoft.Office.Interop.Excel.Application xlApp = new Microsoft.Office.Interop.Excel.Application();
Microsoft.Office.Interop.Excel.Workbook xlWorkBook = xlApp.Workbooks.Open(filename);
xlApp.Visible = false;
xlApp.Run("updateColumnFormat");
xlWorkBook.Close(true);
xlApp.Quit();
Dts.TaskResult = (int)ScriptResults.Success;
Above Code:
1. Creates an object of Microsoft Excel application. To create Excel object, add reference of Microsoft office interop. Download it from here.
2. Opens “CustomerReport.xlsm” workbook.
3. Run the macro within the Excel file.
4. Closes workbook.
5. Quit Excel application by destroying the object.
Save the code and close the visual studio code editor.
Code window looks like following image:
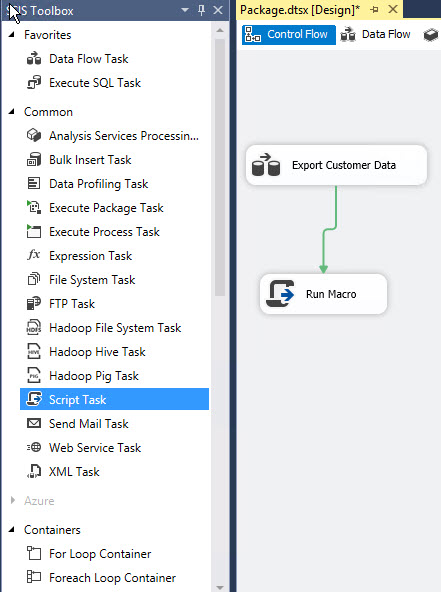
To execute script task after execution of data flow task, drag green arrow beneath data flow task and drop it on execute script task as shown in below image.
Press F5 to execute the package. Once package ran successfully, open the Excel file to make sure that column data types were updated correctly. See the following image:
As you can see in the above image, the column values are in “number” format instead of “text” format.
Wrapping Up
Script task is one of the best components of SQL Server Integration services. It is very efficient, helps to create a custom package and performs the task which is not inbuilt in SQL Server integration services. In this article, I have demonstrated how to execute the macro to change the format of a column of Excel file using SSIS Script task.
Useful tools:
Devart SSIS Data Flow Components – allow you to integrate database and cloud data via SQL Server Integration Services.
Tags: excel, ssis Last modified: October 08, 2024