
The current article focuses on applying the mysqldump utility to backup and restore MySQL databases. This utility is the most common tool for generating backups in several formats or restoring MySQL databases.
Note: On CodingSight you can also read about other MariaDB and MySQL backup strategies.
For demonstration purposes, I created a demo database named EltechDB. It has a table named tblemployee with dummy records.
mysqldump Syntax Example
First, let us see a simple example of the mysqldump. The syntax of the command is the following:
mysqldump -u [username] –p [password] [configoptions] [database name] [table name] > [backupfilename.sql]In the syntax,
- -u [username] is a username to connect to the MySQL server.
- -p [password] is the user’s password.
- [configoption] is the configuration option for customizing the backups.
- [database name] is the name of the database you want to backup
- [table name] is an optional parameter for the name of the table. You may specify the table name if you want to backup it specifically.
- “<” OR “>” – the character indicates the direction. The “>” character serves to generate the backup, and the “<” character is for restoring the backup.
- [backupfilename.sql] is the path and name of the backup file.
Now let us examine the application of the command by examples.
Backup and restore MySQL databases with mysqldump
Example 1: Full Database Backup
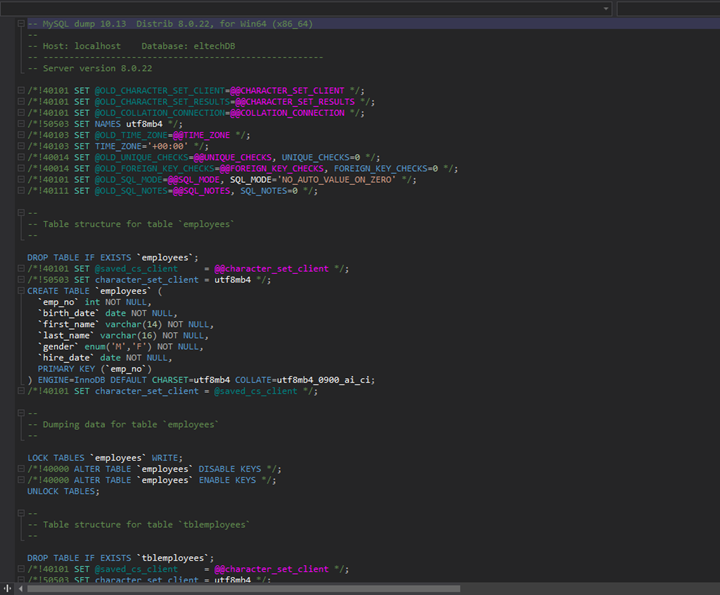
To generate the full backup of the eltechDB database, we run the following query in the command prompt:
mysqldump -u root -p eltechDB > C:\MySQLBackup\EltechDB\Full_EltechDB.sqlOutput

The command saves the backup file to C:\MySQLBackup\EltechDB
The mysqldump command generates MySQL queries to create objects and data:
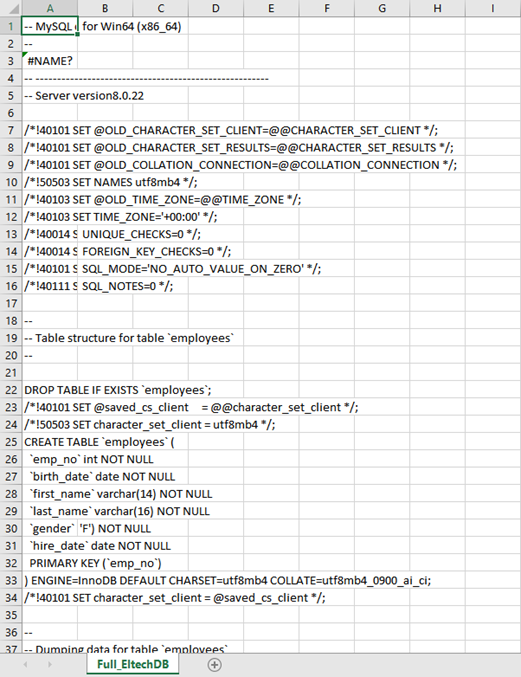
Example 2: Convert and Export Database to CSV File
To generate a full database backup as a Full_EltechDB CSV file, run the following query in the command prompt:
mysqldump -u root -p eltechDB > C:\MySQLBackup\EltechDB\Full_EltechDB.csvThe command saves the backup file to C:\MySQLBackup\EltechDB
Open the CSV file to view the content:
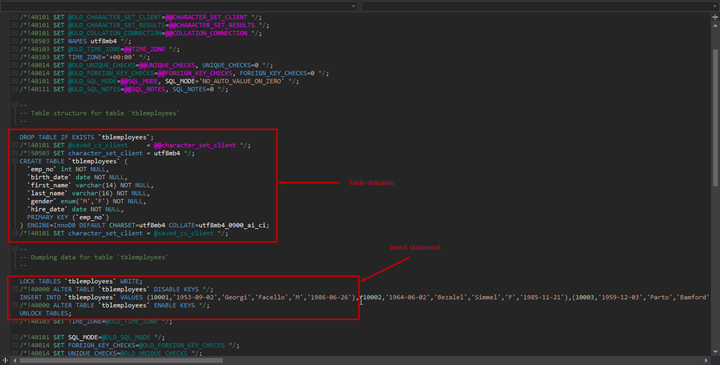
Example 3: Backup of One Single Table Only
Run the following query to generate the backup of the employees‘ table of the eltechDB database as the tblemployees.sql file.
mysqldump -u root -p eltechDB tblemployees > C:\MySQLBackup\EltechDB\tblemployees.sqlThe command saves the backup file to C:\MySQLBackup\EltechDB
Open the tblemployees.sql file to view the content:
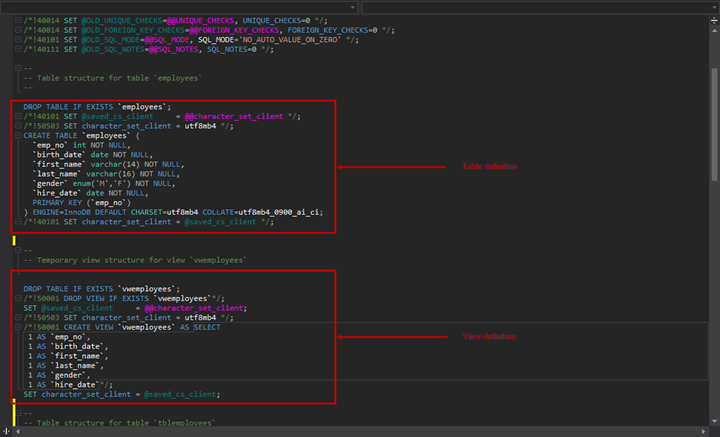
Example 4: Backup Database Schema Only with No Data
If you want to generate the backup of the database schema, you can specify –no-data option. Run the following query to generate the backup of the schema of eltechDBin the eltechDB_schema.sql file:
mysqldump -u root -p --no-data eltechDB > C:\MySQLBackup\EltechDB\eltechDB_schema.sqlThe command saves the backup file to C:\MySQLBackup\EltechDB. Open the eltechDB_schema.sql file:
Now let us examine how we restore the MySQL database.
How to Restore Database Backup
The mysqldump command does not generate the schema and data. Therefore, we must use the MySQL command to restore MySQL databases.
To demonstrate this, we drop and recreate the eltechDB database first:
mysql> drop database eltechDB;
Query OK, 3 rows affected (0.16 sec)
mysql> create database eltechDB;
Query OK, 1 row affected (0.01 sec)
To restore the eltechDB database using the full backup, run the following command in the command prompt:
mysql -u root -p eltechDB < C:\MySQLBackup\EltechDB\Full_EltechDB.sqlOnce the database is restored, let us view the tables and data. Connect to MySQL and run the below query to view the tables:
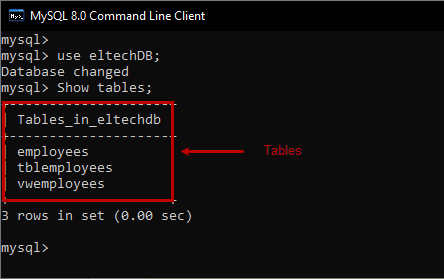
mysql> use eltechDB;
Database changed
mysql> Show tables;
Output:
Run the below query to view the data from the database:
mysql> Select * from tblemployees;Output:

Backup and Restore the Database Using dbForge Studio for MySQL
The Enterprise edition of dbForge Studio for MySQL is Devart’s flagship product for developing and managing MySQL databases. It increases productivity substantially due to the numerous automating options. Now, we are going to examine generating MySQL database backups with the help of this tool.
For test purposes, I downloaded and installed the free dbForge Studio for MySQL Enterprise Trial.
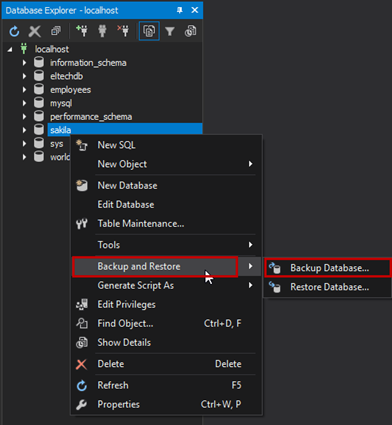
Open the tool and connect to the MySQL instance. Then right-click on the sakila database > Backup and Restore > Backup database.
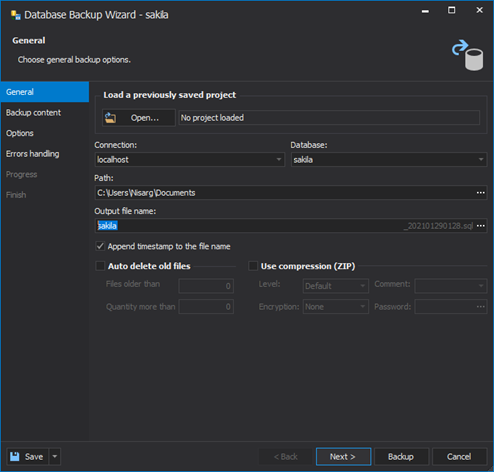
Database Backup Wizard opens. On the General screen, specify the following details:
- The hostname from the Connection drop-down menu.
- The database name from the Database drop-down menu.
- Enter the backup path into the Path textbox.
You can also specify the retention period for the database backup files and enable backup compression.
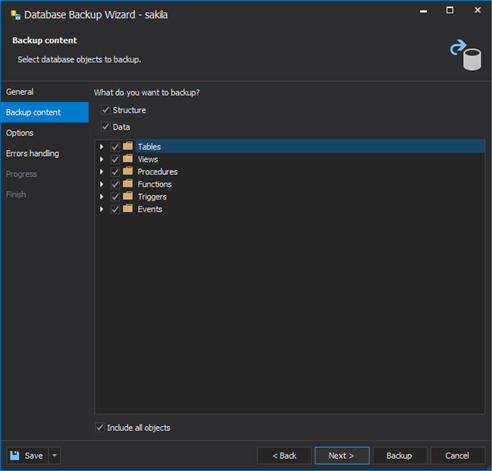
On the Backup content screen, select the objects you want to include into the backup from the list:
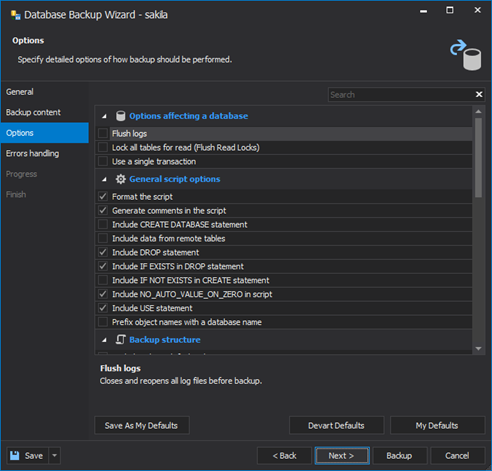
On the Options screen, configure the backup performance:
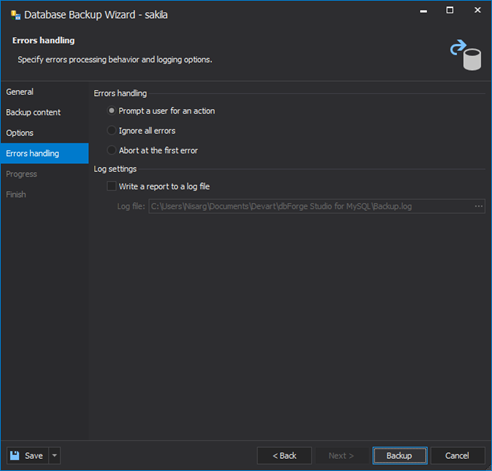
On the Errors handling screen, specify the necessary mechanism. After that, click the Backup button to launch the task of backup generating:
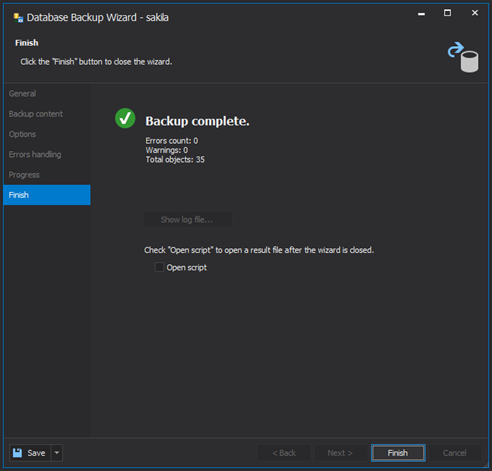
Once the backup is complete, you see the following:
Restore the Backup Using dbForge Studio for MySQL Enterprise
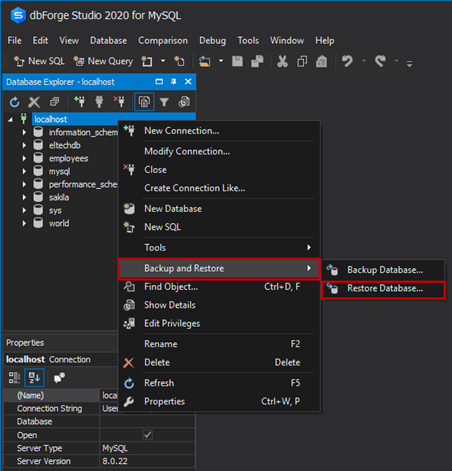
To restore the database, right-click on the connection (localhost) in the Database Explorer window > Backup and Restore > Restore Database:
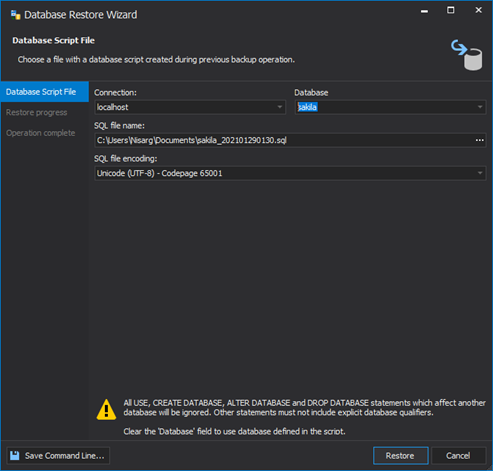
In the Database Restore Wizard window, specify the connection name, database name, SQL backup file, and SQL file encoding. Click Restore.
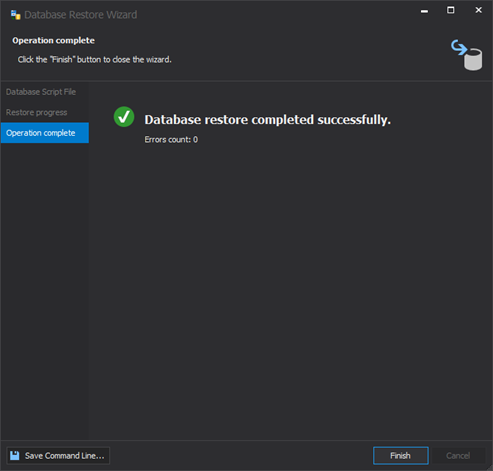
The database has been restored without any errors:
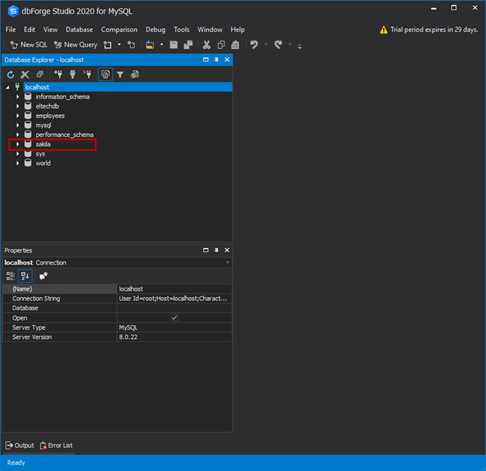
Now you can view it in the Database Explorer window of the tool:
mysqldump vs dbForge Studio for MySQL Enterprise
What is better, the Studio for MySQL or the mysqldump command? The Studio is more productive, and it has other advantages too. Have a look at the below comparison table:
| mysqldump command | dbForge Studio for MySQL Enterprise |
| A command-line tool requiring additional skills to manage backups. | A GUI tool making the backup generation straightforward. |
| Naming conventions require additional skills in Windows and Linux scripting. | Does not require additional skills in Windows and Linux scripting. |
| To automate backups and manage the backup file retention periods, we must write a separate script. | The GUI tool can generate the script applicable for automating backups and backup files’ retention periods. |
| To configure the backup properly, we must refer to the options from additional sources. | The Backup Wizard provides detailed information for configuring backups. |
| Does not support backup compression, and we cannot configure error handling options. | Supports backup compression and allows the users to configure error handling options. |
Summary
This way, we’ve explained the backing up and restoring MySQL databases via both the mysqldump command and dbForge Studio for MySQL Enterprise. We’ve explored the principles and examined the use of the advanced Studio for performing the tasks. Also, we’ve compared the productivity of both variants and their easiness of use.
Hope that you’ll find this article helpful when you configure backing up and restoring databases on MySQL.


