
This article describes the step-by-step deployment process of the Azure Database for MySQL Server.
Open the Azure portal and log in using the appropriate credentials. Note: For demonstration purposes, I got a pay-as-you-go subscription to Microsoft Azure. For more information about the Azure MySQL pricing model and various Azure subscriptions, refer to Subscriptions, licenses, accounts, and tenants for Microsoft’s cloud offerings.
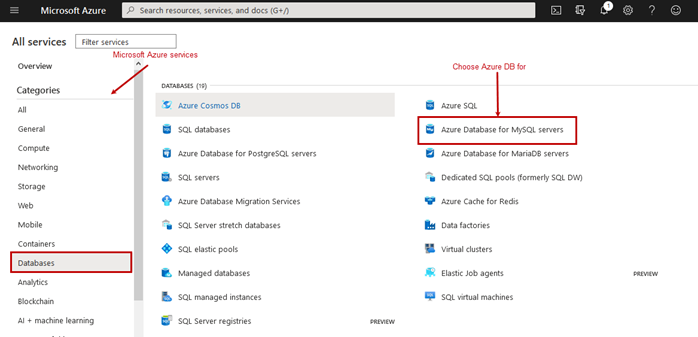
Click All services to view the various services offered by Microsoft.
Click on Databases and select Azure Database for MySQL servers.
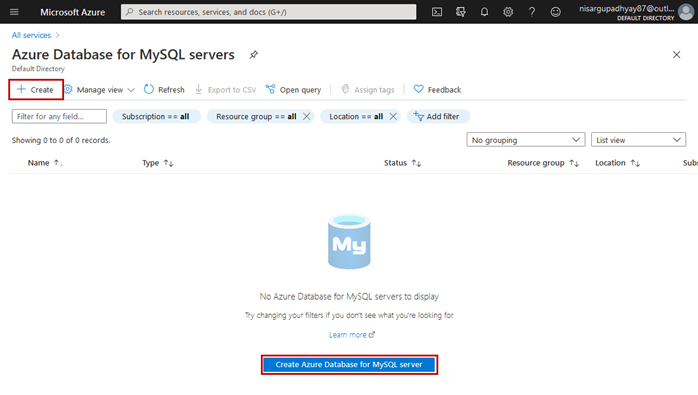
On the Azure Database for MySQL Server screen, click Create...
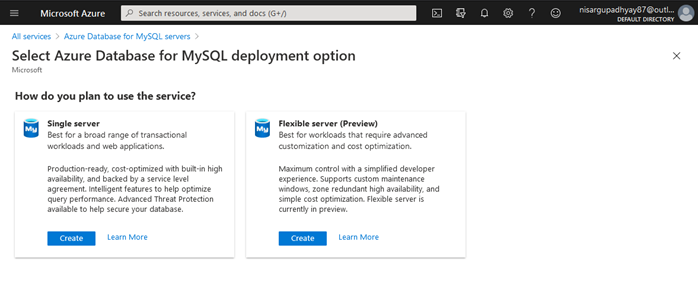
On the next screen, choose the deployment option. We can configure the MySQL server with two deployment options.
- Single Server.
- Flexible Server.
Click on Single Server.
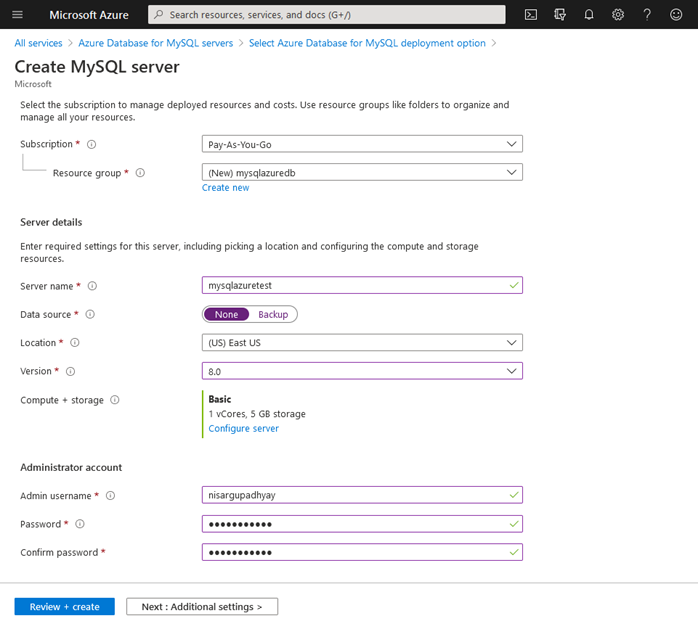
On the Create MySQL server screen, we can specify the details used to create a new MySQL server and configure the following items:
Project details
- Subscription: Choose the appropriate Azure subscription. We have opted for Pay-As-You-Go – you can choose it too.
- Resource group. This category covers the resources related to MySQL Azure databases. Choose the desired Resource Group where you want to create a MySQL server. In our case, we haven’t created any resource groups, therefore, we need to do it. Click on Create New, specify the desired name, and click OK.

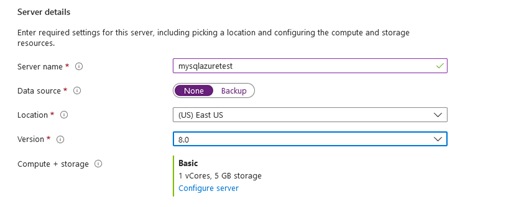
Server Details section
- Server Name: Specify the desired unique name of MySQL Server. That name will get an appendix – the mysql.database.azure.com string automatically. E.g., testservername.mysql.database.azure.com.
- Data Source: You can choose to create a blank database or restore the database or server from a geo-redundant backup. In our case, we will create a blank database.
- Location: Choose the nearest region where a MySQL server can be created.
- Version: Choose the MySQL server version. We can configure MySQL 5.6, MySQL 5.7, and MySQL 8.0.
- Compute + Storage: You can specify total virtual cores and storage for the MySQL server. The cost of the server is determined according to the specified resources. We apply basic settings – one virtual core and 5 GB storage.
Administrative account
- Admin username: Specify the username that has administrative privileges on MySQL Server.
- Password: Specify the desired password for the Admin account.
Have a look at the screenshot below. It displays the configured parameters for the MySQL Server:
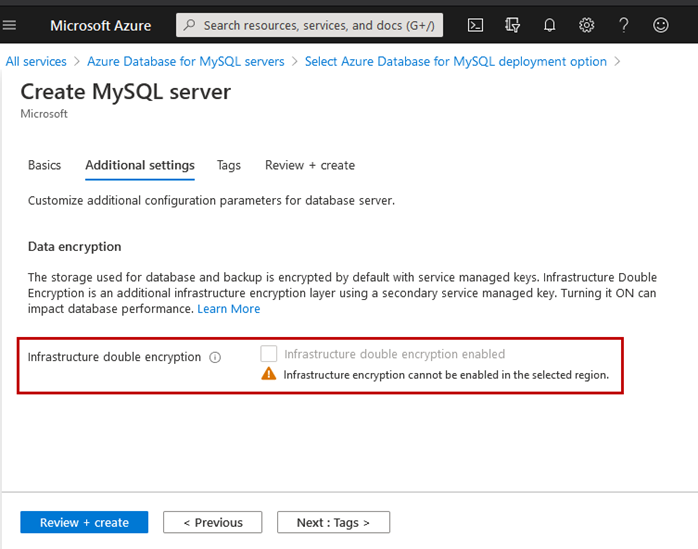
The next step is to enable and configure Data encryption for backup and database using managed keys. It is possible to enable the infrastructure double encryption using a secondary service managed key. In our case, the server location region does not support infrastructure, and the option is disabled.
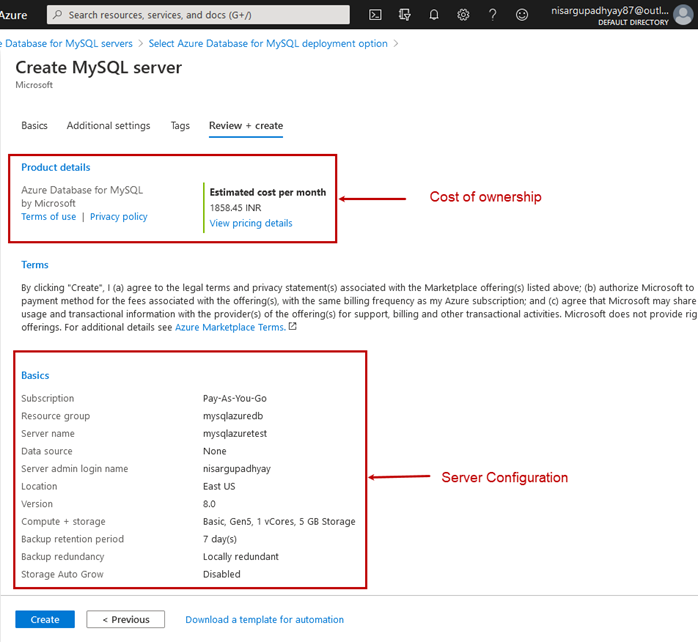
Now we specify the tags to identify the server easily. Click Review + Create. The page will display the configuration details and the estimated cost of ownership of the MySQL Server. Review the configuration and click Create.
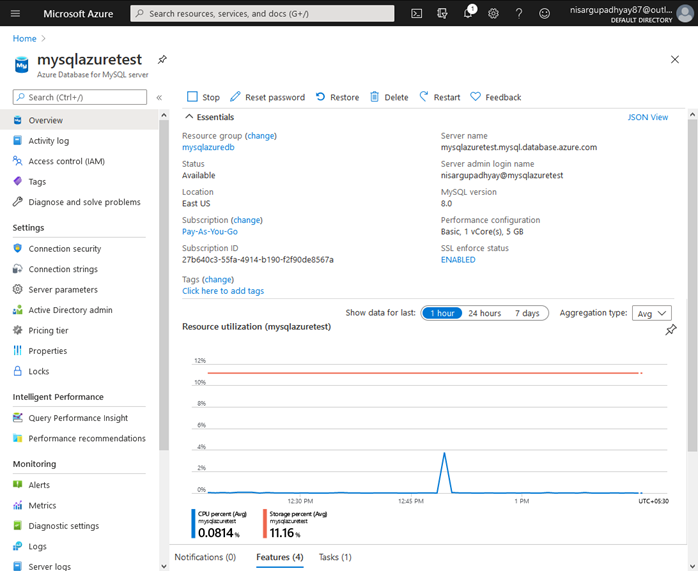
The deployment process begins. Once it is complete, you can see the MySQL Server details on the home page of the Azure portal:
Now, our goal is to connect the MySQL server using MySQL Workbench.
Connect Azure Database to MySQL Workbench
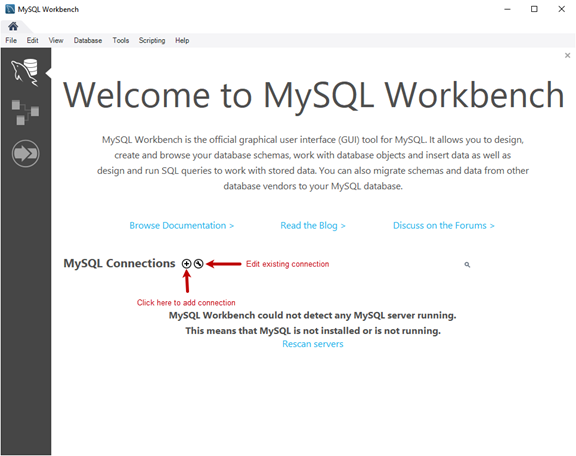
In my case, I have downloaded and installed MySQL Workbench using MySQL community installer. When it is ready for work, launch it.
On the welcome screen, you can view the previously created connections. We have not configured any, that’s why the list is empty.
To add the connection, click on the (+) sign:
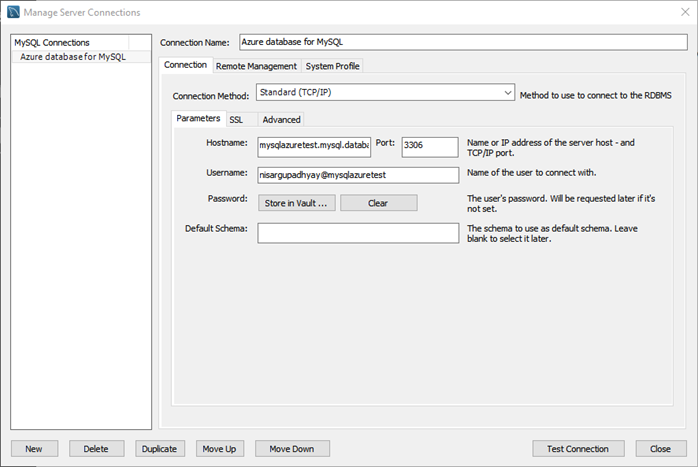
A configuring window opens. There, you set the parameters for connecting to the MySQL server. You must specify the following:
- Connection Name: Specify the appropriate name.
- Connection Method: Define the method to connect to the MySQL Server. You may select from the following options:
- Standard (TCP / IP)
- Locate socket / Pipe
- Standard TCP/IP over SSH.
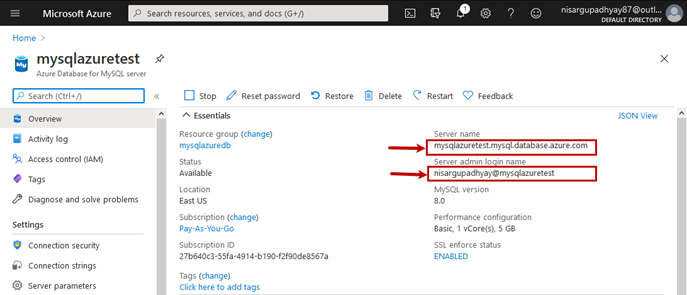
- Hostname: Specify the hostname or IP-address of the workstation with the MySQL Server installed. In our case, you need to so specify the name of the Azure MySQL server. The Server Name and Admin login name are present on the Azure MySQL resource page:
- Port Number: Specify the port number.
- Username: Specify the username for the server admin. This user will connect to the Azure MySQL Server.
Once all configuration parameters have been set, click Test Connection.
The following error occurs while connecting to MySQL Server on Azure:
Client with IP address xxx.xxx.xxx.xxx is not allowed to connect to this MySQL Server.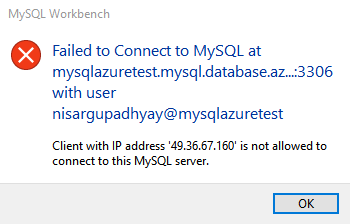
The error indicates that the Azure firewall blocks the computer IP Address. To rectify the issue, we must whitelist that IP-address.
Open Azure portal > MySQL server resource > Connection security. On the Firewall rules screen, set the value of Allow access to the Azure services to Yes. Click Add current client IP address.
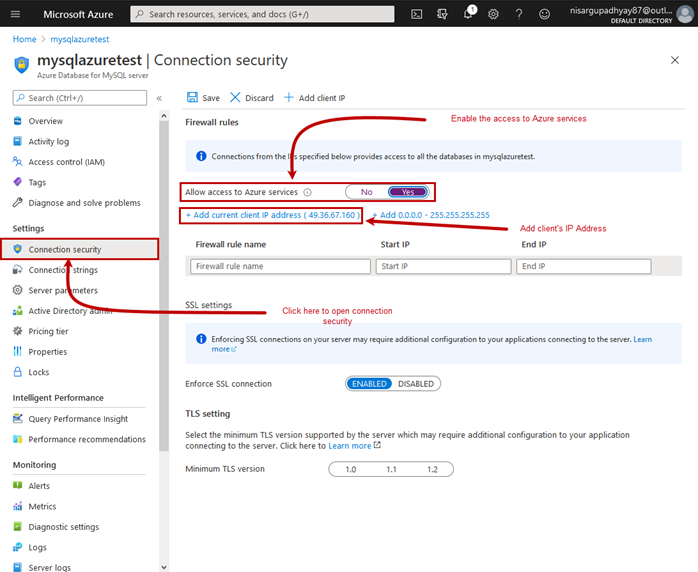
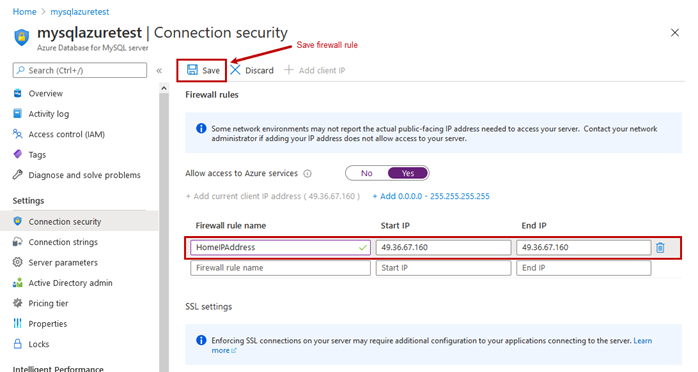
The IP Address will be added to the list of IP addresses allowed to connect to the MySQL Server. Click Save – it will create a firewall rule.
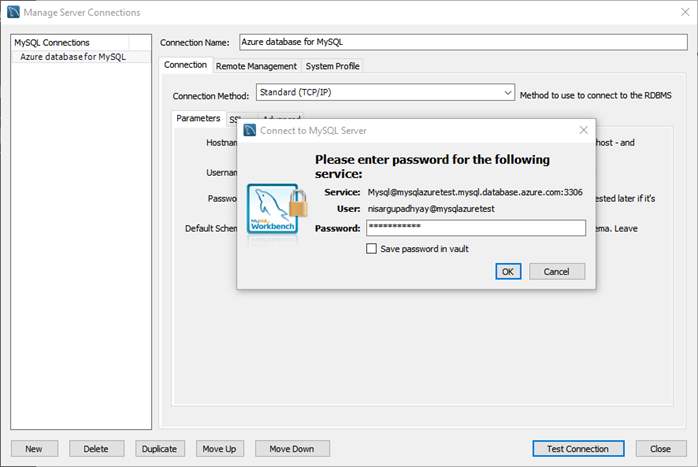
Now, let’s get back to MySQL Workbench, click Test connection. In a new window, specify the password to connect to MySQL Server and click OK.
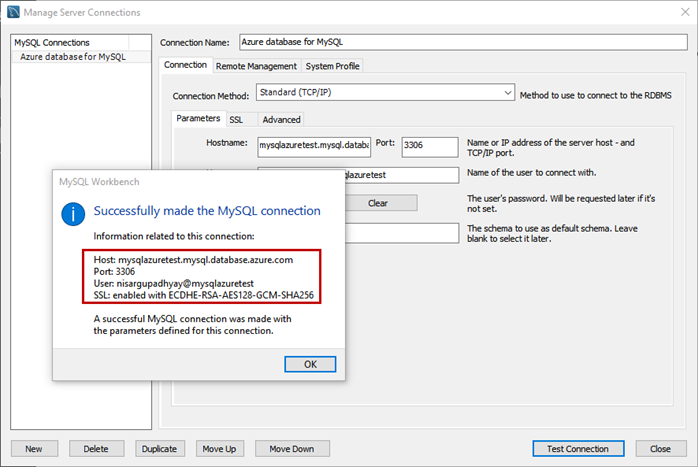
The connection has been established successfully:
The next action is creating the database and objects on the Azure MySQL server.
Create Database and Table in Azure with Workbench
To create a database, open MySQL Workbench and connect to Azure MySQL Server. Once connected, run the following query to create an eltechDB database:
Create database eltechDBWhen you have the database created, run the following query to create the tblemployee table:
use eltechDB;
create table tblEmployees
(
emp_no int,
birth_date date,
first_name varchar(50),
last_name varchar(50),
gender ENUM('M', 'F'),
hire_date date
);
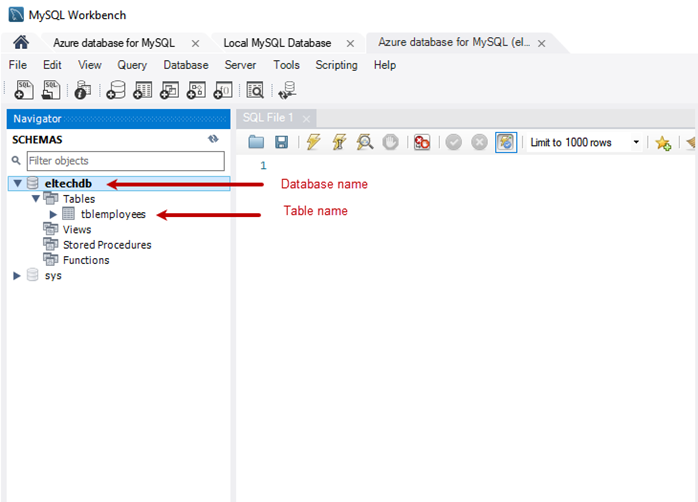
You can view the list of databases on the Schemas pane of the Navigator. You can view the table by expanding the eltechDB schema:
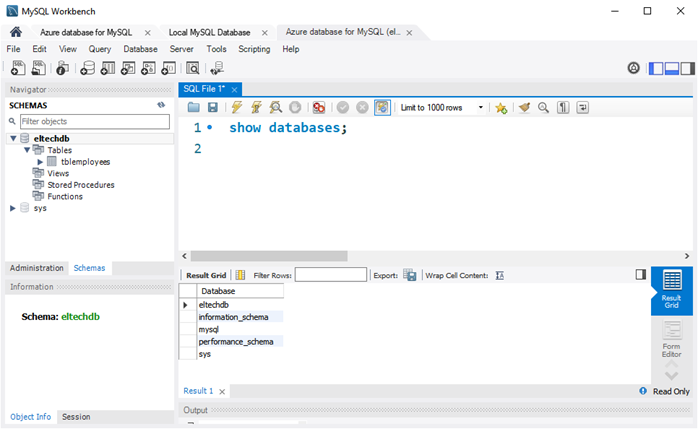
Alternatively, you can run the following query to view the databases:
Show databases;Query Output
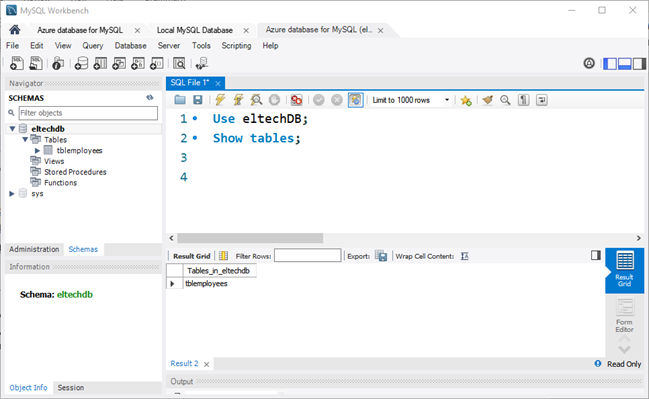
Run the following query to view the tables:
Use eltechDB;
Show tables;
Query Output
In this article, we used MySQL Workbench to illustrate the process. However, it is not the only tool suitable for this purpose. A worthy alternative is Devart’s dbForge Studio for MySQL – in many aspects, it is superior in functionality, especially when it relates to the performance efficiency and enhanced options.
Summary
The article explored the step-by-step deployment process of creating an Azure Database on MySQL Server. we connected the database using MySQL workbench and executed some queries to create a database and tables in the database. Hope that this article will be helpful for your work with Azure databases.