
When you build an ETL / ELT enterprise system, you need the Data Integration tools, such as Microsoft SQL Server Integration Service, Oracle Data Integrator (ODI), Talend, etc. These tools help you to integrate, transform, and load data from the source to the destination location.
The current article is the Oracle Data Integrator reference, which will explain loading multiple datafiles into an Autonomous Data Warehouse (ADW).
What is Oracle Data Integrator?
Oracle Data Integrator (ODI) is a cross-platform software solution developed for data transformation and data integration. Its primary goal is to simplify and speed up software development and maintenance. ODI is powerful and cost-effective, thus becoming the world leader in the ELT (Extract, Load, Transform) field.
Being one of the Oracle products, it integrates with other Oracle solutions seamlessly and works well with large data volumes. Numerous transformation options let the users configure and perform the necessary tasks precisely.
In particular, the scope of the ODI product includes the following:
- Reverse-engineering of applications and databases in an automated way
- Development and maintenance of the data integration, data flows, and data transformation processes
- Automated generation of the documentation
- Adjusting and customization of the generated code
In the software architecture, the central point is an open ODI Repository where this software stores all the configuration info, metadata, and execution logs. This master repository allows several separate environments to exchange metadata and scenarios. Also, it serves as a version control system with the repository location open for the participating developers.
Other notable components of the software architecture are:
- Designer Navigator that checks the data integrity and transforms the data
- Operator Navigator that serves for the management and monitoring tasks
- Topology Navigator that describes the physical and logical architecture of the systems
- Security Manager that deals with creating users, profiles, and managing rights
The strongest advantages of using the ODI product are the following:
- It checks the data quality, detecting the faults and recycling the data automatically. This way, it won’t let the faulty data get into the target tables. No programming is needed, the function is embedded.
- It improves execution performance due to the ELT approach. The retrieved data get to the target server and are transformed there. The productivity grows much higher.
- It offers a simpler and more efficient product architecture by eliminating an additional server for data transforming between the sources and the target server.
- It supports all RDBMSs and leading Data Warehousing platforms, such as Oracle, Exadata, Teradata, IBM DB2, Netezza, Sybase IQ, etc. Such technologies as flat files, ERPs, LDAP, and XML are also supported.
The Oracle Data Integrator 12c software version is current, and our reference will deal with it. It is not meant for earlier versions like Oracle Data Integrator 11g.
In our case study, the system receives the Sales data files from a database. The Oracle Data Integrator needs to pick up all data files to load into the Oracle Autonomous Data Warehouse.
What Do you Need for Oracle ODI Training?
- Download the Oracle Data Integrator version 12.2.1.4 or higher from the Oracle site.
- Install and configure the ODI tool using the official guideline.
- In case you want a prebuilt package that includes ODI and Oracle Database, you can download the Prebuilt Virtual Machine for Oracle Data Integrator 12c package. This is the Oracle VM Virtual Box file that you just need to download and import into the Oracle Virtual Box application. This way, you get a testing environment. Note: Use it for testing purposes and not in the production environment
- You need to have the ADW database instance provisioned (named ADWDEMO)
- Download the ADW Wallet zip file for setting connection between ODI and ADW instance
Create the ADW Connection in Oracle Data Integrator
Unzip the downloaded ADW Wallet file into the secured folder. Then, you should set up the User and Password to access ADW (avoid using ADMIN user).
Open the ODI Studio and connect to your Work Repository. Go to Topology > Physical Architecture > Right-Click on Oracle > New Data Server
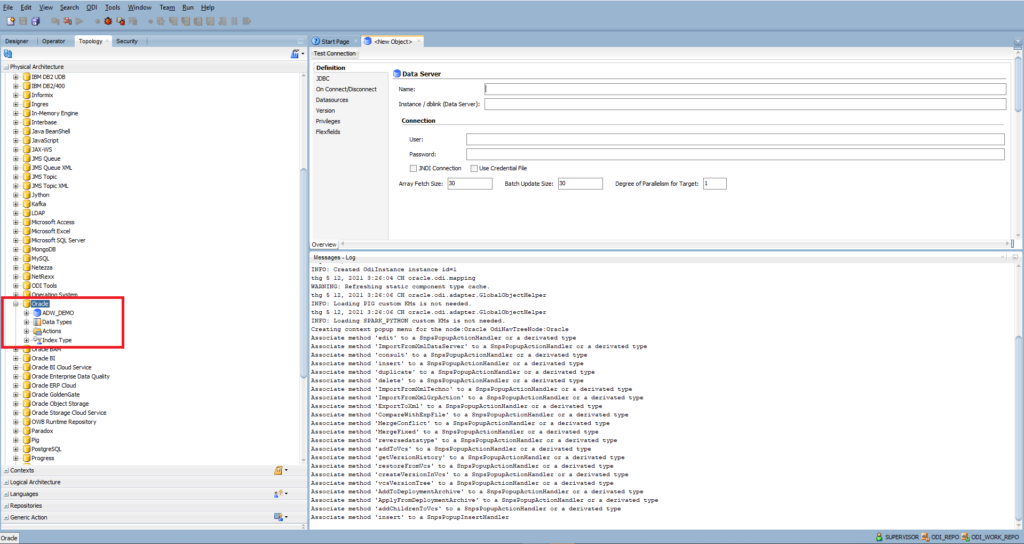
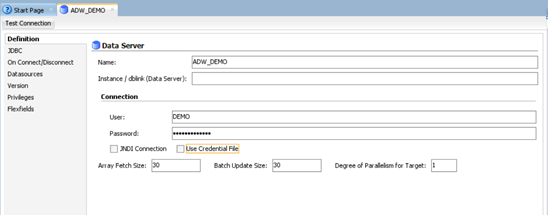
Enter Name: ADW_DEMO
Set up Connection:
- User: the database user created in ADW instance
- Password: enter the password of the database user
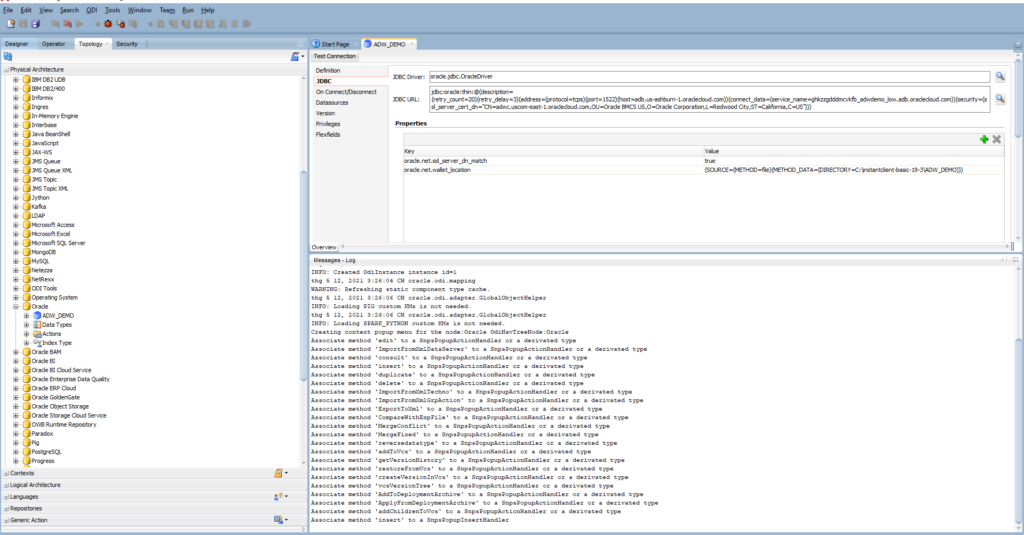
Go to the JDBC tab
- JDBC Driver: oracle.jdbc.OracleDriver
- JDBC URL: unzip the Wallet file and open the tnsnames.ora file – it defines the list of TNS services you can use to connect to the ADW instance.
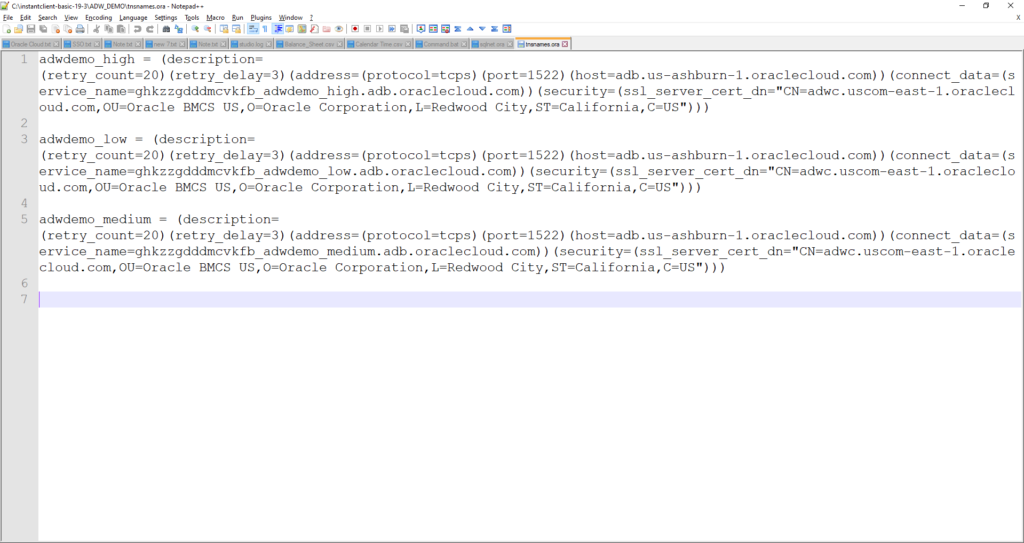
By default, we use the MEDIUM service for connecting to the ADW instance. Therefore, copy the connection string of MEDIUM:
(description= (retry_count=20)(retry_delay=3)(address=(protocol=tcps)(port=1522)(host=adb.us-ashburn-1.oraclecloud.com))(connect_data=(service_name=ghkzzgdddmcvkfb_adwdemo_low.adb.oraclecloud.com))(security=(ssl_server_cert_dn="CN=adwc.uscom-east-1.oraclecloud.com,OU=Oracle BMCS US,O=Oracle Corporation,L=Redwood City,ST=California,C=US")))Properties: you need to add 2 properties:
- oracle.net.wallet_location is the path of folder where you unzipped the Wallet file. For example:
(SOURCE=(METHOD=file)(METHOD_DATA=(DIRECTORY=C:\instantclient-basic-19-3\ADW_DEMO)))- oracle.net.ssl_server_dn_match – true
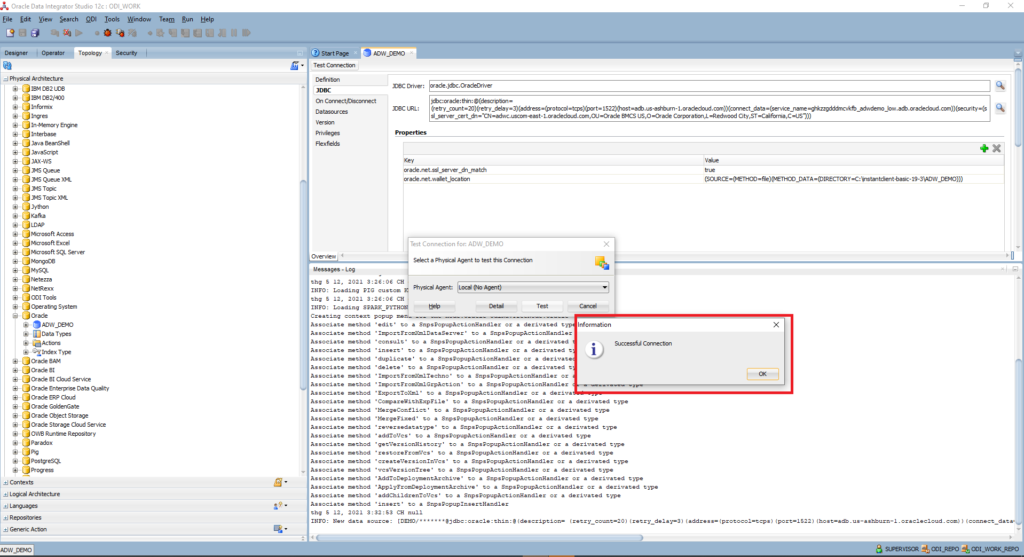
Click Test Connection to ensure the connection is successful:
Click Save > Right-Click on the ADW_DEMO data server created > New Physical Schema
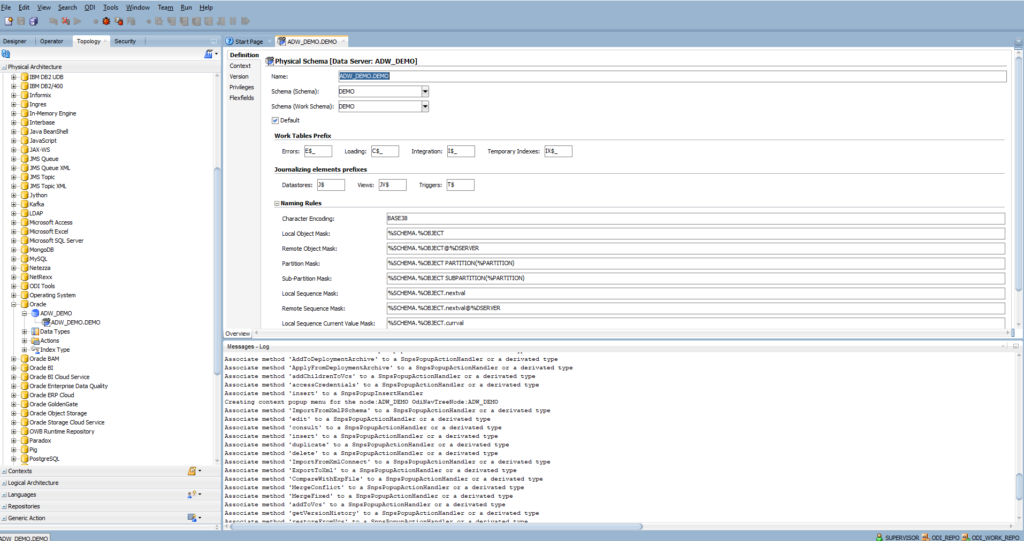
Enter Schema and Work Schema: DEMO
Schema is the database user for loading and transforming the data
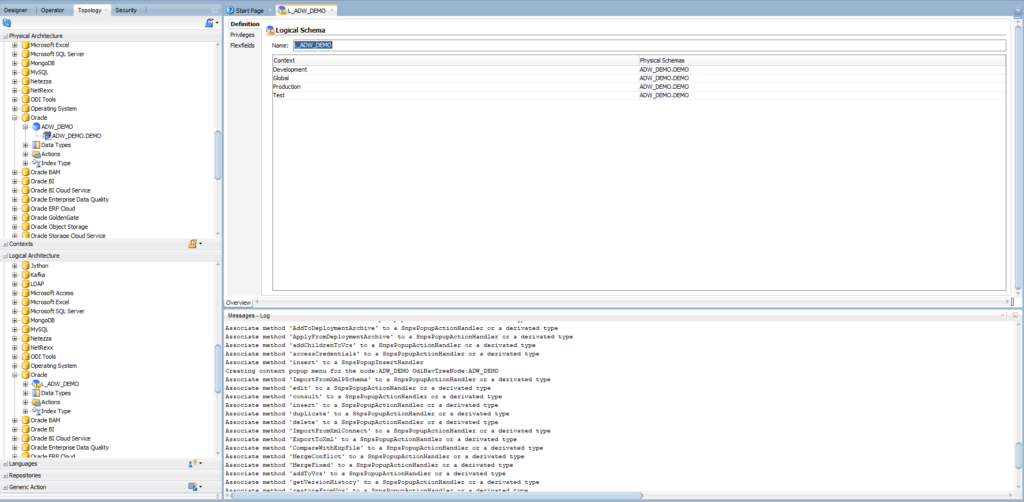
Expand Logical Architecture > Right-click on Oracle > New Logical Schema
Enter the name: L_ADW_DEMO
Use ADW_DEMO.DEMO for all contexts:
The logical schema is used in ODI objects such as Package, Variables, Data Model, Mapping, Procedure, etc. If you need to change the connection of ADW to a different instance, you will not update all objects. Instead, you will only change the connection in Physical Architecture.
Create Connection to the Raw Data File in ODI
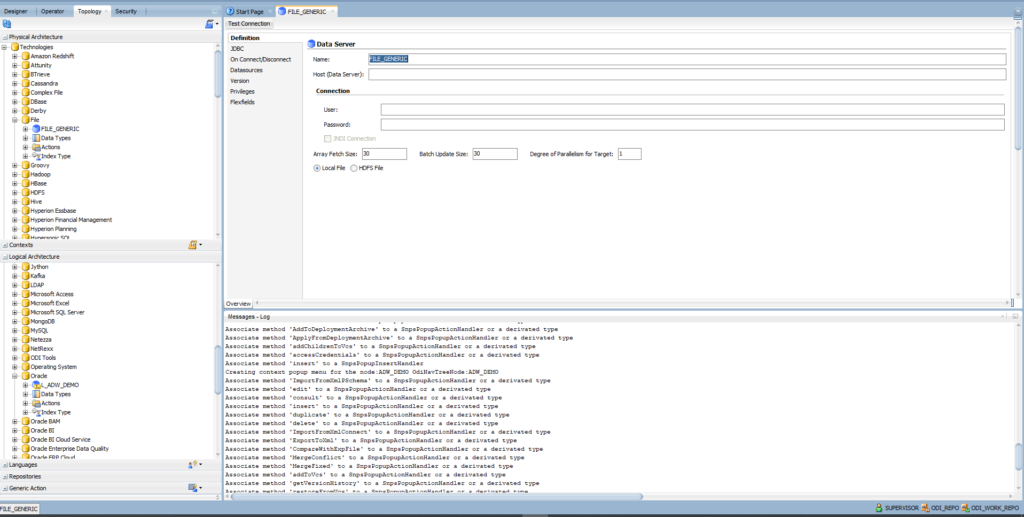
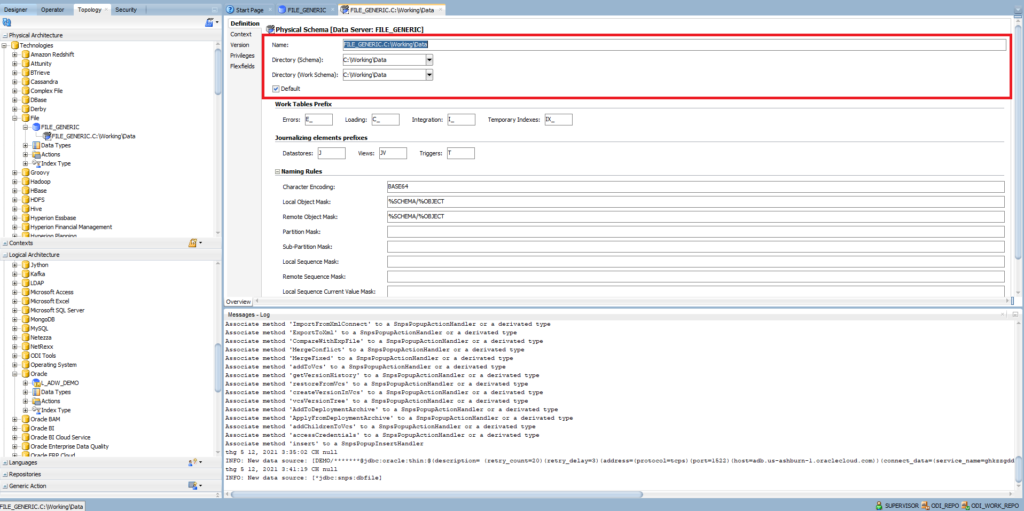
Go to Topology > Physical Architecture > Right-Click on File > New Data Server. For the definition of the Data Server, provide the following information:
- Name: FILE_GENERIC

- Right-click on the FILE_GENERIC data server > New Physical Schema
- Enter Directory (Schema) where ODI will look for the source and target files and create error files for invalid records detected in the source files. The location is either local or shared network directory.
- Enter Directory (Work Schema) where ODI may create temporary files associated with the sources and targets contained in the Data Schema
I am using the same folder for Schema and Work Schema
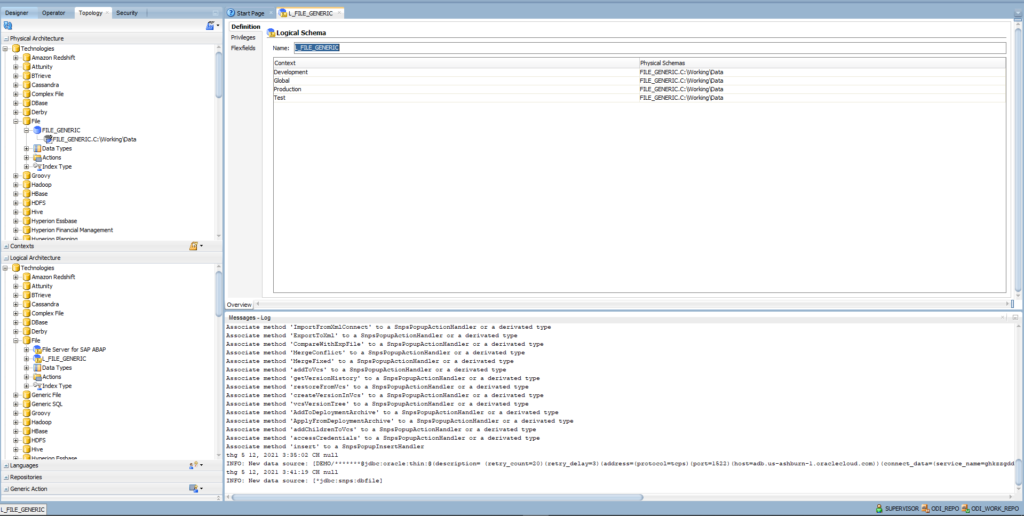
Expand Logical Architecture > Right-click on File > New Logical Schema
- Enter the name: L_FILE_GENERIC
- Use FILE_GENERIC.C:\Working\Data for all contexts
Create a Log Table
We have to load multiple data files into ADW. Thus, we are going to use a log table to manage the list of data files. Open SQL Developer and connect to the ADW DEMO database instance.
Open SQL Worksheet and run the following script in a command line:
CREATE TABLE ETL_SALES_LOAD_LOG(
    "FILE_NAME"  VARCHAR2(100 BYTE)
    , "STATUS"     VARCHAR2(1 BYTE)
    , "LOADED_DT"  DATE
)
| COLUMN NAME | DATA TYPE | Note |
| FILE_NAME | VARCHAR(100) | The name of a data file that needs to proceed |
| STATUS | VARCHAR(1) | Status of the process – Y: file proceeded N: file not proceeded yet |
| LOADED_DT | DATE | When record inserted into the table |
Create the Staging Sale Table
Open SQL Developer and connect to the ADW DEMO database instance.
Open SQL Worksheet and run the following script in a command line:
CREATE TABLE STG_SALES_DAILY(
    SALE_ID  VARCHAR2(100 BYTE)
    , SALE_DATE   DATE
    , SALE_AMOUNT NUMBER(22,7)
    , LOADED_DT  DATE
)
| COLUMN NAME | DATA TYPE | Note |
| SALE_ID | VARCHAR(100) | Sale ID generated from the source database |
| SALE_DATE | DATE | When sale transaction happened in the source database |
| SALE_AMOUNT | NUMBER(22,7) | Sales Amount |
| LOADED_DT | DATE | When a record is inserted into the table |
Create Sample Data for Our Tutorial
Create a sample file for metadata definition:
- SALE_ID|SALE_DATE|SALE_AMOUNT
- AAAAAAA|01/01/2021|10000
Save the sample file as SALES_METADATA.txt and store it in C:\Working\Data\Metadata
Create a Data Model in ODI
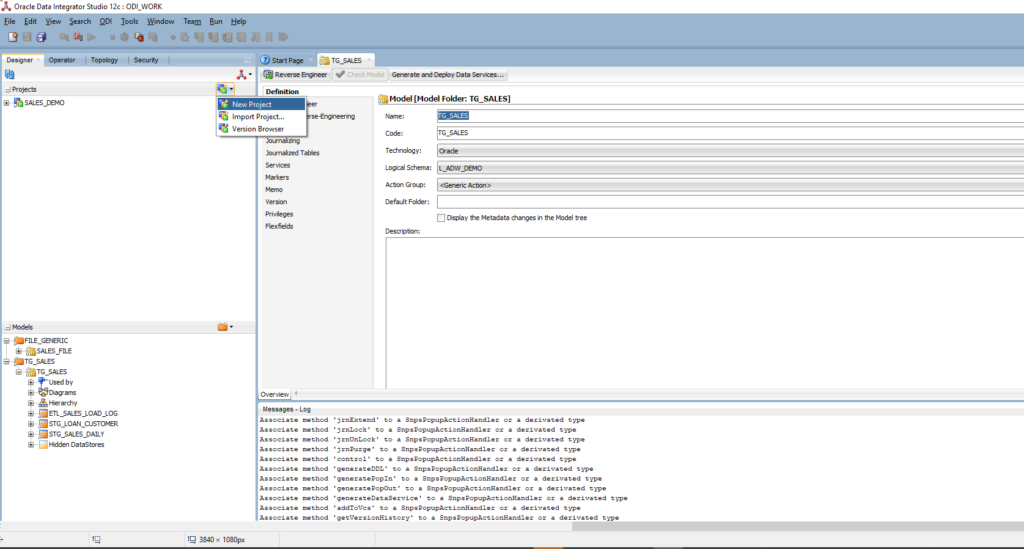
Go to the Designer panel > Expand Model > Click on the Folder icon > New Model Folder
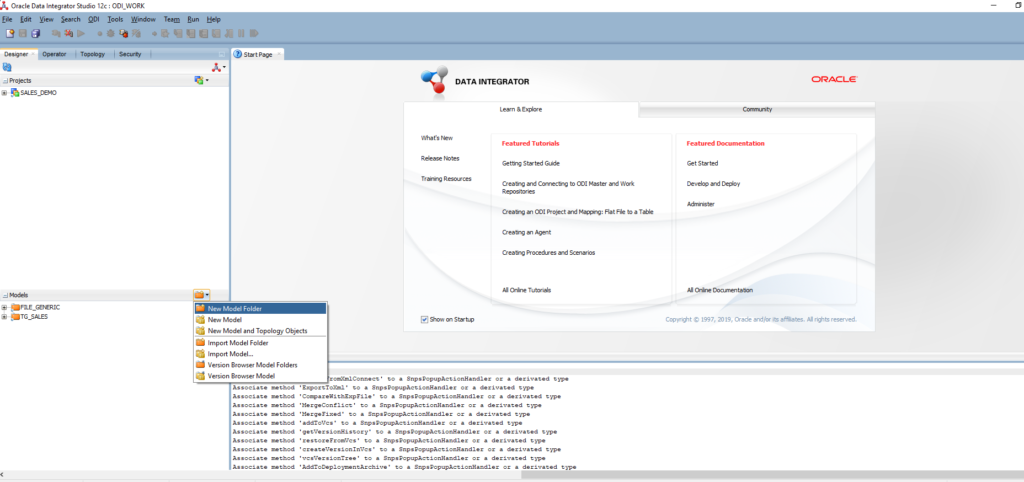
Enter the name: FILE_GENERIC
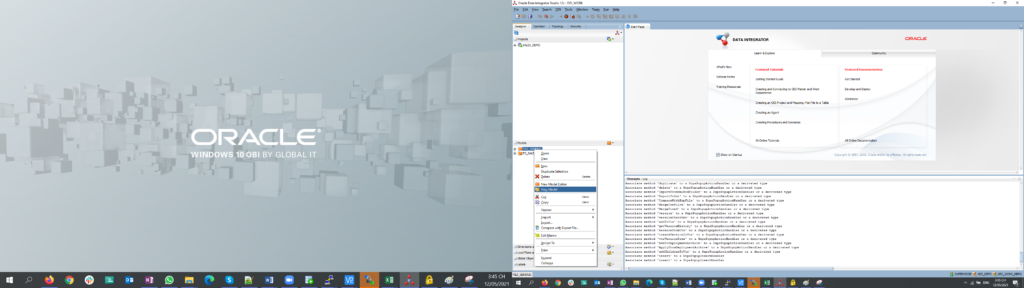
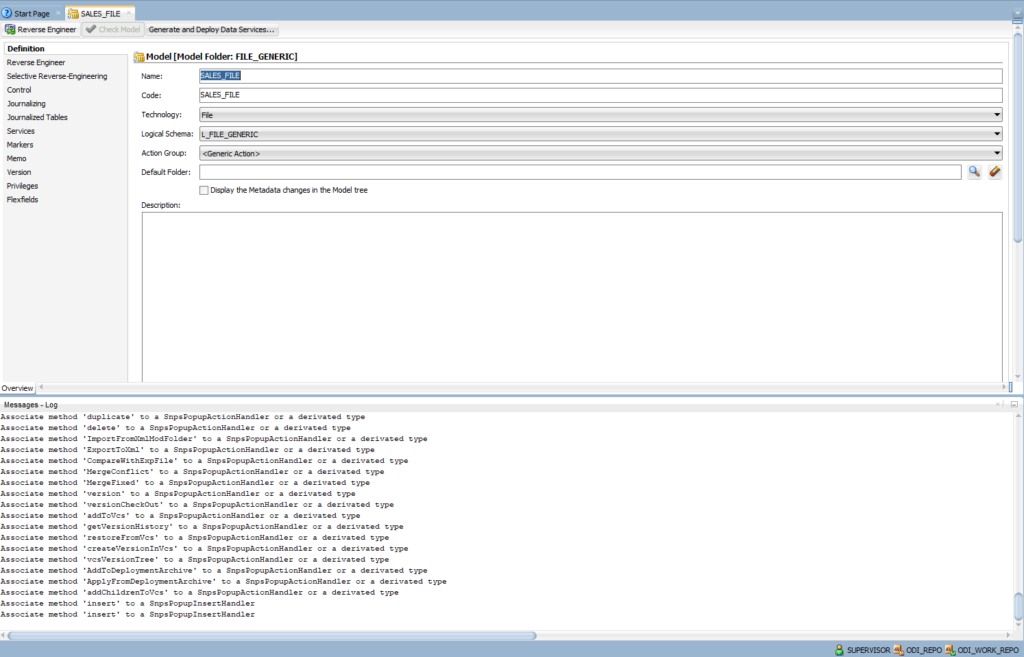
Right-click on the FILE_GENERIC folder > New Model
Configure Definition:
- Name: SALES_FILE
- Technology: File
- Logical Schema: L_FILE_GENERIC
Right-click on SALES_FILE model > New Datastore
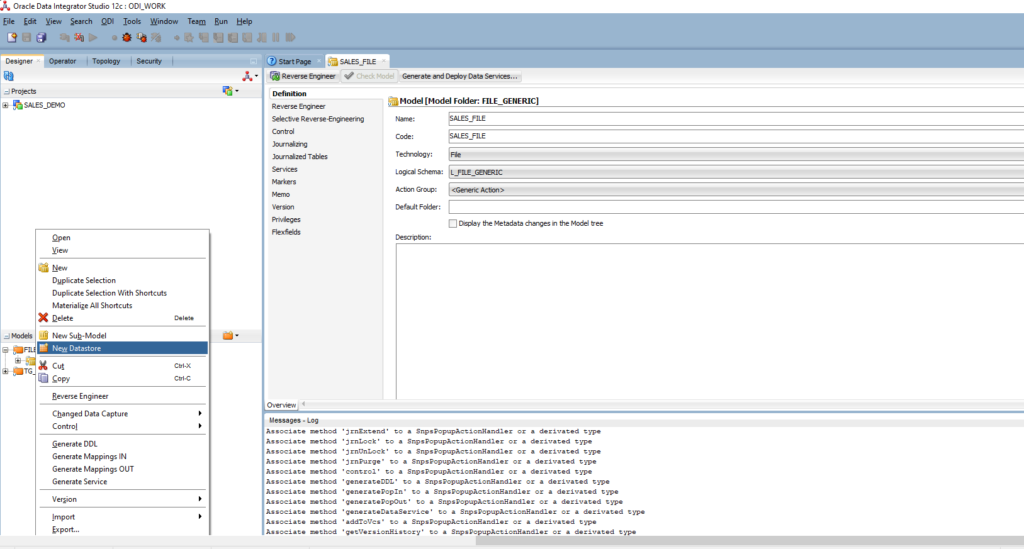
Definition
- Name: SALES_FILE
- Alias: SALE_FILE
- Datastore Type: Table
- Resource Name: browse to file SALES_METADATA.txt. We will update Resource Name with the dynamic file name to support loading multiple files later. Now, we only want to define metadata. Thus, we point to the exact sample file.
Files
- File Format: Delimited
- Heading (Number of Lines): 1
- Record Separator: MS-DOS because our data files are generated in Window OS
- Field Separator: | (pipe bar)
Attributes
- Click on Reverse Engineer
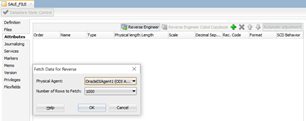
- ODI discovers the data type of each column of the sample file and determines the appropriate data type.
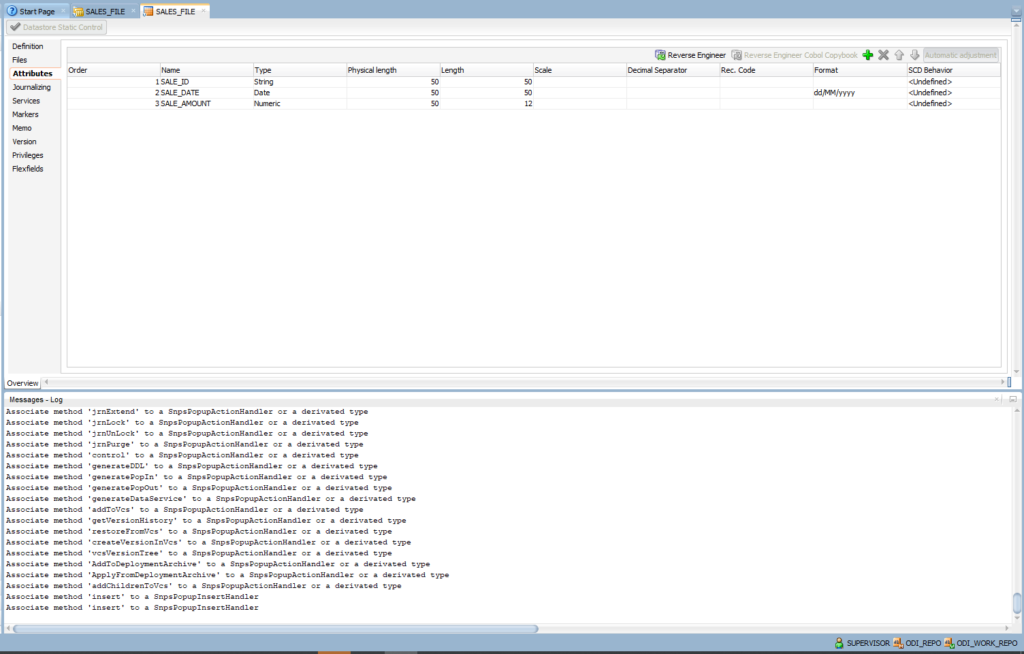
Click Save
Right-click on SALES_FILE model > New Datastore
Enter the name ETL_SALES_FILES
Definition
- Name: ETL_SALES_FILES
- Alias: ETL_SALES_FILES
- Datastore Type: Table
- Resource Name: browse to file ETL_SALES_FILES.txt. This data store will contain the list of SALES data files.
Files
- File Format: Delimited
- Heading (Number of Lines): empty
- Record Separator: MS-DOS because our data files are generated in Window OS
- Field Separator: | (pipe bar)
Attributes
- Click on Add Attribute
- Enter: FILE_NAME
- Type: String
- Physical Length and Length: 100
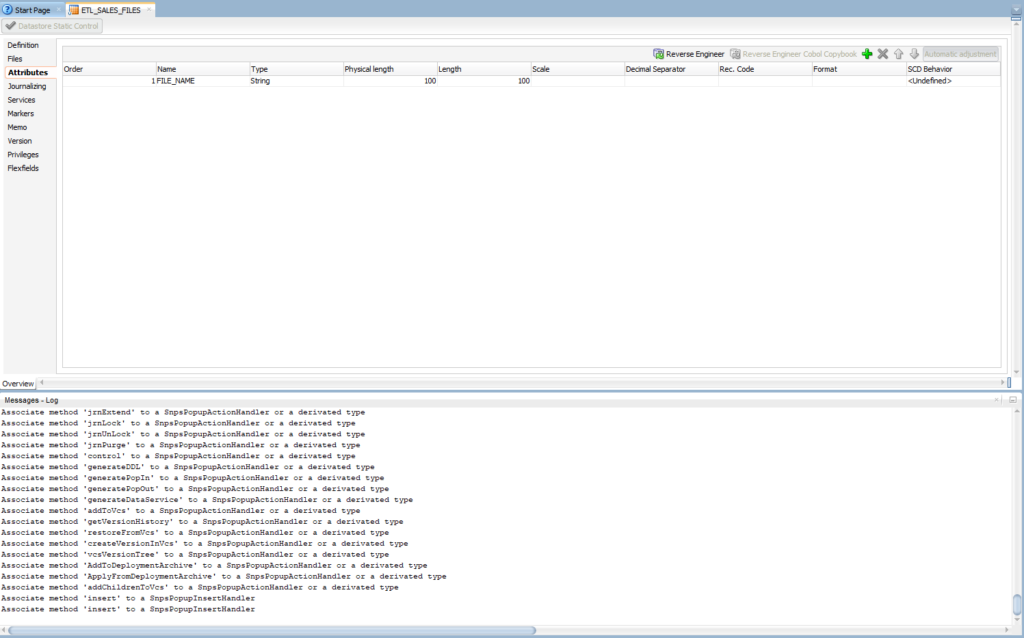
Click Save
Click on the Folder icon in Models > Create New Model Folder. Enter TG_SALES
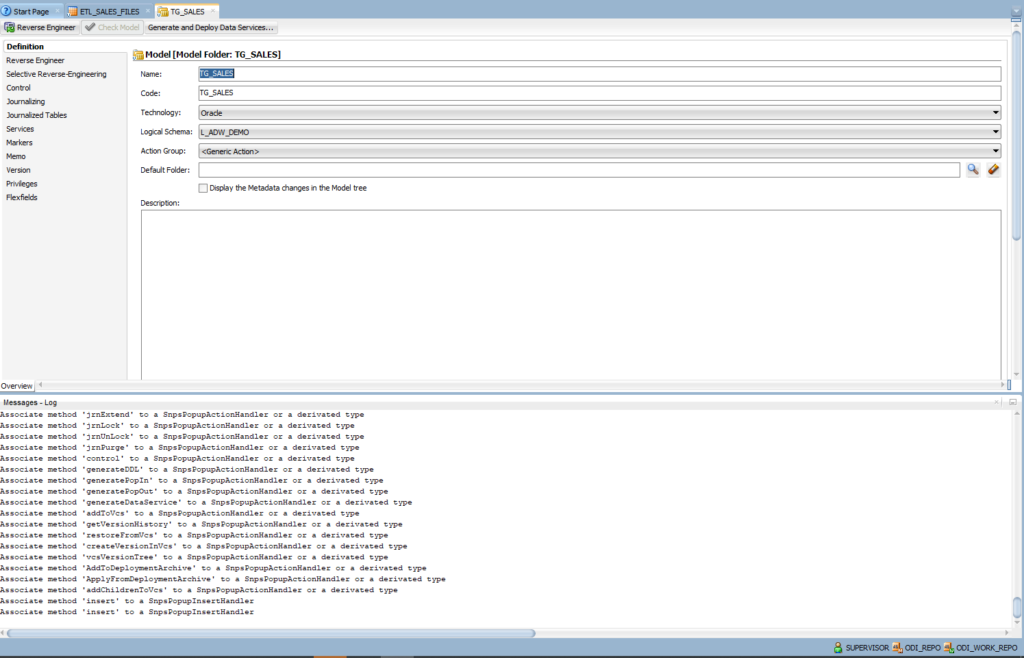
Right-click on TG_SALES > New Model
Definition
- Name: TG_SALES
- Technology: Oracle
- Logical Schema: L_ADW_DEMO
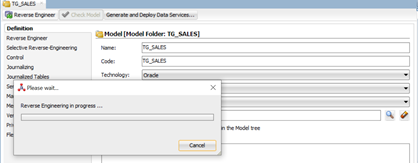
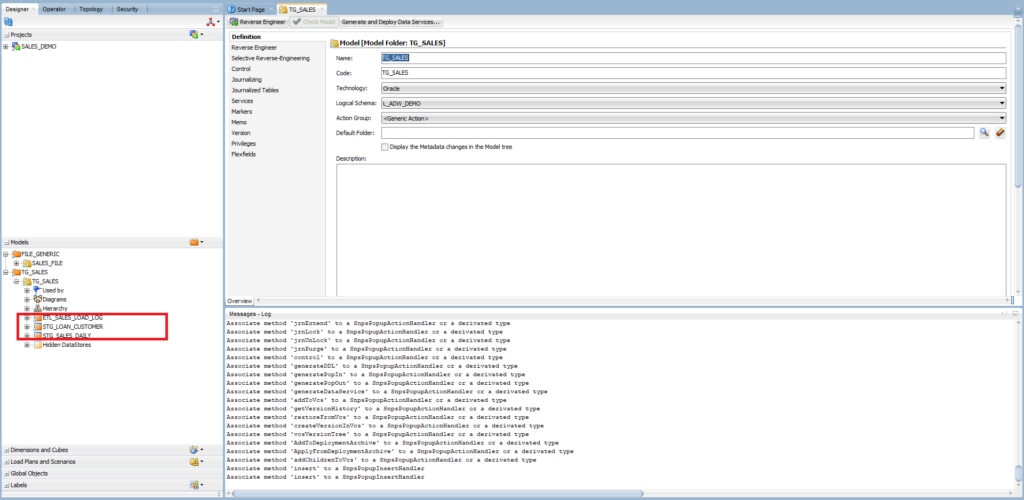
Click on the Reserve Engineer icon. ODI will connect to the ADW database instance and list of all table schemas:
Expand the TG_SALES model, and you will see the list of tables.
Create an ODI Project
Expand Projects and click on the New project icon > New Project. Enter the name: SALES_DEMO
Right-click on the SALES_DEMO project > New folder > enter SALES
The next step is to create project variables. Right-click on Variables > New Variable.This variable has to keep the name of each data file when proceeding with data.
Definition
- Name: ETL_SALES_FILE_NAME
- Datatype: Text
- Keep History: Latest Value
Refreshing
The purpose is to refresh a variable value at run-time.
- Schema: L_ADW_DEMO. As mentioned earlier, we use the Logical Schema only. Whenever the database connection or the directory path is changed, our code stays intact.
- Select Query: enter the following PL/SQL script:
SELECT TRIM(FILE_NAME)
FROM <%=odiRef.getSchemaName()%>.ETL_SALES_LOAD_LOG
WHERE STATUS = 'N'
AND TRUNC(LOADED_DT) = (Select trunc(from_tz(cast(sysdate as timestamp), 'GMT') at time zone 'ASIA/KUALA_LUMPUR')  from dual)
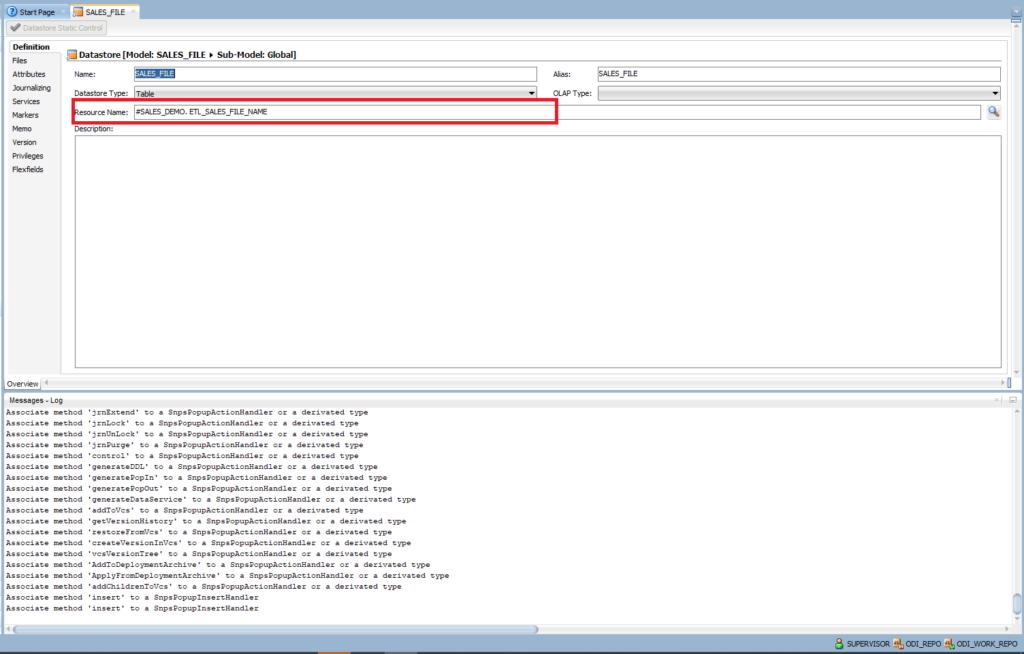
Expand Models > FILE_GENERIC folder > SALES_FILE model
Double-click on SALES_FILE and change the Resource Name = #SALES_DEMO. ETL_SALES_FILE_NAME
Continue creating new variables for the SALES_DEMO project. The next variable is used in a looping process.
Definition
- Name: ETL_SALES_FILE_COUNT
- Datatype: Text
- Keep History: Latest Value
Refreshing (to refresh the variable value at run-time)
- Schema: L_ADW_DEMO. As I mentioned, we only use Logical Schema so whenever the database connection or directory path is change, our code is not impacted.
- Select Query: enter the following PL/SQL script
SELECT COUNT(1)
FROM <%=odiRef.getSchemaName()%>.ETL_SALES_LOAD_LOG
WHERE STATUS = 'N' AND TRUNC(LOADED_DT) = (Select trunc(from_tz(cast(sysdate as timestamp), 'GMT') at time zone 'ASIA/KUALA_LUMPUR')  from dual)
Create Mapping to Import File Names Into ETL_SALES_LOAD_LOG
This process targets importing the list of file names into the ETL table.
Expand the SALES folder in the project, right-click on Mappings > New Mapping
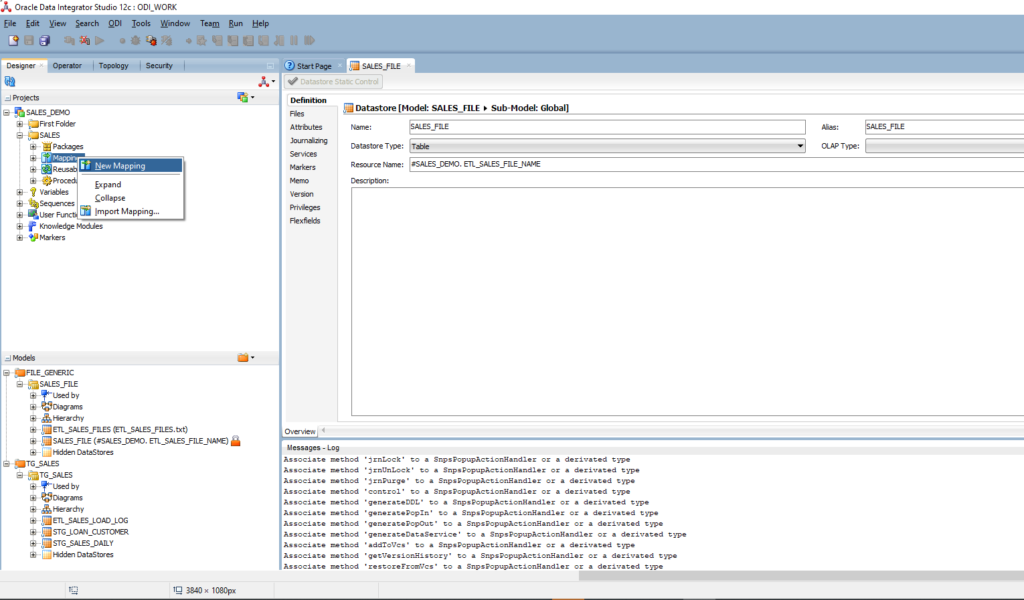
- Enter name: ETL_SALES_LOAD_FILE_NAME.
- Empty mapping is created
- Drag and drop ETL_SALES_FILES from SALES_FILE model into the mapping
- Drag and drop ETL_SALES_LOAD_LOG from TG_SALES model into the mapping
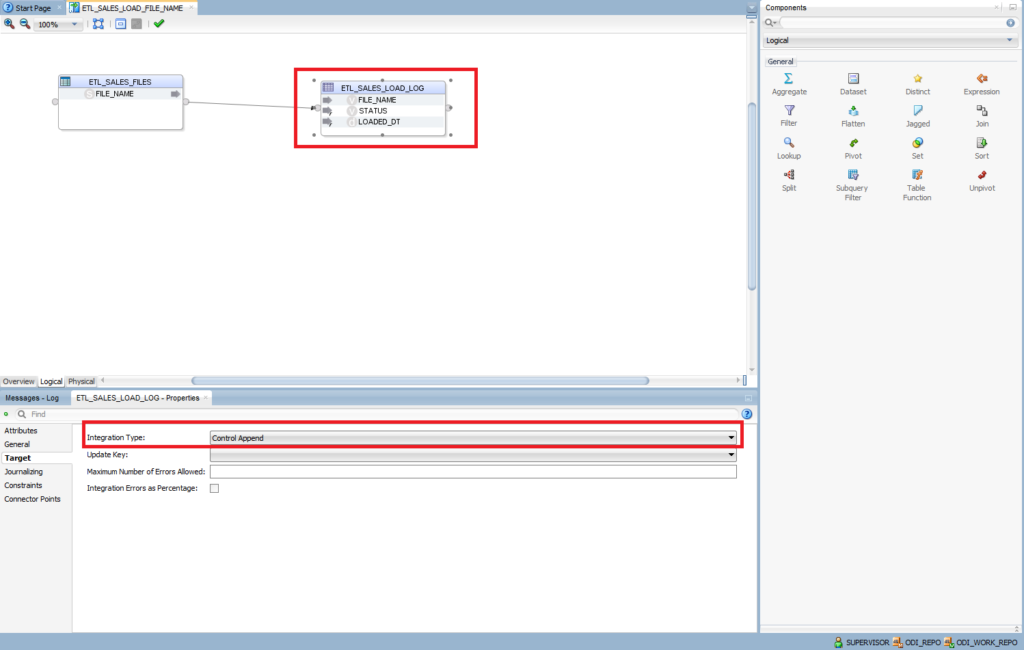
- Create a mapping between ETL_SALES_FILES.FILE_NAME and ETL_SALES_LOAD_LOG.FILE_NAME
- Choose STATUS: Target: ‘N’ (by default, ‘N’ means file not proceeded yet)
- Choose LOADED_DT column (Current Date).
- Target:
(Select trunc(from_tz(cast(sysdate as timestamp), 'GMT') at time zone 'ASIA/KUALA_LUMPUR') from dual)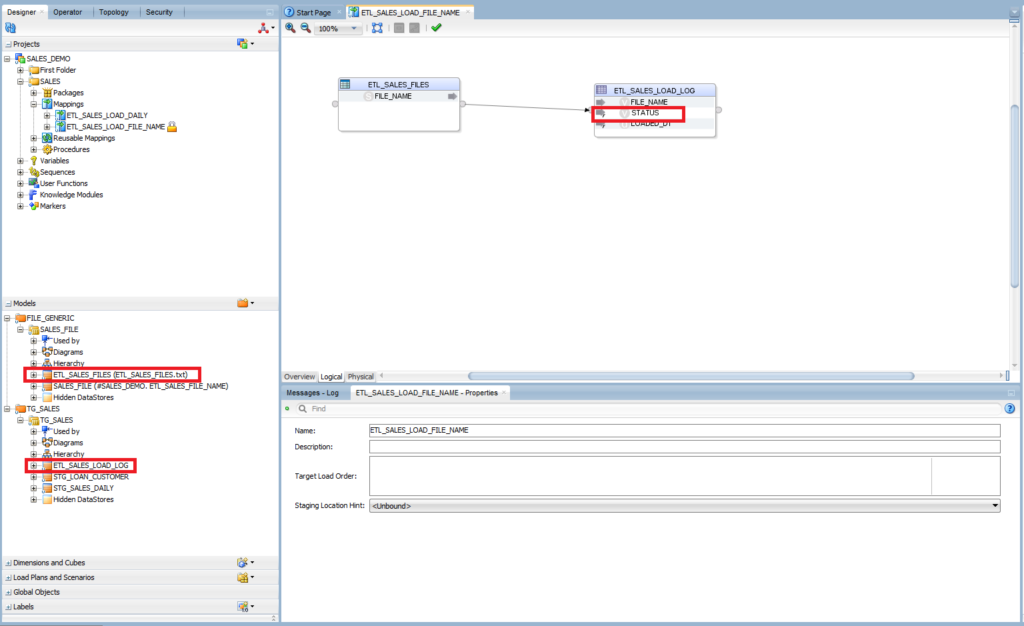
Click on ETL_SALES_LOAD_LOG. Target: Control Append. This option allows us to insert records, not delete them.
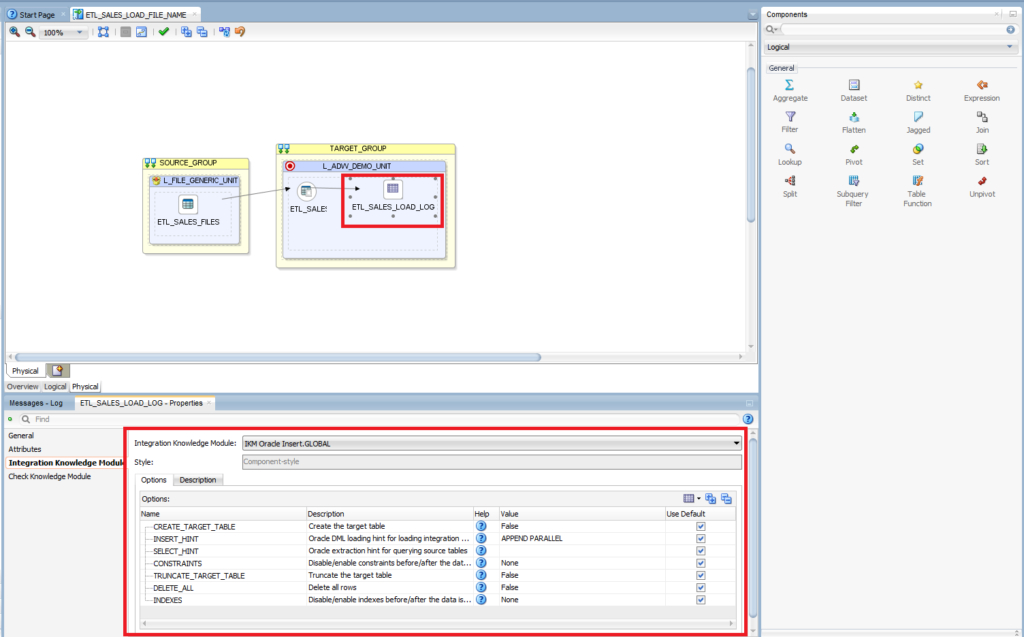
Click on the Physical tab and keep the default settings for ETL_SALES_LOAD_LOG. Integration Knowledge Module: IKM Oracle Insert.GLOBAL
Create Mapping to Import the SALES Data into the STG_SALES_DAILY Table
This mapping targets importing the data files into the STG_SALES_DAILY table.
Expand the SALES folder in the project and right-click on Mappings > New Mapping

- Enter name: ETL_SALES_LOAD_DAILY
- Empty mapping is created
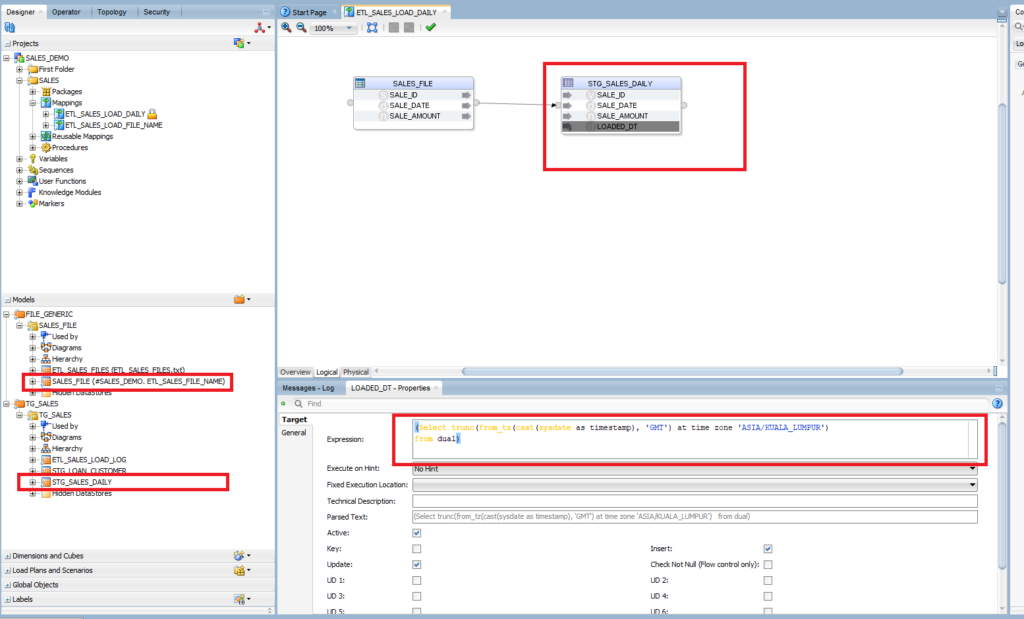
- Drag and drop SALES_FILES from the SALES_FILE model into the mapping
- Drag and drop STG_SALES_DAILY from the TG_SALES model into the mapping
- Create mappings between SALES_FILES and STG_SALES_DAILY
| SALES_FILES | STG_SALES_DAILY | Expression |
| SALE_ID | SALE_ID | |
| SALE_DATE | SALE_DATE | |
| SALE_AMOUNT | SALE_AMOUNT | |
| LOADED_DT | (Select trunc(from_tz(cast(sysdate as timestamp), ‘GMT’) at time zone ‘ASIA/KUALA_LUMPUR’) from dual) |
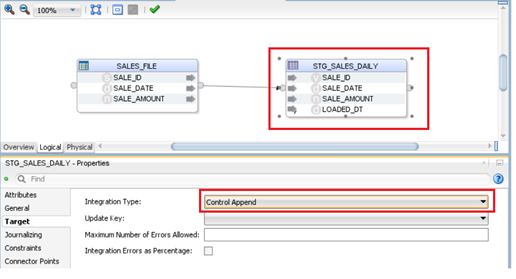
Click on STG_SALES_DAILY. Target: Control Append
Create a Procedure
This step creates a PL/SQL procedure to update the status of a file when it is processed in the ETL_SALES_LOAD_LOG table.
Right-click on the Procedure folder > New Procedure. Enter the name: PROC_UPDATE_FILE_NAME_STATUS. Next, go to the Task tab:
- Enter the task name: Update Status to Y
- Target Logical Schema: L_ADW_DEMO
- Enter the target command:
BEGIN
UPDATE <%=odiRef.GetSchemaName()%>.ETL_SALES_LOAD_LOG
SET STATUS='N'
WHERE FILE_NAME='#SALES_DEMO.ETL_SALES_FILE_NAME'
AND TRUNC(LOADED_DT)= (Select trunc(from_tz(cast(sysdate as timestamp), 'GMT') at time zone 'ASIA/KUALA_LUMPUR')
from dual);
END;
Create a Package
Expand the SALES folder > Right-click on Package > New Package
Enter the name: ETL_SALES_LOAD_DAILY
Drag and drop the OdiOSCommand component into the package. This step is to scan the data files’ location and get the names of all data files.
General: The step name is Get the list of filenames
Command: “CMD /C <Path of Bat file>\Command.bat”
"CMD /C C:\Working\Data\Command.bat"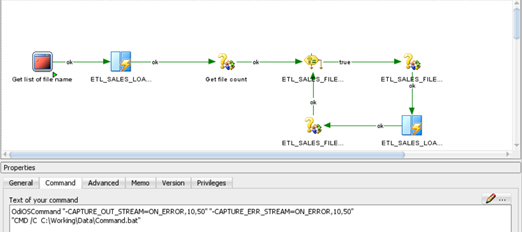
You need to create a bat file named Command.bat
%echo
CD C:\Working\Data
DIR /B SALES*.txt > ETL_SALES_FILES.txt
EXIT
Save the .bat file into the folder <Path of Bat file>. The content of that .bat file must be changed to the data files folder before executing the command to get the list of file names.
As we are running ODI in a Windows environment, the .bat file is a simple way to execute Windows commands.
When you are running ODI in Linux, you can run the command directly:
cd <Path to a folder of data files>
s -ll SALES*.csv |awk '{print $9}' > ETL_SALES_FILES.txt
exit
Drag and drop the ETL_SALES_LOAD_FILE_NAME mapping into the package
Step 3: Drag and drop the ETL_SALES_FILE_COUNT variable
Step name: Get file count
Type: Refresh Variable
The purpose of Step 3 is to get the name of the first data file in the ETL_SALES_LOAD_LOG table
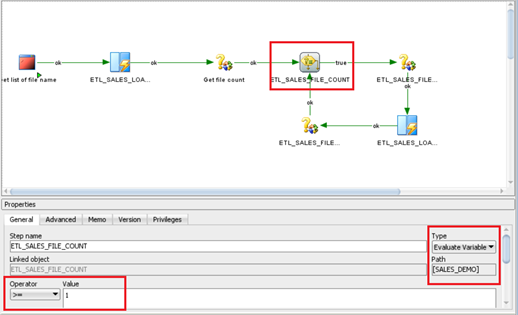
Step 4: Drag and drop the ETL_SALES_FILE_COUNT variable. At this step, we have to check if the data file existed (file count variable >=1)
Step name: Check if the number of data files that need to be processed.
Type: Evaluate Variable
If ETL_SALES_FILE_COUNT >=1 Then continue proceeding
Else Move data files to an archived folder
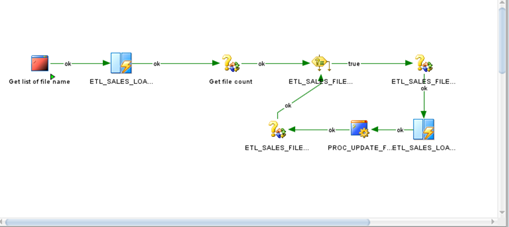
Step 5: Drag and drop the ETL_SALES_LOAD_DAILY mapping into the package to import data from the data file into the ADW Staging table STG_SALES_DAILY
Step 6: Drag and drop the PROC_UPDATE_FILE_NAME_STATUS procedure into the package
Step 7: drag and drop the ETL_SALES_FILE_COUNT variable
Step name: Get file count
Type: Refresh Variable
The purpose of this step is to continue fetching the next data file in the log table ETL_SALES_LOAD_LOG
Save the package.
Execute the Package
There are three sample files:
- SALES_20210419.txt
- SALES_20210420.txt
- SALES_20210421.txt
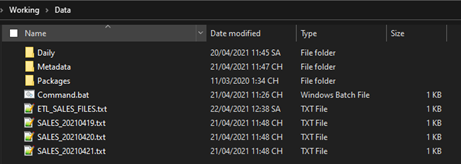
Click the play icon run the package:

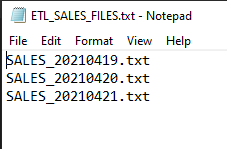
After executing the package, you can check the ETL_SALES_FILES.txt content as shown below. Based on the list, the package proceeds each file one-by-one (looping process):
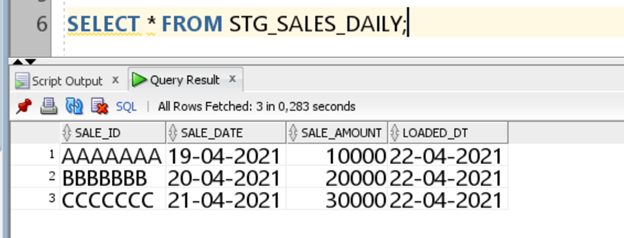
Verify the data in the STG_SALES_DAIL table. There are three records loaded from our data files:
Conclusion
This article explained the process of building an ETL ODI package that supports loading multiple data files into an ADW instance. The work-flow is basic and quite common, but I believe this package is one of the ETL patterns you have to work on sometimes
Depending on your requirements and circumstances, you can continue developing other work-flows based on this pattern:
- Load the data files from the SFTP server
- Archive data files after they are processed completely
- Write more logging, such as the number of inserted rows, deleted rows, etc.