Let’s assume that you are developing a data warehouse project, and your team needs the appropriate environment immediately and under the minimum budget. Business users have to explore their data as soon as possible. This will be our goal for the current tutorial: to create a data warehouse for importing and exploring the data quickly and straightforwardly using Oracle.
Background for Oracle Autonomous Data Warehouse (ADW)
Oracle Autonomous Data Warehouse (ADW) is a fully managed and high-performance solution. This autonomous technology includes all of the Oracle Database advantages in the environment adjusted and optimized for the Data Warehouse workload. Thus, you don’t need to take more effort and resources in the DBA role to do the database management and optimization jobs.
Notice the most essential pluses of Oracle Autonomous Database:
- Self-Driving – The user defines service levels while the database makes them happen.
- Self-Securing – It protects the data from both external attacks and malicious internal users.
- Self-Repairing – It provides automated protection from all downtime.
Implementation

Register an Oracle Cloud Infrastructure Console (OCI) Account
Follow the below steps to start the path to obtain our Oracle Autonomous Data Warehouse:
- Access https://signup.cloud.oracle.com/
- Enter the required information. You will receive the confirmation email to your account.
- Confirm the account by clicking the link in an email, and complete the registration process.
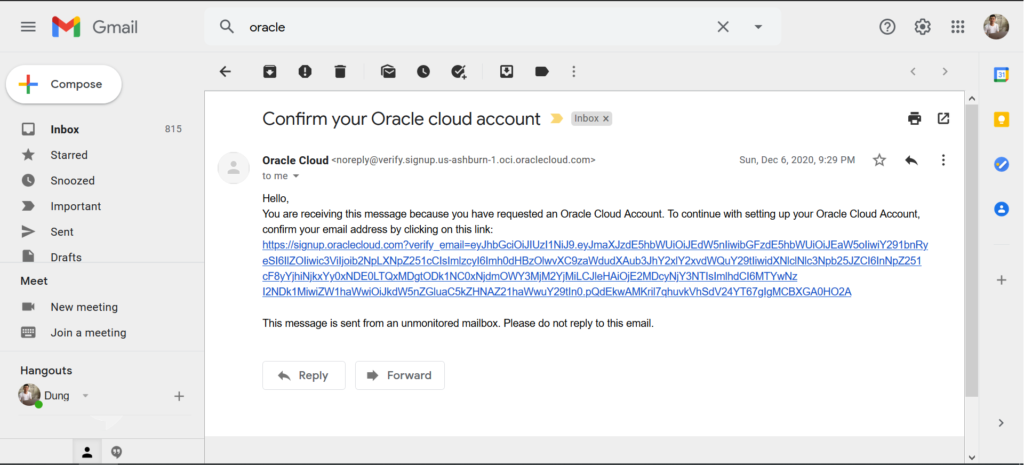
Oracle platforms offer free access for 1 month to use all cloud services. However, you need to put $300 in credits, and there will be some functional limitations in the service.
Log into the OCI Cloud
After the successful account registration with Oracle Cloud, you’ll get one more email message with a confirmation.
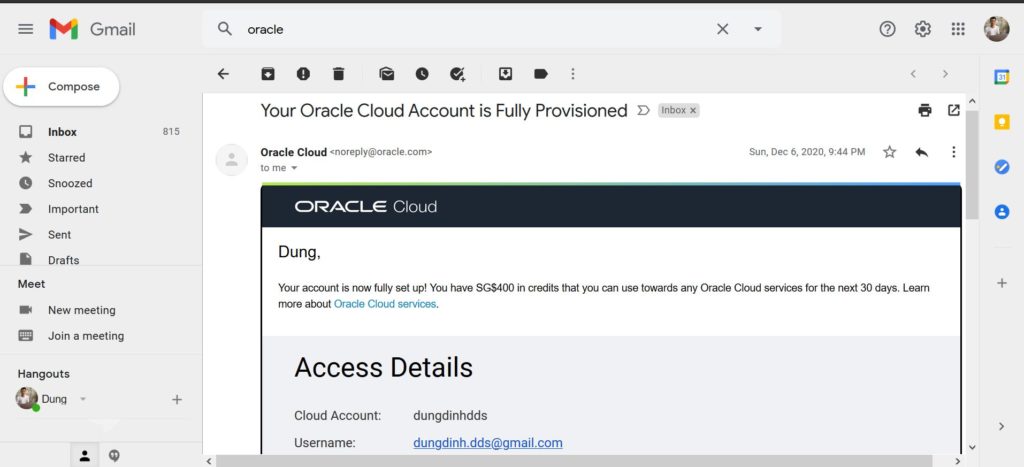
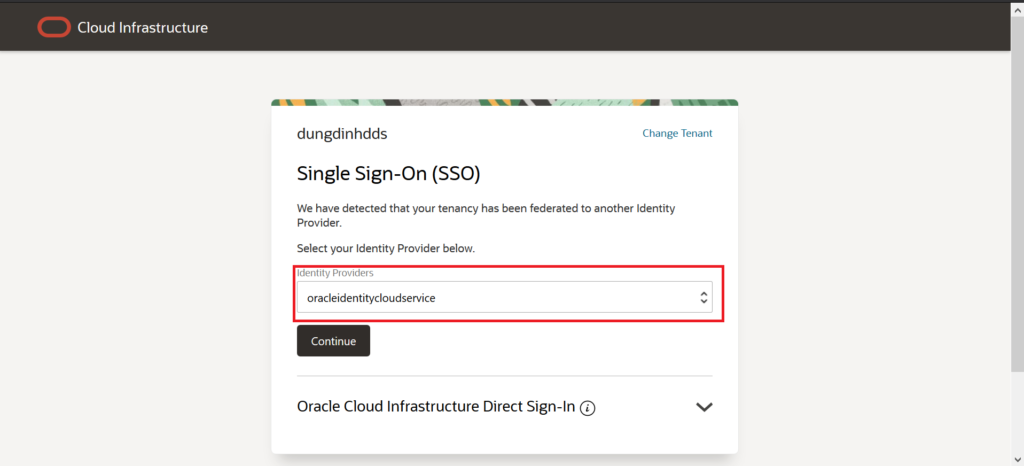
Click Sign In to Oracle Cloud – you will get redirected to the Login page:
- Select Identity Provider = oracleidentitycloudservice. The service is used to manage Cloud Account in your organization. It is quite similar to the Windows Active Directory.
- Click Continue
- Enter your username and password
Create an ADW Database Instance
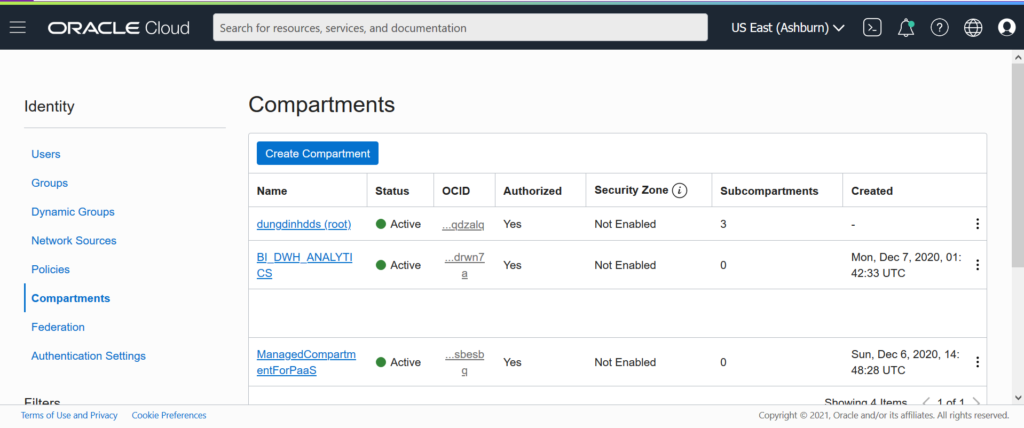
Before creating an autonomous software, our ADW instance (database instance), we have to create a compartment in OCI.
A compartment is a logical object serving as a container for grouping the related resources, such as Virtual Cloud Networks, Compute Instances, Databases, etc. together.
This step is optional but it is recommended to create it. It will help you to manage the cloud resources effectively. On the top-left hamburger menu, select Identity > Compartments
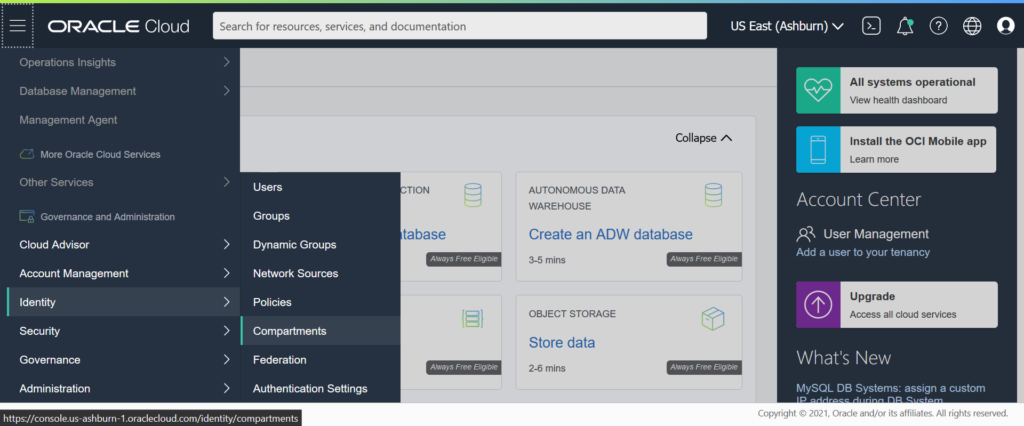
Click Create Compartment
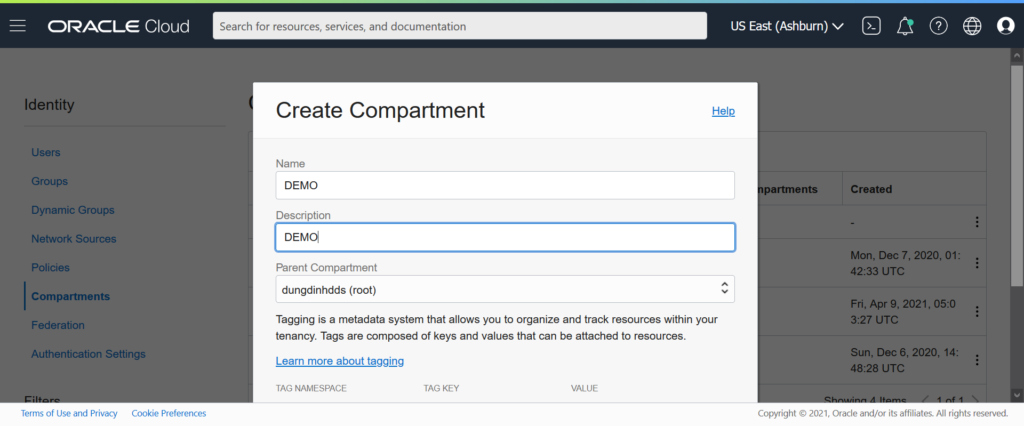
Enter DEMO as the compartment name and Description. The Parent Compartment is always root. Click Create Compartment.
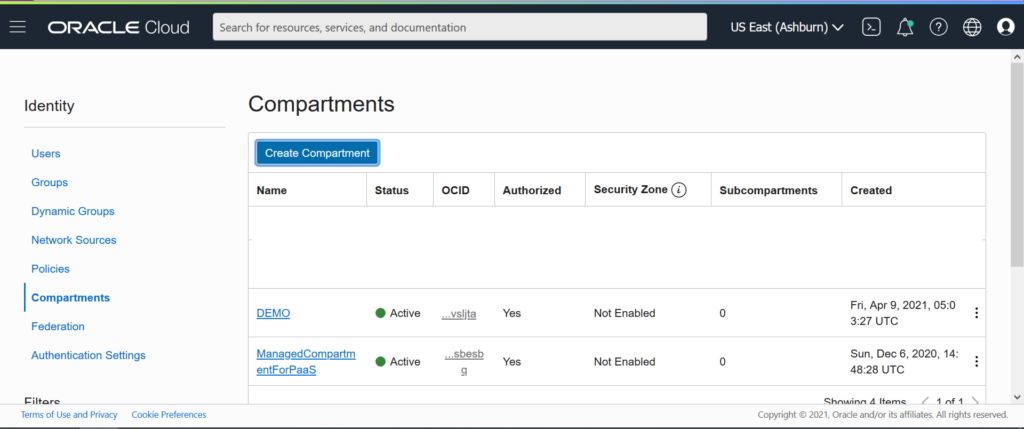
The DEMO compartment appears in the list:
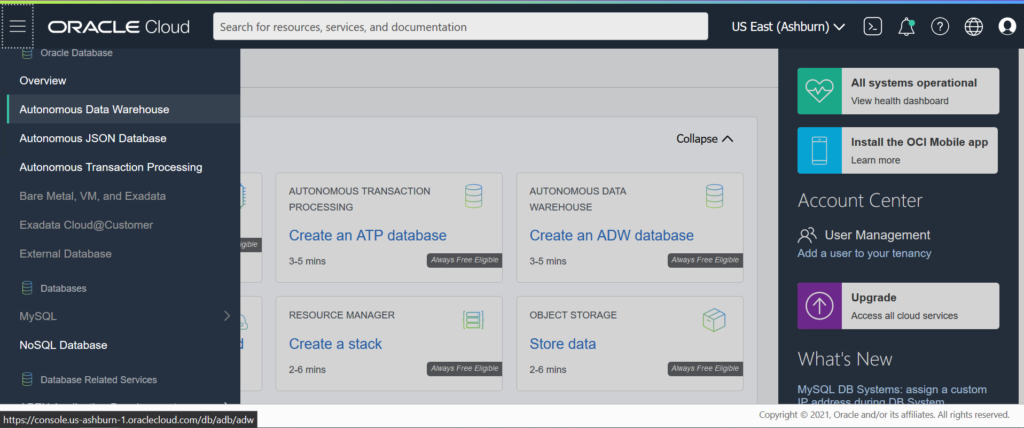
Return to the main menu in the top-left corner and select Autonomous Data Warehouse
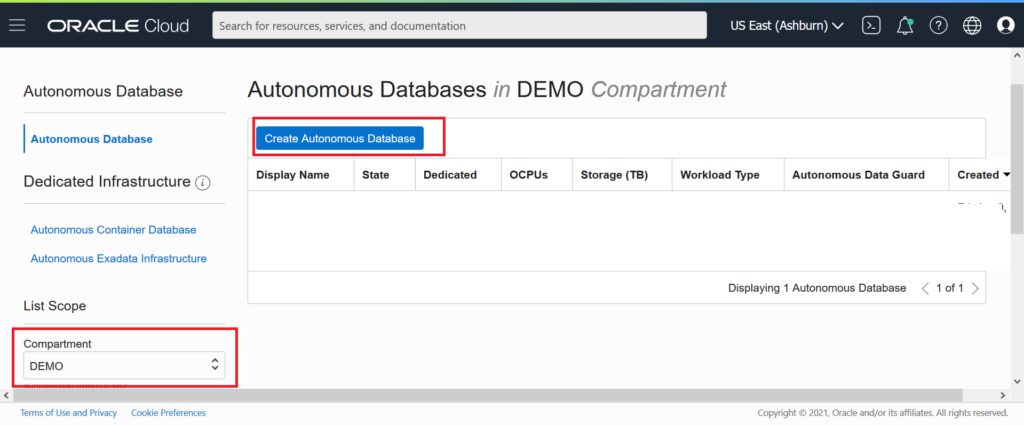
On the ADW console display, select the DEMO compartment from the drop-down list and click Create Autonomous Database:
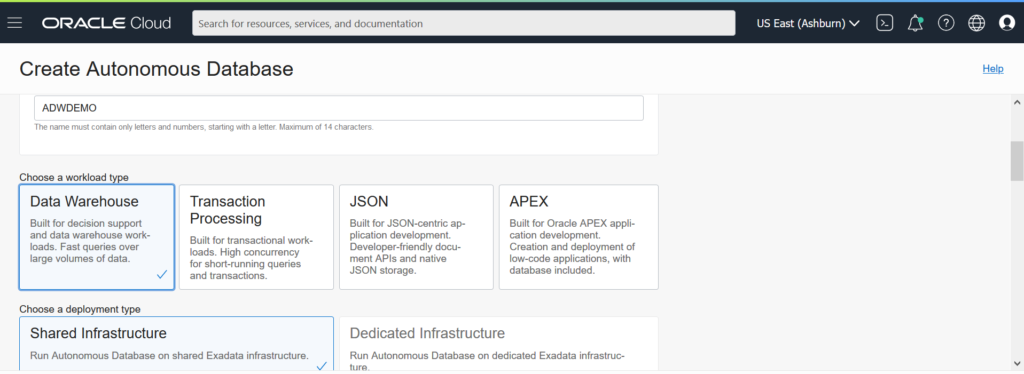
Enter basic information for the Oracle DB:
- Compartment: DEMO
- Display Name: ADWDEMO
- Database Name: ADWDEMO
- Workload type: Data Warehouse. The system provides several workload types for specific purposes (Data Warehouse, Online Transaction Processing, JSON application, etc.)
- Development type: Shared Infrastructure. This is the server-less architecture, so you don’t need to care about the Operation System and Server installation.
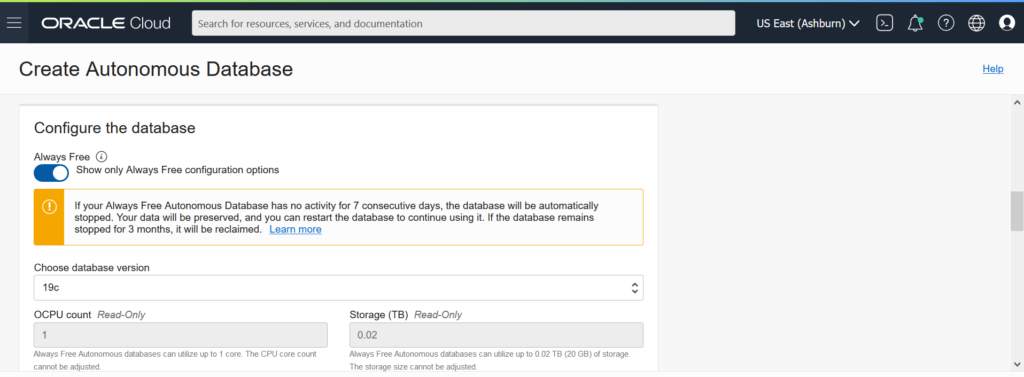
Next, we proceed to Configure the database
For this tutorial, enable Always Free. With this option, you won’t be charged any fee. However, note that the database server only provides you with 1 OCPU and 0.02 TB of Storage.
Go to Create administrator credentials. By default, when dealing with Oracle database login, the Oracle Autonomous Database only provides you with an ADMIN account for the database instance. This account ensures most of the DBA privileges, but it does not grant full permissions as the DBA account or SYS account in an Oracle database solution would give you.Enter the password for ADMIN: Oracle#202104
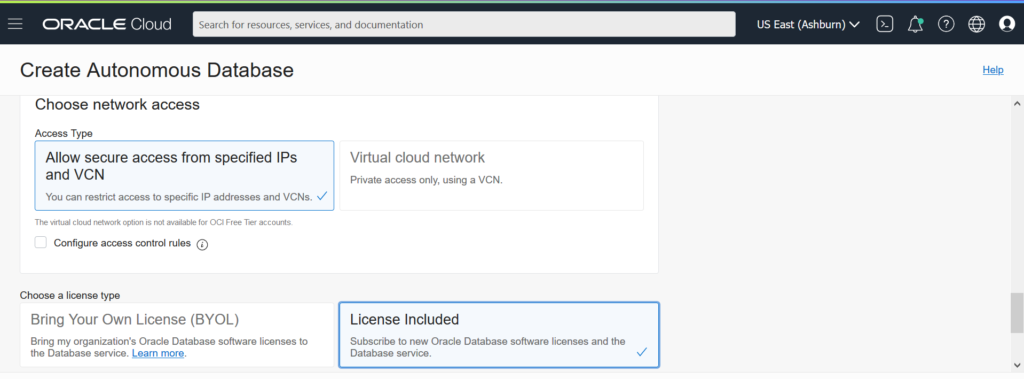
The next section is Choose Network Access
- Access Type: Allow secure access anywhere. It allows you to access your database instance from any location, such as your company’s network or the home network. However, Oracle Autonomous Data Warehouse supports Access Control Limit that allows you to limit the end-points access. E.g., you can allow only one computer note to access Oracle Autonomous Database via IP Address.
- Choose a license type: License Included
- Click Create Autonomous Database
The provisioning process will take a few minutes to create the database instance.
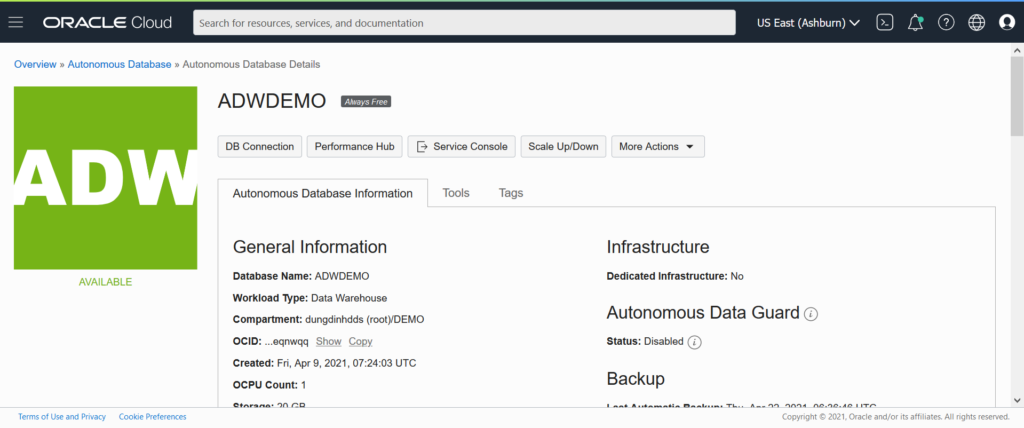
Connecting SQL Developer to the ADW Instance
After provisioning the Oracle Autonomous Data Warehouse instance, you can set up a connection to it using SQL Developer or SQL Plus (a command client tool). Click here to download and install the latest version of SQL Developer. Make sure to download the Wallet Credentials File.
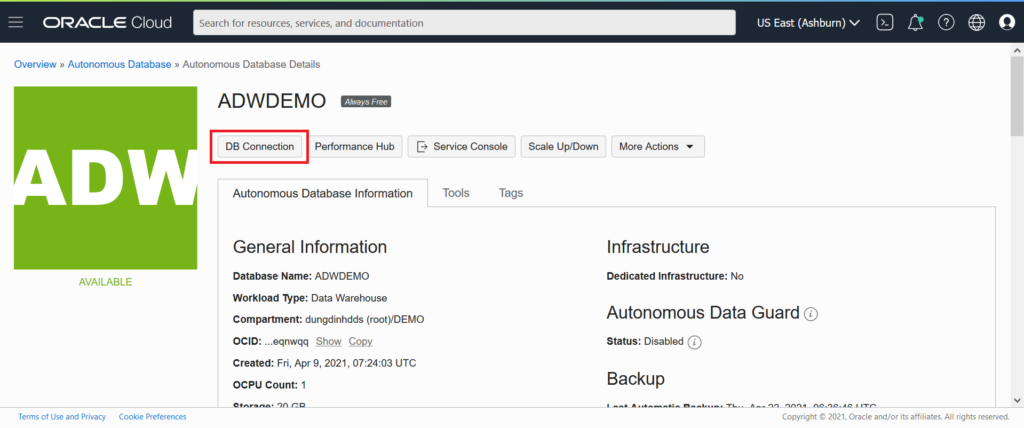
Navigate to the Autonomous Database page console and click on DB Connection.
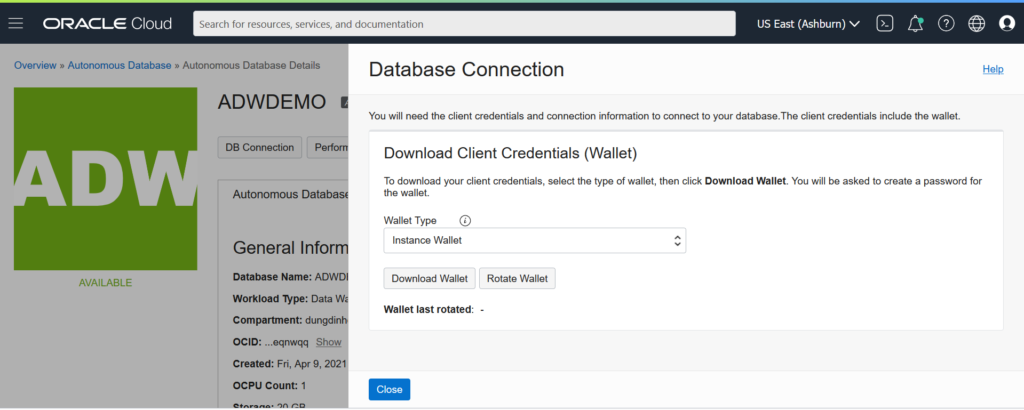
The Database Connection page displays the following data:
Wallet Type: you can select from the two kinds:
- Instance Wallet: a wallet for a single database only (a database-specific wallet). It is suitable for end-users and applications.
- Regional Wallet: a wallet for all Autonomous Database for your tenant and region. E.g., your tenant is in the Tokyo region (Data Center in Tokyo), and you use this wallet type to access all Autonomous databases in this region. This type is suitable for the database administration role.
Click Download Wallet
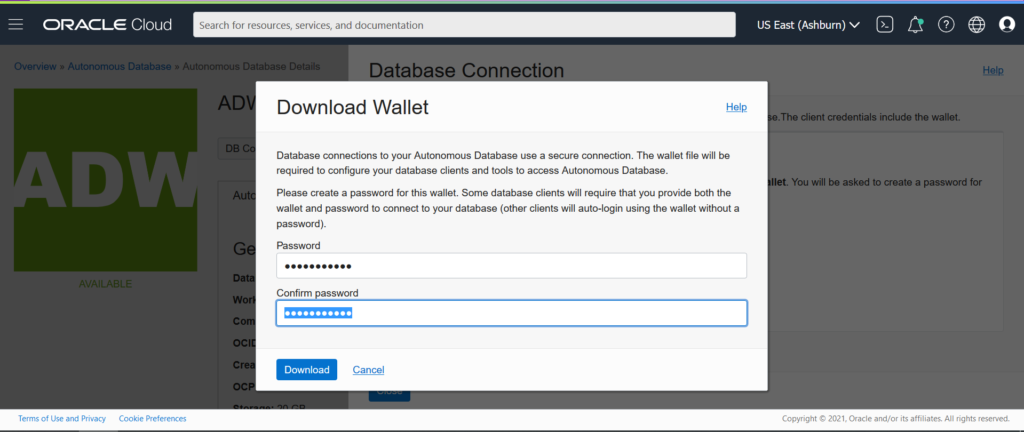
Enter the password for the Wallet file to protect it and save the zip file in a secured location.
Open the SQL Developer and create a new connection:
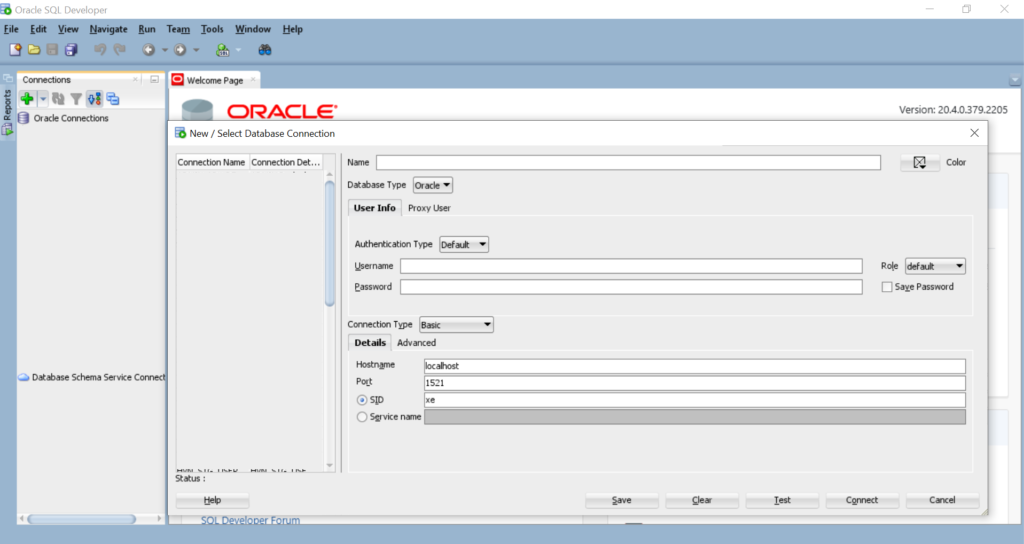
- Name: ADWDEMO_ADMIN
- Username: ADMIN
- Password: Oracle#202104
- Checkmark the Save Password option
- Connection Type: Cloud Wallet
- Configuration file: browse to the location of your downloaded Wallet file
- Service: adwdemo_high
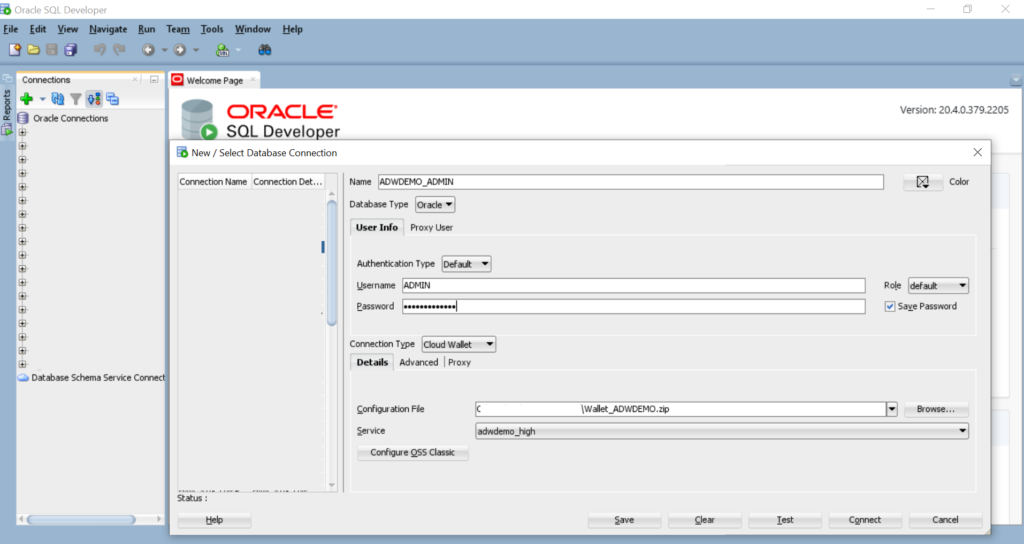
Click Test to make sure you can connect to the ADW instance successfully.
Note: If the computer is behind the company’s proxy or firewall, you’ll need to ask the network admin to configure the proxy or open an outbound connection to hosts in the oraclecloud.com domain using port 1522.
We’ve provisioned an ADW database instance and connected it to ADW with the ADMIN user. However, we never use the ADMIN schema for the end-users or applications. Instead, we need to create the database schema user for business purposes, such as HR for the HR department, or SALES for the SALES department.
Do the following:
- Connect to the ADW database instance with ADMIN
- Create a DEMO user by executing the below command
CREATE USER DEMO IDENTIFIED BY Oracle#202104;
GRANT DWROLE TO DEMO;
GRANT UNLIMITED TABLESPACE TO DEMO; 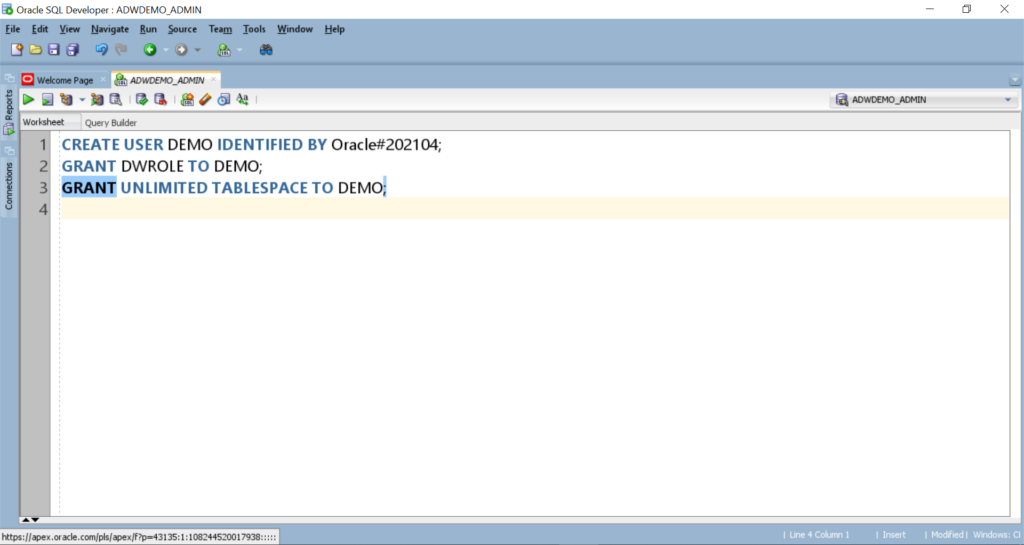
Create a connection to ADW with the DEMO user in SQL Developer:
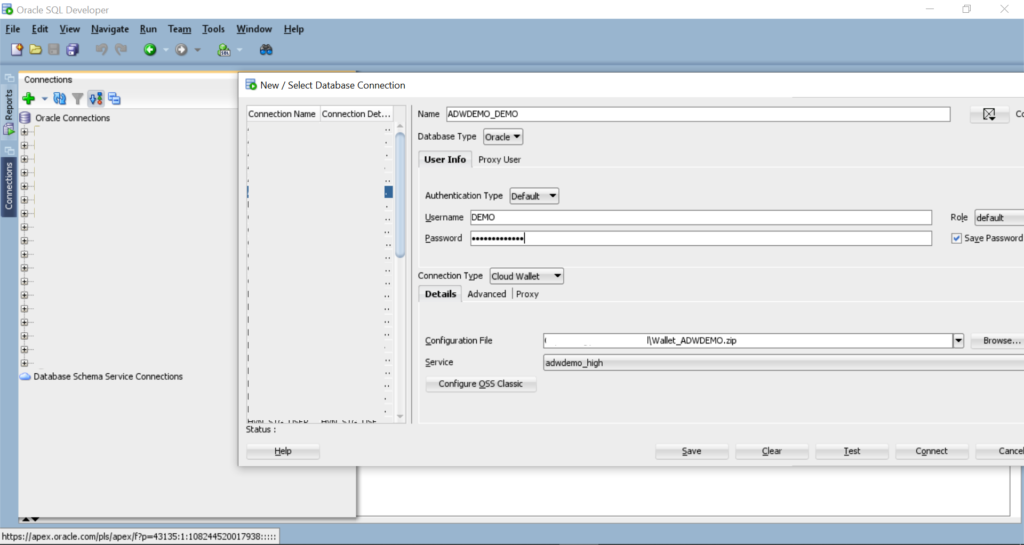
Conclusion
This tutorial illustrated the process of connecting to the ADW database instance. Now you can load the data to Oracle Autonomous Database and process it in your Oracle database solution. Therefore, you don’t need any further efforts for installation and management, the on-premised Oracle database instance does it.
Read Also:
- Import Data into Oracle Autonomous Data Warehouse using Oracle Object Storage
- Database Security in Oracle
- Create and Configure Oracle Linked Server in SQL Server


