With the recent data protection laws and the implementation of GDPR last year, it is imperative for us to know the type of data our databases are storing. This will help us classify data based on the regulations and help us meet the data privacy standards. It is quite difficult for DBAs to know the type of data within a database. However, there is a new built-in tool within SQL Server Management Studio (SSMS) that can help us to easily discover the data within the database. With this tool, we will be able to classify the data and work on reporting any sensitive data.
Global Data Protection Regulation aka GDPR
GDPR was first adopted in 2016 and came into enforcement from 2018. Basically, it is a new framework for data protection in Europe. However, it not only affects organizations located within the EU but anything remotely related to it. It is important for organizations to know the implications of not adhering to these regulations, as the consequences can be damaging. To get an idea of the consequences, refer to paragraph 5 here: https://gdpr-info.eu/art-83-gdpr/, “Infringements of the following provisions shall, in accordance with paragraph 2, be subject to administrative fines up to 20 000 000 EUR, or in the case of an undertaking, up to 4 % of the total worldwide annual turnover of the preceding financial year, whichever is higher”. For one of these reasons, you would notice a number of companies scrambling to meet the regulatory requirements last year. Even major companies worldwide, including Microsoft, have implemented GDPR across all their customers worldwide irrespective of whether they are located within the EU or outside. As DBAs or data professionals, we need to be aware of the consequences of our actions and understand the importance of the data that is stored within our databases.
Download the latest SQL Server Management Studio (SSMS)
Before we start the demo for data discovery and classification, it is important for us to download the latest version of SQL Server Management Studio (SSMS). As you know, SSMS is no longer part of the SQL Server installation, there are new releases of the product which are released frequently with newer and upgraded features. As data discovery and classification is an in-built tool within SSMS, it is recommended to always have the latest version of SSMS. At the time of this writing, the latest SSMS version is 17.9.1 and can be downloaded here. Make sure to close all versions of SSMS on your server before installing, as the installation stops when SSMS is running. Once installed, restart your server and proceed with the next steps.
Restore a Sample database
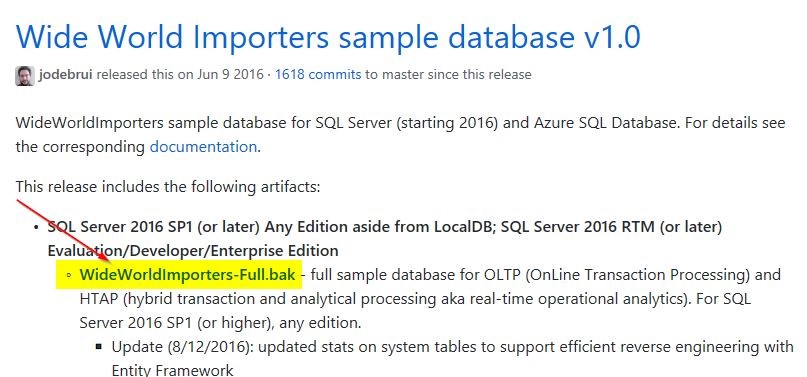
To demonstrate the new built-in data classification feature in SSMS, you can use the sample SQL Server database that is available for download. I used the “WideWorldImporters” sample database in this demo. You can download a sample backup file and restore it on your server. Refer to this link for the backup file. You can download the selected file as shown below.
Once the backup file is downloaded, restore the database using it. You can use this sample script for performing the restoration. You may need to update the folder paths as per the location on your server.
restore database WideWorldImporters
from disk='C:\WideWorldImporters-Full.bak'
with move 'WWI_Primary' to 'C:\SQLData\WideWorldImporters.mdf',
     move 'WWI_UserData' to 'C:\SQLData\WideWorldImporters_UserData.ndf',
	 move 'WWI_Log' to 'C:\SQLData\WideWorldImporters.ldf',
	 move 'WWI_InMemory_Data_1' to 'C:\SQLData\WideWorldImporters_InMemory_Data_1',
	 stats
Classify Data
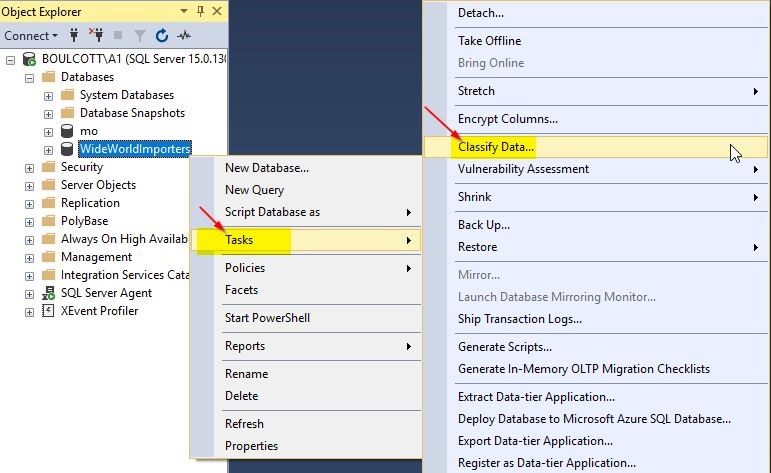
Once the database is restored, right-click the database in SSMS, go to Tasks and click Classify Data, as shown below.
Once you click Classify Data, a dialog will open where you can view the classification recommendations.

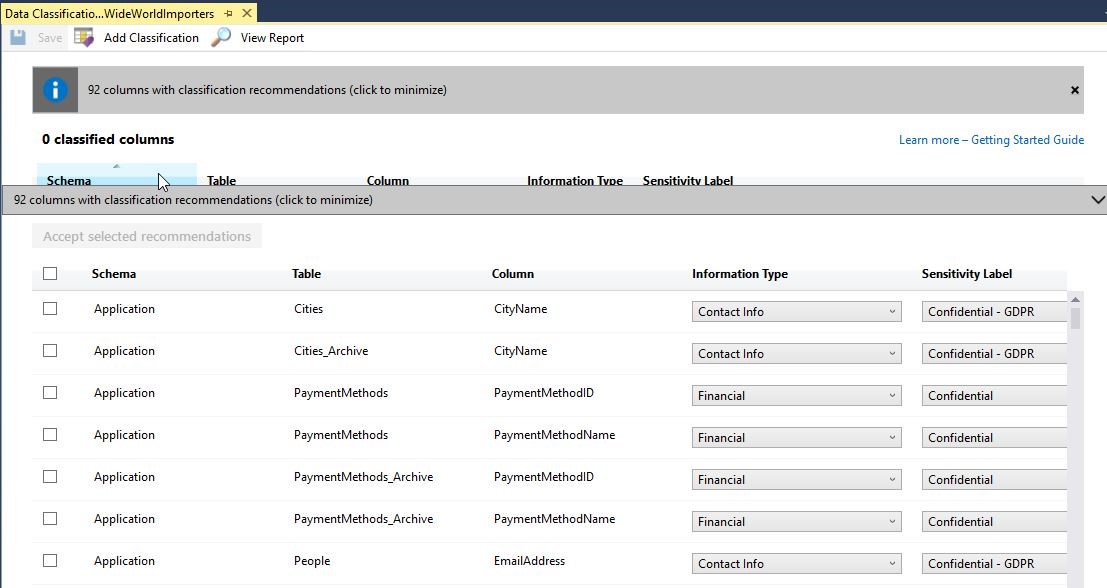
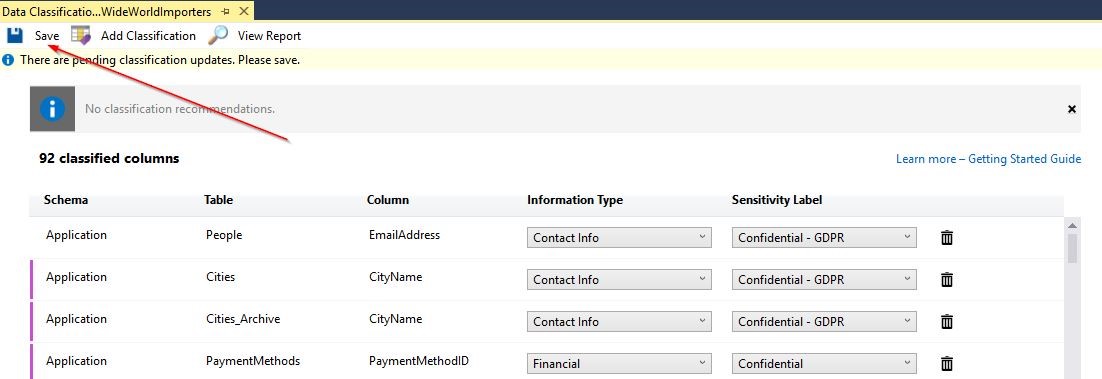
Once you click Click to view, you will be able to view the detailed list of columns that are recommended for data classification. On the screenshot below, you can see a list of 92 columns with classification recommendations. The tool was able to perform the scan for you and provide recommendations with no user input.
Select several columns in the recommended list
Out of the 92 columns that were recommended, we can first select several columns in the list and view the changes that occur. In our demo, we will select the EmailAddress column in the People table. On the screenshot below, you can see that the EmailAddress column is selected on the left-hand side. Once that is done, you will see the Accept selected recommendations option. Otherwise, this option is greyed out.
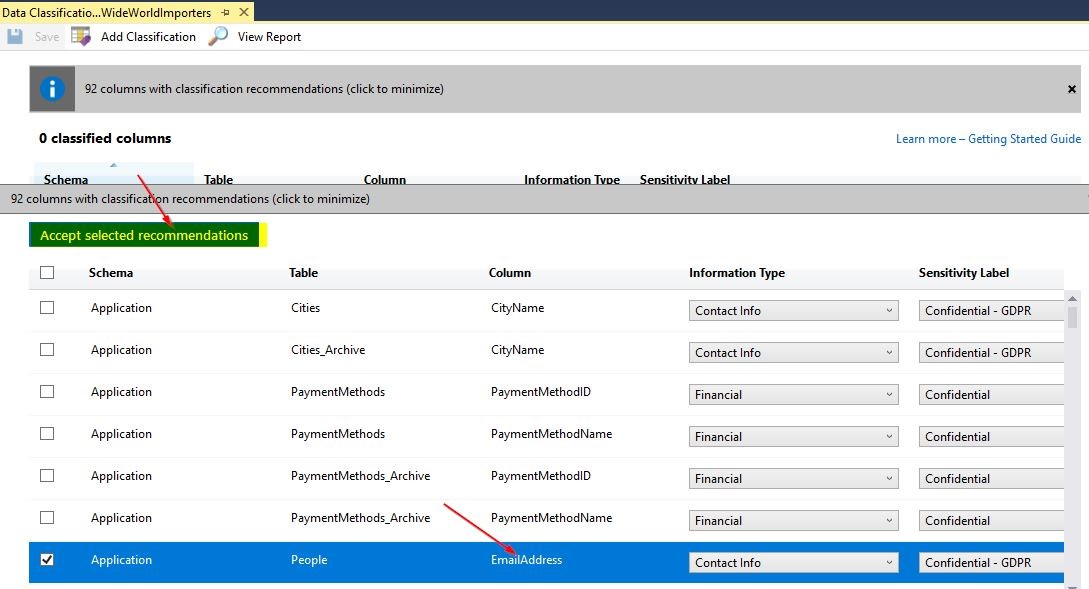
In the sensitivity label column, you can also see whether the column needs to adhere to the GDPR or not. Once the column is selected, you will see that the recommendation needs to be saved.
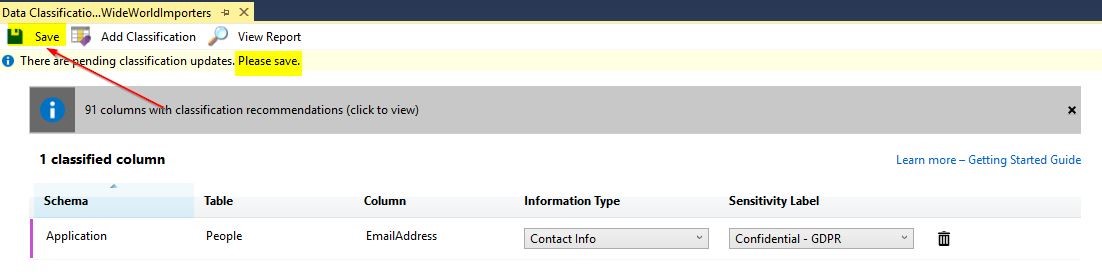
Click Save, and you will see the confirmation that the changes have been updated successfully.
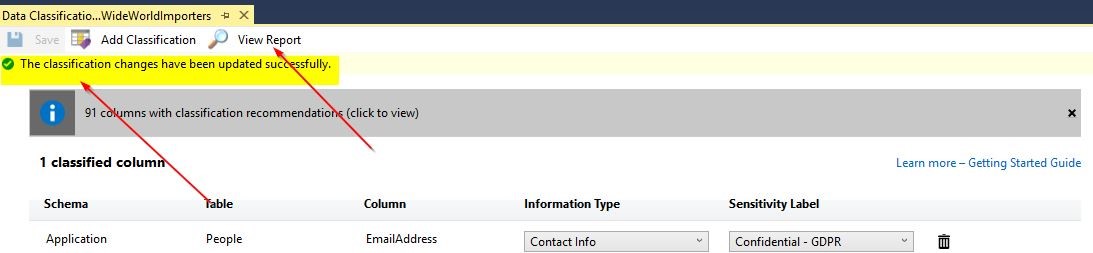
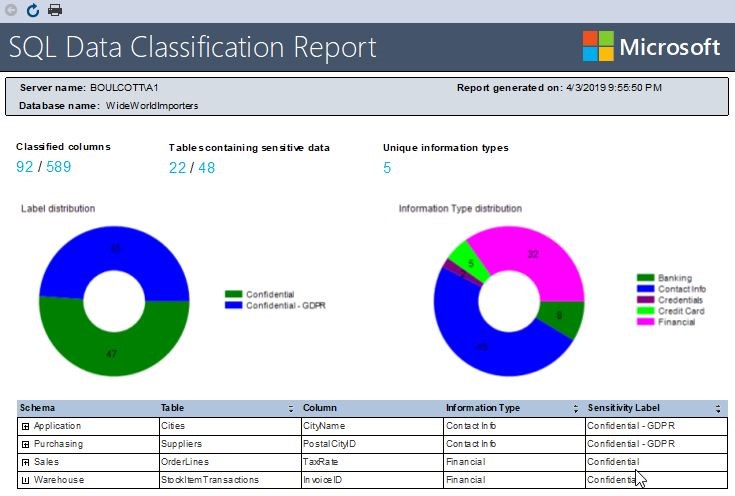
Now, you can click View Report to generate a report for the SQL Data Classification for the WideWorldImporters database. The report is shown below.
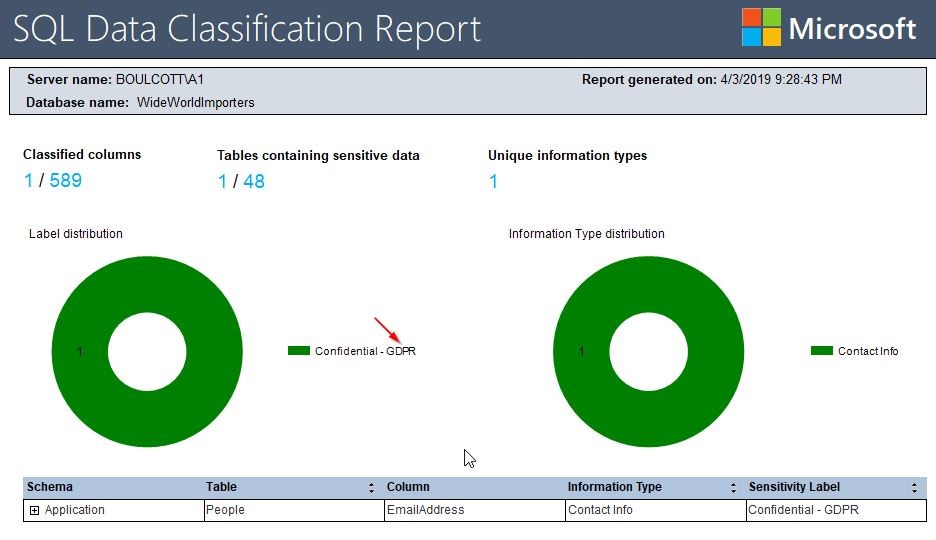
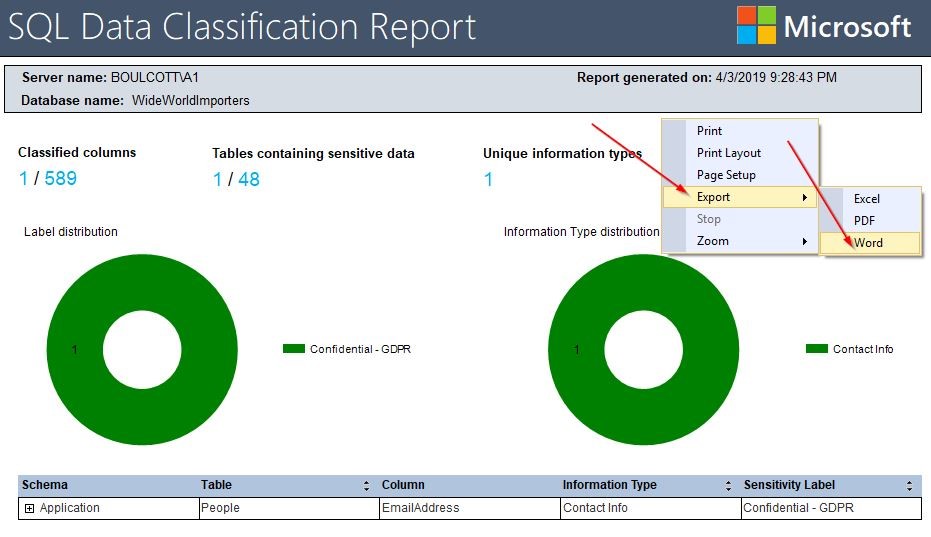
In the report, you can see the total count of tables, columns, and data distribution. Under the data distribution, you can see if the data is labeled as GDPR or not. Using this tool, you have a better understanding of the importance and the kind of data being stored in your database. In order to make things easier, you can also export this report either as an Excel, PDF or Word and email it to your business manager or CIO for review. Just right-click anywhere in the report and use any of the options as shown below.
Select all columns in the recommended list
In the previous example, you applied only one column from the list of recommended columns. However, you have the option to select all the columns in the recommended list and make your database compliant in terms of data security policies. Just select the Checkbox option thereby selecting all the columns in the recommended list, as shown on the screenshot below.
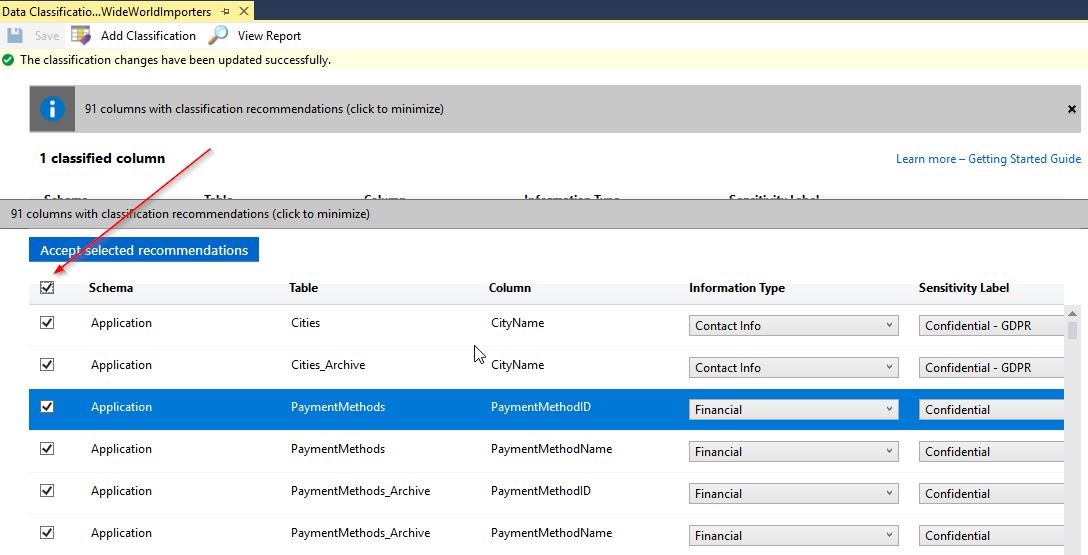
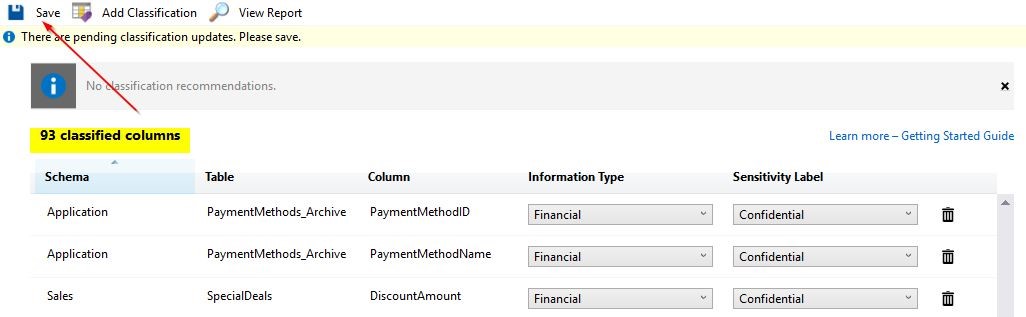
With this option, all the columns get selected and are ready to be applied. In order to make the changes to your database, click Accept selected recommendations. On the screenshot, you can see 91 columns with classification recommendations. With just a click of a button, you can apply the recommendations for all those columns. Just like you did in the previous example for a single column, go ahead and click Save to complete the process.
Once you click Save, the classification changes get updated successfully. Now, click View Report to view the detailed data classification report.
From this report, you can see that all the classified columns belonged to the tables within 4 schemas. To get details of the table names, click the Table column to view. The report has a pie chart with details of GDPR sensitivity. There is also another useful pie chart for the information type distribution.
Add classification option
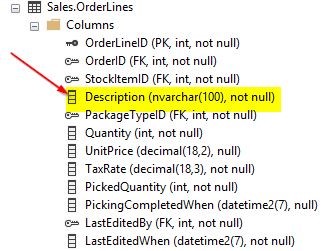
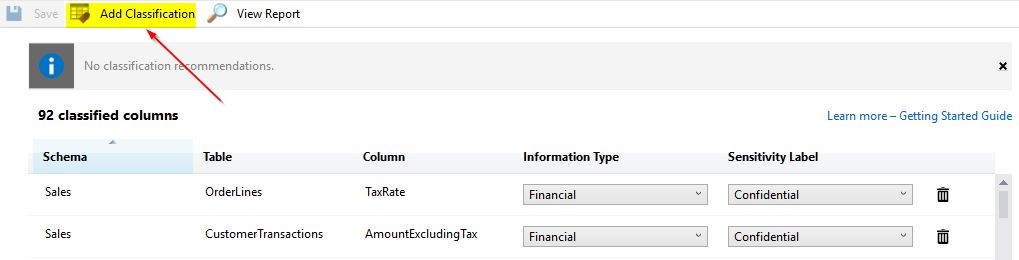
You may have noticed that a number of tables were labeled as containing sensitive data from the generated data classification report. This was through the recommendation that was generated by using this data classification tool. However, you may want to review the report further and add your own data classification based on your understanding of the data. This is a manual process, where we select the columns on our own. From the data classification report below, you can see that only one column TaxRate in the OrderLines table is classified to contain confidential data.
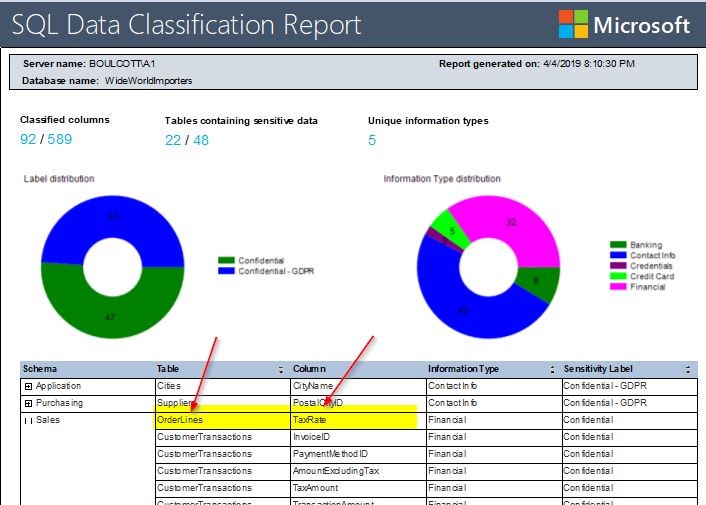
However, you realize that other columns in this table need to be in this report too. You can review the OrderLines table and plan to include the Description column in the data classification report.
In this case, right-click the database and perform the same operations as you did earlier for classifying data. You will see the Add Classification option.
Once done, you can select the table and column as shown below. Select the options that are available in the drop-down menu to classify the data. On the screenshot below, you can see that the Description column in the OrderLines table is marked as Confidential. Add the data classification by clicking the Add button.
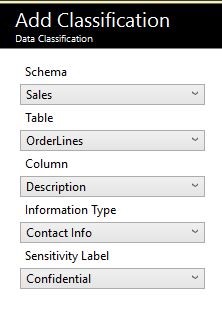
Once done, click Save to update the changes.
In order to confirm that the changes have been applied successfully, you can re-run the data classification report as you did in the previous steps. After that, you can verify that the column was added successfully.

In the report, you can confirm that the Description column was indeed added successfully and is labeled as confidential. With this approach, you can label other columns of your choice based on certain requirements or directions from the management.
Extended properties in columns
When you check the columns further, you can get details of the extended properties catalog view related to the columns labeled for data classification. For example, when you right-click the Description column in the Sales.OrderLines table, you will be able to view the details in the Extended Properties section for that column.

The sys_information_type_name and sys_sensitivity_label_name values are descriptions in the column of the sys.extended_properties catalog view. The metadata regarding these data classifications are stored in this catalog view: sys.extended_properties.
Additional Comments
With this new tool, you will notice that the Microsoft product team has made this task of data classification so simple and easy-to-use. To be honest, there is no real excuse for any lack of understanding of the underlying data within your database. Considering the importance of user data protection and the concerns of various global agencies regarding compromising user data by well-known organizations, it is highly important for DBAs and data professionals to take data protection seriously and keep up to speed with the latest technology offering. Considering that this tool is free and easy-to-use, there is no real reason not to use it across your production systems.
Conclusion
- In this article, you read about the use of a new cool feature within SQL Server Management Studio (SSMS)
- You briefly learned a number of important items regarding data protection
- You understood the importance of keeping your SSMS version up to date with the latest versions so that you don’t miss out any new features or upgrades
- You saw how you can easily test out new features by restoring a sample SQL Server database
- You learned how to classify the data using SSMS
- You learned how to generate reports to view details of the labeled columns
- You learned how to manually add your own data classifications based on your understanding of the underlying data
- You also know that all of the data classifications can be done based on this simple tool and you can generate amazing reports and get a better understanding of the data and the database you are managing.
Tags: database administration, ssms Last modified: September 21, 2021