
Microsoft announced cross-platform support of SQL Server – the SQL Server 2017 and SQL Server 2019 work on Microsoft Windows and Linux. We can install SQL Server 2017 and higher on Red Hat Enterprise Linux, Ubuntu, and SUSE Enterprise Server. We can also set up high availability and disaster recovery mechanism for SQL Server on Linux like SQL Server Log shipping and AlwaysOn Availability Group.
Form the implementation point of view, the AlwaysOn availability group on Linux and Windows failover cluster are the same, except for the following differences:
- Linux-based implementation of AlwaysOn uses pacemaker services. It does not require a cluster setup.
- Before SQL Server 2019 on Linux, MSDTC was not supported. Hence, if your application uses distributed transactions, the AG deployment must be done on Windows servers.
- Pacemaker service does not require AD. So, unlike Windows implementation, Linux does not require a domain setup.
In the series of articles, we will learn about the deployment process of AlwaysOn availability groups on Linux. For that, we’ll do the following:
- Set up a demo lab using Oracle VM VirtualBox Manager.
- Configure the network interface and install Ubuntu 18.04 and SQL Server 2019 on Linux.
- Deploy the AlwaysOn availability group on SQL Server 2019 on Linux.
Here, we’ll clarify how to set up a lab environment to deploy the AlwaysOn availability groups. The detailed configuration of the lab environment is following:
| Node | Virtual Hardware | IP Address | Operating System | SQL Server | Role |
| LinuxSQL01 | 2 GB virtual RAM and 40GB Virtual Hard disk | 192.168.0.140 | Ubuntu 18.04 | SQL Server 2019 | Primary replica |
| LinuxSQL02 | 2 GB virtual RAM and 40GB Virtual Hard disk | 192.168.0.141 | Ubuntu 18.04 | SQL Server 2019 | Secondary Replica |
| LinuxSQL03 | 2GB virtual RAM and 40 GB virtual hard disks | 192.168.0.142 | Ubuntu 18.04 | SQL Server 2019 | Secondary Replica |
Note: All virtual machines (Nodes) must be in the same network and connect to each other. The installation of SQL Server 2019 requires an Internet connection. Therefore, each Node must be able to connect to the Internet.
Create a Virtual Machine
We prepare the virtual environment using Oracle VM VirtualBox software. When you download and install the package, launch the application.
To create a new virtual machine, click New.
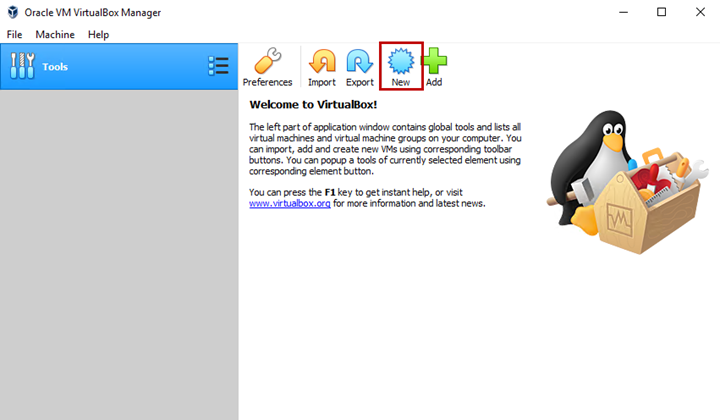
The Create Virtual machine wizard starts.
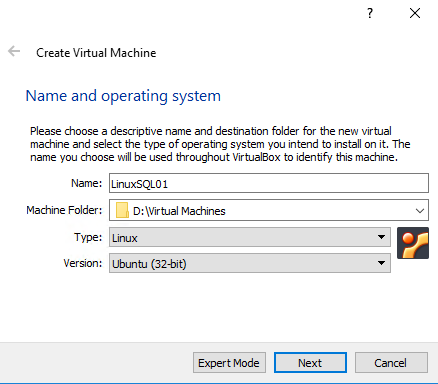
In the Name field, specify the desired name of the virtual machine.
In the Machine Folder field, enter the location to save the virtual machine and its files.
Choose the type and version of the virtual machine’s operating system from the Type and Version drop-down box.
Click Next.
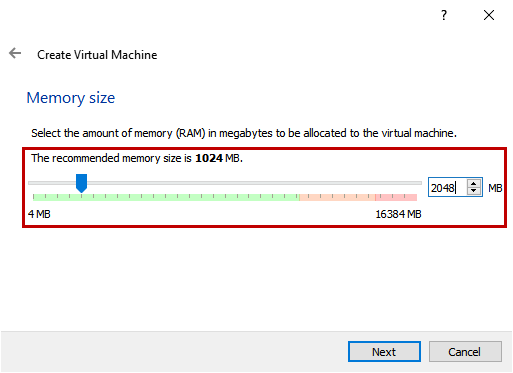
On the Memory size screen, specify the amount of virtual memory to assign to the virtual machine. Click Next.
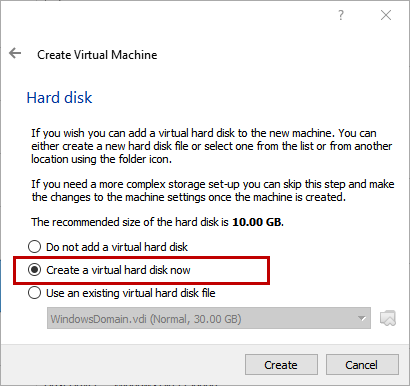
On the Hard disk screen, you can choose any of the following options:
- Do not add a virtual hard disk – select this if you want to add a virtual disk after creating a virtual machine.
- Create a virtual hard disk now – the wizard will create a new virtual hard disk.
- Use an existing virtual hard disk file – select this if you have already created a virtual hard disk or will create a new virtual machine using an existing hard disk.
We want to create a new disk. Hence, we select Create a virtual hard disk now.
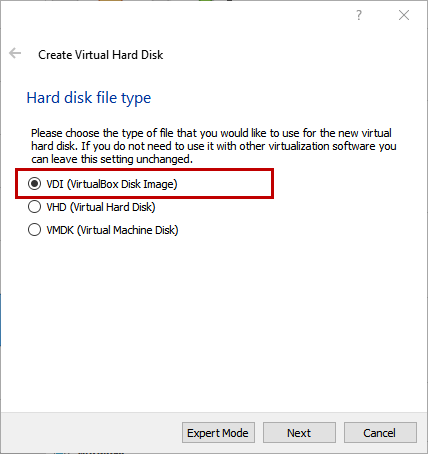
On the Hard disk file type screen, choose the type of the virtual hard disk. Using the Oracle Virtual Box, you can create three types:
- VDI (VirtualBox Disk Image)
- VHD (Virtual Hard Disk)
- VMDK (Virtual Machine Disk)
We will create a VDI (Virtual Disk Image) file.
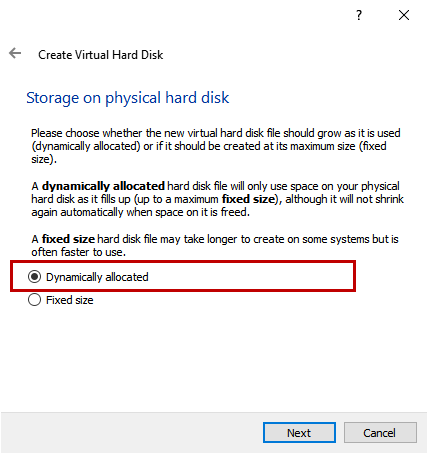
On Storage on a physical hard disk screen, you can choose the virtual hard disk growth parameters:
- Dynamically allocated. Here, the disk growth is based on its usage. The initial size is a few MBs. When you use the disk, it grows automatically up to a maximum size. Note: The dynamically allocated disk does not shrink.
- Fixed-size. Here, the virtual disk size remains fixed. If you create a fixed-size disk, it takes a long to create a disk. However, once it is created, the performance is higher than of the dynamically allocated disk.
We choose the dynamically allocated disk:
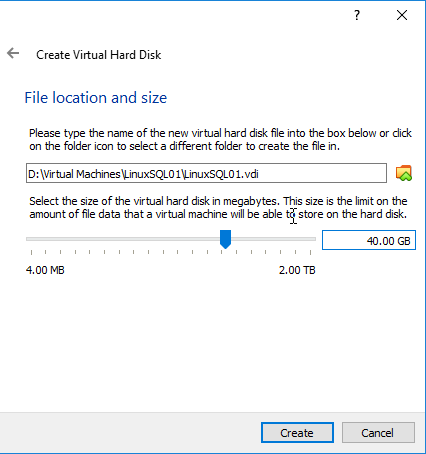
You can specify the location of the virtual disk and its maximum size on the File location and size screen.
We have allocated 40 GB to the virtual machine. Therefore, the virtual machine cannot utilize more than 40GB to store the data on the hard drive of the host machine.
Click on Create to save the configuration, and close the window.
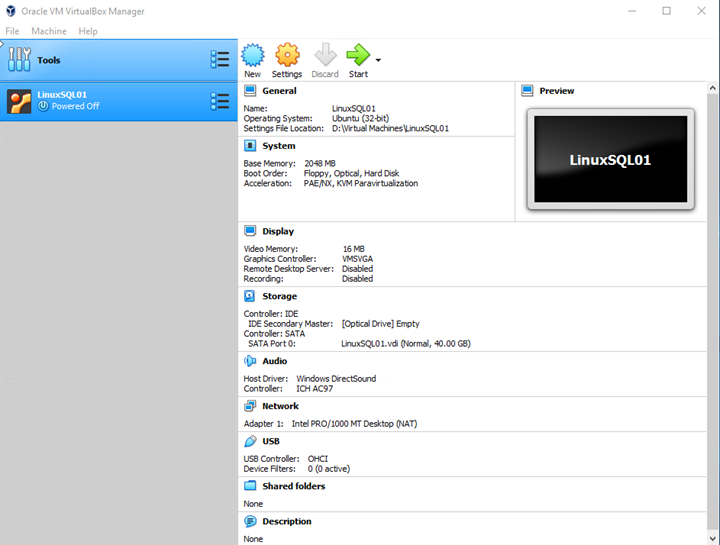
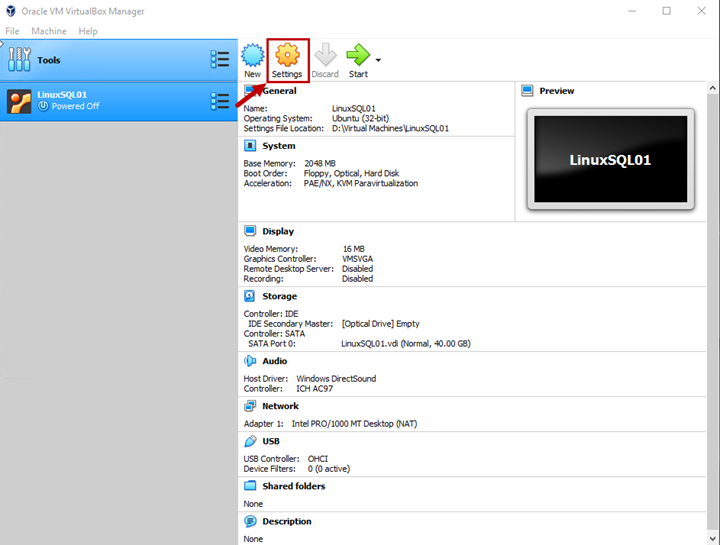
Once the virtual machine creation is complete, you can see it in the list of virtual machines and other VMs in Oracle VM VirtualBox Manager:
Configure the Network interface
In the AlwaysOn availability group lab setup, we are going to configure three virtual machines. Each of them must be able to connect to each other and the Internet. We can configure four network adaptors, and each adapter can be attached to six different network types.
- NAT
- NAT Network
- Bridge Adapter
- Internal Network
- Host-only Adapter
- Generic driver.
You can read more about the network configuration supported in the Oracle VM Virtual manager in this article.
In our lab setup, we must provide the static IP addresses. As our virtual machine must access the Internet, the best suitable network configuration is Bridge Adaptor. It has access to the network in the same way as your workstation or host machine, and it can excess external DHCP services, routing information, and name lookup services.
To set up the network configuration, right-click on LinuxSQL01 virtual box and select Settings.
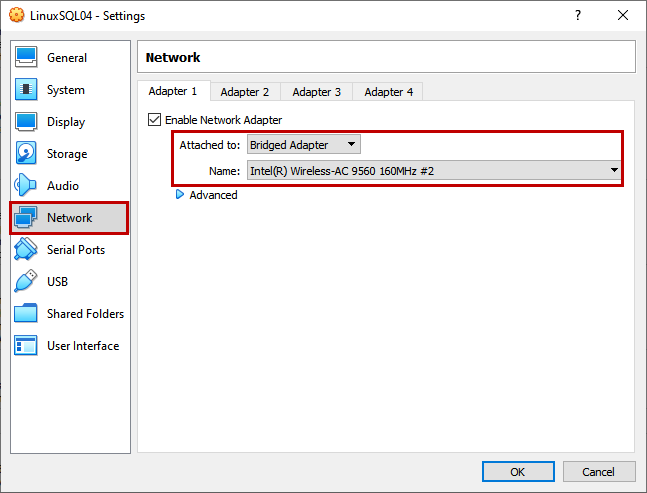
On the virtual machine configuration screen, click on Network and choose Bridged Adapter from the “Attached to” drop-down menu.
Select the desired network interface from the Name drop-down list.
Click OK to save the configuration, and close the dialog box.
The first virtual machine has been created. Similarly, we must create two more virtual machines with the same configuration.
Summary
The current article was dedicated to the process of creating a virtual machine with Oracle VM Virtual Box.
In the next article, we’ll explain how we can install Ubuntu 18.04 and configure the network interfaces for all virtual machines. Moreover, we will walk through the process of installing SQL Server 2019 on Linux.
Tags: failover cluster instance, linux, sql always on, sql server 2017, sql server availability groups Last modified: September 18, 2021